
In this tutorial, we will learn how to install OwnCloud on Ubuntu 18.04.
What is OwnCloud?
Let’s first understand what is OwnCloud. You might be aware of DropBox i.e. file hosting service application. Similarly, OwnCloud is a collection of Client-Server software for creating file hosting services. The functionality of OwnCloud is just similar to DropBox but with a difference i.e. OwnCloud is free and open-source software.
Open-Source software simply denotes that its source code is available to everyone. You can install OwnCloud and work upon it without even paying a single penny. As you can do contact synchronization, online document editing and many more things on Google Drive, the same as with OwnCloud. It also offers you to do online document editing, contact synchronization and many more. You can also have access to the files through mobile too.
OwnCloud is written in PHP and JavaScript languages. It works with various database management systems such as MySQL, ORACLE, PostgreSQL or MariaDB. It maintains the synchronization with all the computers either it is window based or Linux based operating system. It provides the text editor for users to interact. For more details, you can check the OwnCloud official documentation.
If you want to install OwnCloud on CentOS do check this: How to install Owncloud on CentOS?
Let’s understand how to install OwnCloud on Ubuntu_18.04?
Steps to Install OwnCloud on Ubuntu
We’ll go over the entire process in a step-by-step manner and if you follow through, you’ll have successfully installed OwnCloud on Ubuntu.
1. Update the Ubuntu Repositories
The first step is to update the repo and upgrade all the install packages i.e. to install versions of the packages. Here, we will update the packages i.e. to restore them again. We will use an update and upgrade using apt command.
There is a difference between both apt and apt-get command. The apt command is the collection of all functionalities of the apt-get command. The command for this is as follows:
sudo apt update && apt upgrade
This will upgrade all the repositories in the system.
2. Install the LAMP Server Stack
As discussed earlier, the OwnCloud is based on PHP and JavaScript, so it’s important to install the LAMP server before you install OwnCloud on Ubuntu. The LAMP stack is the collection of Apache server, MySQL database management, and the PHP package.
Therefore, it’s required to install the LAMP stack before installing OwnCloud. Either you can install each package separately, or you can install it directly by using a simple command. It is just like the backbone of the OwnCloud. The command for this is as follows:
sudo apt install lamp-server^
This will download all the packages related to the LAMP stack. While installing the database, it will show a dialog box as given below:
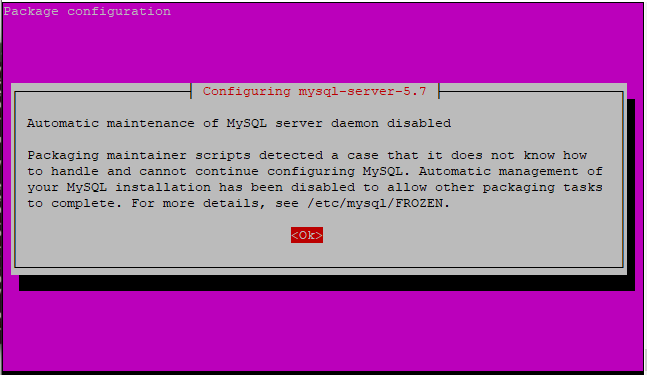
Respond OK to this. This command will install all the LAMP packages. It’s your choice, either you can download it separately or combined.
3. Download the Public Key
After successfully downloading the LAMP stack, the next step is to download the key. Here, we will first download the key and then import it. If you have a different version of Ubuntu, check the official documentation to download the release key. We will use wget command to download to the release key. The command is as follows:
wget -nv https://download.owncloud.org/download/repositories/production/Ubuntu_18.04/Release.key -O Release.key
apt-key add - < Release.key

After downloading the, run apt-add command. It should respond with OK as shown above.
The next step is to add the new repository to our apt sources. For this, we will use the echo command. The key will be stored in owncloud.list file stored in the /etc/apt/sources.list.d directory. The command for this is as follows:
echo 'deb http://download.owncloud.org/download/repositories/production/Ubuntu_18.04/ /' > /etc/apt/sources.list.d/owncloud.list
Now let’s update the packages again so the newly added repository is refreshed in our system.
sudo apt update
4. Download and Install OwnCloud on Ubuntu
After successfully downloading the release key, the next step is to download and install OwnCloud on Ubuntu. Use apt install command to download the OwnCloud package. Let’s have a look at the command below:
sudo apt install owncloud-files
This will install OwnCloud on Ubuntu server.
Restarting Apache Server
After successfully installing the OwnCloud package, we need to start the Apache Server again. We will use systemctl command with the restart keyword to start the services again. Let’s have a look at the command below:
sudo systemctl restart apache2.service
You can check the status of the server using systemctl command with status keyword. Let’s have a look at the command below:
sudo systemctl status apache2.service
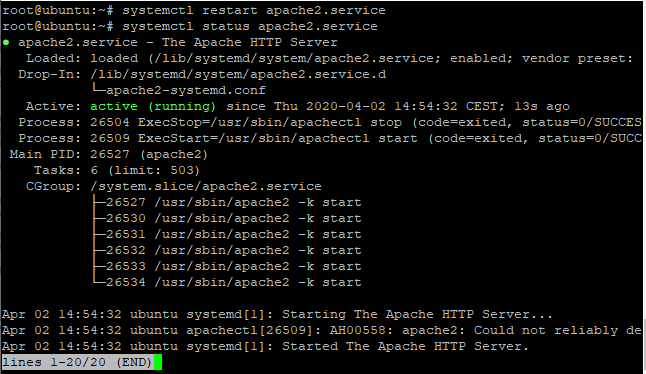
You can see the status as running shown in the above figure. Exit this using “q”, you will be redirected to the command prompt.
OwnCloud Database Configurations
Here, we need to make some database configurations i.e to create the database and the user. As well as grant the privileges to the user over the database.
Here, we will use the SQL queries to create a user and the database. Folks, don’t forget to make the installation secure i.e. to set the password. If you have not done so, use the following command as given below.
mysql_secure_installation
Set of questions will be asked, it is recommended to respond YES to all the questions. Set the password and then create the database and the user using the command given below.
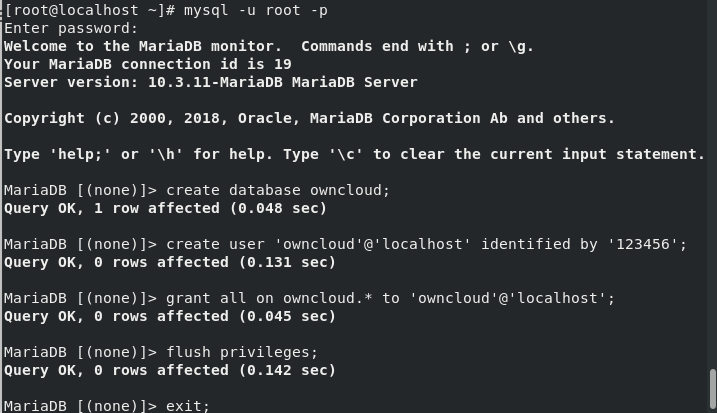
Let’s have a look at the command below, please don’t use the password as “123456”. 🙂
mysql -u root -p
>create database owncloud
>create user 'owncloud'@'localhost' identified by '123456';
>grant all on owncloud.* to 'owncloud'@'localhost';
>flush privileges;
>exit();
Getting Started with OwnCloud on Ubuntu
After you successfully install OwnCloud on Ubuntu making all the necessary configurations, let’s begin working with the OwnCloud. To start with this, just type the Server IP address on the browser followed by the OwnCloud. You can check the IP address using the following command:
sudo ifconfig
It will display the IP address. Now, type the URL including the IP address in the browser as given below:
http://server-IP-Address/owncloud
OR
localhost/OwnCloud
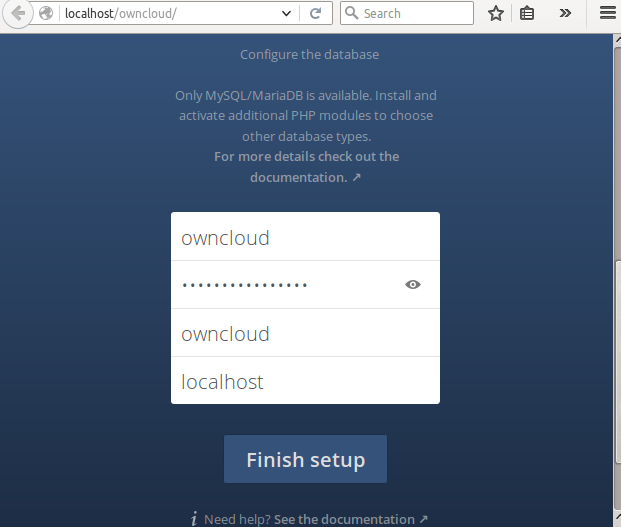
You will see the following window as given below:

When you install OwnCloud on Ubuntu, you also need to make sure that the administrator and other users are created. Further, you will be asked to fill up the database details such as database name, user and so on as shown in the image below:
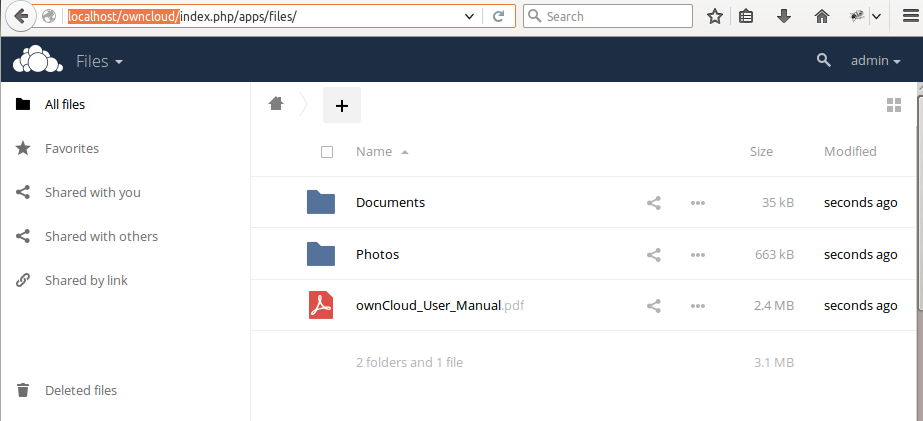
Finish the setup and the owncloud dashboard will appear. That’s the last step of the installation process. The image is shown below:
Yeah! It’s done. You now know how to completely install OwnCloud on Ubuntu.
Conclusion
We have successfully learned how to install OwnCloud on Ubuntu. If face any issue, do let us know in the comment section.