
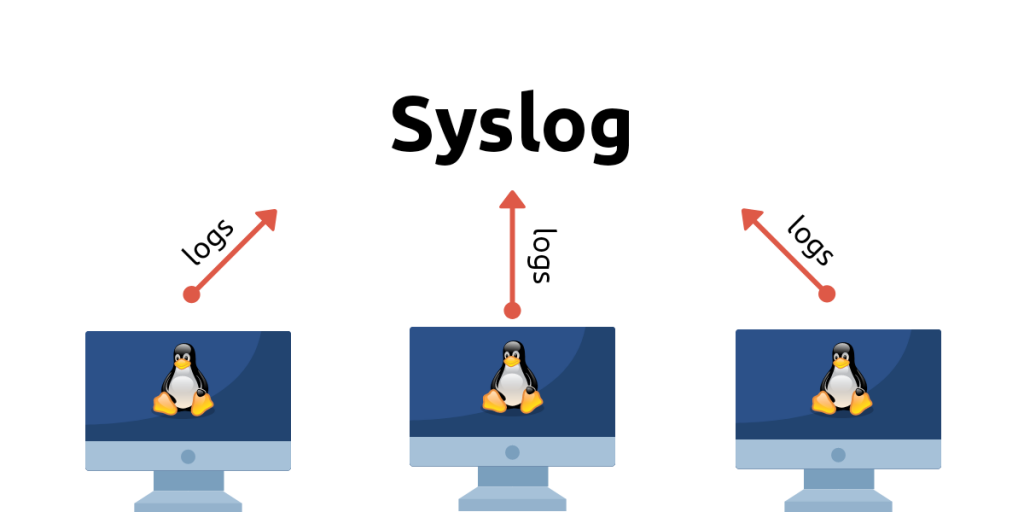
In this tutorial, we will look at Syslog in Linux and how to send logs to a remote machine using it. Syslog is a standard for message logging. It has been the standard logging mechanism on Linux/Unix systems for a very long time. Although most of the distros now ship with journald – a systemd based logger – Syslog still exists and is generally used in conjunction with journald.
What is Syslog?
Syslog is a vague concept, generally referring to the following three things:
- Syslog Daemon: It is a daemon that listens for logs and writes them to a specific location. The location(s) is defined in the configuration file for the daemon.
rsyslogis the Syslog daemon shipped with most of the distros. - Syslog Message Format: It refers to the syntax of Syslog messages. The syntax is usually defined by a standard (for e.g., RFC5424).
- Syslog Protocol: It refers to the protocol used for remote logging. Modern Syslog daemons can use TCP and TLS in addition to UDP which is the legacy protocol for remote logging.
The advantage of Syslog over journald is that logs are written in files that can be read using basic text manipulation commands like cat, grep, tail, etc.
journald logs are written in binary, and you need to use the journalctl command to view them.
Viewing local Syslogs
Logs are a great source of information on what’s happening in the system. They’re also the first place one should look for any kind of troubleshooting.
Generally, logs are written under the /var/log directory. How this directory is structured depends on your distro.
Note: This method only works for logs written by a Syslog daemon and not for logs written by journald.
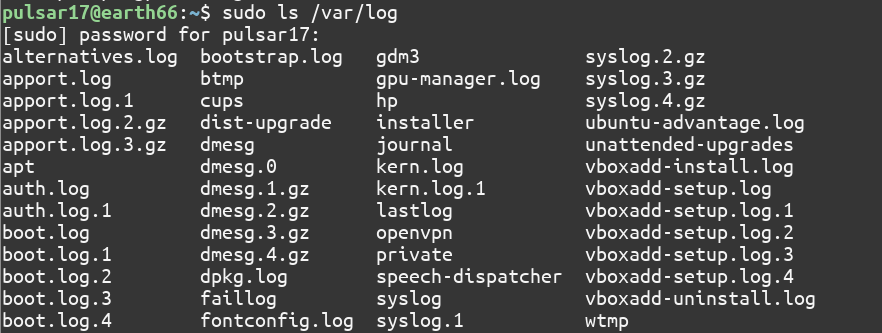
1. Display syslogs with the ls command
Listing the contents of /var/log for an Ubuntu 20.04 machine using the ls command:
$ sudo ls /var/log
2. View system logs in Linux using the tail command
Using the tail command you can view the last few logs. Adding the -f option lets you watch them in real time.
For RedHat based systems:
$ sudo tail -f /var/log/messages
For Ubuntu/Debian based systems:
$ sudo tail -f /var/log/syslog
Similarly, the tail command can be used to view kernel logs (kern.log), boot logs (boot.log), etc .
The rules for which logs go where are defined in the Syslog daemon’s configuration file. For rsyslog, it is /etc/rsyslog.conf
3. View and Edit syslogs in Linux with a text editor
Let’s look at rsyslog‘s configuration file using the nano editor:
$ sudo nano /etc/rsyslog.conf

As can be seen in the screenshot, it uses imjournal module to read the messages from the journal. Scrolling through the file, the rules for the location of logs can be seen:
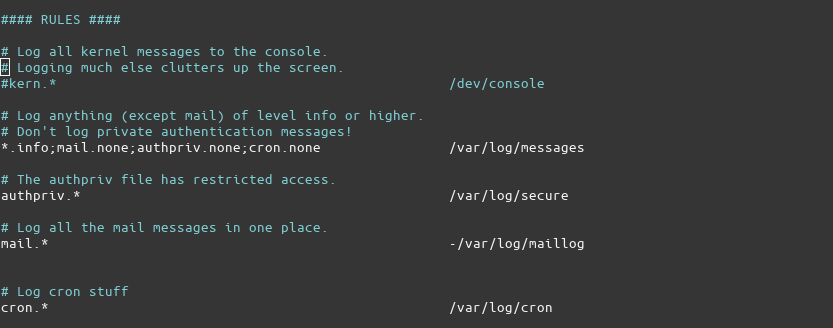
Note: For some distros the location rules are defined separately in /etc/rsyslog.d/50-default.conf
The ‘kern’, ‘info’, etc., at the start of some lines, are ‘facility codes’ as defined by the Syslog standard. More information about the facility codes and other parts of the Syslog standard can be found on this Wikipedia page.
Syslog also supports remote logging over the network in addition to local logging. It follows a server/client architecture for remote logging. Next, we’ll look at how to configure this server/client architecture so that messages can be logged remotely.
Server Configuration for Remote System Logging
We will be configuring a CentOS 8 machine as the remote server that receives Syslog messages from hosts through TCP. You’ll need superuser privileges for every step. So, either change to the root user or prefix sudo before every command.
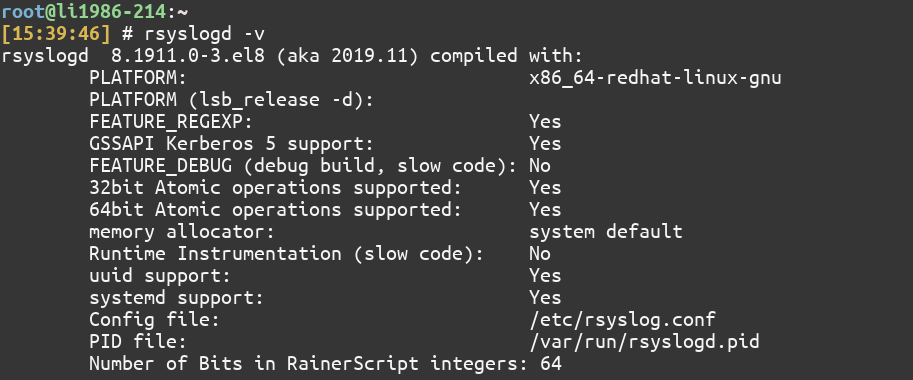
1. Check if rsyslog is installed
rsyslog is the Syslog daemon that will listen for logs from the host. To check if it’s installed, type:
$ rsyslogd -v
It will print some information if it’s installed
If it is not already installed, you can install it using the dnf command:
$ sudo dnf install rsyslog

2. Edit rsyslog’s configuration file
The file we need to modify is /etc/rsyslog.conf. You can use the editor of your choice. I’ll be using the nano editor.
$ sudo nano /etc/rsyslog.conf
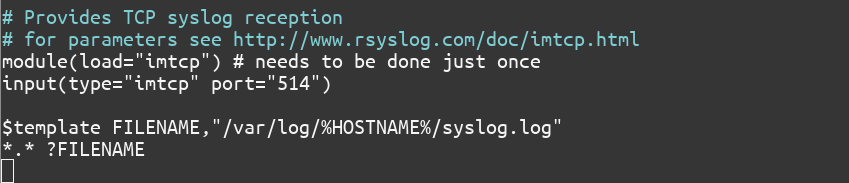
You can also group the logs by creating separate directories for separate client systems using what rsyslog calls ‘templates’. These templates are directives for rsyslog.
To enable the grouping of logs by systems, add lines 7 and 8. To enable TCP, uncomment lines 4 and 5 by deleting the ‘#’ character at the start of the line.
...
# Provides TCP syslog reception
# for parameters see http://www.rsyslog.com/doc/imtcp.html
module(load="imtcp") # needs to be done just once
input(type="imtcp" port="514")

$template FILENAME,"/var/log/%HOSTNAME%/syslog.log"
*.* ?FILENAME
...
3. Configure the firewall to open the port used by rsyslog
By default rsyslog listens on port 514. We need to open this port using the firewall-cmd command:
$ sudo firewall-cmd  --add-port=514/tcp  --zone=public  --permanent
$ sudo firewall-cmd --reload

4. Restart rsyslog
Now that we’ve made changes to the configuration file and opened the port, we need to restart rsyslog so that it can pick up the new configuration. We can restart rsyslog using the systemctl command:
$ sudo systemctl restart rsyslog
If you want rsylog to automatically start every time you boot up, type:
$ sudo systemctl enable rsyslog
5. Check if rsyslog is listening on the port opened
We can use the netstat command to list all the open ports:
$ sudo netstat -pnlt

As is highlighted in the screenshot above, rsyslog is listening on port 514.
Client Configuration for Viewing Remote Syslogs
Each client will have to be configured separately. To configure the client:
1. Check if rsyslog is installed
On client systems too rsyslog needs to be installed. If it is not already installed, you can install it using the same steps as for the server.
2. Edit rsyslog’s configuration file
Only 1 line needs to be added to the client’s /etc/rsyslog.conf file. Open it with the editor of your choice:
$ sudo nano /etc/rsyslog.conf
And add the following line:
...
*.* @@<server's-ip-address>:514
...
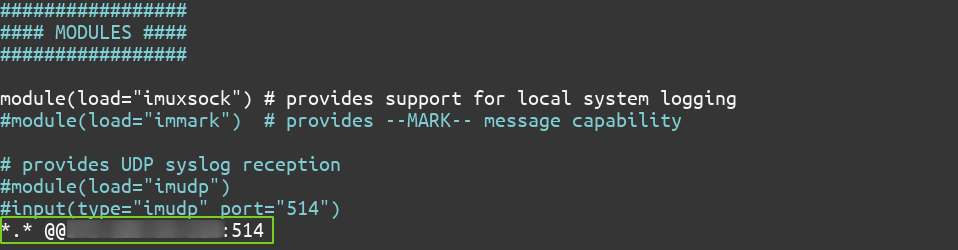
*.* tells rsyslog to forward all logs. The @@ means a TCP connection, and 514 is the port number. You might need to configure the firewall to open the port no. 514 on client systems as well if the client has a firewall set up. In that case, follow the same steps as for the server.
3. Restart rsyslog
We need to restart rsyslog on client systems as well as using the systemctl command:
$ sudo systemctl restart rsyslog
$ sudo systemctl enable rsyslog
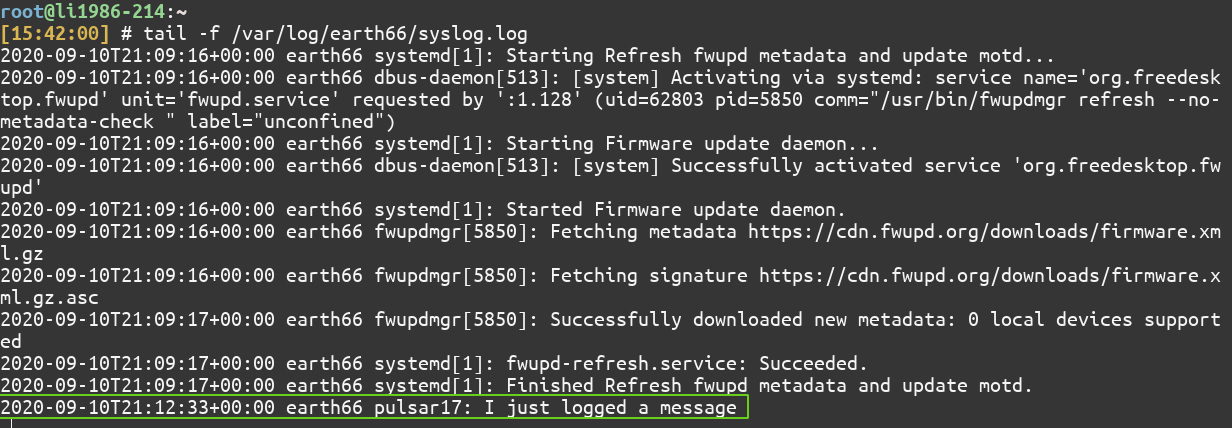
Test the logging operation
On your client system, type:
$ logger "I just logged a message"

On the server system, you will find a separate directory created for every client( and 1 directory for the server system itself).

Viewing the contents of /var/log/earth66/syslog.log Using the tail command on the server system:
$ sudo tail -f /var/log/earth66/syslog.log
Conclusion
In this tutorial, we learned about Syslog and set up remote logging using rsyslog. Checking logs is one of the first and most important parts of troubleshooting. Knowing how to view and understand logs can help save both time and effort. To know more about the features of rsyslog and it’s configuration, look at its man page and documentation.