

In this module, we will be learning how to install plugins in vim using Vundle. Vim is a very small program and is minimalist by design. It is meant to run on machines with low computing and storage. This is not ideal for developers who want to use vim for their daily workflow. Luckily the vim community has come up with a lot of plugins to customise vim like a modern IDE.
Vim offers flexibility both in terms of plugins and plugin manager. Vim offers multiple plugin managers like Vundle, Plug, Pathogen to choose from. In a previous article, we have already discussed how to install vim plugins using vim plug. In this article, we will discuss an alternative to it – Vundle.
Also read: VIM tutorial
A short intro on Vundle
Before we proceed to the installation steps here is short summary of Vundle. Vundle is short for Vim bundle. Vundle is designed to be simple and minimalistic. Vundle offers a variety of features:
- It keeps track and configures your plugins right in the .vimrc.
- It install configured plugins (a.k.a. scripts/bundle).
- Allows updating configured/installed plugins.
- Search by name all available Vim scripts.
- Helps in cleaning unused plugins up.
- It automatically manages the runtime path of your installed scripts.
- It regenerates help tags after installing and updating.
Vundle has fallen out of interest because of the competitive newer features of vim-plug. However, Vundle is now undergoing interface changes to support a new set of features.
Now let us jump into the installation steps.
Prerequsites
The vim plugins are generally open-source projects and are hosted over websites like Github and GitLab. The plugin manager needs to clone the repository before using it, so it essential to have git installed. The installation instruction for git for different distribution are as follows:
-# For Debian Based distributions like Ubuntu
sudo apt install git

# For Fedora or RPM-based system
sudo dnf install git

# For Arch-based distributions
sudo pacman -S git
Installing Vundle
To install the Vundle, run the following command in your terminal. It clones the Vundle repository to your local ~/.vim folder.
git clone https://github.com/VundleVim/Vundle.vim.git ~/.vim/bundle/Vundle.vim
Note: If you are using Neovim use should be using ~/.config/nvim instead of ~/.vim.
Configuring Vundle
For vim, to Vundle we need to make some changes in the ~/.vimrc. If you don’t have a ~/.vimrc create a blank file and name it ~/.vimrc. The changes to be made to the ~/.vimrc are as follows:
set nocompatible              " be iMproved, required
filetype off                  " required

" set the runtime path to include Vundle and initialize Vundle
" The directory should be changed in case you downloaded in case you download it somewhere else
set rtp+=~/.vim/bundle/Vundle.vim
call vundle#begin()

" let Vundle manage Vundle, required
Plugin 'VundleVim/Vundle.vim'

" All the plugins to be installed are to be mentioned here
" inside the vundle#begin and vundle#end

call vundle#end()            " required
filetype plugin indent on    " required
We have now successfully configured Vundle. It is time to install some plugins.
Installing Plugins with Vundle on VIM
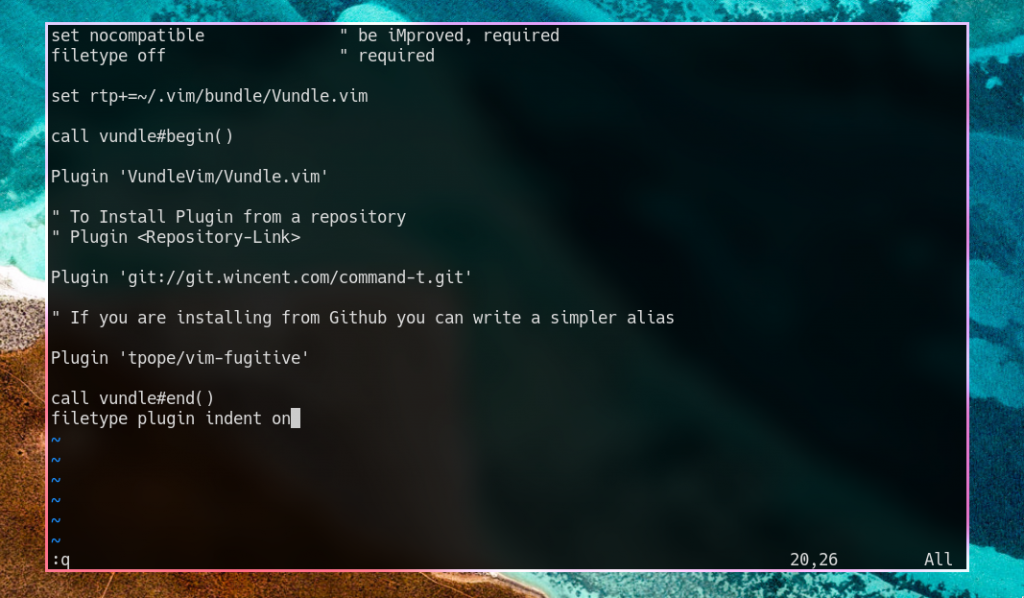
Here is part of ~/.vimrc showing different ways and options to install plugins in vim.
call vundle#begin()

Plugin 'VundleVim/Vundle.vim'

" To Install Plugin from a repository
" Plugin <Repository-Link>

Plugin 'git://git.wincent.com/command-t.git'

" If you are installing from Github you can write a simpler alias

Plugin 'tpope/vim-fugitive'

" git repos on your local machine (i.e. when working on your own plugin)
" Plugin 'file:///home/gmarik/path/to/plugin'

" Install L9 and avoid a Naming conflict if you've already installed a
" different version somewhere else.
" Plugin 'ascenator/L9', {'name': 'newL9'}

" All of your Plugins must be added before the following line
call vundle#end()
Feel free to add more plugins inside inside your .vimrc. After you have completed you editing use the command:
:source %
and then run the command,
:PluginInstall
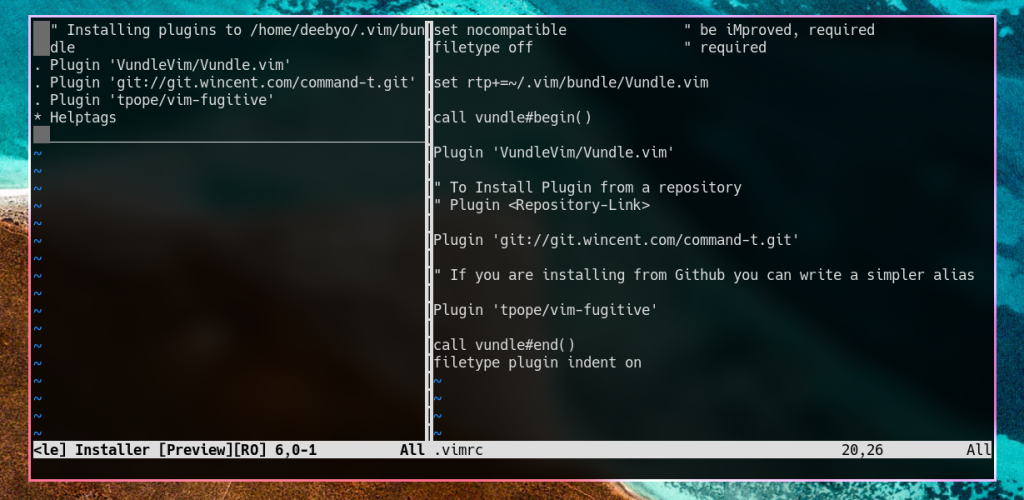
Vundle will now install the plugins mentioned in the ~/.vimrc.
Close the vim application using :q and restart it to see the see the into effect.
Vundle Commands
To make life easier for you, here is a quick reference to some of the Vundle commands with their functionalities.
| Command | Usage |
| :PluginList | lists configured plugins |
| :PluginInstall | installs plugins; append `!` to update or just :PluginUpdate |
| :PluginSearch foo | PluginSearch foo |
| :PluginClean | confirms removal of unused plugins; append `!` to auto-approve removal |
Conclusion
This brings us to the end of the article on Vundle. If you run into any issues you can always access the local man page using :h vundle. Here are a few .vimrc you can take inspiration from. Stay tuned for more such articles on vim.