
Audio, network, and NVIDIA graphics card often pose challenges for users who have recently installed Linux on their desktop. If it works, it works; but if it does not work, then you will have to spend hours trying to troubleshoot the problems arising on your PC. Even if everything works perfectly, sometimes the minor inconveniences on the settings implemented by the Desktop Environment might result in a turn-off for the user.
GNOME developers have been adding small quality of life updates to the GNOME desktop environment, with frequent updates to every distribution. However, this desktop environment, the default DE for many Linux distributions like Ubuntu and Fedora, still lacks several features.
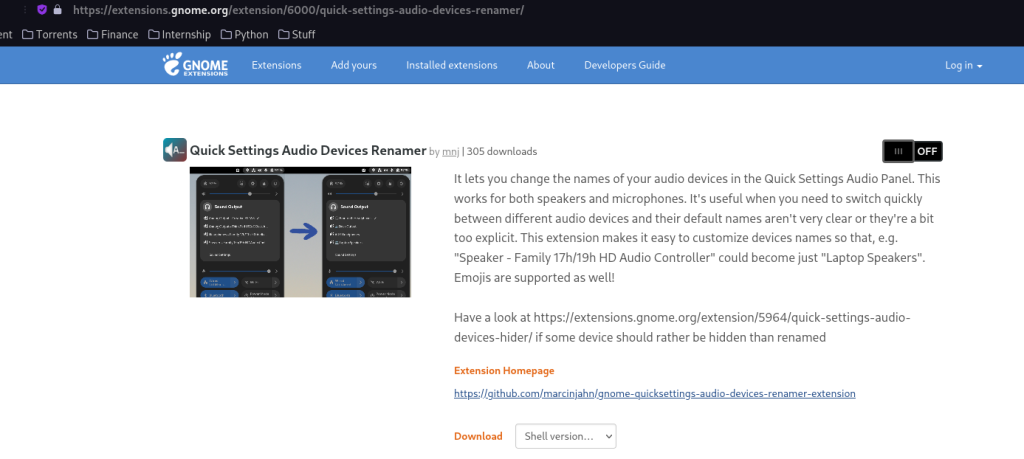
On GNOME, renaming audio devices can be easily done with the help of an extension called ‘Quick Settings Audio Devices Renamer’. To install this extension, visit the GNOME extension website, and first install the ‘Chrome GNOME Shell’ extension if not already installed. After installing the browser plugin, log out and log back into your device, then return to the website and activate the ‘Quick Settings Audio Devices Renamer’ extension. The renamed audio devices will be visible in the quick settings menu.
Challenges in the GNOME Desktop Environment
Starting with GNOME 44, users can easily view and toggle all connected/paired Bluetooth, Wi-Fi, and audio devices from the quick settings menu without having to open the Settings application. However, there are still many features that are missing from the GNOME which you might miss if you are coming from the Windows, macOS, or even other desktop environments such as KDE or Cinnamon.
While some of the ‘missing’ features can be added to the GNOME desktop with the help of GNOME extensions.
Limitation: Renaming Audio Devices in GNOME
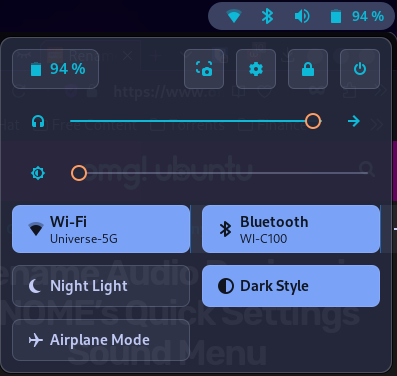
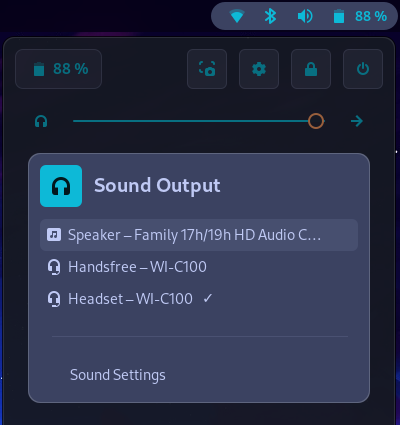
For example, you cannot rename audio devices which are connected to your device, whether through your HDMI port, 3.5 mm headphone jack or just via Bluetooth. This may be a problem for users who have connected numerous audio devices to their PC or laptop and might get confused about the names of different output devices. Even if the correct names show up, sometimes they get truncated because their name is too long.
However, as always, if a GNOME desktop feature is missing, rest assured someone has already created an extension for it. For our specific use case, there is an extension called ‘Quick Settings Audio Devices Renamer‘ which is available on the official GNOME extensions website.
Step-by-Step Guide to Installing the Extension
Begin by visiting the GNOME extension website and installing the ‘Chrome GNOME Shell’ extension if it isn’t already installed on your system. You will be redirected to the extension website of your browser (Firefox, Chrome, or Edge browser).
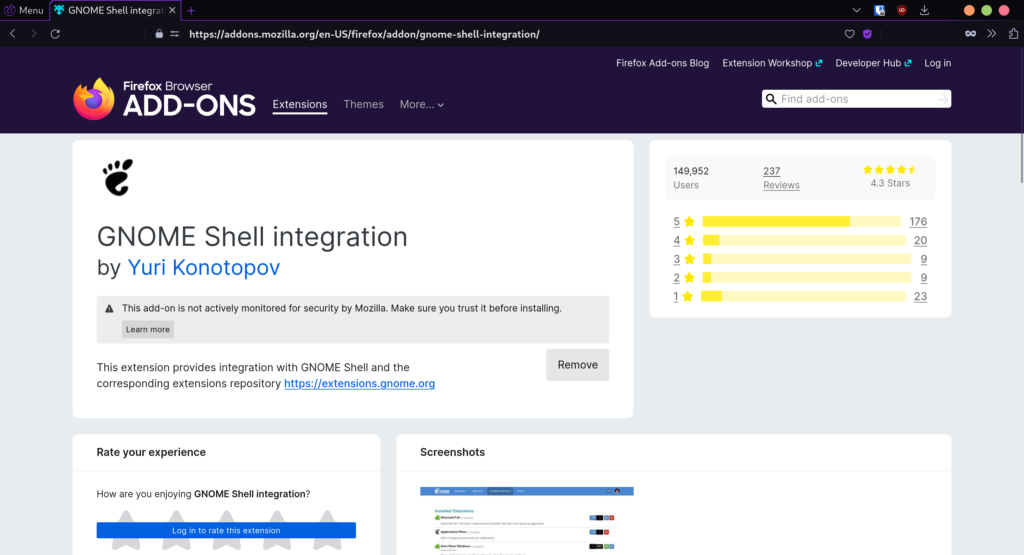
Once you’ve installed the browser plugin, you may need to log out and then log back into your device. After logging back in, revisit the website and search for the ‘Quick Settings Audio Devices Renamer‘ extension.
Renaming Audio Devices: A Walkthrough
Now, open the ‘Extensions’ application, which is used to manage all the installed extensions on your desktop.
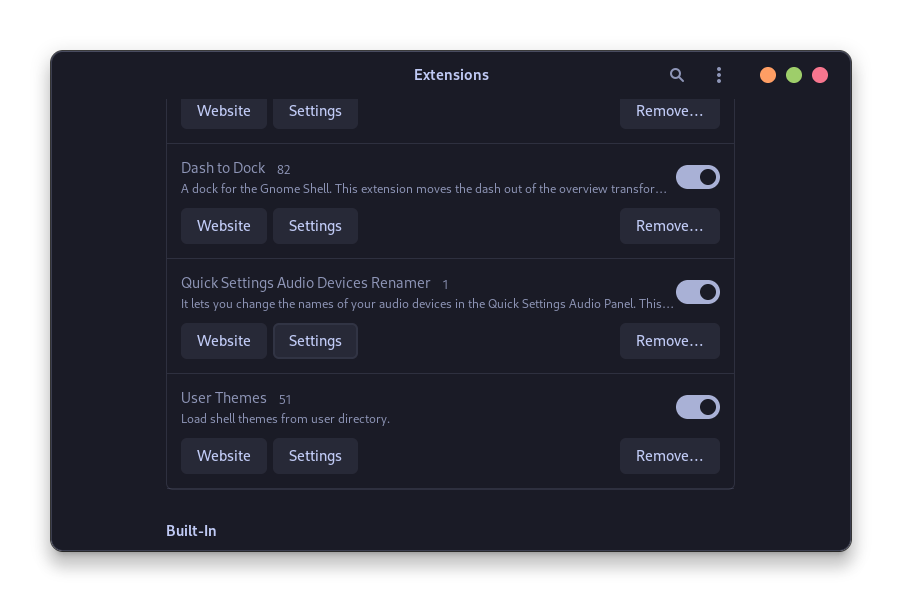
Open the settings of this newly installed extension, and then you can easily rename audio (input and output) devices which are connected to your laptop/PC.
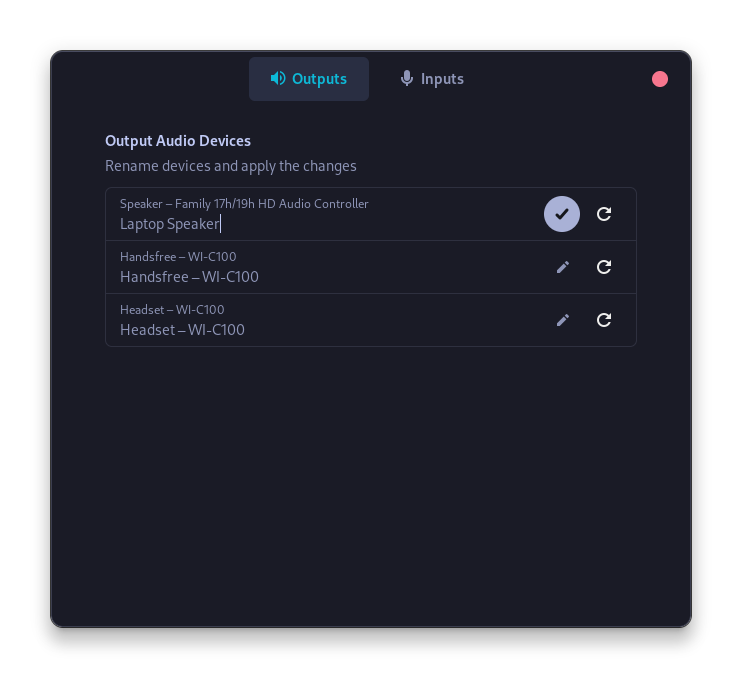
Once you are done, simply click on the check button and then close the settings menu. Now, you will see the renamed audio devices next time you will open the quick settings menu.

You can also use the GNOME extension manager to install this extension on your desktop.
Concluding Thoughts: Leveraging the Power of GNOME
Though there might be some missing features in the GNOME desktop environment, the open-source community consistently comes up with creative solutions. The ‘Quick Settings Audio Devices Renamer’ extension is one such example that allows users to customize their desktop audio settings.
With tools like this and the ‘User Themes’ extension, personalizing your GNOME desktop becomes an effortless task. What other GNOME extensions have you found useful in personalizing your desktop experience?