
In this tutorial we’ll build a Linux server on a Raspberry Pi with Raspbian which is an operating system based on Debian.
In the end we’ll also host a NGINX server on our Raspberry Pi Linux server!
What is a Raspberry Pi?
Raspberry Pi is a single-board, cheap credit card size computer. It can be powered with a Micro-USB charger, and it doesn’t need much power to operate. It has a whole variety of possibilities, from robotics to motion detected CCTV surveillance (MotionEyeOS), to developing scientific instruments, to composing music, and a lot more. It has been even sent to space!
The first ever released board was the Raspberry Pi, since then the Raspberry Pi Foundation have released following boards:
- Raspberry Pi 2
- Raspberry Pi Zero
- Raspberry Pi 3
- Raspberry Pi 4
- Raspberry Pi Pico
which further have more versions among themselves.
In this tutorial we’ll use a Raspberry Pi 2 to make a headless install of Raspbian which can be communicated through SSH, the procedure should be similar for the other variants as well.
Requirements
Here is the list of items you’ll need to build a Linux Server with a Raspberry Pi,
- Raspberry Pi
- Ethernet Cable (RJ45 Cable)
- USB WiFi Adapter (Optional)
- Power Supply
- microSD or SD card (at least 8GB)
- microSD or SD card reader (OPTIONAL)
Steps to Set up a Linux server on a Raspberry Pi
Before we setup a Linux server on a Raspberry Pi, follow the steps to install Raspbian operating system on Raspberry Pi computer.
Step 1: Get Raspbian operating system image
You can download the official Raspbian operating system image at https://www.raspberrypi.org/software/operating-systems/
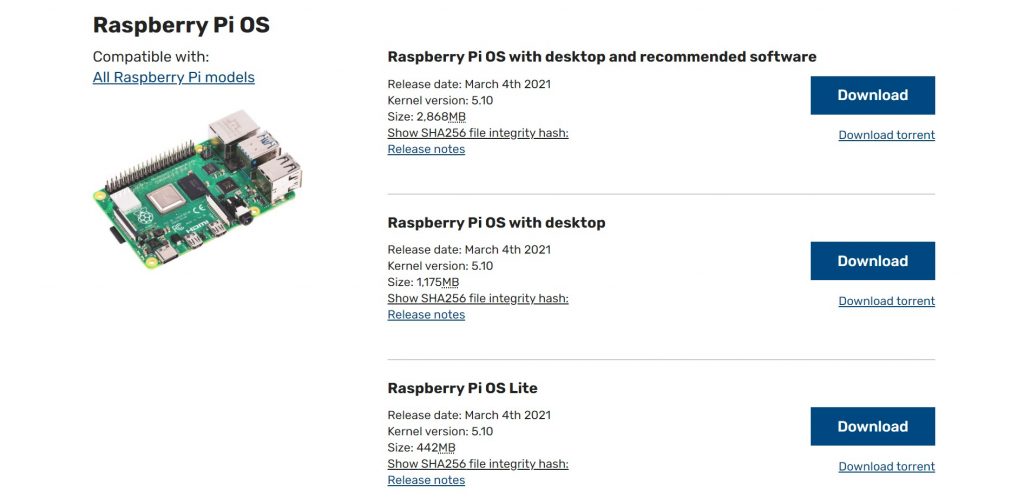
You can choose any of the above images, basically they only differ in number of packages, and you can also install those packages anytime using an active internet connection later, so irrespective of the image you download above the process will be same to install Raspbian on Raspberry Pi computer.
If you require desktop, it will be rather easy to install “Raspberry Pi OS with Desktop” image or “Raspberry Pi OS with desktop and recommended software”.
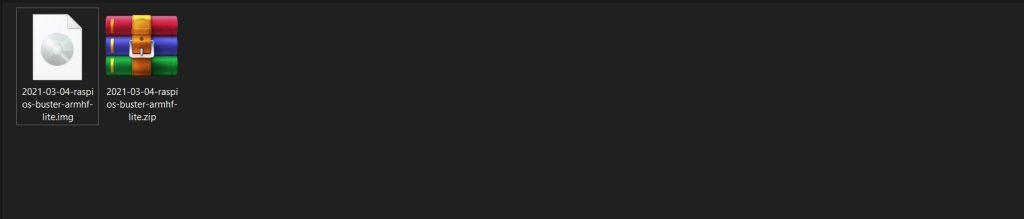
Since we are building a Linux server, we’ll go with the “Raspberry Pi OS Lite”. Once you are done with downloading the .zip file, now extract the zip archive.
Step 2: Download and Install win32diskimager
Now download and install win32diskimager from https://sourceforge.net/projects/win32diskimager/ which we’ll use to write the image to the microSD card (or SD card).
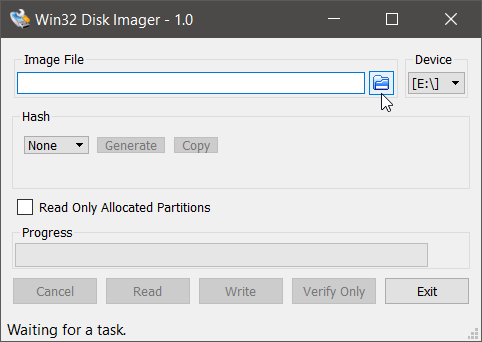
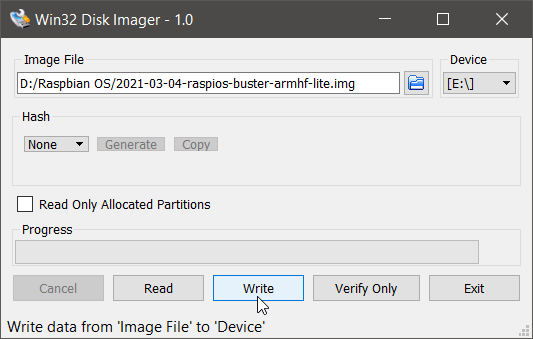
Step 3: Use win32diskimager to write Raspbian OS image to microSD (or SD) card
Select the Raspbian OS image file which you have just extracted, and select the device (SD card) to which you’ll be writing the image, and press the Write button to start writing.
NOTE: This will overwrite all the data present on your microSD (here [E:\] Device), make sure to take a backup of it!
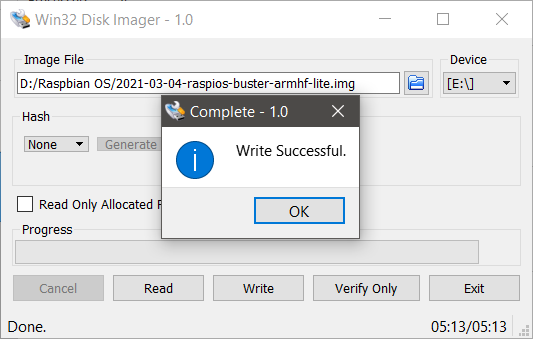
and it will start writing image to the device,

after completion now we can proceed to further steps.
Step 4: Enabling SSH for headless install
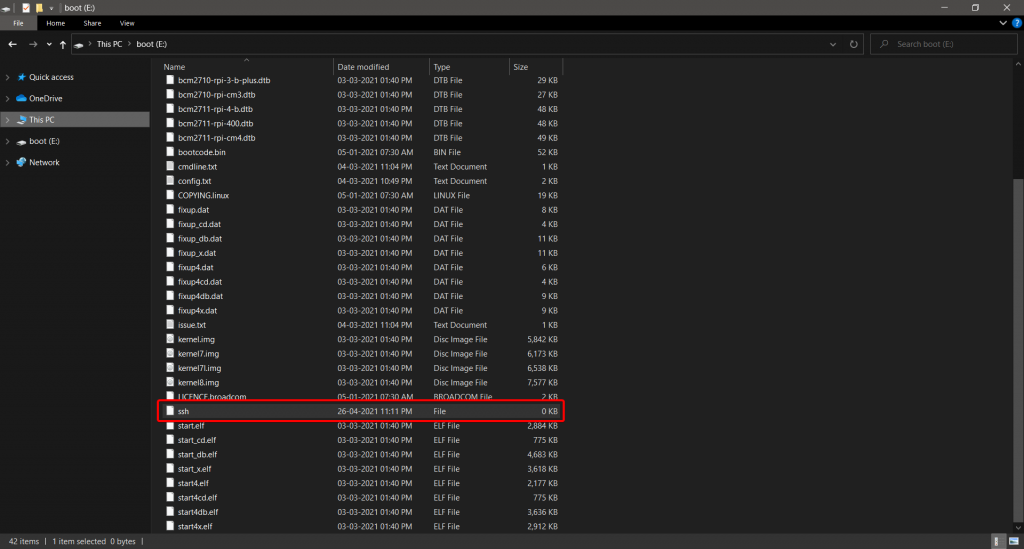
Since we are installing the Raspbian without any display, mouse or keyboard. We can only communicate with the Raspbian OS which is now installed on the microSD with the help of SSH. By default SSH is disabled in Raspbian OS, so as to enable it.
You have to create a blank file called ssh and put it in the microSD in order to enable SSH on boot,
After that we can now eject the microSD, and put it in our Raspberry Pi microSD slot.
Step 5: Connecting to Raspberry Pi
Now we are all set to boot our Raspberry Pi Linux Server!
All you have to do is to connect the Ethernet Cable (RJ45 Cable) from Raspberry Pi to your Router, then connect and switch on your Power Supply.
After that open your router’s admin page, and look into the connected devices to find the Raspberry Pi’s local IP address.
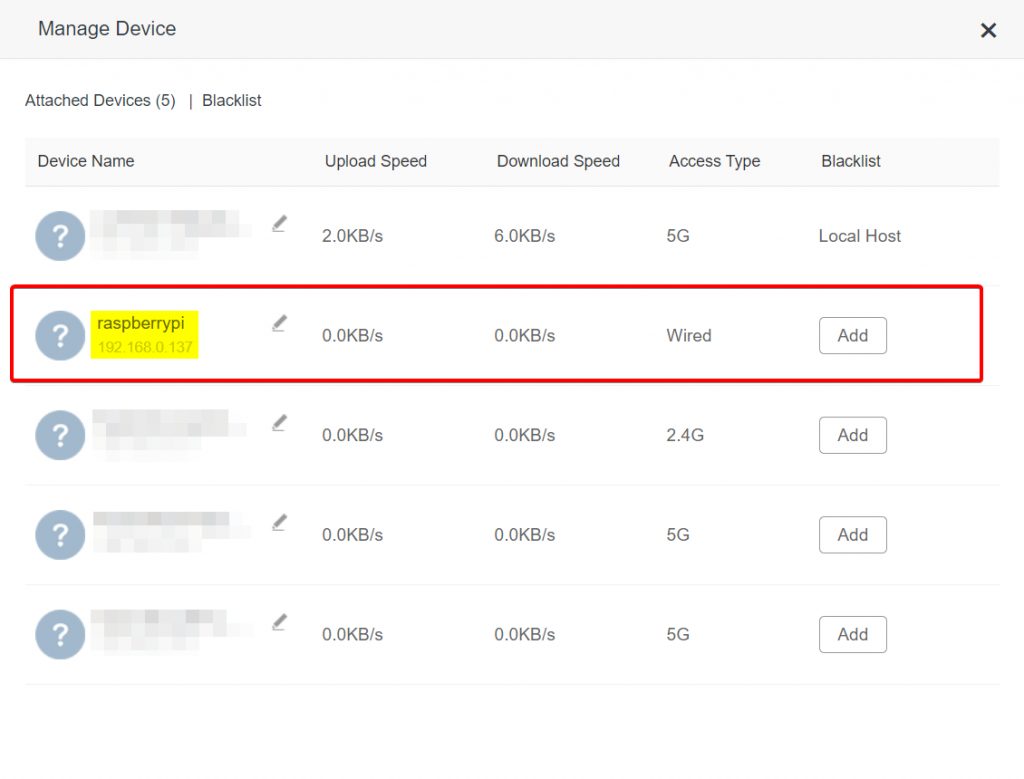
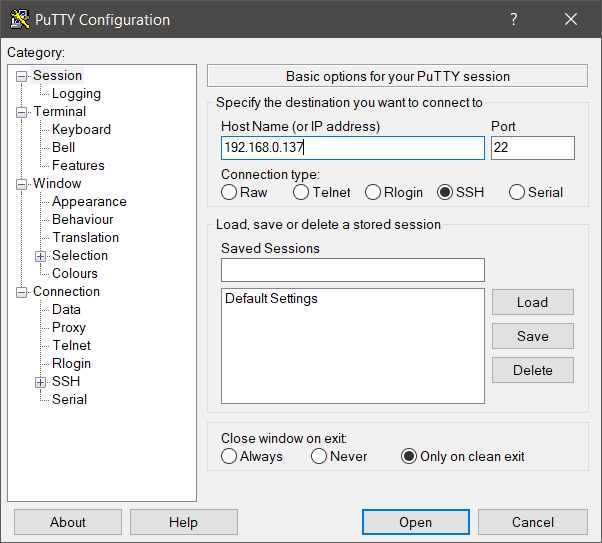
so we can see that our Raspberry Pi is connected, and it’s IP address. Now we can use PuTTy to SSH into our Raspberry Pi Linux Server:
The default login for the Raspbian is with the user pi and the password is raspberry Don’t forget to change the password after logging in.
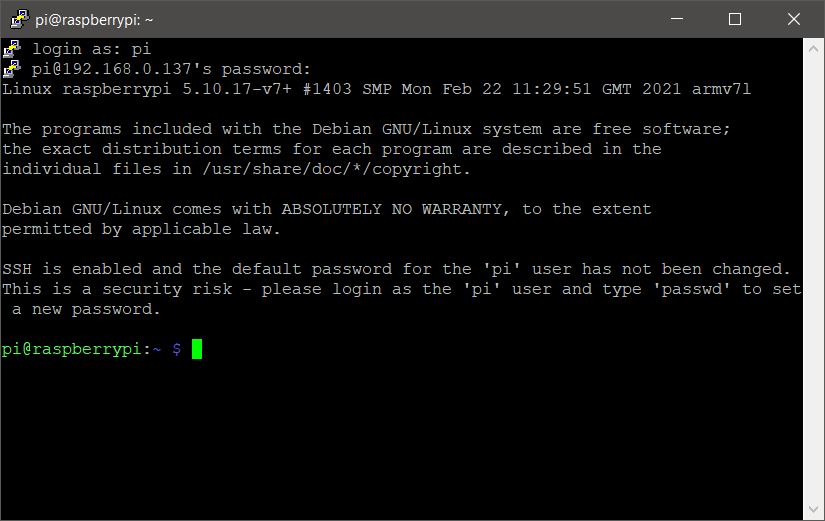
We have successfully connected over SSH to our Raspberry Pi Linux Server!
Step 6: Important things that needs to be done
Right after booting and connecting into a new Raspbian OS on a Raspberry Pi, it is important to expand the system and you can also tweak with the other settings in the raspi-config script, which is executed with the sudo command:
sudo raspi-config
which will open the raspi-config script window,
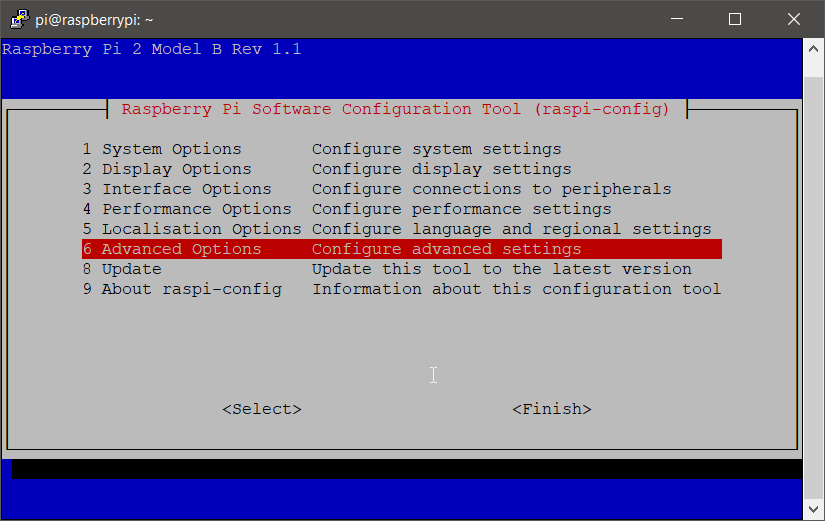
Now navigate to Advanced Options and hit enter,
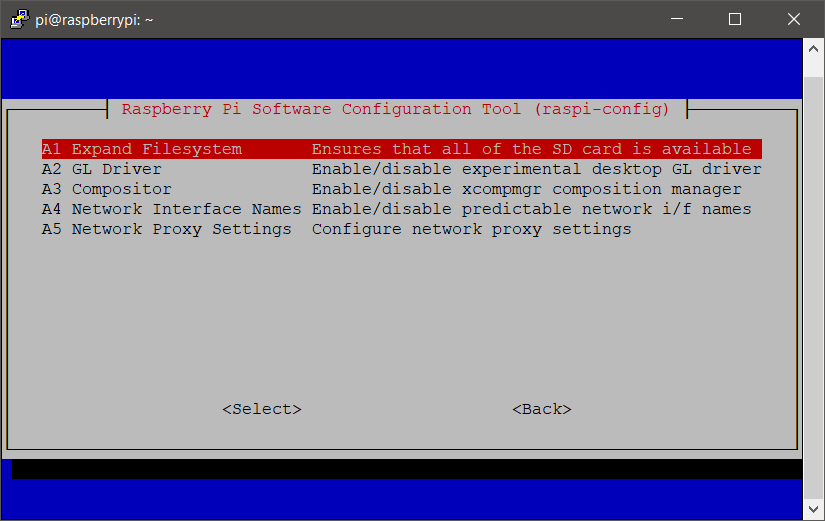
Now select Expand Filesystem and hit enter to expand the filesystem.
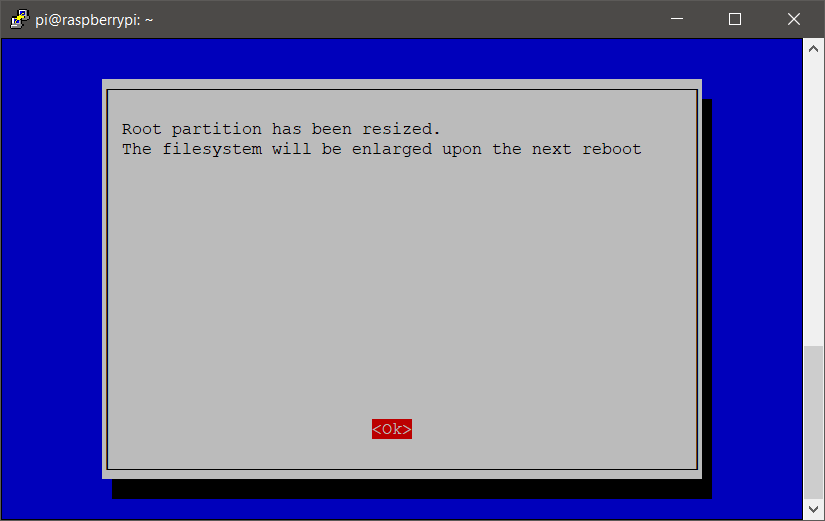
It requires a reboot to finally enlarge the filesystem, use the reboot command with sudo command to reboot Raspberry Pi:
sudo reboot
Now our Raspberry Pi Linux Server is ready to use!
Installing NGINX on Raspberry Pi
Before we install NGINX, update the repositories by using:
sudo apt update
Now we’ll install NGINX on Raspberry Pi, by using:
sudo apt install nginx
After successful completion of the installation. Go to your web browser, and enter your Raspberry Pi’s IP address in the address bar,
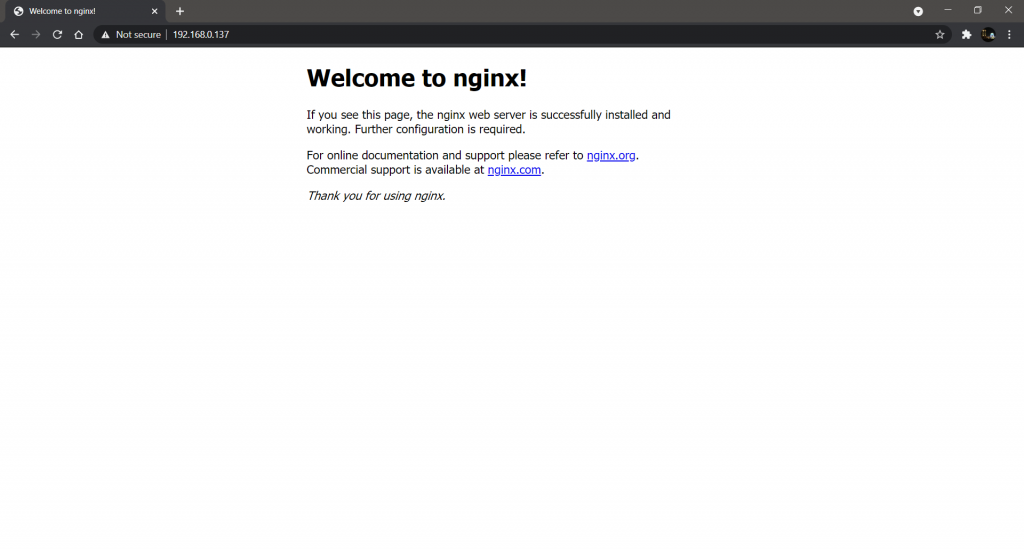
Voila! We made it! We just served our first page through a NGINX web server installed on our Raspberry Pi computer running Raspbian Linux Server!
Some Tips & Tricks
What if you don’t have access to the router?
If you don’t have access to the router, your Raspberry Pi will not be able to get online. You can still SSH to your Raspberry Pi, by connecting the ethernet cable directly to your system but it will be hard to find your Raspberry Pi’s IP address, so what you can do is it to define the IP address in the cmdline.txt file in your microSD card,
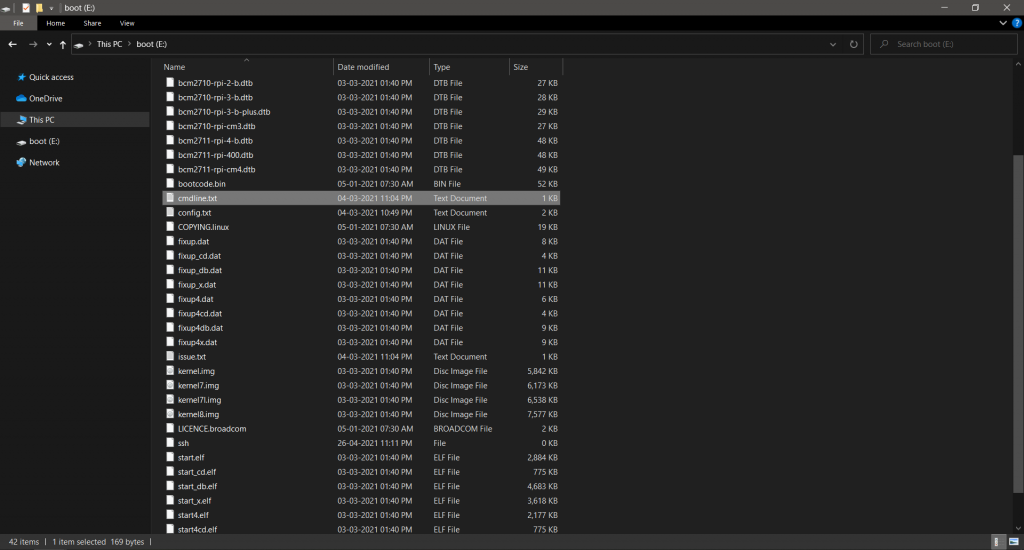
And, then add the ip=192.168.3.14 at the end of the first line to make your Raspberry Pi listen for connections on 192.168.3.14 IP address or any other local IP address of your own choice.

Then connect the Power Supply to let Raspberry Pi boot, now SSH into that IP address and you’ll be able to connect over SSH to your Raspberry Pi.
But there is still a problem, your Raspbian Linux Server cannot communicate over Internet, newer Raspberry Pi versions come with WiFi adapter inbuilt, so you can configure the WiFi adapter to connect to certain SSID to get access to Internet.
If your Raspberry Pi doesn’t have a WiFi adapter, you can make use of the USB Tethering available on almost all the Android Phones.
You just have to connect a micro-USB to USB cable from your phone to the Raspberry Pi, and turn on USB Tethering on your phone to get the access to internet. More permanent solution would be is to get a USB WiFi Adapter and install it on your Raspberry Pi.
Can you host a webpage on internet without Port Forwarding?
It is generally not recommended to port forward on your home connection unless you have advance mechanisms to tackle security issues. But you can still host a webpage or SSH into your Raspberry Pi Linux Server using services like remote.it. You can check them out, and other such services.
Conclusion
Raspberry Pi can definitely be used as a Linux Server, and the process is straightforward. Though it is not recommend to port forward on your home connection unless you make use of advance security mechanisms to safe guard your home connection from any attacks.
I hope you enjoyed reading the tutorial as much as I did writing it!