
In this tutorial we walk through the steps to install Docker on Arch and Arch based systems( Manjaro, Garuda etc.). We’ll also go over the complete setup steps for Docker so you’re ready to go.
Btw, if you’re using Debian, we also have a guide to install Docker on Debian. Let’s get started!
What is Docker?
Docker is a software platform designed for building an application in a loosely isolated environment called a container. Containers are essentially lightweight and contain everything required to run the application, so we don’t need to worry about files installed in the Host computer. We can run many containers on the host machine without affecting one another. Docker provides us with a way to create, run, manage and communicate with the containers.
Docker like any other software comes mainly in two different versions – the stable version and the development version. The stable version is recommended for most users, who want to get their work going without any hassle. The development version is the version that is being currently worked on. It contains newer/improved features, but it is generally unstable and is not generally not recommended for daily use. We will be going through the installations of both versions.
1A. Install the Official version of Docker on Arch
We will be using pacman to install the official binaries from the Community. Open a terminal an type:
sudo pacman -S docker
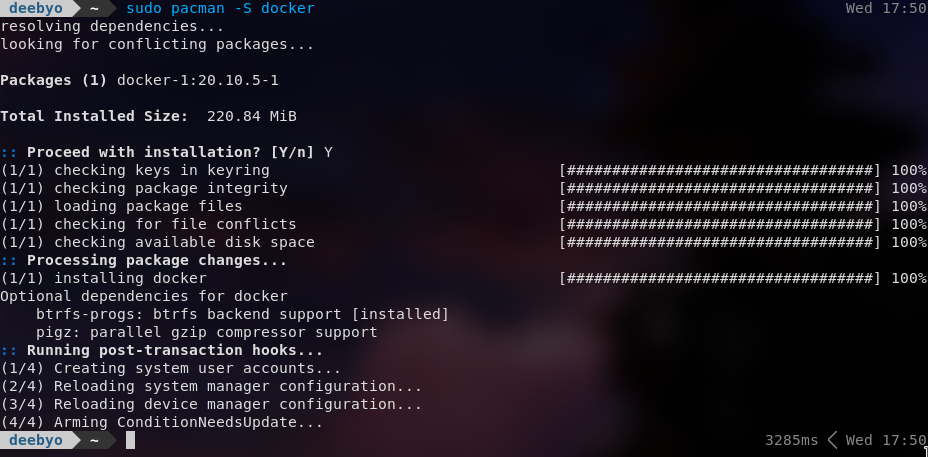
That’s all!! Just a line of code.
1B. Installing the development version of Docker on Arch
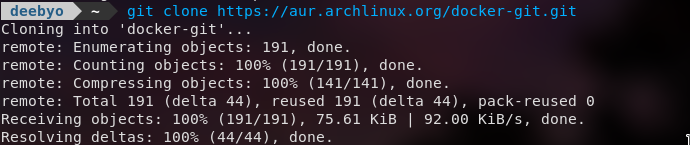
The development version is in the Arch User Repository. We need to clone it and build it from the source. So we open up a terminal and first clone the repository. You need to have git installed for this.
git clone https://aur.archlinux.org/docker-git.git
Before we build it from the source we need the tools to build it from source, these tools fall under the ‘base-devel’ package. So we download the required packages using pacman.
sudo pacman -S base-devel
Go to the repository folder and build it using ‘mkpkg -sri’
cd docker-git/
makepkg -sri
2. Starting the docker service on startup
Before we can use docker, we need to enable Docker daemon. We can easily do it using systemctl start.
sudo systemctl start docker.service
This becomes a tiring job to enable docker daemon every time after we boot our computer. We can make sure the docker daemon is run every time we boot our computer using systemctl enable.
sudo systemctl enable docker.service
3. Adding User to Docker group
Running docker requires sudo privileges. So we need to root every time we run docker. This can be eliminated by adding the user to the docker group. To add the user to the docker group, use the usermod command.
sudo usermod -aG docker $USER
The user needs to log back in to see the effect.
Note: Anyone added to the docker group is root equivalent, so make sure you trust the user that you are adding to the docker group.
4. Hello Docker!
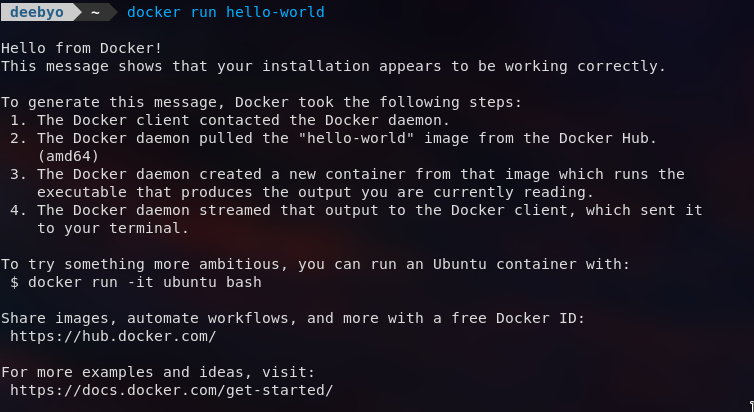
Now that we have docker installed we can run our first docker command- “Hello World”
docker run hello-world
Conclusion
You are now all set up to run docker, pull images and create your own application. To create your own docker based application you can refer to this article.