

How many times have you found yourself in a position where there is not enough disk space left on your computer? For me the answer is plenty. And these are the times that call for the du and the df commands that Linux offers.
Also read: Checking Disk Space Used in Linux – How To Use The df Command in Linux?
Limitations of the df command
As you might already have guessed the df command stands for “disk-free”. The df command gives you information pertaining to how much disk space is free on the machine. Now after some practical testing, you might have found that the df command is not particularly very helpful in some particular situations.
One of them is that the df command fails to show us the space used in a folder or directory level. If there was a situation where the root partition is nearly full, we will probably want to know which particular folder or directory is taking up most of the space.
The du command in Linux
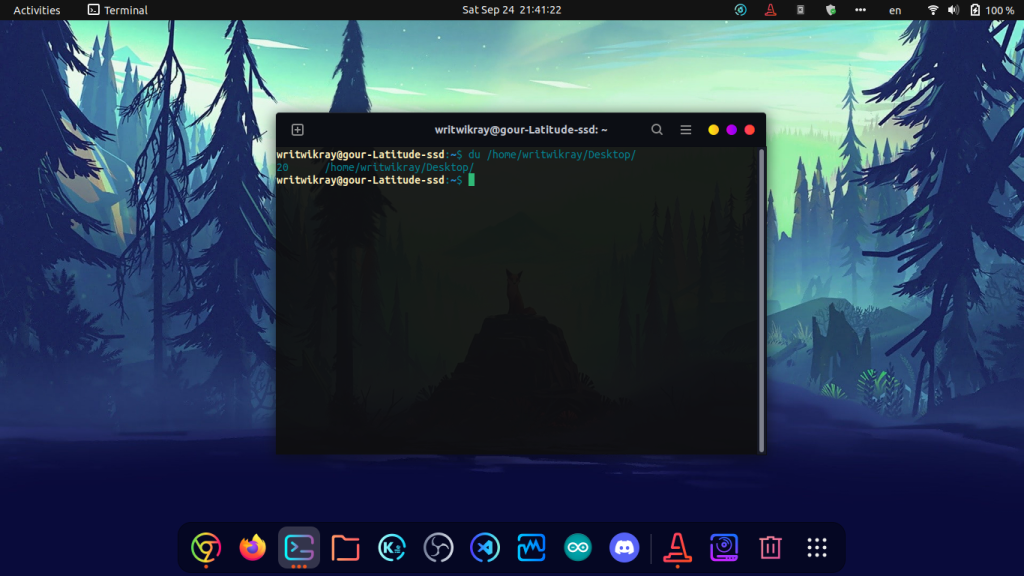
The way that the du command works is that the user provides the path to the folder or directory and it’ll show how much space is used inside that directory. As an example let us give the du command and the path to our Desktop folder. The output is as follows:
Human Readability and Scrolling text
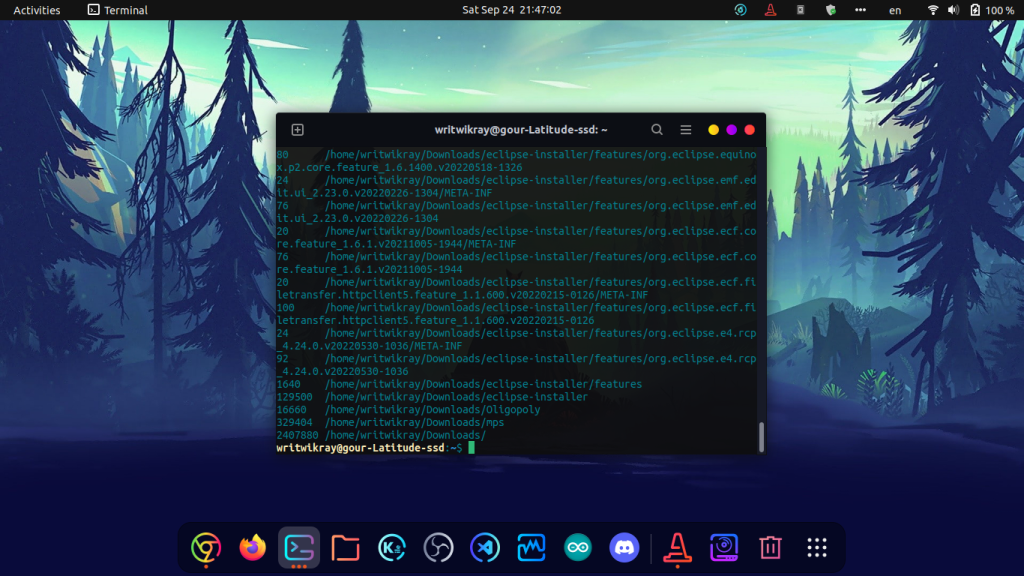
Now you might have guessed what could be a problem while using the du command. When running the du command in our home directory it can be seen that the terminal window is flooded with information and also the data is not really human readable.
The human readability can be turned on similar to the df command by issuing a -h flag. The other problem is solved by controlling how deep the du command is allowed to go. This is achieved by issuing a --max-depth flag with the number of your choice. We will be running the du command in our home directory with the maximum depth of 0 and see the results.
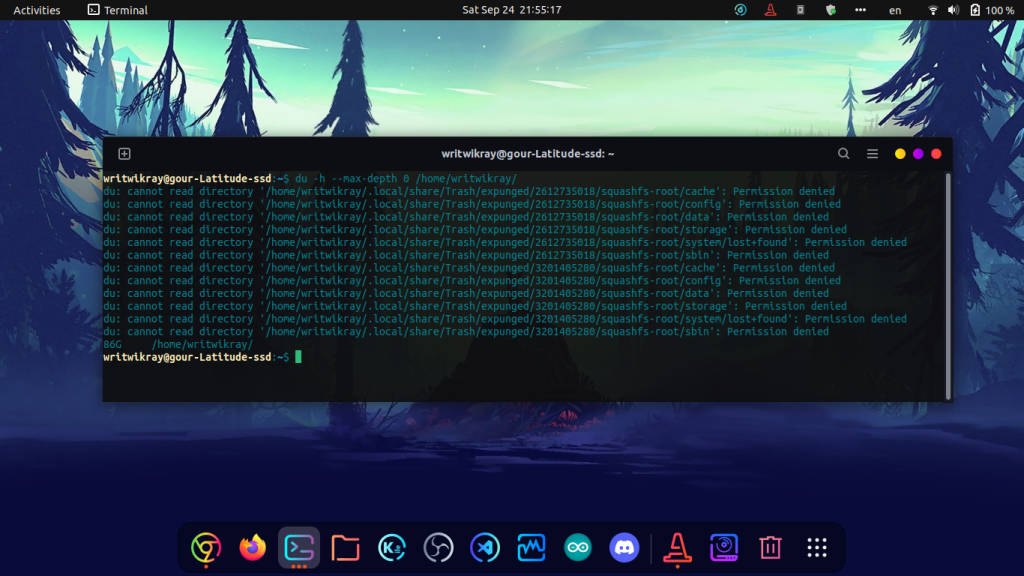
Now the output is a lot easier to read. The scrolling is not necessary and also the numbers are human-readable. What the max-depth option does is it controls how many directories deep is the du command allowed to go, so by limiting it to 0 we are basically stating to tell us only the disk space used by the path we give to it.
Comparing disk usage of different directories
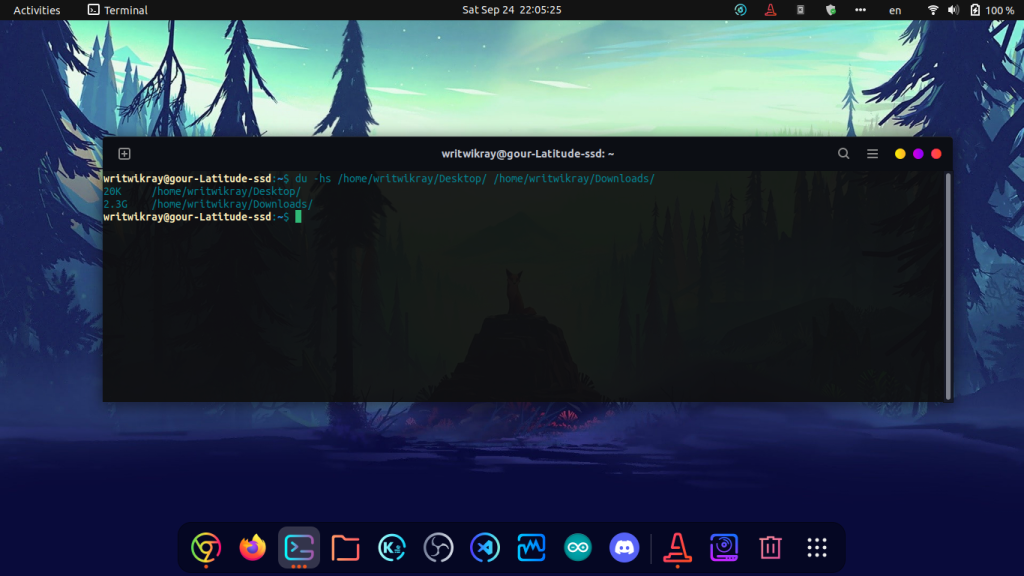
The s flag is useful in the sense it allows users to summarize the data. In the following example, we will see a particularly useful use case of this. Say we want to compare the disk usage of two directories (say, Desktop and Downloads). One way we can do that is by running the du command with the h flag and the max-depth flag separately on both directors.
But that is too much of a hassle, to do this in an efficient way, we can use the s flag. The following image shows the result:
Creating a grand total
We can also issue the c flag to create a grand total of the disk usage. The following image illustrates the situation:

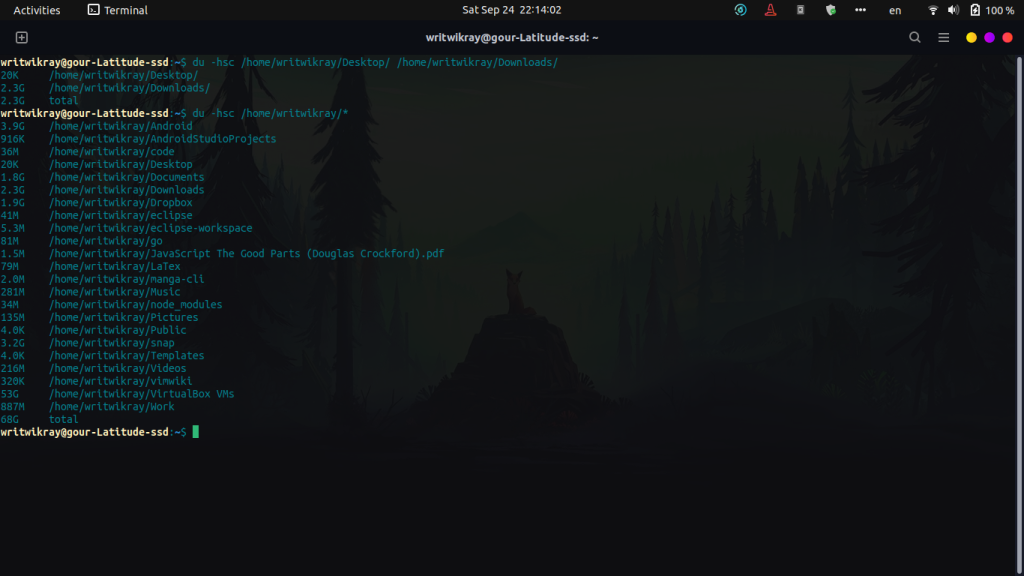
Our favourite way to check disk-usage
The favourite way to check disk usage is by using all of the above flags and the asterisk(*) sign. The asterisk sign signifies all the folders in the path given by the user. The final output is illustrated below:
Summary
Now, there you go readers! You have all the necessary knowledge to check disk usage in your Linux machine. You won’t have to scroll through thousands and thousands of pages in the terminal and you will also be able to generate a simple total of the disk usage by mentioned directories. Hope you guys liked the article, and as always, keep on reading!