
The df command in Linux is a powerful tool for monitoring disk usage and the available amount of space on your system. Whether you’re a Linux server administrator or a regular user, understanding how to use the df command can help you better manage your disk space and ensure your system runs smoothly. In this article, we’ll take a detailed look at this command, including various options and real-world examples.
Basic Usage of df
The basic syntax for the df command is simply df. By default, the command will display information about all filesystems connected to your system in bytes.
This can be difficult to read and understand, especially on systems with large amounts of storage. To make the output more readable, you can use the -h option, which displays the information in “human-readable” format (i.e., with units like GB, MB, and KB).
What is the df command used for?
df is short for disk-free. With this command, you can check the available space and the used space on all the filesystems that are connected to your Linux system. The command offers multiple options to display the data better. Let’s look over the different command options now.
Command options for the df command
By default, the df command displays all the information in bytes. The days of bytes are really over and with terabytes and petabytes of data storage, understanding data in bytes is very difficult. Let’s see what it looks like on a Linux system with a comparatively small file storage space.
root@HowLinux:~# df
The output will be something like this:
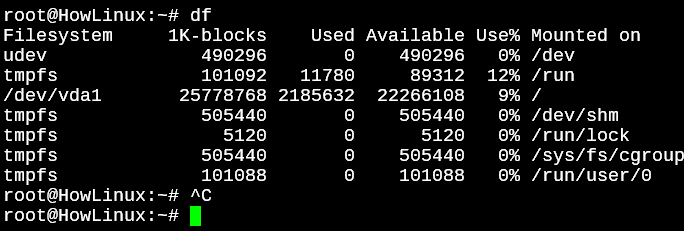
As you can see, it’s just very inconvenient to understand this output. Let’s see what we can do to make the output look prettier.
Displaying df output in human-readable format
Let’s say you are a Linux server administrator and you want to check the disk usage of your server. The df command doesn’t leave us hanging here. It instead, offers us the -h option. When the command is run with the -h option, the command outputs in clear human-readable format, suddenly making sense. Let’s see how it looks.
root@HowLinux:~# df -h
The output will be something like this:
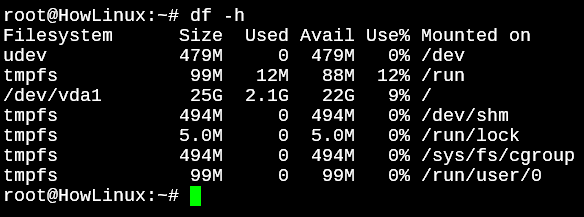
That’s much better! But it just lists out the names of the filesystems on the left, the sizes, and the mount points. How do we find the file system types?
Displaying file system types using df
In addition to displaying disk usage, you may also want to know the types of filesystems on your system. To do this, the df command gives us a very handy option -T or –print-type to list an additional column with the filesystem types. Let’s run the command below.
root@HowLinux:~# df -T
OR
root@HowLinux:~# df --print-type
The output will be something like this:
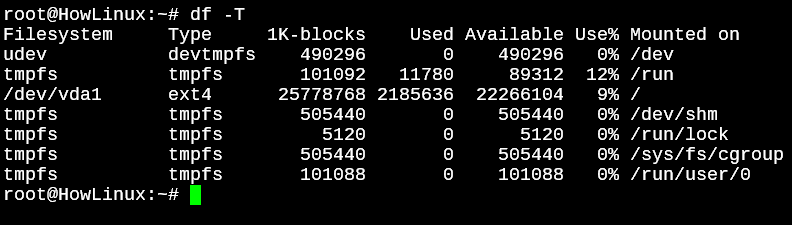
Notice the second column now has the filesystem types. That’s great! Now I don’t want to see all the filesystems, but only the ones that are ext4 formatted. These are the filesystems where my persistent data lies. All other filesystems in the above example (tmpfs and devtmpfs) are temporary storage filesystems and will be wiped clean when the system is restarted.
Viewing Storage Data By Filesystem Type
You can also view the storage data for a specific filesystem type using the -t option or –type= option. For example, to view the storage data for ext4, use the following command.
root@HowLinux:~# df -t ext4
OR
root@HowLinux:~# df --type=ext4
The output will be something like this:

Great, now we know how to display filesystem usage by a filesystem type. Now let’s also display the total disk usage in a human-readable format.
Excluding Specified Filesystems From The Output
We learned how to view output for specific filesystems. Now let’s see how we can output everything while excluding a specific filesystem.
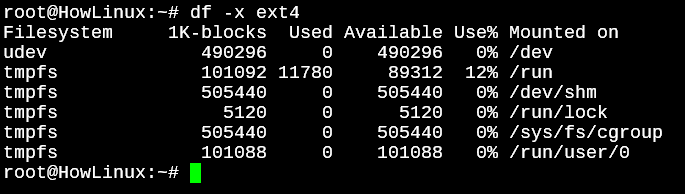
To exclude a specific filesystem type from the output, you can use the -x option. For example, to exclude ext4 filesystems from the output, you can use the following command:
root@HowLinux:~# df -x ext4
The output will be something like this:
Displaying Total Disk Usage Using df Command
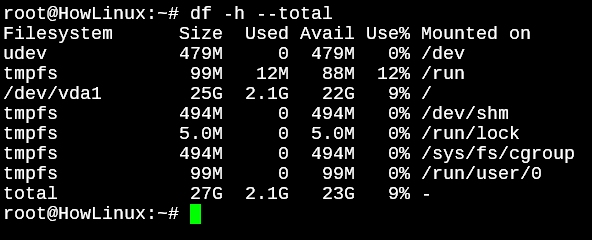
We’ll make use of the –total option to list out the total disk usage. To display the total disk usage of all filesystems, you can use the --total option in combination with the -h option for human-readable format.
root@HowLinux:~# df -h --total
The output will be something like this:
Summary
As time has progressed, many new GUI-based utilities have been introduced for the Linux operating system which allows you to view filesystem details without really having to enter any commands in the terminal. But when using such a powerful operating system, you will find yourself needing the terminal very often if not all the time.
So, even though there are always going to be GUI replacements for a terminal functionality, getting used to all the commands at least at their basic level will be very handy for you. And if you need to understand a command in-depth, don’t forget to refer to the man pages. Learn how to access man pages in Linux.
References