
As a top choice for Linux users, qBitTorrent has made a name for itself with its user-friendly interface and open-source nature. With additional versions for Windows and macOS, it’s no wonder the software has become widely popular. However, users might notice one minor drawback: the absence of a built-in dark mode option.
In this article, we’ll walk you through an easy-to-follow, step-by-step guide to adding a custom dark theme to your qBitTorrent application. Not only will this give your torrent client a personalized touch, but it will also protect your eyes from harsh screen glare during late-night downloading sprees. So, let’s get started and give your qBitTorrent a stylish, dark makeover that you’ll surely appreciate.
Set Up Dark Theme on qBitTorrent
In this article, we will discuss how we can apply dark themes to this application and save our eyes.
Step 1: Download themes
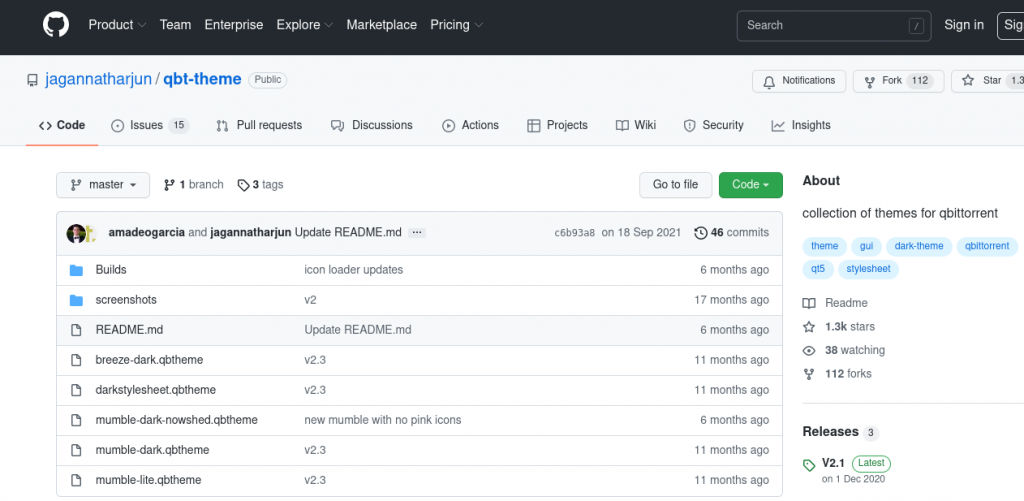
This GitHub repository has an excellent collection of dark themes for qBitTorrent. Download the zip file from the releases section located on the right side. There’s also a Dracula theme for qBitTorrent in this repository. Download this by pressing the green button on the right and clicking on ‘Download as Zip.’
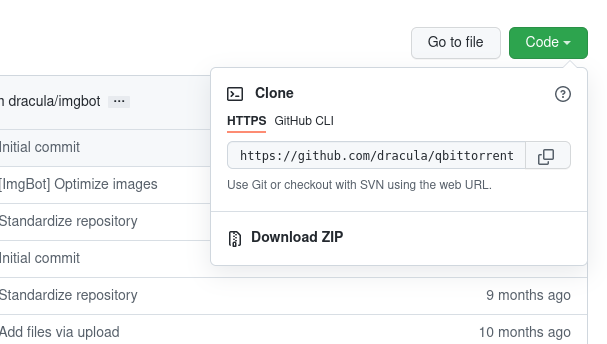
You can also clone the repository using git in the command line.
Step 2: Extract the Zip Files
Now, head to the Downloads folder in your file manager and select ‘Extract Here’ after right-clicking the downloaded zip files. You can also do this in the terminal by:
cd ~/Downloads/
Extract the archives by typing :
unzip qbt-themev2.1.zip
unzip qbittorrent-master.zip
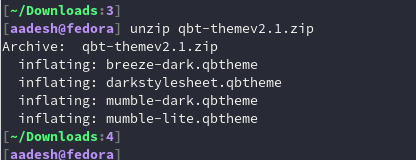
Replace the version number, as yours can be different from mine in the future as they release newer updates.
Also, check out how to use zip and unzip files using the Linux terminal.
Step 3: Move .qbtheme files to the correct location
Now, this step is entirely optional, but to follow conventions, we will follow it. This will also keep our Downloads folder clean. In your home directory, create a hidden directory named .themes. To do this in the command line, type:
mkdir ~/.themes
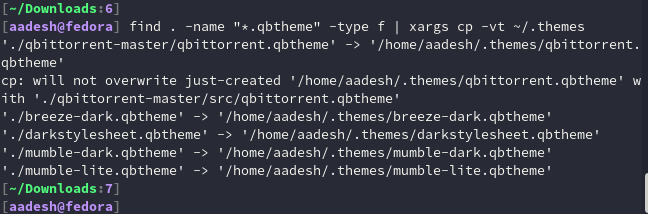
Now, navigate to the directory where you have extracted the zip files and copy-paste all the .qbtheme files to the .themes directory we just created. To do this easily in the command line, use the find command like this :
find . -name "*.qbtheme" -type f | xargs cp -vt ~/.themes
Step 4: Apply the theme
Ensure you have first enabled ‘View hidden files and folders from your file manager, as we have moved all the themes to a remote directory for convenience’s sake. It is usually located on the settings menu at the top right in the file manager. Now, we are ready to apply the themes.
If you wonder if a terminal-based file manager exists, this article has you covered.
Open the qBitTorrent application and go to Preferences from the Tools tab on the header bar, or press ‘Alt+O’ to open it.
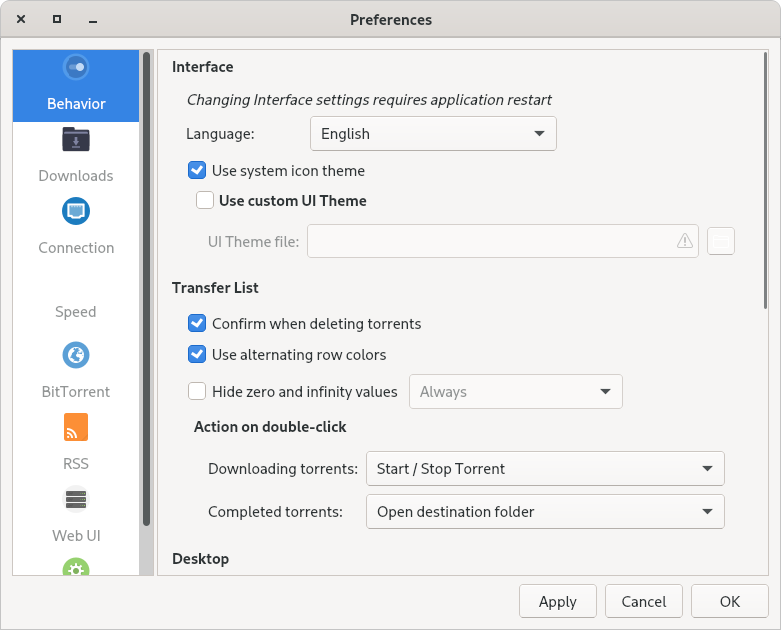
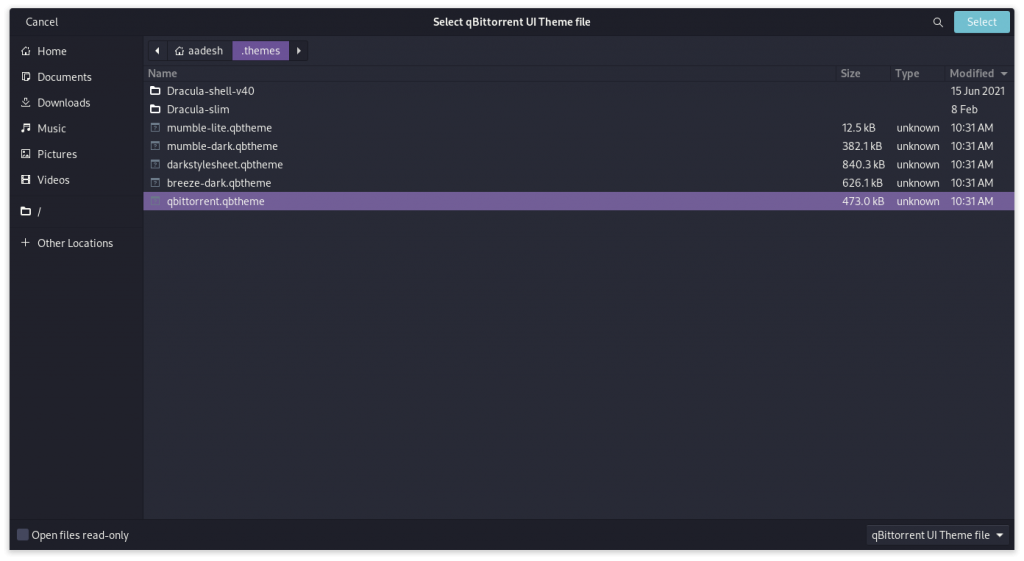
Click on the ‘Use Custom Theme’ checkbox and click on the file icon below it. Now, navigate to the .themes folder we created earlier in this tutorial, and select any theme you like.
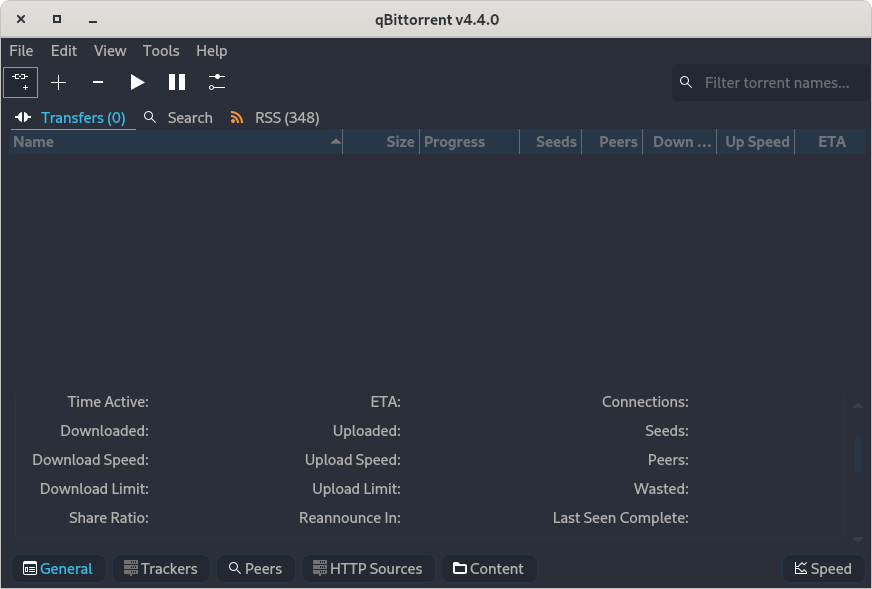
You can try out different themes individually and determine which one you like. At last, click apply and hit OK. All you need to do now is restart the application, and your theme will be applied.
Summary
In conclusion, this straightforward guide has equipped you with the knowledge to personalize your qBitTorrent experience by incorporating a dark theme. Say goodbye to eye strain during those late-night downloading marathons, as you can now select from an array of stylish and modern dark themes that cater to your taste.
By following the steps outlined in this article, you’ve upgraded your torrent client’s visual appeal and improved user experience. So, revel in your newly transformed qBitTorrent with an eye-friendly dark theme. And always remember that a touch of resourcefulness and technical know-how can go a long way in customizing any software to your heart’s content.
How can I enable the dark theme on Qbittorrent?
To enable the dark mode on Qbittorrent, go to the “Options” menu in the top left corner, then select “Preferences.” Under the “Interface” tab, you can change the UI theme to dark.
Can I change the UI theme colors on Qbittorrent?
You can change the UI theme colors on Qbittorrent by selecting the desired color scheme from the theme options in the preferences menu.
How do I fix any issues with the dark theme on Qbittorrent?
If you encounter any problems with the dark theme on Qbittorrent, you can check the Qbittorrent official forums for solutions or troubleshooting tips.
Is switching between the dark and light UI themes on Qbittorrent is easy?
Switching between the dark and light UI themes on Qbittorrent is easy. You can go to the preferences menu and select the desired UI theme color.
Where can I find more information about changing the UI theme on Qbittorrent?
You can read about changing the UI theme on Qbittorrent on various online sources such as development forums, official documentation, or tutorials.
Why does the dark theme on Qbittorrent have issues with text colors?
The dark theme on Qbittorrent might have issues with text colors if it is not correctly configured. You can adjust the color settings in the preferences menu to fix this problem.
How can I enable the dark mode if I am new to Qbittorrent?
If you are new to Qbittorrent and want to enable dark mode, you can follow the step-by-step guide provided in the application or seek help from someone familiar with the software.
How do I switch back to the default light mode theme?
If you wish to switch back to the default light mode theme on Qbittorrent, you can go back to the settings menu, select the default theme file, and restart the application for the changes to take effect.