
MPV player is one of the most widely used media players on Windows, Linux, and macOS. It is an extremely lightweight player, and you have to customize it according to your needs. We have already discussed the differences between a VLC media player and an MPV player, so if you are not into customizations and just need to have a video player that “just works,” then the MPV player might not be for you.
As a user who has used a VLC media player his whole life, I found certain things that I didn’t like about this player, such as the Keyboard shortcuts and the overall look of the player. So I changed it using Lua scripts available on GitHub and a few custom key bindings. In this tutorial, we are going to discuss exactly those customizations that will make it feel more like a VLC player.
Installing MPV player
This is the starting point, let’s first install it on your distribution before doing anything. Open a Terminal and type the following commands, depending on your distribution :
# On Debian and Ubuntu based distributions
sudo apt update && sudo apt install mpv

# On Arch Linux based distribution
sudo pacman -S mpv

# On Fedora Workstation
sudo dnf install mpv
When you first play any file using this player, you will be greeted with an Interface that looks something like this :

Customizing MPV player
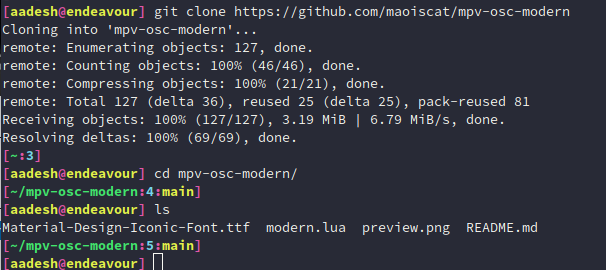
Now, let’s start customizing, open your terminal and type the following command to clone scripts from GitHub :
git clone https://github.com/maoiscat/mpv-osc-modern
You can use any theme listed on this page.
Now, let’s create a directory that will store all of our scripts and will be utilized by MPV :
mkdir ~/.config/mpv/scripts
Now, from the cloned directory, let’s move the Lua scripts into our newly created directory. Type :
mv mpv-osc-modern/modern.lua ~/.config/mpv/scripts
Create another directory that will host the font required by this script :
mkdir ~/.config/mpv/fonts
Again, move the font to this directory by typing :
mv mpv-osc-modern/Material-Design-Iconic-Font.ttf ~/.config/mpv/fonts
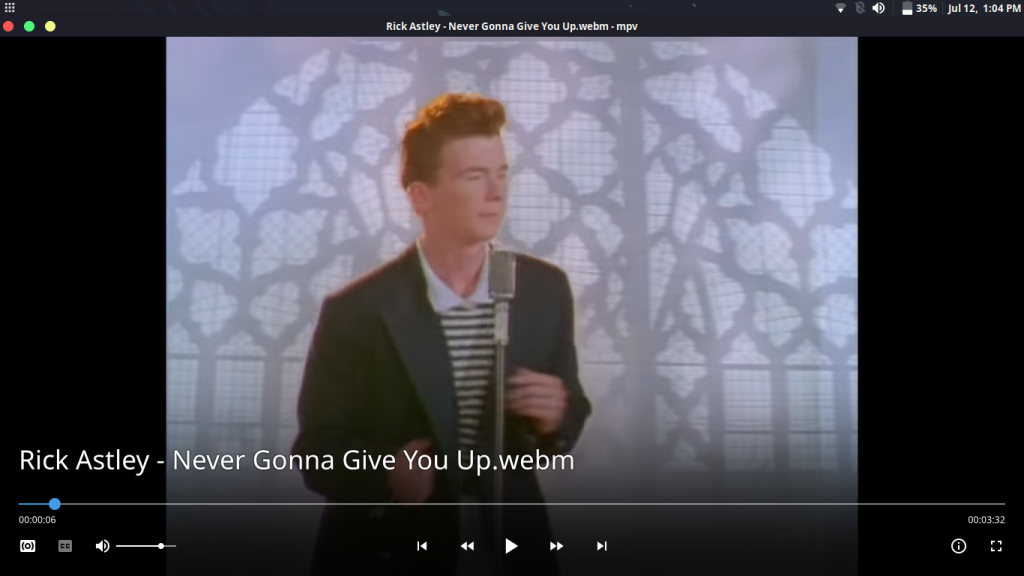
Well, that’s it, open any file now to check what mp looks like now :
I’ve also added other scripts such as file-browser, autoload, and cover-art. You can add them using the above method.
There are many more scripts listed on this page, so you can install any of them that suits your needs.
Now, This part is optional, but I have also changed the key bindings of various actions, you can also do this by creating a file named input.conf using your favorite text editor, type :
# For Vim users
vim ~/.config/mpv/input.conf

# For nano users
nano ~/.config/mpv/input.conf
Press ‘I’ to get into insert mode if you are using vim. My config file looks something like this :
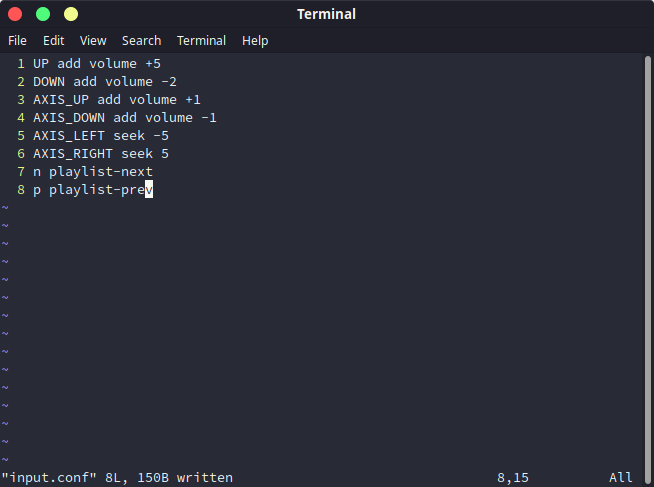
The above configuration does the following :
- ‘The up arrow key’ increases the volume by 5 units
- ‘Down arrow key’ decreases by 5 units
- ‘Mouse/Touchpad scroll up’ increases the volume
- ‘Mouse/Touchpad Scroll down’ decreases the volume
- ‘Swiping left on touchpad’ goes 5 seconds back
- ‘Swiping right on touchpad’ goes 5 seconds forward
- ‘n’ Key will play the next media in the playlist
- ‘p’ key will play the previous file in the playlist
If you are using vim, then press the Escape key and type :wq to save and exit. If you are using a nano editor, then press Ctrl+O and Ctrl+X to save and exit.
You should also edit the mpv.conf file to suit your needs, open it in either Vim or nano using :
vim  ~/.config/mpv/mpv.conf

# OR

nano ~/.config/mpv/mpv.conf
Add the following lines :
save-position-on-quit=yes
# The default volume of mpv when you open it
volume=90
blend-subtitles=yes
screenshot-directory=~/Pictures/Screenshots
screenshot-format=png
osc=no
# You should read about Hardware acceleration on mpv to choose your correct settings
hwdec=vaapi
# Display English Subtitles if available
slang=en
# Defalt audio language
alang=en
Press Ctrl+O and Ctrl+X to save and exit if you are using nano and press the Escape key and then type :wq to save and exit out of Vim editor.
Enable the ‘autoload’ script by adding a file named autoload.conf file in the script-opts directory :
vim ~/.config/mpv/script-opts/autoload.conf
# Or
nano ~/.config/mpv/script-opts/autoload.conf
Add the following lines :
disabled=no
images=yes
videos=yes
audio=yes
ignore_hidden=yes
Again, save and exit out of your editor.
If you have enabled the file-browser script, then you can access the file browser from the terminal by pressing the Ctrl+O key, and navigating between the directories using the arrow keys on your keyboard.
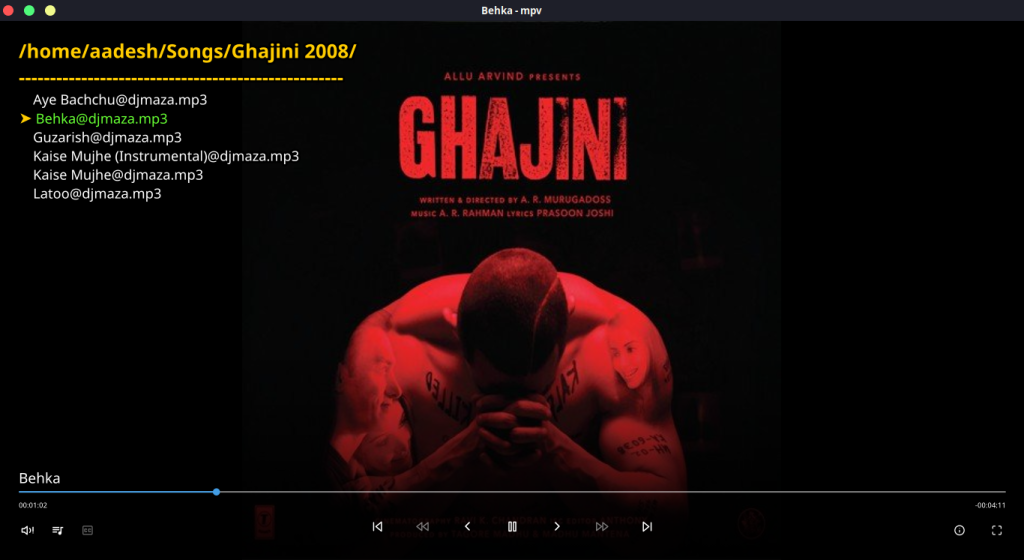
In the above screenshot, I have used a theme named modern-x-compact, and you can get it from here.
Summary
The possibilities are endless here, you can basically add scripts to download subtitles automatically, stream torrents, and many more. You can even use an MPV player as an Image viewer. The functionality is definitely much more than a VLC media player, but that requires spending time in the Terminal, which is why many people choose to go with VLC. Hopefully, this tutorial helped you with making MPV more beautiful to look at and easy to use.
What is an MPV media player?
MPV is a free and open-source media player software known for its high-quality playback and customization options.
How do I customize my mpv configuration file?
You can customize your mpv configuration file by editing the “mpv.conf” file, which contains various settings for playback, subtitles, shaders, and more.
What are some common configuration options in mpv?
Some common configuration options in mpv include setting playback format, enabling/disabling OSD (On-Screen Display), specifying shader settings, and configuring input commands.
How can I access the config file for mpv?
You can access the configuration file for mpv by locating the “mpv.conf” file in the mpv folder on your system.
Can I use command line options to customize mpv?
Yes, you can use command line options to override settings in the mpv configuration file and specify certain parameters when running mpv.
What is the purpose of the ‘shader’ setting in mpv?
The ‘shader’ setting in mpv allows you to apply visual effects and adjustments to the video playback, such as scaling, debanding, or dithering.
How can I make changes to the context menu in mpv?
You can customize the context menu in mpv by editing the ‘input.conf’ file, which allows you to assign functions and shortcuts to different actions within the media player.
What are some common file formats supported by mpv?
mpv supports a wide range of file formats, including popular ones like MP4, MKV, AVI, and more, making it a versatile media player for various types of content.
Can I change the playback position in mpv?
Yes, you can change the playback position in mpv by seeking forward or backward using the appropriate keys.