
Bash is an acronym for Borne Again Shell. It is used to interact with the operating system and is also the login shell. It is the default shell in the Linux-based operating systems. Although many other shells are available, the bash was made the default shell because it was an easily available free and open-source shell. It still is the best and there are not many reasons to change it.
What is Synth-Shell?
Bash is not only used in the command line activity but users can also develop shell scripts (also known as shell scripts) that take user input and act on the same. Today we are going to talk about such shell script i.e. Synth-Shell. The look of the default bash shell is very boring – no colours, icons, only text & text.
But Synth-Shell has brought various features for us like fancy bash prompt, better alias, etc. It is nothing but a collection of small scripts. It enables users to customize the shell as they want. There are many themes available for popular shells like ZSH, etc. But bash is widely used and many people like it simple and neat just like bash.
Prerequisites
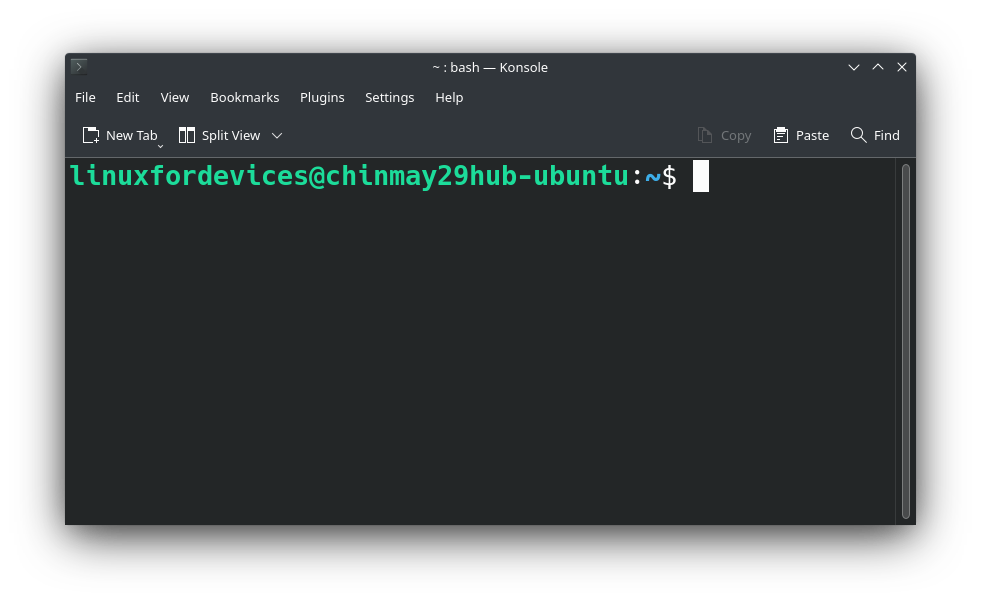
For this tutorial, you will need a bash shell. It is already the default shell and you can check with the below command –
❯ echo $SHELL
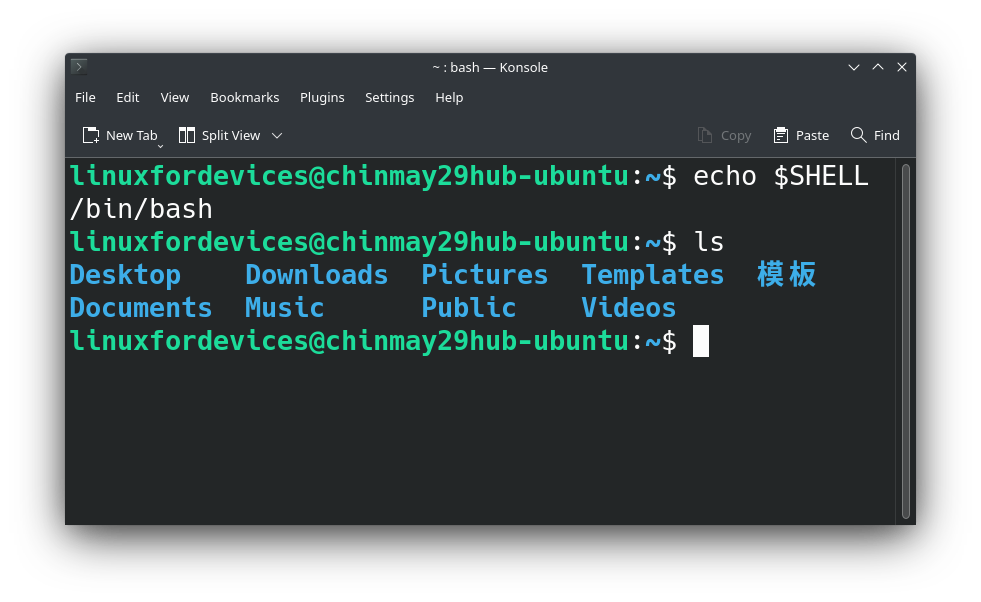
If you have some other shell installed and if you are planning to change the shell to bash you can easily do with the help of below –
Firstly, install bash –
❯ sudo apt install bash
Then we will need to change the shell manually with the help of –
❯ chsh
Type your password and give the new path as /bin/bash
Note: The above steps are necessary only if you have uninstalled bash previously. Otherwise, Linux has bash by default and you do not need to reinstall it.
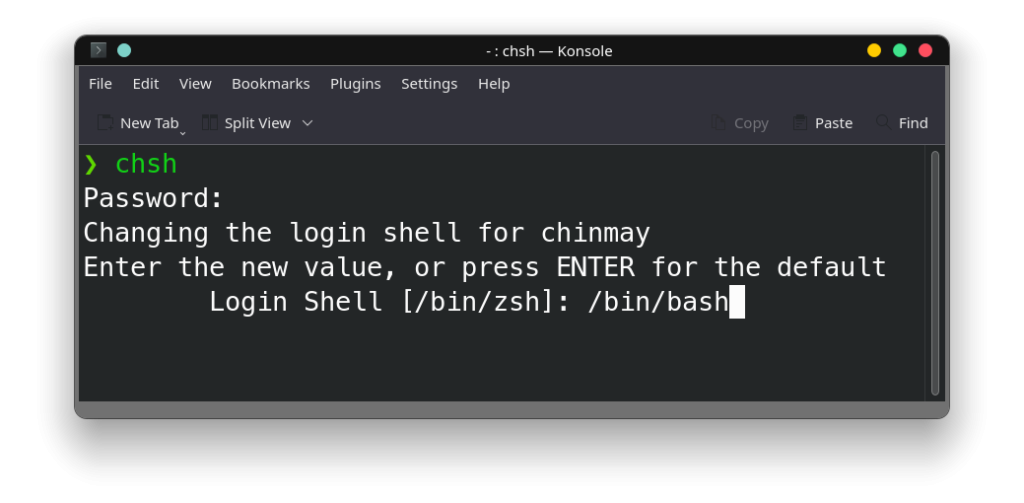
As you can see in the above image, I have a ZSH shell and I want to move to bash.
Install Git
You will need git version control because we are going to clone from a public repository –
❯ sudo apt install git
Synth-Shell Installation
Let’s first clone the project on your local system –
❯ git clone --recursive https://github.com/andresgongora/synth-shell.git
Navigate to the project folder –
❯ cd synth-shell
Give executable permissions to the setup script –
❯ sudo chmod +x setup.sh
Finally, run the installer –
❯ ./setup.sh
As you run the script you will get the following screen –
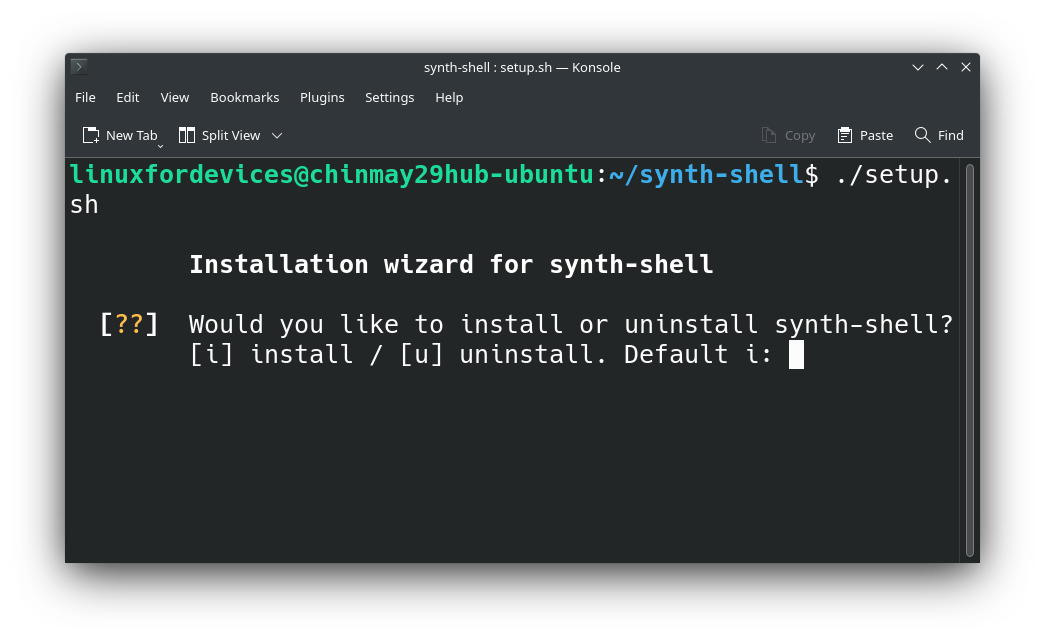
We want to install so type i and hit enter. (The uninstallation process is also shown at the end of the article)
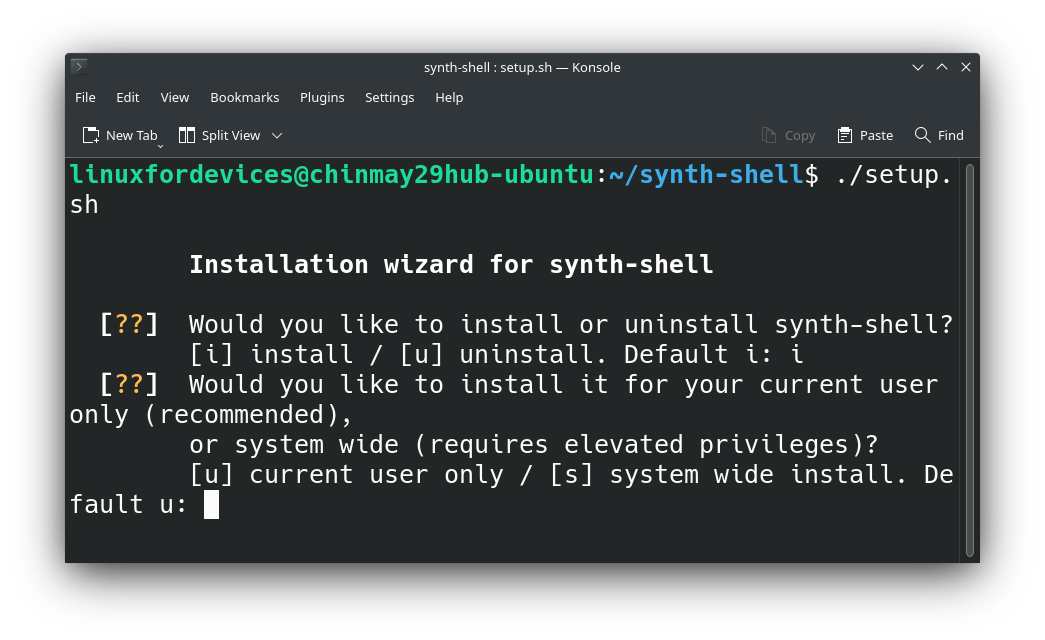
Next, it will ask you for installing for the current user or all users present in the system. Don’t get confused here, let me explain to you. What I usually do is install new themes, etc. for current users only, so that I can try other shells on different users without any conflicts.
I will recommend you type u and hit Enter.
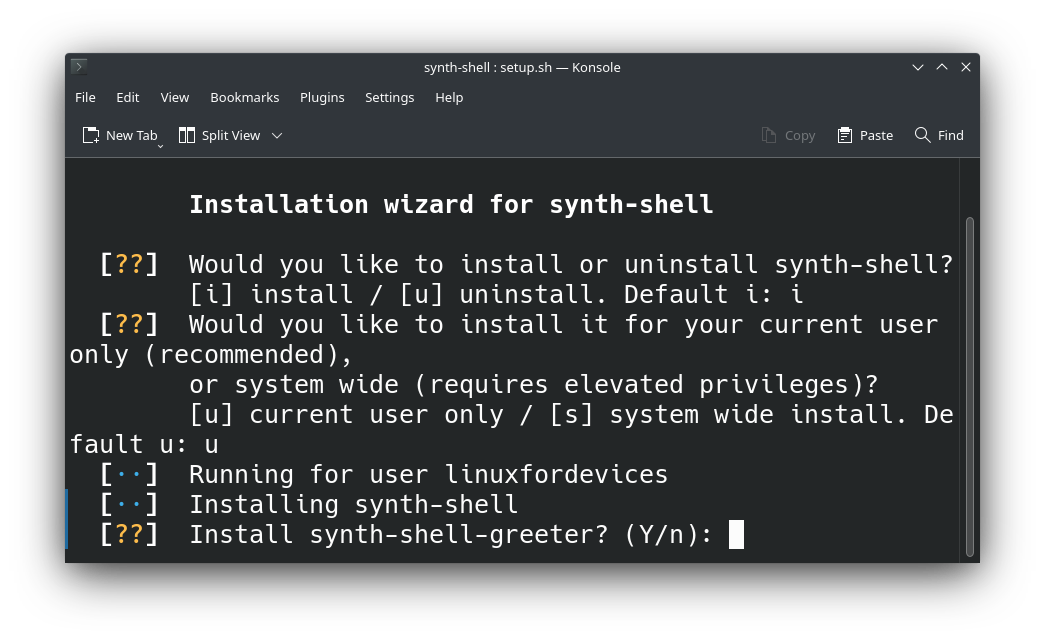
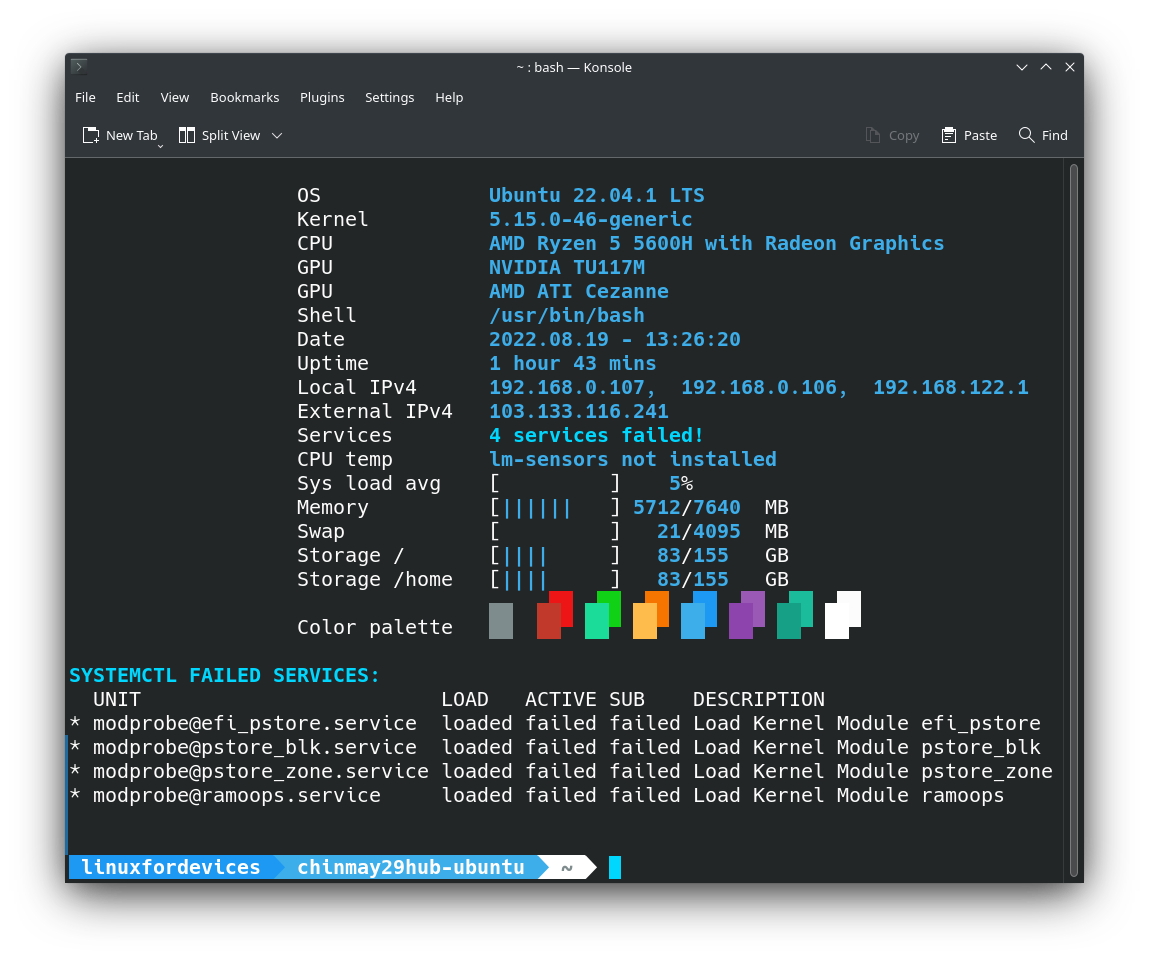
Greeter gives a summary of the system’s current health and services with an ASCII art logo. It will greet you every time you launch a new terminal instance. Type Y to install the greeter. Anyways I have shown an improved version of the greeter in the next section.
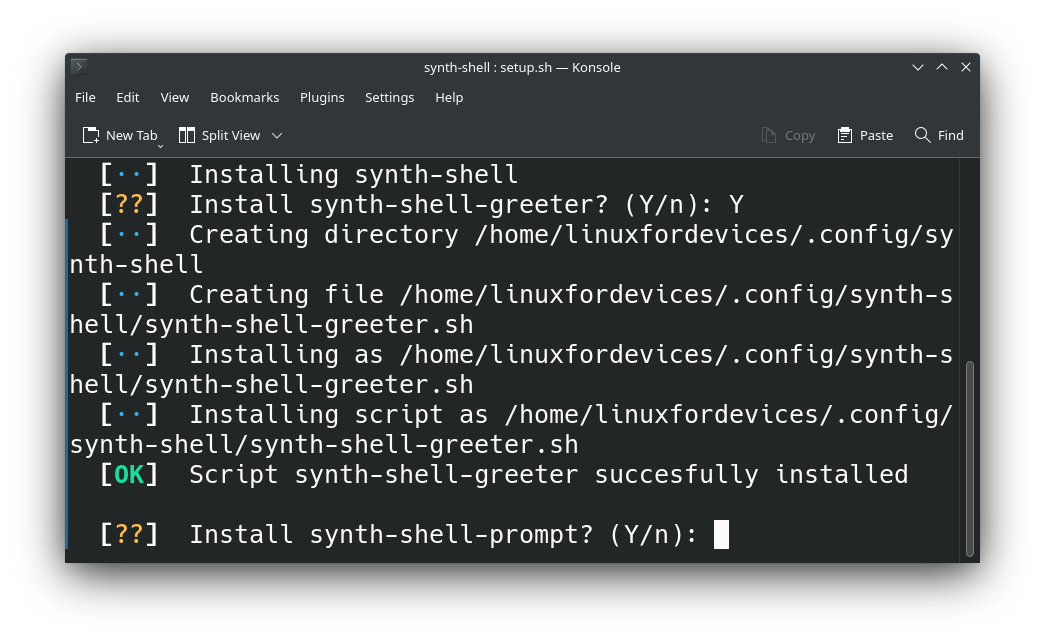
Prompt is the fancy look of the terminal with colours and aesthetics. Better colours when in an environment like python or git, etc. Type Y and hit enter.
Further in the installation type Y in the below to use the full power of synth shell and hit enter –
- better-ls
- alias
- better history
We are now done with the installation. Close this terminal and open a new instance. Your terminal should look like the below –
Let’s Improve The Startup Greeter!
I actually don’t like the greeter so much. It is not showing the ASCII art properly and is only visible at a certain terminal dimension size –
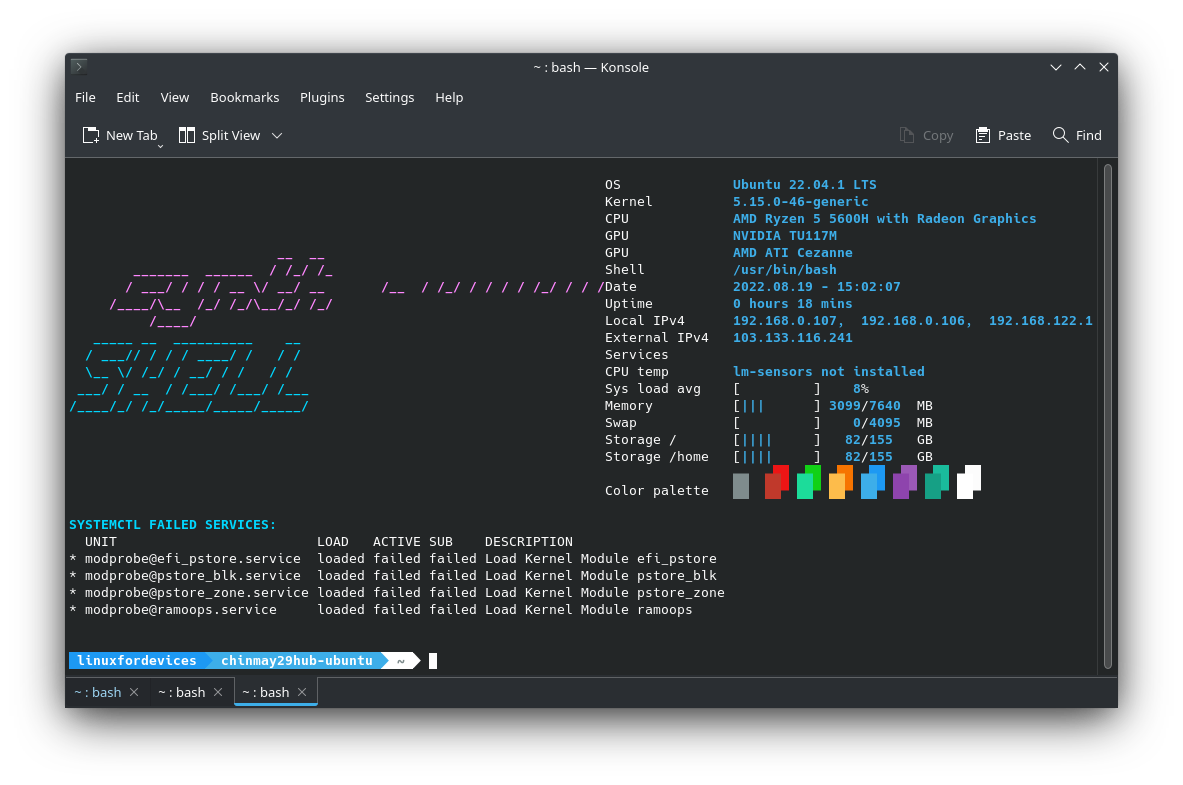
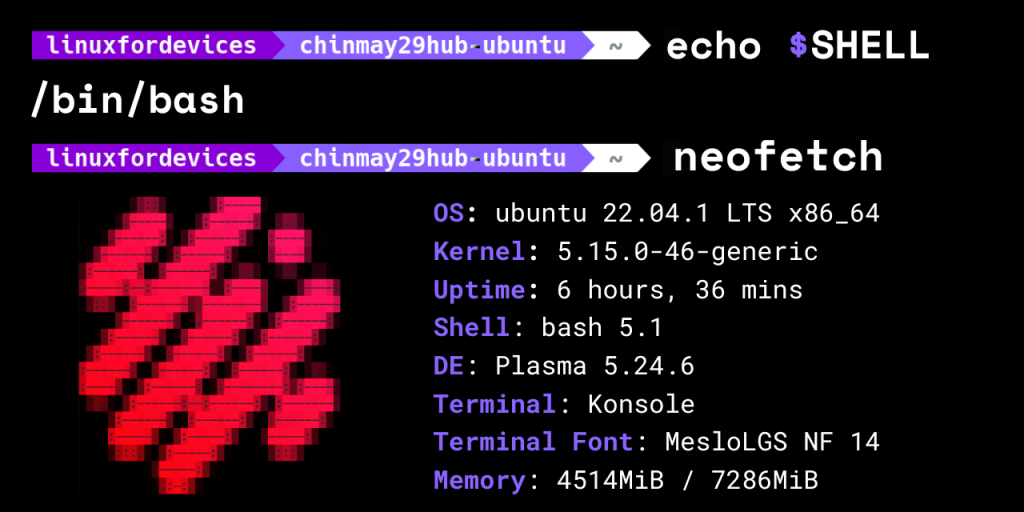
Let’s replace it with neofetch. Neofetch also displays system information but in a beautiful and well-aligned manner.
Installation
❯ sudo apt install neofetch
Now, we will need to edit the bash configuration file to ignore the default greeter and run neofetch every time we launch the terminal –
❯ gedit ~/.bashrc
And comment/remove the below code from that file –
if [ -f /home/linuxfordevices/config/synth-shell/synth-shell-greeter.sh ] && [ -n "$(echo $- | grep i )" ]
then
    source /home/linuxfordevices/config/synth-shell/synth-shell-greeter.sh

fi
For neofetch – In the same file, at the last new line type neofetch. Save and Close the file. Now if you open a new terminal you will see this prompt –

Features Of Synth-Shell Prompt
Let’s discuss some features included in the script –
1) Fancy Prompt
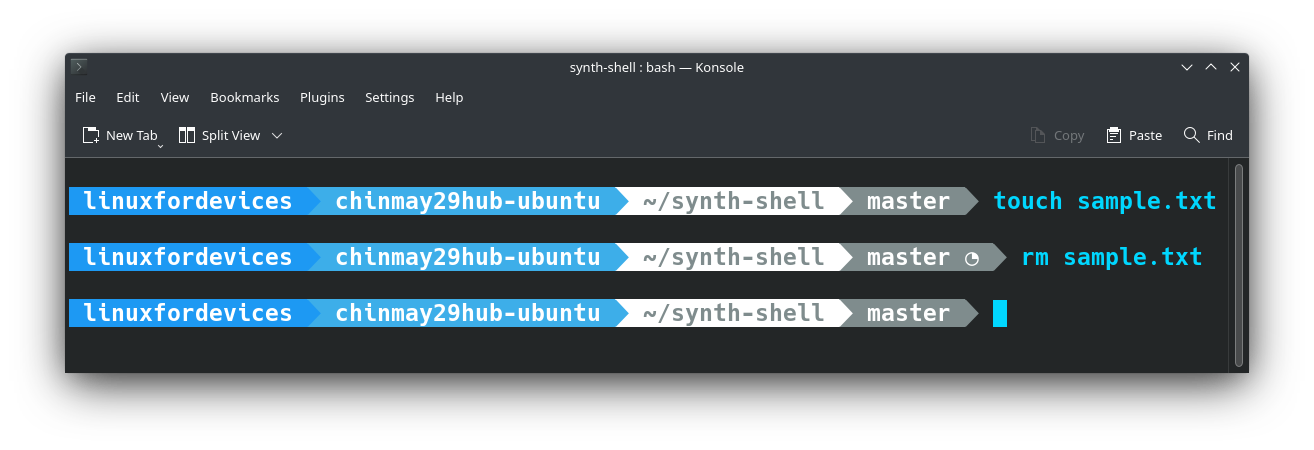
The fancy prompt knows how to behave in an environment. For eg: In the above image, when I cd into a git repository, it changes the right prompt to the branch of the repository. And if I make some changes like creating a new file, it will represent it with icons so that I know it’s time to push. The same applies to environments like python, etc.
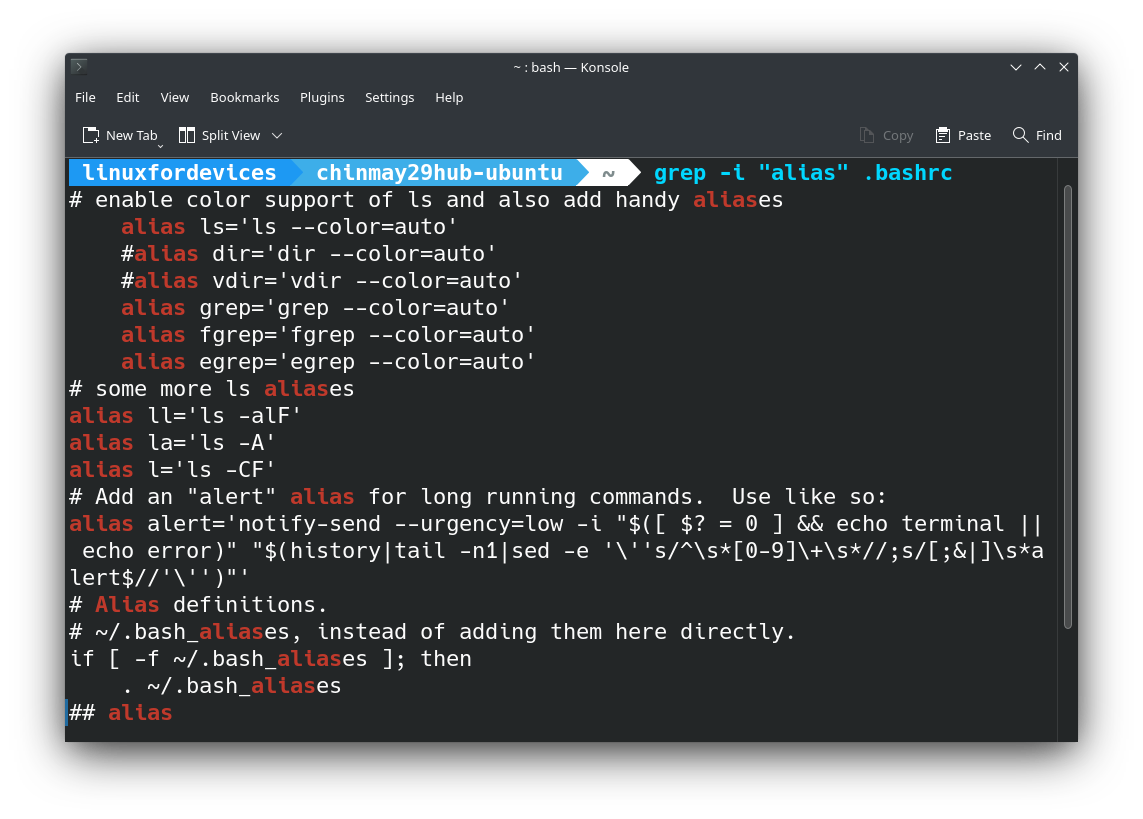
2) Alias ❯ Better ls
Normally ls is used to display the contents of the current directory. ls here will add colours in the output and separate folders and files and hidden files
3) Alias ❯ grep
grep is to find lines of the given string in a file. Colours are added to the output for better understanding.
4) Alias ❯ tree
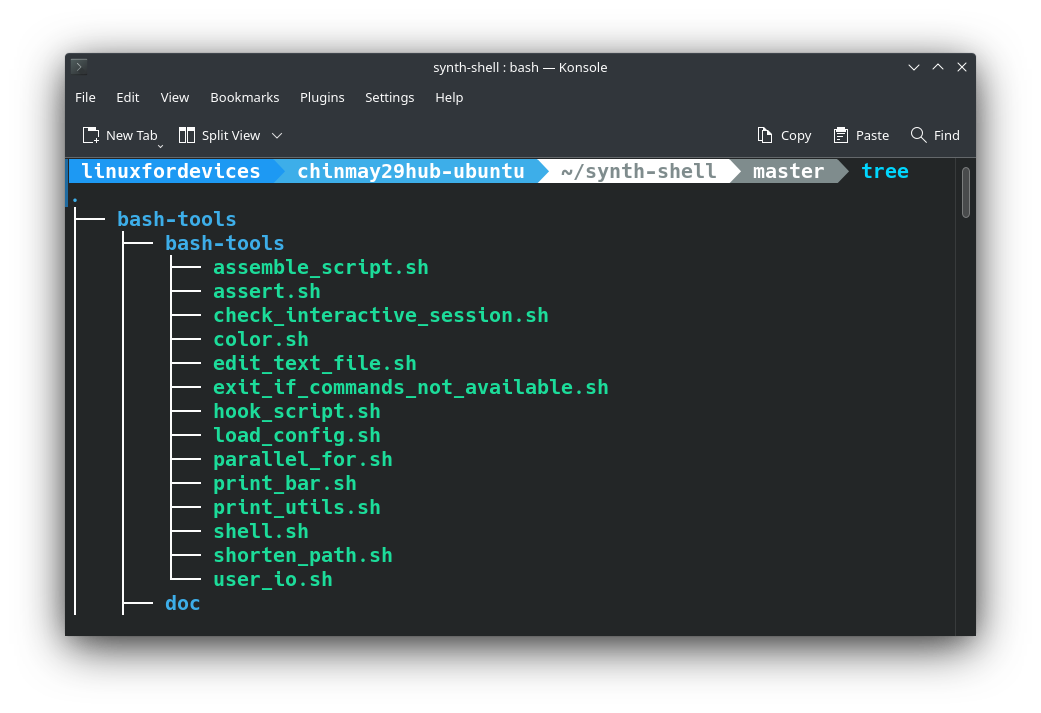
The tree command is used to display a tree-like structure of the current directory. Files, hidden files, pdfs, etc. are separated by colours and folders are kept at the top.
5) Alias ❯ Better History
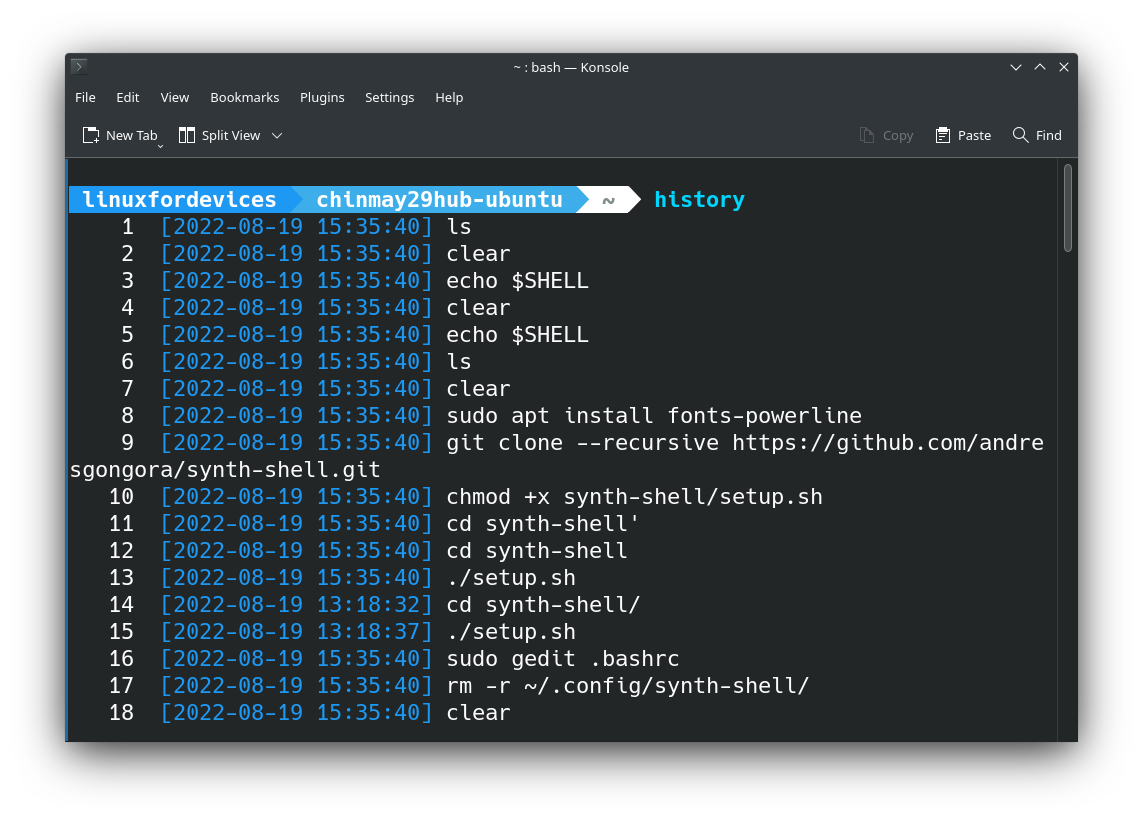
The history command gives the history of the commands executed from the day the OS was installed (unless you have set some limit in the terminal) but with time and date.
Let’s Try Different Color Combinations!
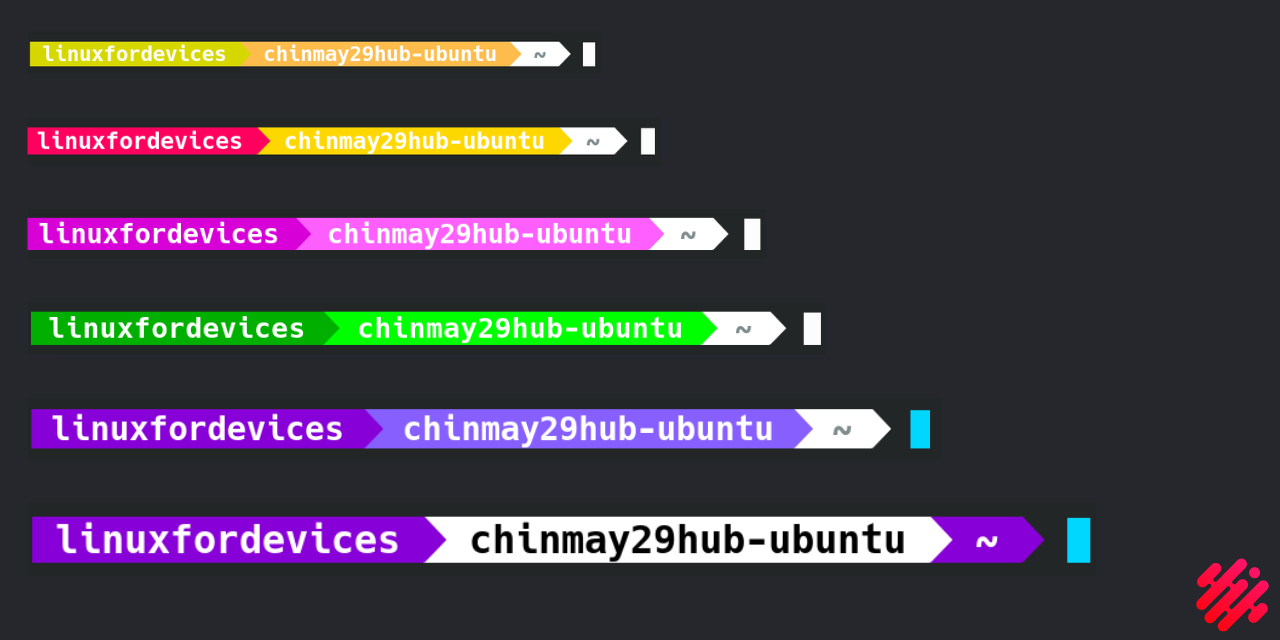
I like the default blue colour but I like the purple shade more. To change the colour we need to edit the config file –
❯ gedit ~/.config/synth-shell/synth-shell-prompt.config
For example, if you want a purple theme like the above then replace the following values in the files –
background_user="92"

font_color_host="16"

background_pwd="92"
You can play with the values and set the 256 colour scheme colours with the help of this website. You can also change the behaviour of the prompt by playing with the separator characters.
Uninstalling Synth-Shell
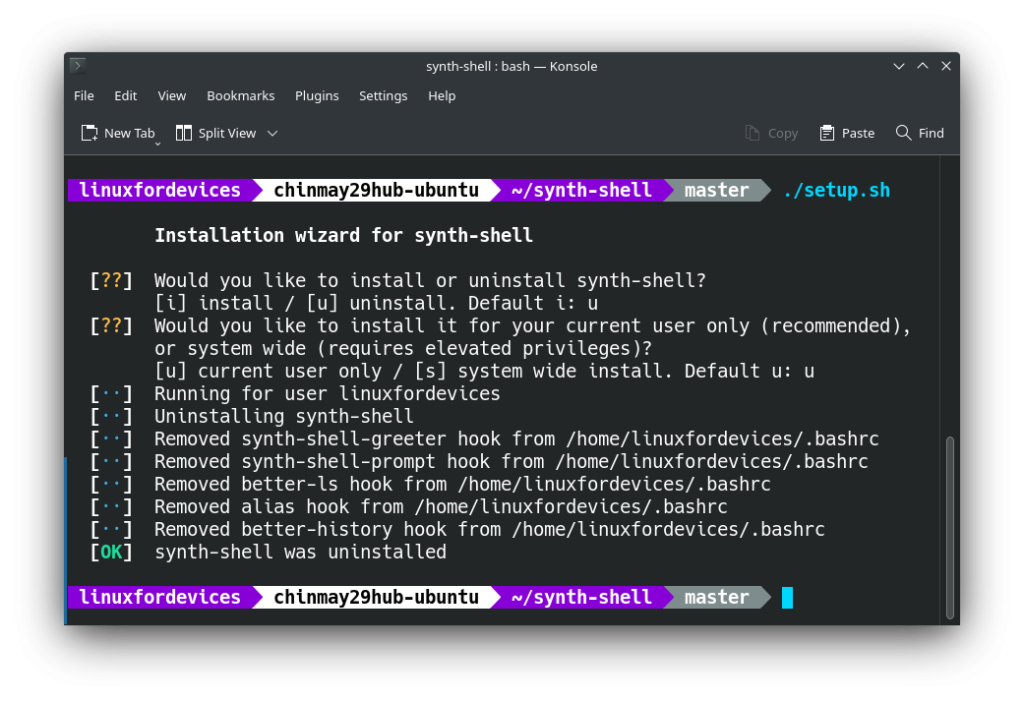
To completely remove synth-shell go to the project folder again and run the setup script –
❯ ./setup.sh
And this time type u & u again as we want to uninstall –
Let’s remove all the related config files –
❯ rm -r ~/.config/synth-shell/
Now edit the bash config file and remove all the unwanted code related to synth-shell –
❯ gedit ~/.bashrc
My config file contained the below useless code so I removed it –
##-----------------------------------------------------
## synth-shell-greeter.sh
if [ -f /home/linuxfordevices/.config/synth-shell/synth-shell-greeter.sh ] && [ -n "$( echo $- #| grep i )" ]; then
   source /home/linuxfordevices/.config/synth-shell/synth-shell-greeter.sh
fi

##-----------------------------------------------------
## synth-shell-prompt.sh
if [ -f /home/linuxfordevices/.config/synth-shell/synth-shell-prompt.sh ] && [ -n "$( echo $- |
|
|
|
Now, launch a new terminal you will get your old shell prompt back!
Summary
We learned how to boost our terminal with synth-shell. Try to customize the shell according to your need by tweaking the config files.