
Linux Lite is a lightweight Linux distribution based on Ubuntu LTS designed specifically to run on older hardware, as it does not require heavy resources to run. You can give your old laptop or PC a new life by installing this OS on it. Linux Lite uses a customized XFCE desktop environment, which is very lightweight.
The minimum system requirements for Linux Lite are:
- 768MB RAM
- 8 GB Storage
- 1GHz or faster processor
- 3D accelerated video card with at least 256 MB.
- A 1024×786 display
- It supports UEFI, secure boot as well as Legacy systems.
It also offers itself as a beginner-friendly distro as well as a replacement for Windows Users, just like Linux Mint does. So, in this tutorial, we will try to install Linux Lite on our Machine and see how it performs. Let’s get started by preparing a bootable Flash drive.
Also Read: Linux Lite vs Lubuntu
Create a Bootable USB drive
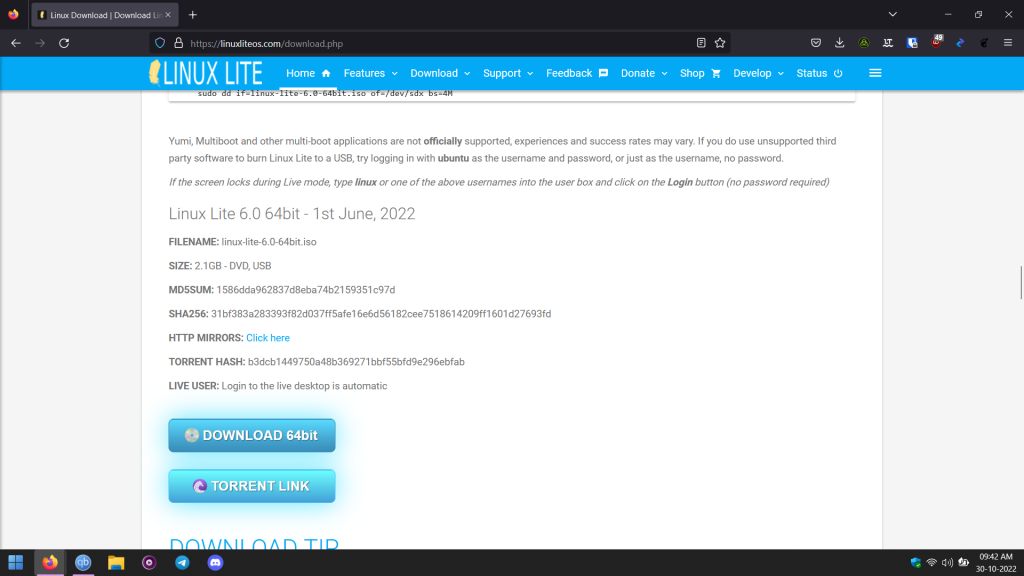
Visit Linux Lite’s official website and download their ISO using either a direct link or via P2P using torrent clients (It is legal).
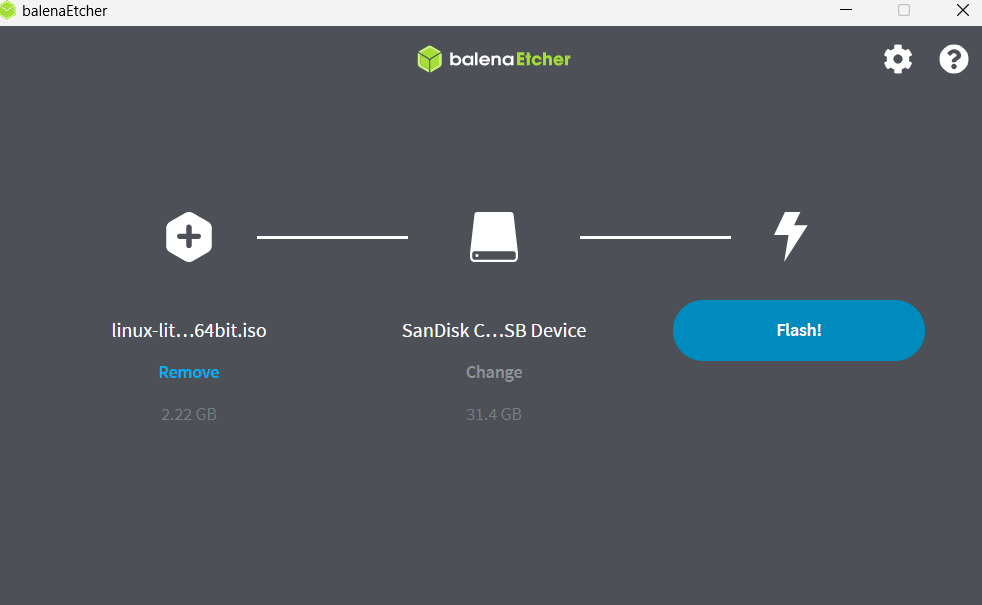
Now, you need a flash drive with at least 4 GB of storage, we will use a tool called Balena Etcher, but if you are not going to use secure boot then you can also try Ventoy. Download etcher from their website and then plug in your USB drive, make sure there is no data on your drive because this step will completely format your USB stick.
Install Etcher from your Downloads folder and then launch it, from here, you have to select the Linux Lite ISO file which we have downloaded and then select your USB drive and hit the Flash button.
Once the process is complete, shut down your computer.
Boot with your USB
Turn on your PC again while keeping your USB device plugged in, and when Your Manufacturer logo comes up, press the F10 key on your keyboard (This key depends upon your manufacturer, but it is usually it is one of Esc, F2, F10, F12 or Del keys) to go into your boot menu.
From this boot menu, you have to change your boot order using the arrow keys and F5 and F6 keys so that your Machine can boot from the USB drive. Save and exit out of this Menu, and now you will be booted with the Live ISO of Linux Lite.
Installing Linux Lite Operating System
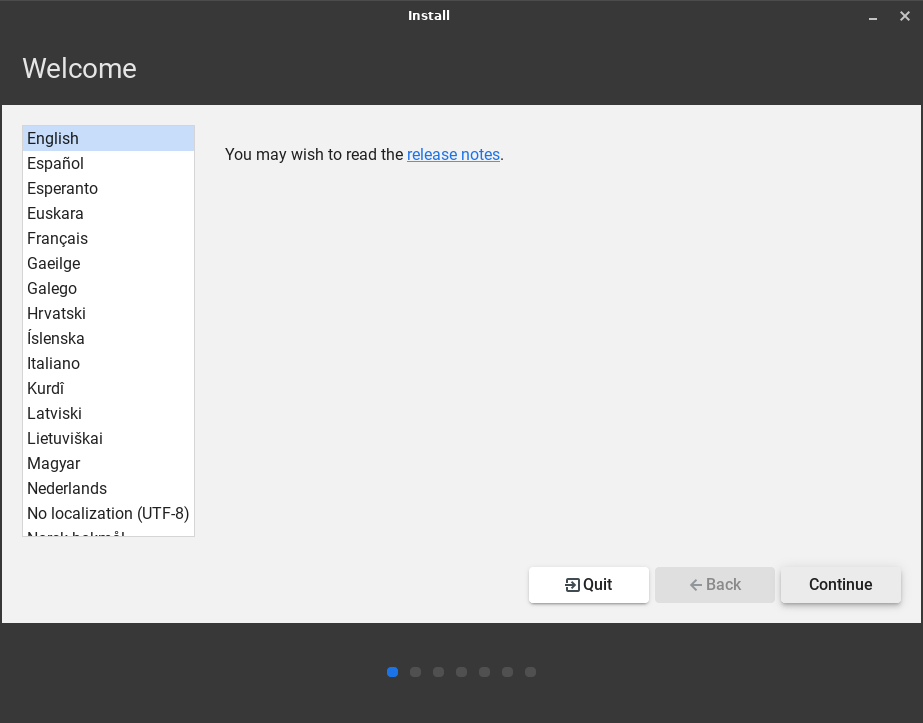
You should ensure that you are connected to the Internet (completely optional) so that any important update gets automatically applied while installing this OS. From the desktop, double-click on the ‘Install Linux Lite’ icon to begin the installation.
Select your language and keyboard layout and hit the ‘Continue’ button.
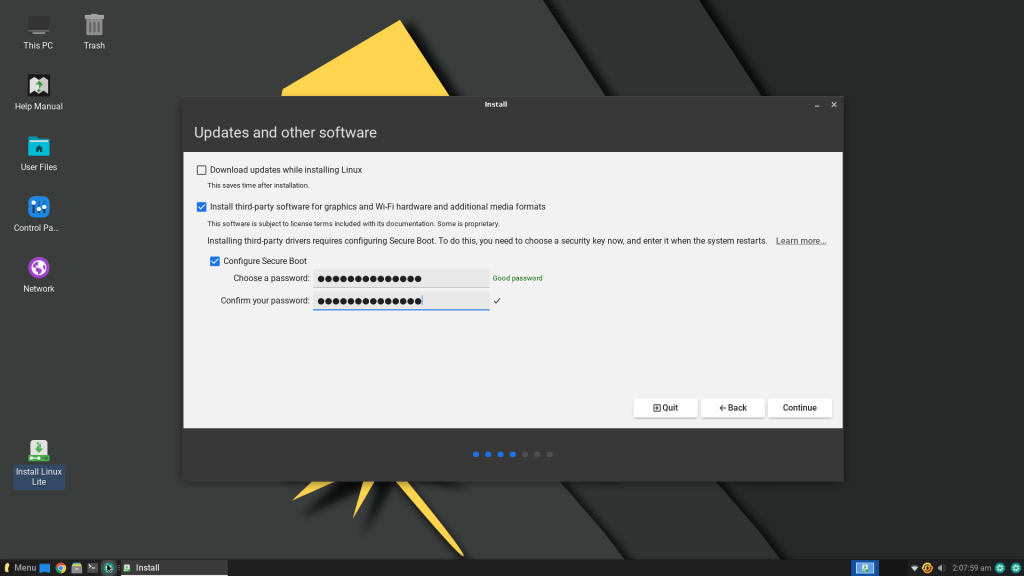
From the ‘Updates and other software’ section, it is recommended that you disable the ‘Download updates while installing Linux’ option, you can enable third-party drivers and media codecs from here. Hit the continue button again.
Finally, you have to choose whether to perform a complete clean install on your drive or do a custom installation. I’m going to perform a custom installation as I have two SSDs and I would like to use a custom partition scheme.
| Drive | Mount Point | Size | Format |
| Boot | /boot/efi | 512 MB | fat16 |
| Root (C:/ Drive) | / | At least 10 GB | ext4 |
| Home | /home | The Rest | ext4 |
When finished, just hit the ‘Install Now‘ button and your Installation will start.
While the Installation is going on in the background, you will be asked to select your Timezone, and then you will be asked to enter your Personal details such as your Name and Password.
Once the installation is finished, you will be prompted to restart your PC. When the PC is shut down, simply remove your USB stick and then wait for your PC to start.
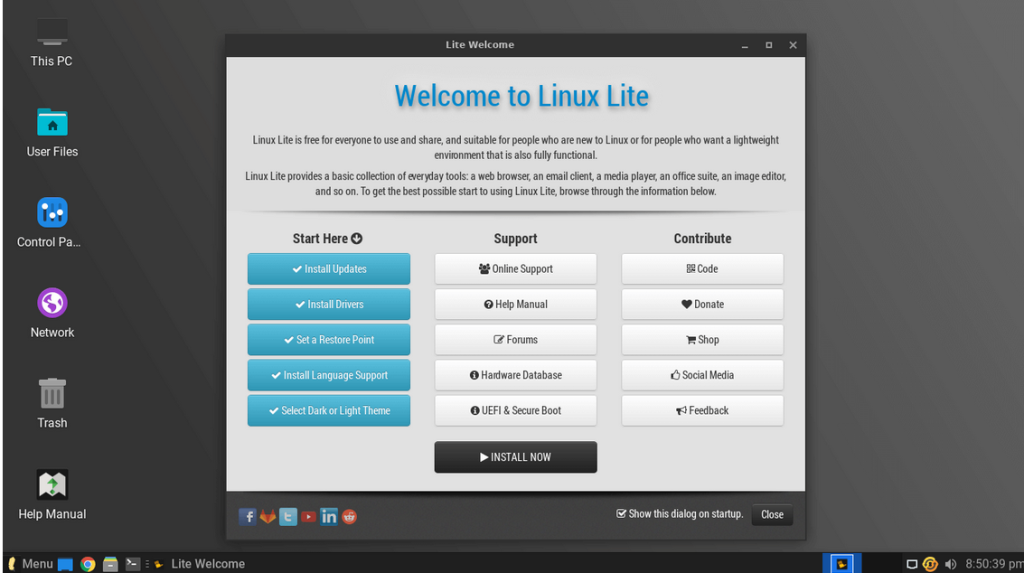
You will be greeted with the Welcome screen when you restart your PC, you can choose to install updates now, install drivers, language support, and a Dark theme from this screen, uncheck the ‘Show this dialog on Startup’ box, and you are done with the installation.
Summary: A Lightweight Linux Operating System
This is a wonderful Linux distro especially for older machines as you can give your old hardware a new life. This in turn reduces the amount of e-waste generated. Because this is Ubuntu-based, you have access to a humongous amount of software libraries you can install on your PC. People who are new to Linux and people who want a lightweight Linux based operating system can give this distro a try.
The default web browser installed is Chrome, however, I will recommend you to install any open Source browser such as Firefox or LibreWolf.