

Glate is a versatile tool for Linux that offers translation and TTS (Text-to-Speech) capabilities, helping users to overcome the language barrier. It provides the users an easy way to convert the text into spoken words and also translate them to different languages. Glate relies on the Google Translate service and acts as a medium to help users translate as well as access a few additional features.
Users can also provide unknown text, and it can automatically detect the language and then convert it to the desired language, making it useful for a wide range of users. Glate is well maintained as an open-source project, and you can check out the official GitHub page for it.
In the following guide we will learn the advantages of Glate, then we will go through the step-by-step procedure of the installation and set it up on Linux, and finally conclude with the insights how this can be useful for the users. If you’re perhaps looking for other applications using Text-to-Speech technology, perhaps for narrating books, then you may want to check this article out about Koodo.
What features does it offer?
- Extensive Language Support: Glate supports translation services in between over 104 languages. Here’s a full list of languages that the application has active support for.
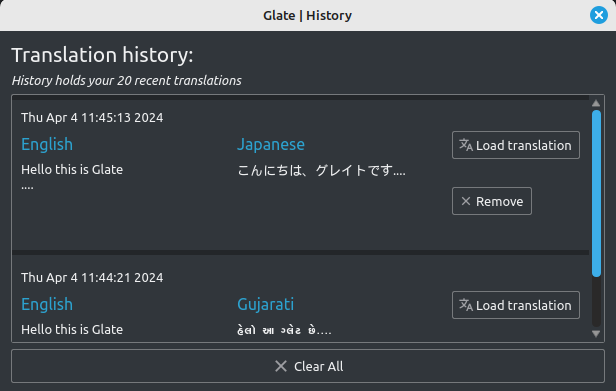
- Translation History: The application also keeps a history of the sentences or pieces of text that you have translated, so that you can always access them should you wish. You can also export your Translation History as a (.txt) file.
- Imports and Exports: In the application, you’ll also have an option for accessing your clipboard. This is quite convenient for the user as they’ll be able to click on the clipboard icon under the input window and paste your clipboard contents in the text box, or, after your text has been translated, you can click the clipboard icon under the output window to copy the contents back to your clipboard.
- Share to Pastebin: Glate also has built-in features for you to be able to share your translated text directly to Pastebin. It also has a Pastebin generator that will automatically format your text to be shared to Pastebin.
- Text-to-Speech: The application also has a button to allow you to listen to the text you are translating, or the text you have translated. The text-to-speech feature is quite nifty, and along with the incredible language support, can help people learn and understand other languages much better.
You are also able to download the selected text in an (.mp3) format to be able to listen to it from your device directly. - Support for Hotkeys: You can also create a HOTKEY to translate any piece of selected text on any Web Browser or standalone application at any time you wish. Having a HOTKEY makes the experience much better in that the user does not have to have the application open at all times.
- A Dedicated Dark and Light mode: Glate also has support for both Light and Dark themes to cater to users of either preferences !
Installation
Let’s now explore the installation steps, so that we can set up Glate on our Linux environment. It should be noted however that Glate only has one installation method, and that is through the Snap store.
Using Snaps
Step 1: Open a Terminal
Firstly, launch a terminal on your Linux system. You can do this by searching for ‘Terminal’ in your systems’ application menu or use the shortcut key combination for launching the terminal ‘Ctrl + Alt + T’.
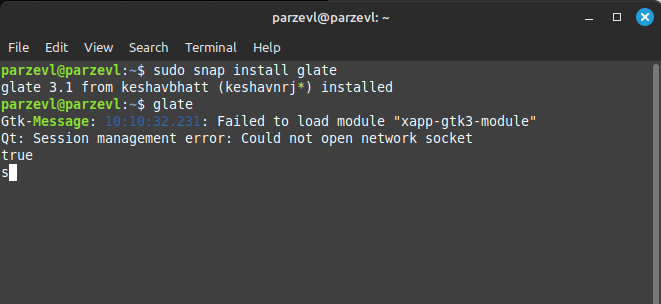
Step 2: Install Glate
Now run the following command in your terminal to install Glate:
sudo snap install glate
If snaps have not been set up on your Linux system yet, you can use this article here, to follow a guide showing you how to install and setup Snaps, so that you will be able to download and install various applications from the Snap Store.
Step 3: Running Glate
Now run the following command in your terminal to install Glate:
glate

Usage
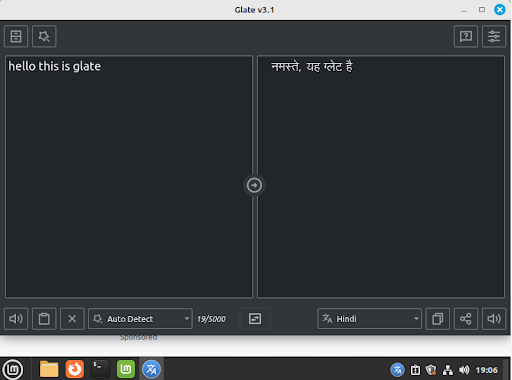
- You can input your text to be translated into the input box and select what language you want to translate it to.
- Then press the arrow button present on the bar between the two windows.
- The translated text will appear in the output window, which is on the right side.
Conclusion
In conclusion, installing Glate on a Linux system provides users with a powerful tool for text-to-speech conversion and translation, enhancing accessibility and usability. Glate’s benefits, which include efficiency, compatibility for several languages, customization possibilities, and accessibility features, make it a worthwhile addition to the Linux ecosystem.