
CouchDB is a free and open-source fault-tolerant database made and maintained by the Apache Software Foundation. It is a very good choice for a NoSQL type database, where you do not want a relational database.
In this tutorial, we shall see how to configure and install the latest version of CouchDB from the Command-Line.
Step 1: Retrieve and add the GPG Public Keys
Before doing any downloading, it is customary to get the GPG Key for the package so that information can be transferred securely by verifying with the key.
The public key is available at this link: https://couchdb.apache.org/repo/bintray-pubkey.asc
We will use the wget command to download the public GPG key.
wget https://couchdb.apache.org/repo/bintray-pubkey.asc

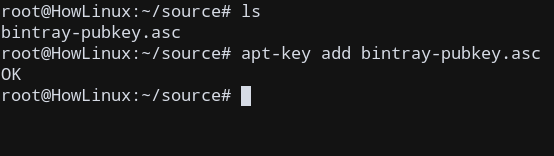
After the public key is downloaded, add it to the system keys using apt-key.
apt-key add bintray-pubkey.asc
Step 2: Add the CouchDB repository to the Sources List
We need to add the CouchDB source to our list of sources in the system so that any future updates can occur using that source URL when using apt update.
We need to modify /etc/apt/sources.list.
Use any text editor (like nano, vi, etc) and open /etc/apt/sources.list. I will be using vi editor to edit the file.
root@HowLinux:~/source# vi /etc/apt/sources.list
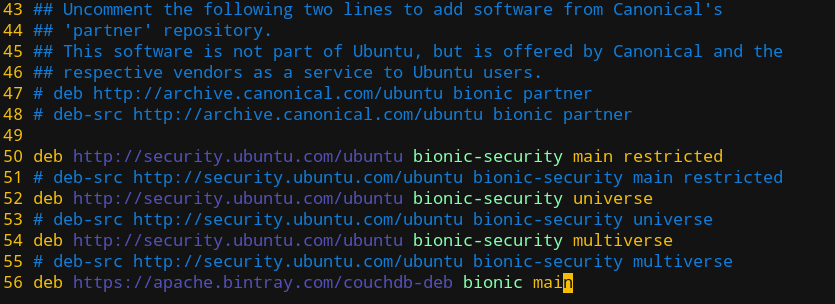
Go to the end of the file, and add this line to ensure that we add the repository source link.
deb https://apache.bintray.com/couchdb-deb bionic main
Exit the editor, after saving changes.
Now, we are ready to update the system and install our package!
Step 3: Install the CouchDB Package
We first update the system and all previously installed sources:
sudo apt update
Then, we install couchdb using:
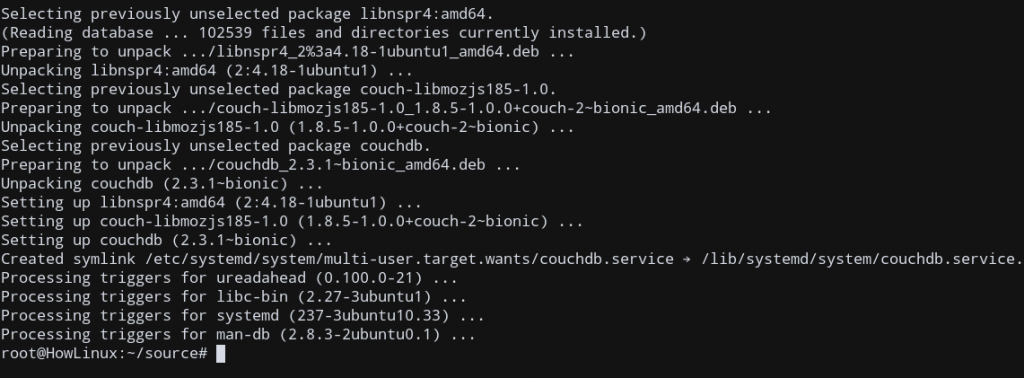
sudo apt install couchdb
Step 4: Configure CouchDB
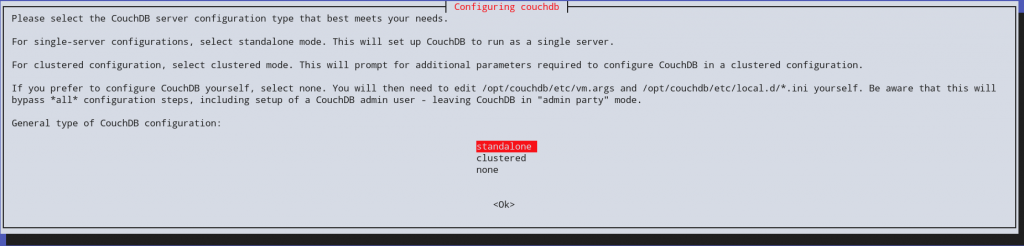
After following the required prompts, you will be faced with the installation screen. There are different ways through which we can set up the server, but we shall use the standalone option in this tutorial for configuring CouchDB.
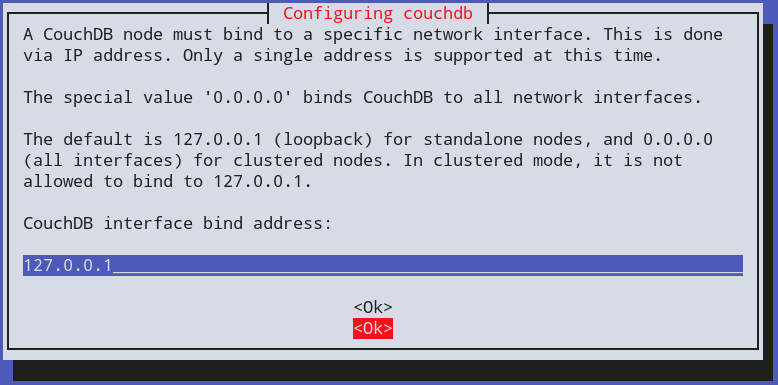
Next, you will be given an option to set the IP address of the network interface on which the CouchDB will bind to. For single-server setup, we can leave the default as 127.0.0.0 (localhost). If you are configuring a cluster, enter the interface IP address or type 0.0.0.0 which will cause CouchDB to bind to all network interfaces.
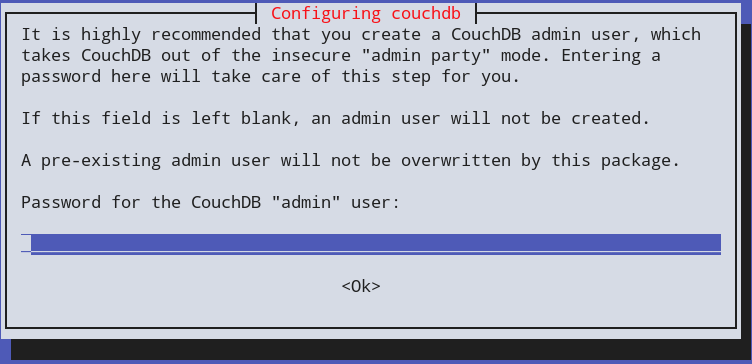
We will now be provided with an option to set an admin user (with a password), which is the recommended option for most servers.
After setting your passwords, the installation will finally configure all services and finish!
Step 5: Test and verify the CouchDB installation
To verify if CouchDB was installed successfully, we shall go to the address of the CouchDB server and check if it sends a response.
By default, for a single server DB, my server is at the address 127.0.0.1. CouchDB by default uses the port 5984, so the sever listens at 127.0.0.1:5984.
Let’s use curl to send a request to the server.
curl 127.0.0.1:5984

Sure enough, we get our ‘Welcome’ message response! This means that we have correctly installed CouchDB.
Now, you can finally use CouchDB in your Ubuntu 18.04 System!
Conclusion
In this tutorial, we learned how to set up and install CouchDB, a NoSQL Database on Ubuntu 18.04 from the Command Line using only a few steps. Hope this tutorial helped you to debug any problems that you were facing previously!