I.Introduction
Upgrading the Linux kernel on CentOS is a process that allows you to take advantage of the latest improvements and optimizations in the kernel. The kernel is the core of the operating system, and upgrading it can improve system performance and security. Upgrading the Linux kernel on CentOS can provide a number of benefits, including improved performance, security, and hardware support. It is important to carefully follow the process to ensure that the upgrade is successful and to minimize the risk of any issues occurring.
II.Pre-Requisites
Prerequisites and requirements for upgrading the kernel on CentOS include a working installation of CentOS 7, a sufficient amount of free space on your hard drive, and internet access to download the necessary packages.
III.Backup Your System
Before starting the upgrade process, it is essential to create a backup of your system. This will allow you to restore your system to a previous state in case anything goes wrong during the upgrade. There are several tools and techniques available for creating backups, including using tools such as rsync or tar.
IV.Verify the Current Kernel Version
To check the current kernel version on your CentOS system, we use the command
uname -mrs
This command prints the system information, including the kernel version. This command is used to verify the current kernel version best used to keep a track of our kernel version before upgrading to a new version of the kernel.

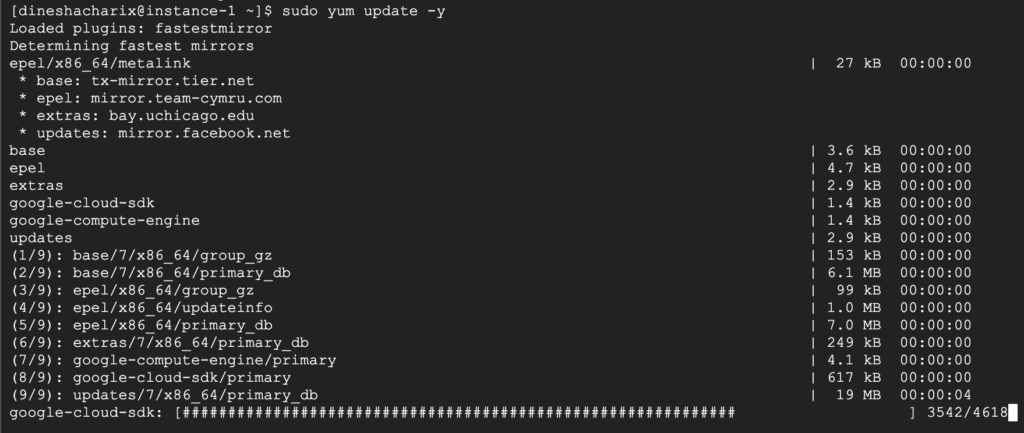
V.Updating the System Packages
Before upgrading the kernel, it is recommended to update all the installed packages to the latest version. This can be done using the command,
sudo yum update -y
The -y flag is used to automatically answer “yes” when prompted to confirm the update. This step is important to ensure that all the packages are up-to-date and compatible with the new kernel version.
VI.Adding Elrepo Repository
Elrepo is a third-party repository that provides newer versions of the kernel for CentOS. To add the Elrepo repository, you can use the command,
sudo rpm --import https://www.elrepo.org/RPM-GPG-KEY-elrepo.org
This command imports the GPG key for the repository, which is used to verify the authenticity of the packages.

VII.Installing the Elrepo Repository
Once the GPG key is imported, the Elrepo repository can be installed using the command
sudo rpm -Uvh https://www.elrepo.org/elrepo-release-7.0-3.el7.elrepo.noarch.rpm
This command installs the Elrepo repository on our system, and makes the newer kernel versions available for installation.

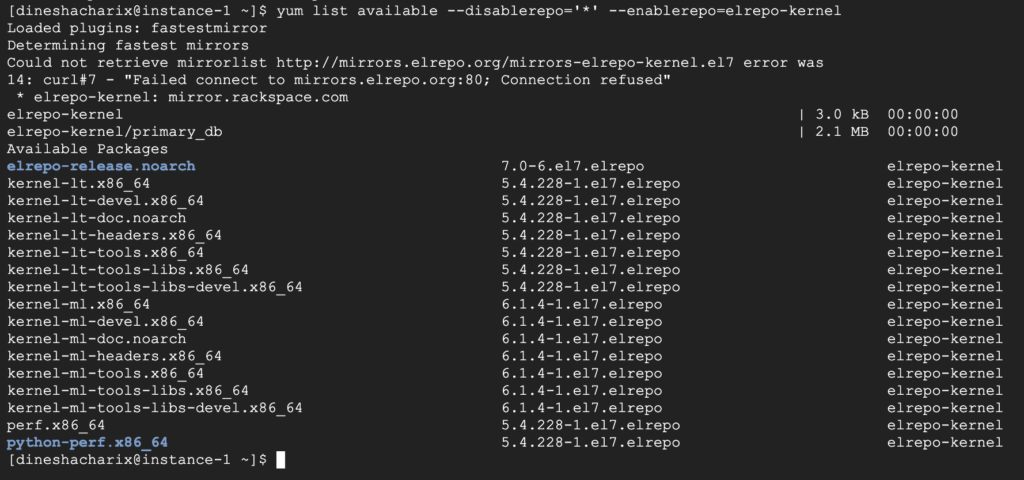
VIII.List All Available Kernels
To see a list of all the available kernels from the Elrepo repository, we use the command,
yum list available --disablerepo='*' --enablerepo=elrepo-kernel
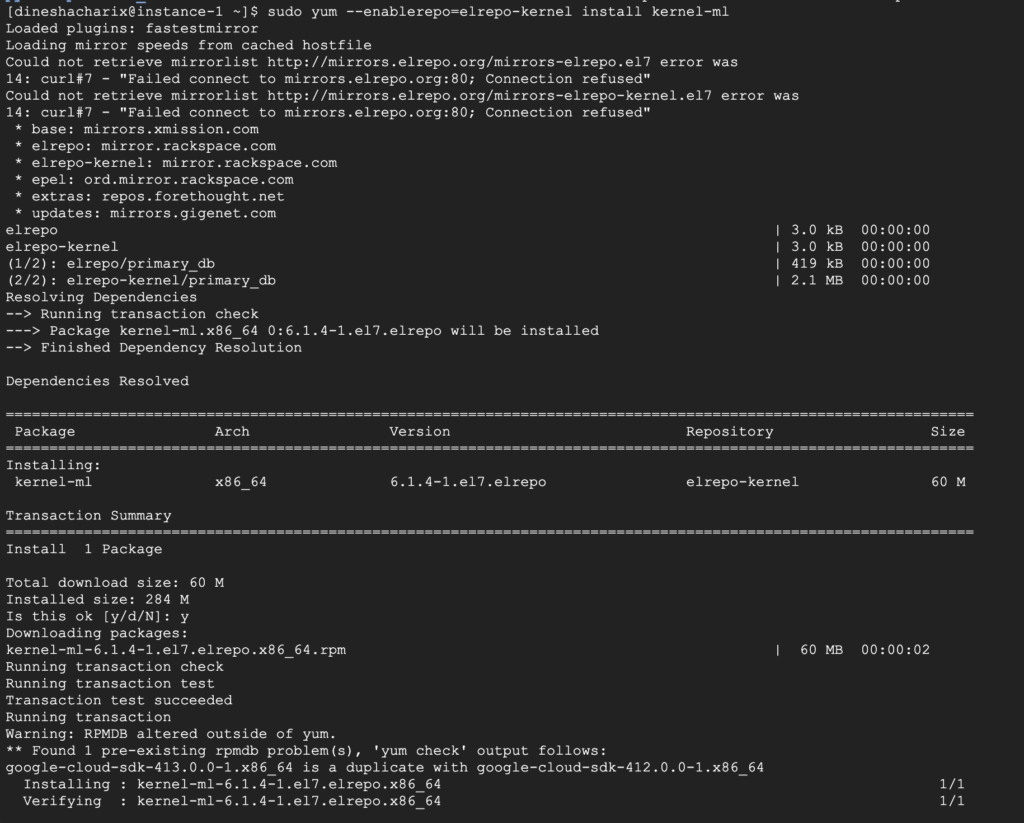
IX.Install New CentOS Kernel Version
To install the new kernel version in CentOs, we use the following command, the ml stands for mainline stable branch this is a rather recent version of the kernel that is installed in CentOs.
sudo yum --enablerepo=elrepo-kernel install kernel-ml
To install long term support branch of the Kernel, we execute the following command,
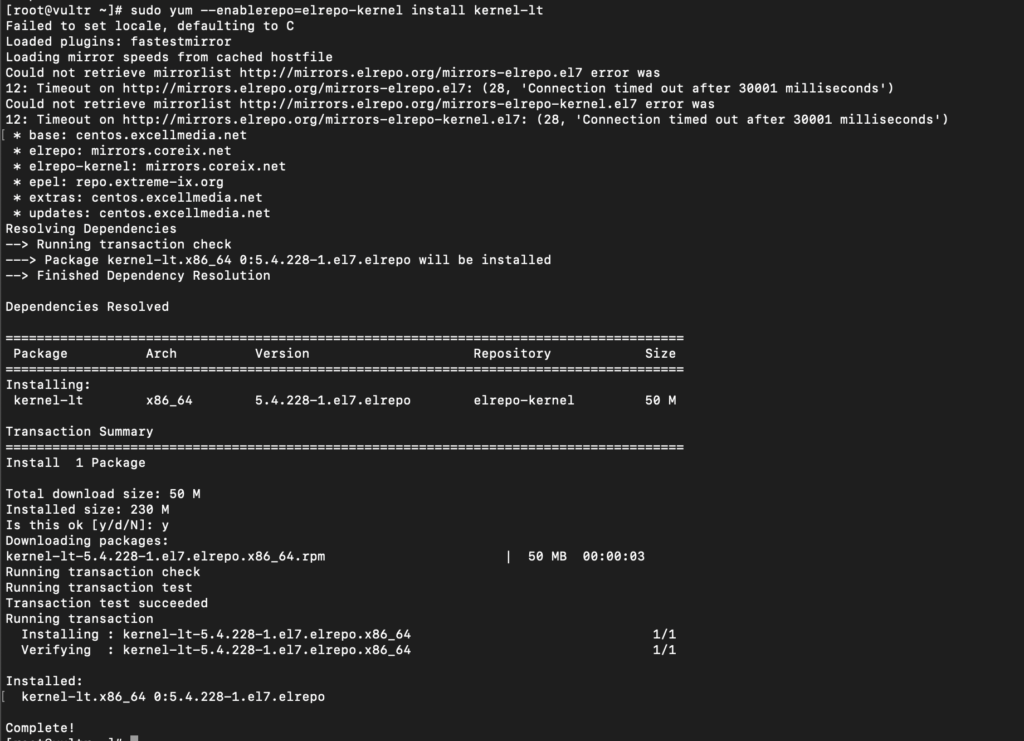
sudo yum --enablerepo=elrepo-kernel install kernel-lt
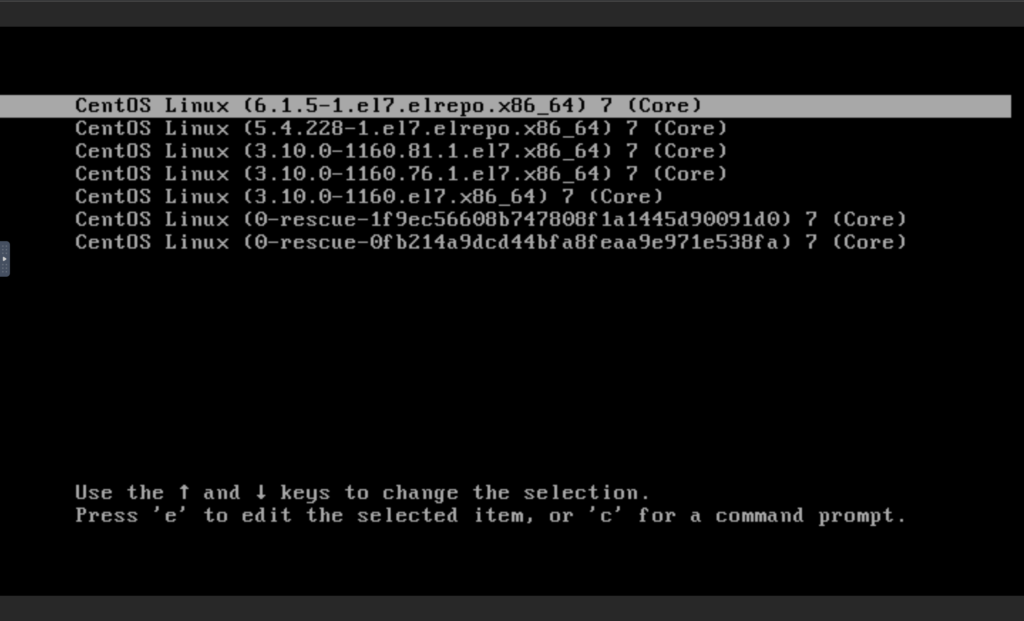
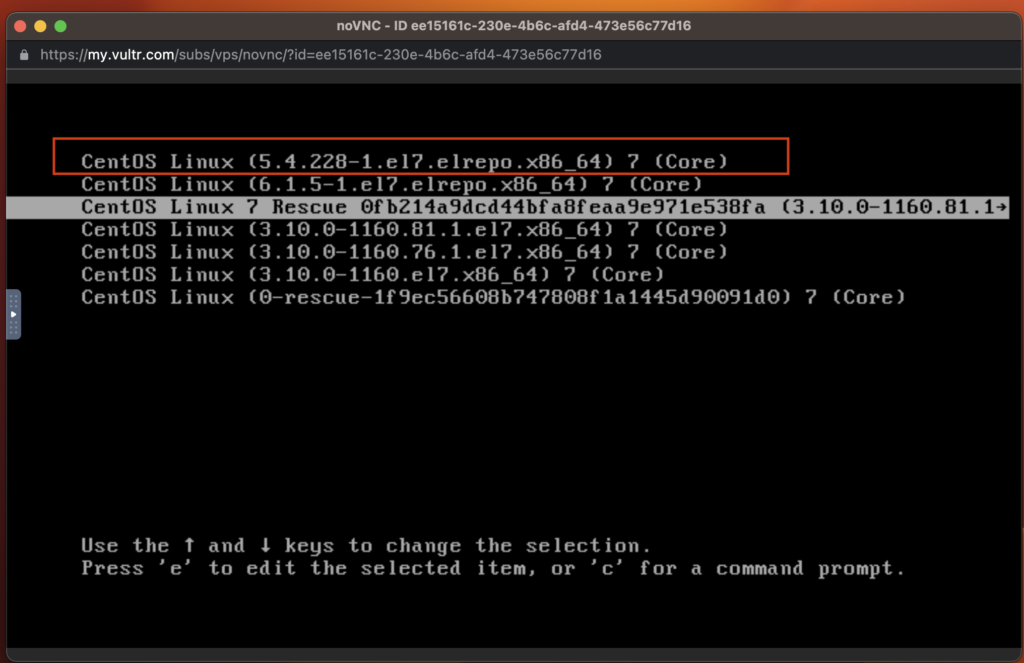
X.Reboot the System and Select Kernel
After the new kernel is installed, you need to reboot the system to start using it.

During the reboot, you will be presented with a GRUB menu, where you can select the new kernel version to boot into.
XI.Verify the New Kernel Version
After the reboot, you can verify the new kernel version using the command “uname -mrs” again to confirm that the new kernel version is now in use.
uname -mrs

XII.Set Default Kernel In GRUB After Verification
In order to set the new kernel version as the default, we edit the GRUB configuration file using the command
sudo vim /etc/default/grub
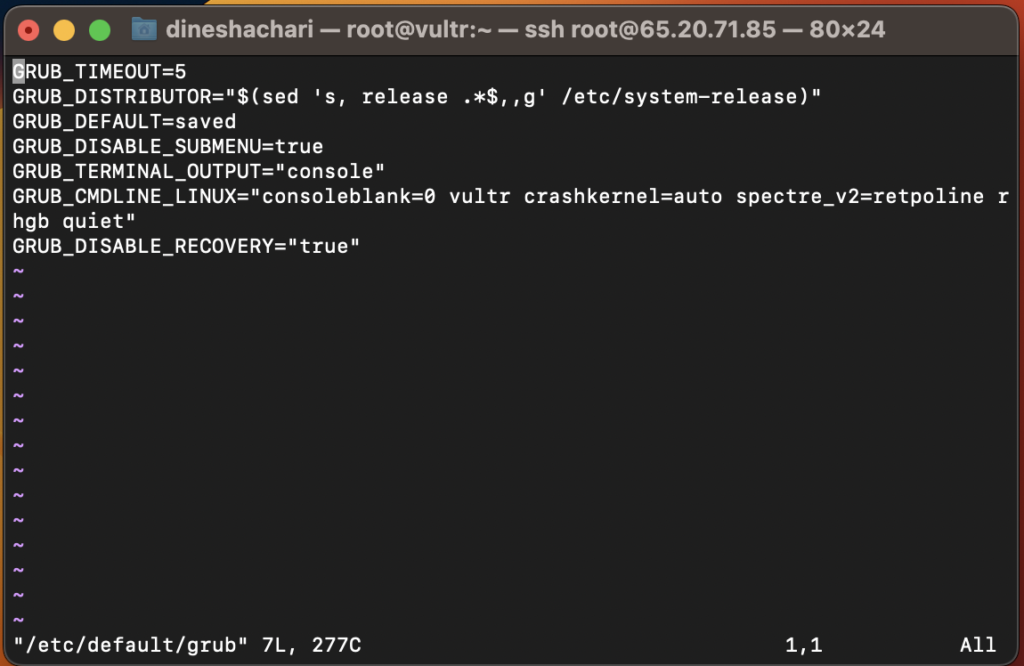
Here we set the default kernel version by editing the line “GRUB_DEFAULT=saved” to “GRUB_DEFAULT=’0′”, where ‘0’ is the latest kernel in the GRUB list.
XIII.Recreating The Kernel Configuration
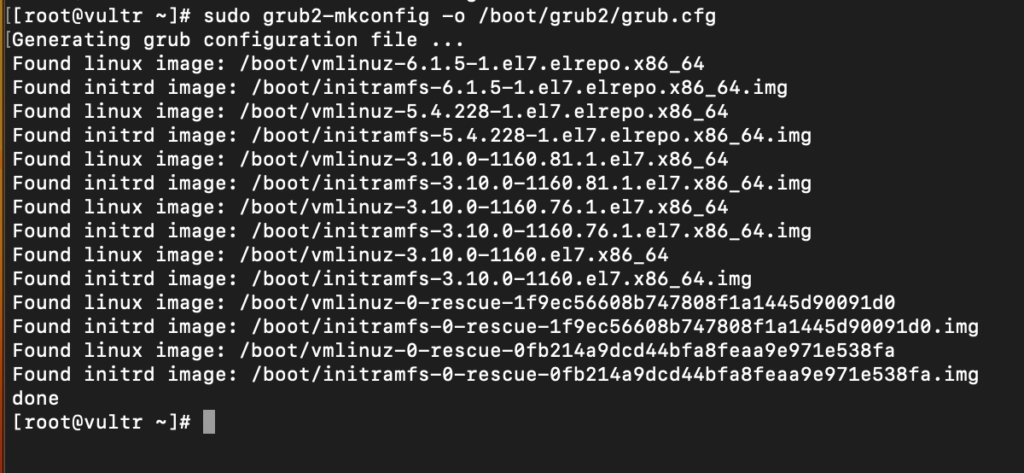
After the GRUB configuration file is updated in CentOs, you need to recreate the kernel configuration by deploying the following command,
sudo grub2-mkconfig -o /boot/grub2/grub.cfg
Now, we reboot to check if the changes took place,