
If you want instant access to a folder across many devices, Syncthing is what you need. It is an open source, cross-platform file-syncing solution that can work locally or over the Internet! It has clients for the Linux Desktop, Windows, and macOS. It also has an Android app to sync from and to s martphones! There is no centralized third party server involved in this syncing process, so the user’s data is safely protected from prying eyes. The entire process is also encrypted using TLS, which adds another layer of security.
Here’s a guide to doing just that. By the end of this article, you’ll have a robust syncing system setup on your Ubuntu/Debian machine, ready to work seamlessly.
Steps to Install Syncthing on Ubuntu/Debian Systems
Syncthing is not present in the default repos, but has its own repo. For Ubuntu/Debian systems, you can use this repo. For other distros, you can follow the instructions given on the Syncthing website. Here, I’ll show how to install Syncthing on an Ubuntu/Debian system.
Step 1 – Add Syncthing repo to apt sources
Firstly, let’s add the repository to our apt database to ensure that we can download the packages from the repo:
echo "deb https://apt.syncthing.net/ syncthing stable" | sudo tee /etc/apt/sources.list.d/syncthing.list

Step 2 – Add Syncthing’s PGP keys
Next, we will add the Syncthing repository’s PGP key to our apt keys using the following command:
curl -s https://syncthing.net/release-key.txt | sudo apt-key add -

Step 3 – Update apt’s database
Then we use the apt command to update the repositories so we can get the latest packages and dependencies:
sudo apt update
Step 4 – Install Syncthing
Once we are done with all the steps above, we can finally go ahead and install Syncthing. For that, run the command :
sudo apt install syncthing
Step 5 – Enable the Syncthing service
Syncthing is now installed, but we need to enable it manually using the systemctl command to automatically start it at bootup. The official Syncthing package ships with the needed systemd service file under /lib/systemd/system/[email protected].
To enable Syncthing type the following command replacing username with your actual username:
sudo systemctl enable [email protected]

Now start the syncthing service using the systemctl command:
sudo systemctl start [email protected]
By default, Syncthing service listens on port 8384. Point the web browser’s address bar to 127.0.0.1:8384 to access the Syncthing Web UI. Syncthing also provides a CLI which has the same features as the Web UI.
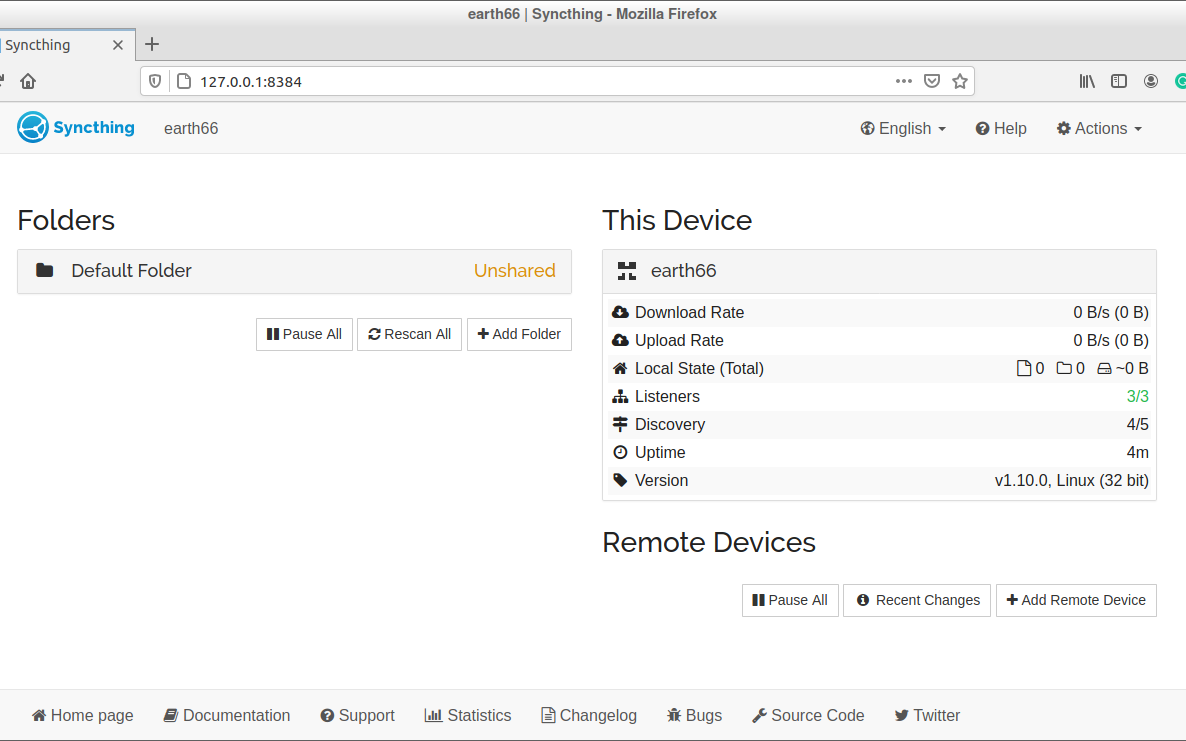
Using Syncthing Web GUI for file synchronization
We will be using the Syncthing WebUI as an interface to Syncthing in this article. First, we need to add devices so that we can sync between them. A group of devices that sync folders with each other is called a cluster in Syncthing. All the devices in the cluster must have Syncthing installed. For Android Devices, the Syncthing Android app must be installed.
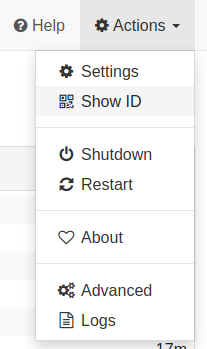
Show your Device ID
In Syncthing, devices are identified by a unique long alphanumeric string. This string is known as the Device ID. To see your Device ID, Select Actions > Show ID. This ID should only be shared with devices you intend to sync with. Show ID will also show you a QR Code that can be scanned by smartphones.
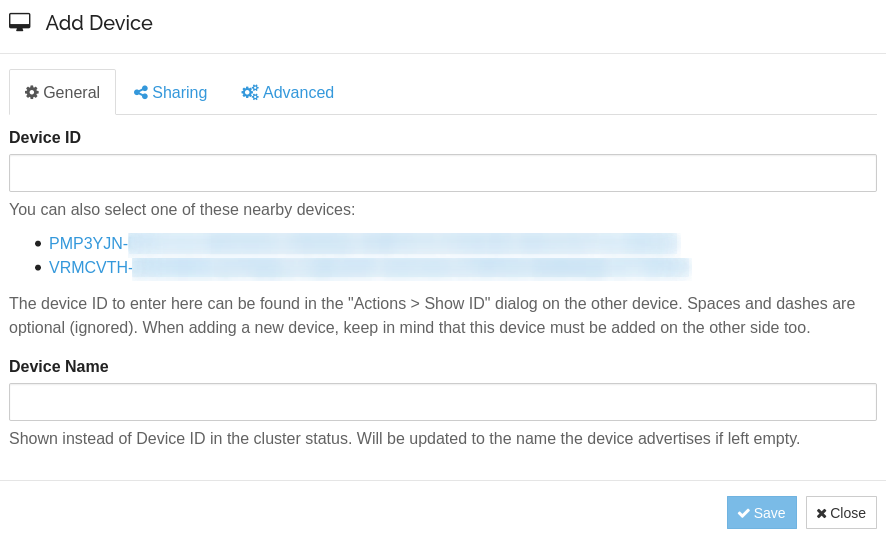
Add a device
To add a device, click on the Add Remote Device button on the bottom right of Syncthing Web UI. It automatically recognizes the devices having Syncthing installed which are on the local network. If the device you want to sync with is not shown, manually enter that 2nd device’s Device ID in the given text field. Then click on the Save button.
The 2nd device will receive a notification that you want to connect with it. Click on Add Device button, and the 2nd device will be added to the cluster.

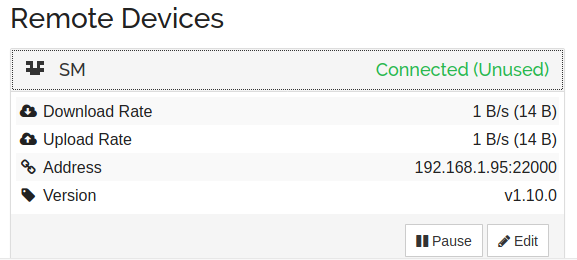
Wait for a few seconds, and then the 2nd Device will appear as Connected in the Remote Devices list.
Add Folders
Now that we have successfully added a device to our cluster, we can start syncing with it. But first, we need to tell it which folders to sync. To add a folder for Syncthing click on the Add Folders button in the Folders section of Syncthing Web UI.
It will show a window where you can enter the Folder Path of the folder you want to sync.
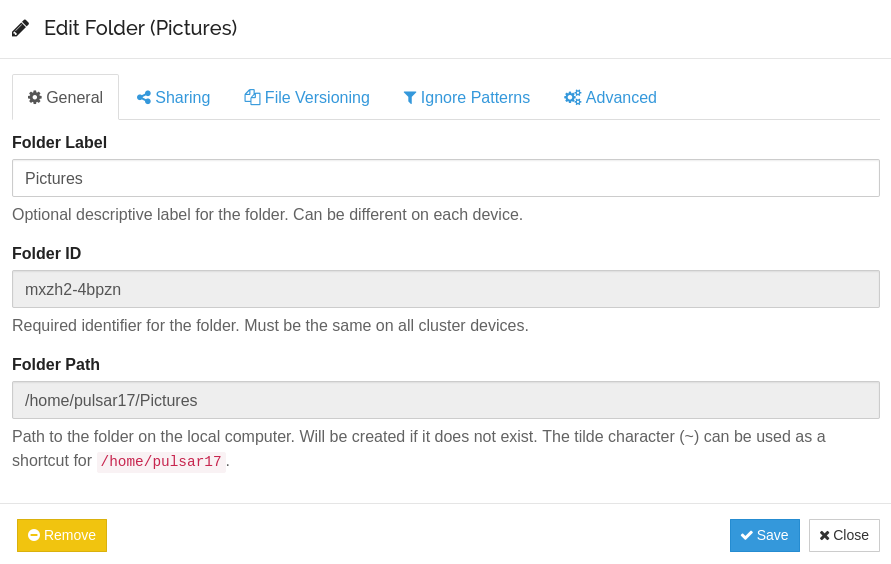
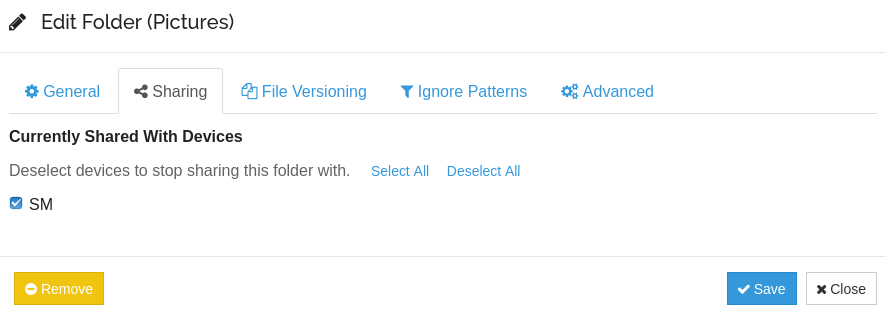
To select which devices to sync, go to the Sharing tab and check the devices that should sync this folder.
After you click Save, the devices checked will receive a notification that you want to share this folder with them. They can either accept or decline the request. If they choose to accept it, the path on that notification-receiving machine will now be asked where the folder (for which the notification was sent) should be synced. The path asked will be on the receiving machine.
Folder syncing Options
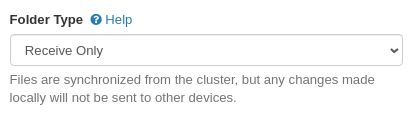
There are three types of Folders that can be synced in Syncthing.
- Send & Receive (default)
- Send Only
- Receive Only
These options can be accessed by clicking on a folder and then clicking Edit button
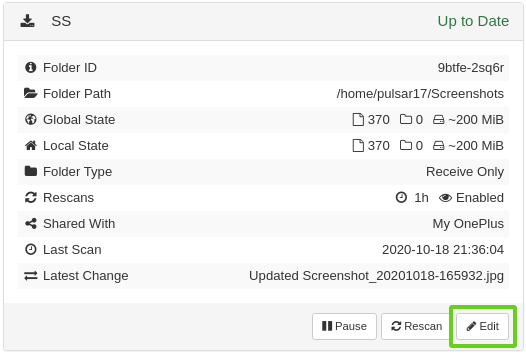
Then under the Advanced tab, select the Folder Type
Conclusion: A Trustworthy and Decentralized file syncing app
If you followed the above steps, you would have understood that installing Syncthing is a pretty easy task on Ubuntu or Debian Linux systems.
Syncthing is a useful application for syncing between various devices at once efficiently. With this guide, I have explained how to add Syncthing to apt sources, install it, and finally enable its services. Additionally, I have also introduced you to the Web UI of Syncthing, where you can add your devices to your cluster and sync your folders between them.
Syncthing allows granular control over how anything should be shared via the Folder Type option. It can also be used for backups if File Versioning is turned on when editing the Folder Settings.
I hope this helps! Let me know if you have any other questions.
References
The Syncthing Project on GitHub