

In this tutorial, we will learn how to install Jupyter Notebook in Ubuntu/Debian server.
What is Jupyter Notebook?
Let’s first learn what is Jupyter notebook. Jupyter is the web-based interface used for code analysis. The web application where you can visualize the live code i.e. it will create the graph of the code. This helps in data analysis. It’s easy to understand the code in Jupyter notebook than other IDE’s. Jupyter notebook provides the feature to easily share the notebook with other users. Notebook simply means the project code created in the Jupyter environment.
Earlier, Jupyter was known as iPython i.e. Interactive python. We can also say that Jupyter is the evolution of the iPython notebooks. It provides the server so that you can run your projects either on the local computer or remotely. One more add-on that it supports more than 40 programming languages including R and Scala.
The code can be shared using Github, Gmail or DropBox. Most developers prefer to run the code on Jupyter because it creates a better visualization like tables and graphs than on normal python IDE. Yeah! It’s the best way to make someone understand the code. Folks, don’t be confused between Jupyter and Spyder.
Both are different. Spyder is a simple IDE for python just like visual code whereas Jupyter is a web application that provides the web-interface to run the live code. For more details, check the Jupyter official documentation.
Let’s discuss how to install Jupyter in Ubuntu/Debian. There are two ways to install Jupyter either using Anaconda or without Anaconda. Let’s have a look at both methods:
Install Jupyter in Ubuntu/Debian with Anaconda
It is quite easier to install Jupyter in Ubuntu through Anaconda. Folks, for this first you have to install Anaconda in the Ubuntu System. Check the blog: How to install Anaconda in Ubuntu? Follow the steps as stated in the blog. After successfully installing the Anaconda, just follow a simple command:
jupyter notebook
This command will successfully start the Jupyter notebook.
Installing Jupyter in Ubuntu/Debian without Anaconda
Earlier, we discussed how to install Jupyter notebook with Anaconda. Let’s discuss how to install Jupyter without Anaconda. For this, you have to install Python and PIP libraries followed by the iPython too. Python is the requirement of the Jupyter. Let’s discuss the process to install it.
1. Update the Ubuntu Repositories
The first step is to update and upgrade the repositories. Update the repositories simply denotes to restore the packages while upgrading denotes to install the latest versions of the repositories. We will use the apt command to update and upgrade the packages. We tend to use the apt command while updating the packages.
Folks, there is a difference between apt and apt-get command. Let’s have a look at the command below:
sudo apt update && apt upgrade
2. Install Python libraries
The next step is to install the python and PIP libraries. You might be thinking that why is it important to install Python. Although, Jupyter runs the code in many programming languages, Python is the requirement if you want to install Jupyter in Ubuntu/Debian. Without it, it won’t run. Let’s have a look at the command below to install Python.
sudo apt install python
The command to install PIP is as follows:
apt install python python-pip
If you have already installed the python and pip, check the version of the following using version command. Let’s have a look at the command below:
python --version
pip --version

If you haven’t installed the python, check this how to install latest version of Python on Ubuntu/Debian? Therefore, will successfully install the latest version of the Python.
3. Install the IPython
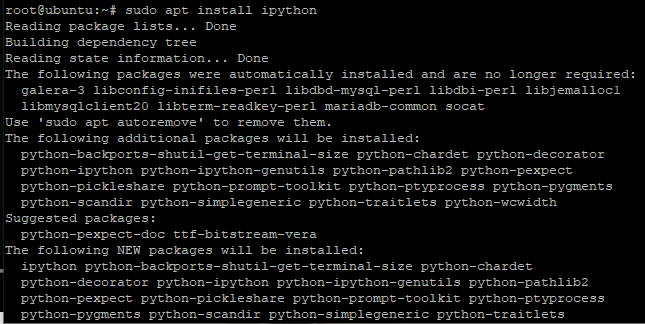
After successfully installing the Python and PIP libraries, the next step is to install the IPython. IPython is an interactive shell, or in other words, we can say that it is the Python interpreter. It provides more useful features than the default Python interpreter. For more details, we can also check the IPython Official Documentation. Here, to install we will use the apt install command. Let’s have a look at the command below:
sudo apt install ipython
4. Install the Jupyter in Ubuntu/Debian
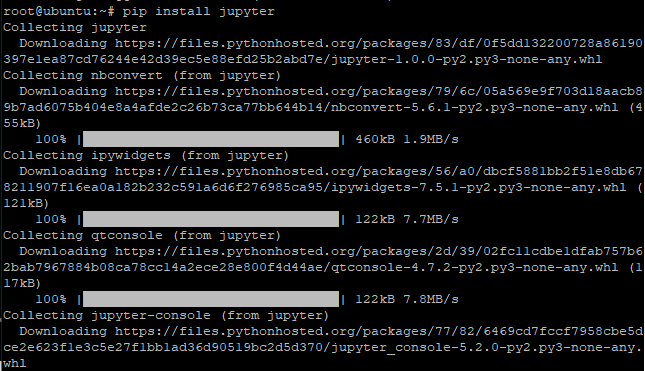
After successfully installing the IPython i.e. the interactive shell, the next step is to download the Jupyter Notebook. We will use pip install command to do so. Let’s have a look at the command below:
pip install jupyter
Starting Jupyter Notebook Server on Ubuntu/Debian
After successfully installing the Jupyter notebook, the next step is to start the Jupyter. We will add the –allow root command if you are the root user, otherwise, non-root users don’t need to use this. To begin with the Jupyter Notebook we will use jupyter notebook command. Let’s have a look at the command below:
jupyter notebook --allow-root
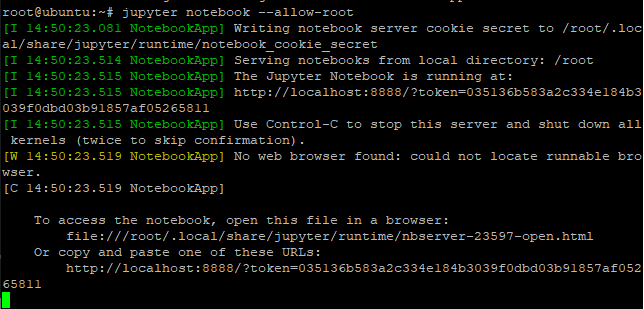
You will see the link in the image given above. You will get to know the port number i.e. 8888. Therefore, on the browser, it can be accessed using localhost/8888. Folks, there is a token given in the link. The token is used for the verification. Copy the token and paste it in the browser. If you want to access the Jupyter on the browser, type the following command below:
http://localhost/8888
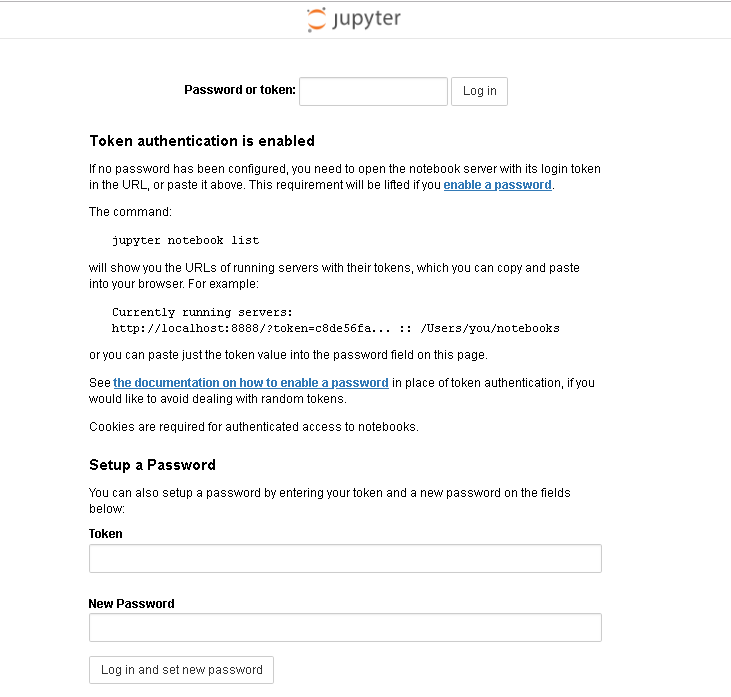
Use the token and set the password. After setting the password, you will be logged in the Jupyter dashboard where you can create the projects. The dashboard will appear as given below:

That’s it! You now know how to install Jupyter in Ubuntu/Debian.
How to Uninstall Jupyter Notebook?
Till now, we have successfully learned how to install Jupyter in Ubuntu/Debian. But we should also aware of how to uninstall it. To remove Jupyter notebook, we need to install the pip-autoremove package. Here, we will use the pip install command to install the autoremove package. Let’s have a look at the command below:
pip install pip-autoremove

Use pip command with auto-remove package to remove the Jupyter package using the following command:
pip-autoremove jupyter -y
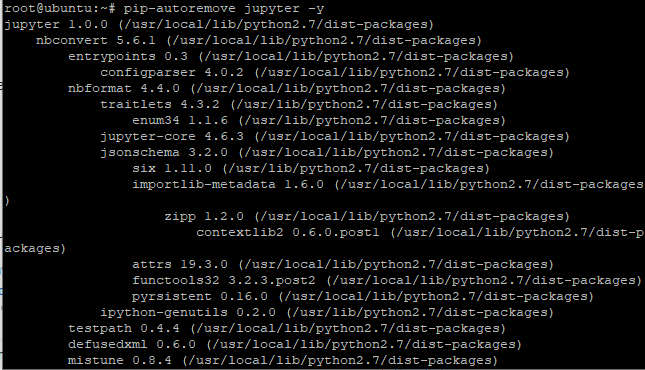
This will successfully remove the Jupyter package from the system.
Conclusion
If you followed through this tutorial, you should now know how to install Jupyter in Ubuntu/Debian. If face any issues, do let us know in the comment section.