

Think about it, if you have a Linux machine, and you want to remotely log in using SSH or want to use SCP or SFTP on that machine. For that, our machine should be connected to internet, and we should have its IP address. In that case, the remote machine should also have a static IP address instead of the Dynamic IP address. In this tutorial, we will discuss the major differences and features of these IP addresses and also learn how to set static addresses manually on the system.
We will start by discussing little types of IP addresses.
Dynamic IP address
- By default DHCP server, allocate IP addresses to device connected to internet for a fixed interval of time.
- After that it allocates a new IP address to the device, which might be different from previous IP address, or it gets renewed again. This known as dynamic IP address allocation.
- Dynamic IP address is a temporarily assigned IP address to a network element.
- This becomes a problem as we should always know the IP address of that system to remotely access it, and we can’t know the new IP address without physically accessing the system.
Static IP address
- Static IP address is an IP address that assigned to a network element always remains the same.
- They are configured manually.
- Static IP address is more useful for remote log-in to any system.
We are taking some considerations here,
- We will only use IPv4 address here, not IPv6, and it’s normal we very much uses IPv4 for IP address assignment.
- Also, we will use only class C private IP address for simplicity. Which ranges from 192.168.0.0 to 192.168.255.255
- And definitely, we are going to configure a static IP address not a dynamic IP address as we discussed above.
There are multiple ways to set IP address on a Linux PC
- GUI based method for the PCs with a Desktop environment.
- CLI based method for servers and headless PCs:
nmtuicommand which is a semi-GUI commandip addr addcommand
Let’s look at each method one by one as mentioned above.
GUI Based method
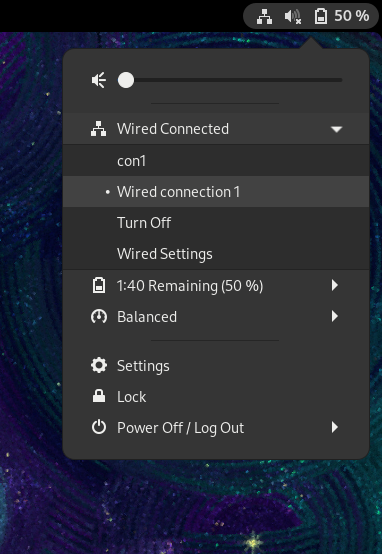
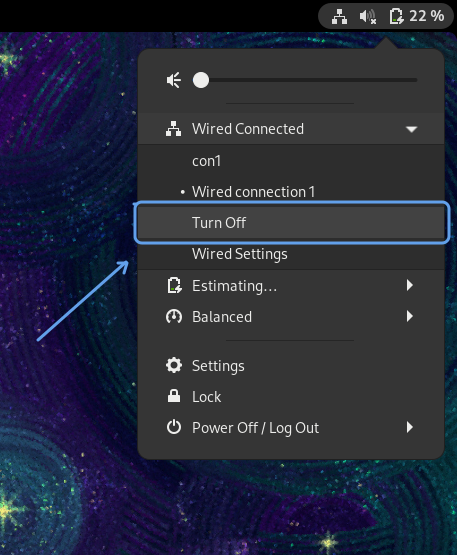
If your system have GUI, for GNOME windows manager click on group of indicators (Network, Speaker, and Battery) > Wired Connected > Wired Settings. For other Desktop Environments, the same concept applies.
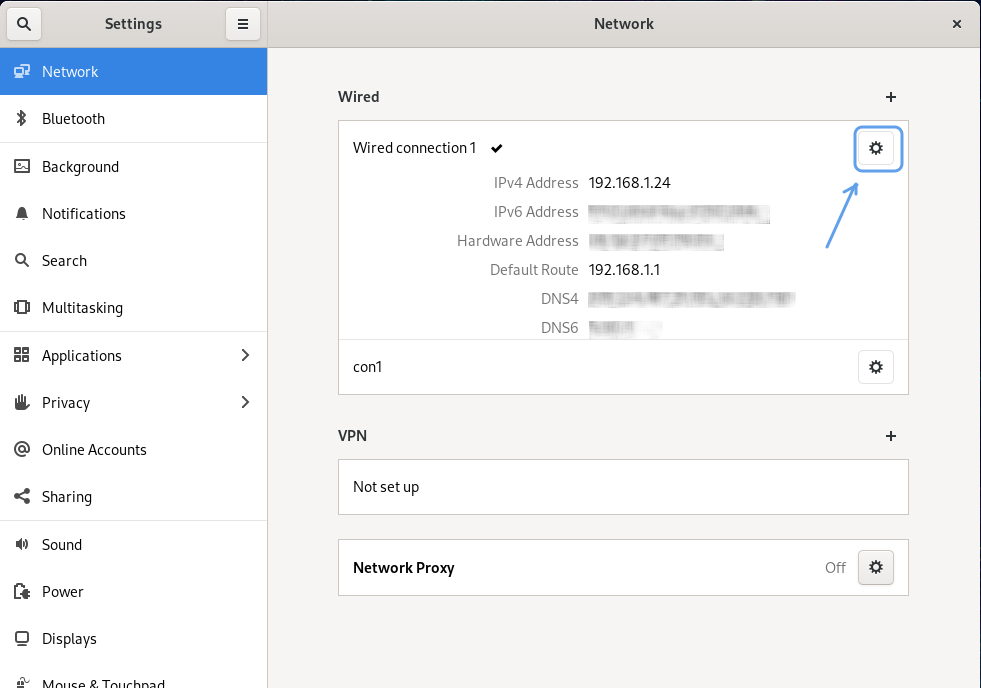
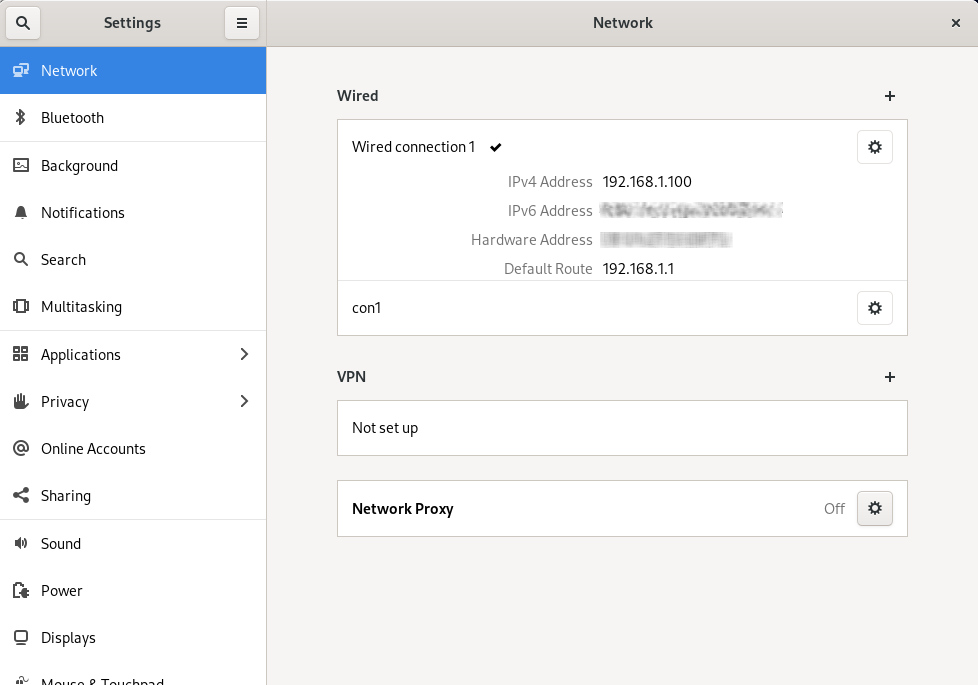
Then, you will get a window like below and click the gear as indicated below.
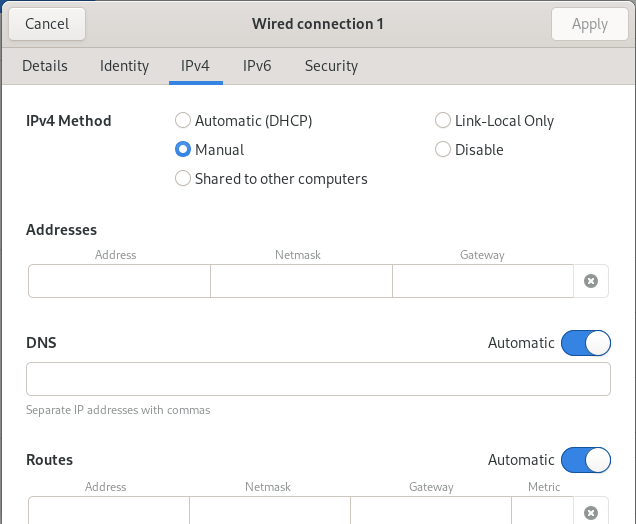
Head over to IPv4 tab and select IPv4 Method option to Manual.
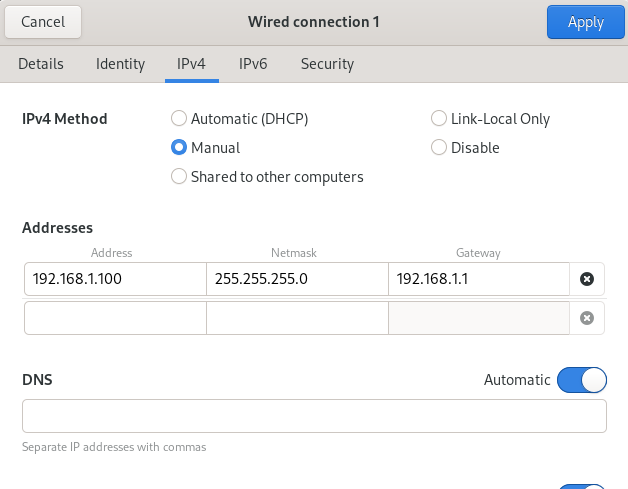
And type an IP address in address bar along with Netmask & Gateway.
- Let’s say IP Address should be 192.168.1.100
- And Sub Netmask will be 255.255.255.0, as it is class C IP address.
- Gateway will be IP address of your Router, generally it remains 192.168.1.1
- Finally, Click on the Apply button.
After performing the above steps, disconnect from the network and reconnect to it.
Now, new IP address is set and active. We can observe in below image that our IP address has changed to 192.168.1.100
If your system doesn’t have GUI, then we can use command line interface instead to configure the same thing.
CLI Based method
a) nmtui command
nmtui command is a semi-GUI command, here we set our IP address interactively but via Terminal. Open Terminal on your system and run nmtui command with sudo privilege. It will ask for password, provide your password.

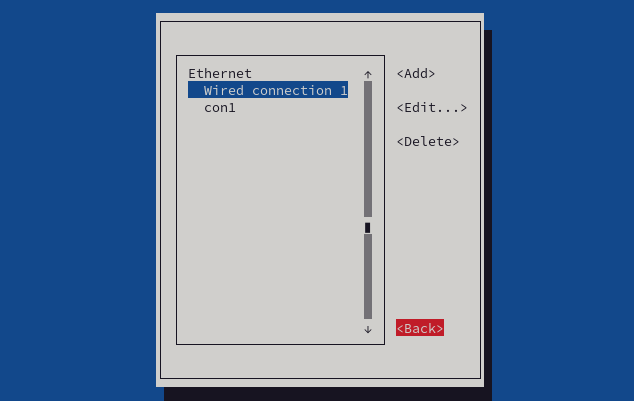
sudo nmtui commandA semi-GUI window will open. While Edit a connection option is highlighted, press few times Tab until <OK> button is also highlighted. When <OK> button is also highlighted, click Enter.

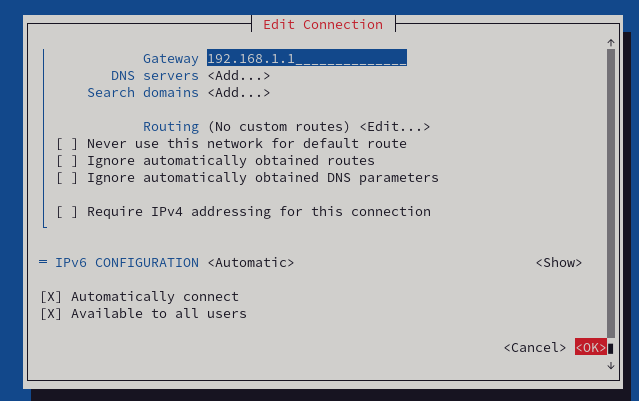
In a new window, press Tab a few times until <Edit…> button is highlighted, and then press Enter.
Here we have to edit connection. Carefully, we have to go to Addresses field using Tab, Up and Down arrow keys on our keyboard. And change it to 192.168.1.110/24. Gateway field will be 192.168.1.1. We are trying new IP address here.
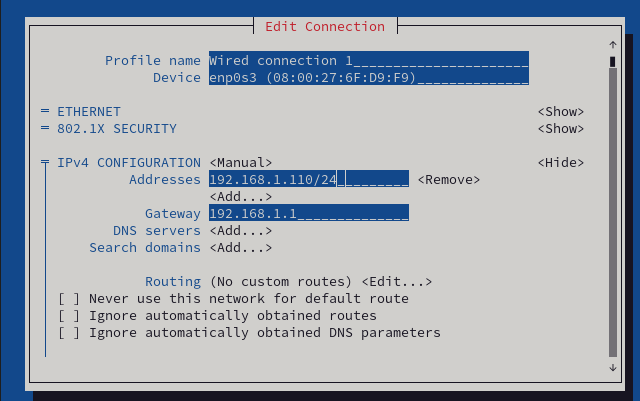
Finally, press Enter on <OK> button.
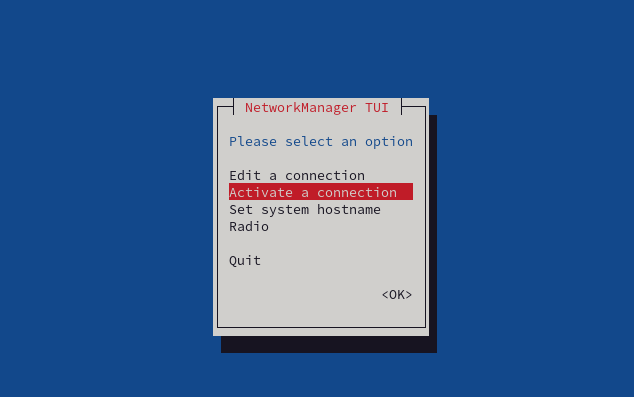
Fully come back to Terminal, and fire sudo nmtui command once again. This time for Deactivation and again Activation of our connection. We will observe our new IP address only after that.

sudo nmtui commandWe use Tab and arrow keys. When Activate a connection option and <OK> both are highlighted, press Enter.
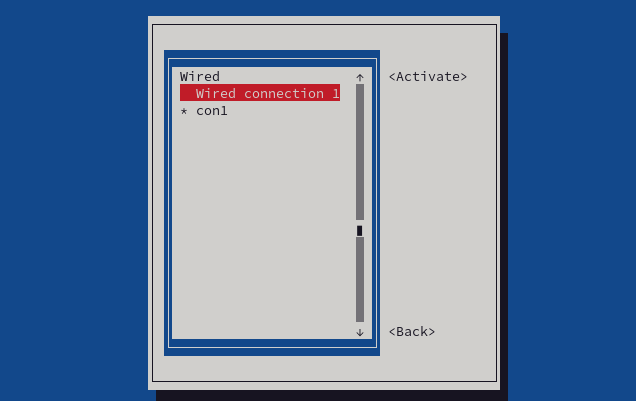
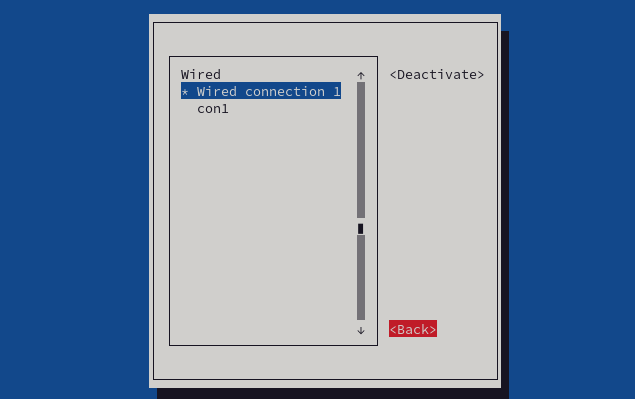
- Highlight Wired connection 1 option and <Deactivate> button.
- Press Enter for Deactivating connection.
- Again, press Enter for the Activation of connection.
Now, our window look like the image below. Just go back to Terminal, we are done here.
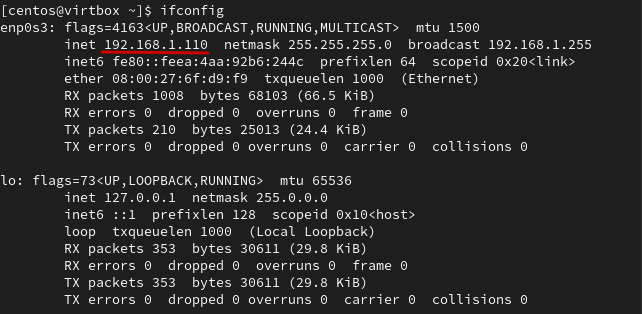
Let’s confirm our new IP address. Type the following commands in the Terminal window:
ifconfig
Now, we got new IP address. It’s highlighted by red color.
ifconfig command for network informationb) ip addr add command
The syntax for adding IP address using this command looks something like this:
ip addr add <ip_address/subnet_mask> dev <interface>
Similarly, syntax for removing IP address looks like this:
ip addr del <ip_address/subnet_mask> dev <interface>
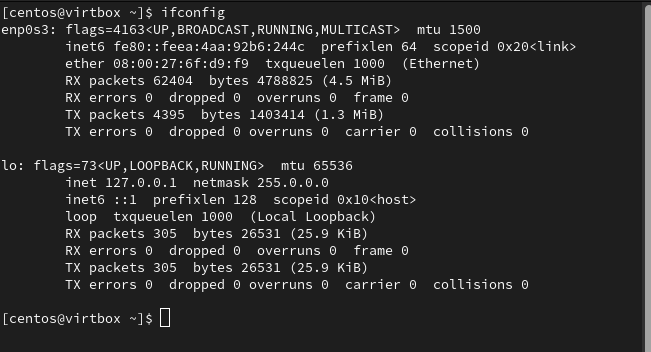
Before adding IP address from this command. We should remove previous IP address.

sudo ip addr del command for deleting IP addressLet’s confirm our removed IP address. There is no line starting with inet4 in the following output, so we have removed our IPv4 address successfully.
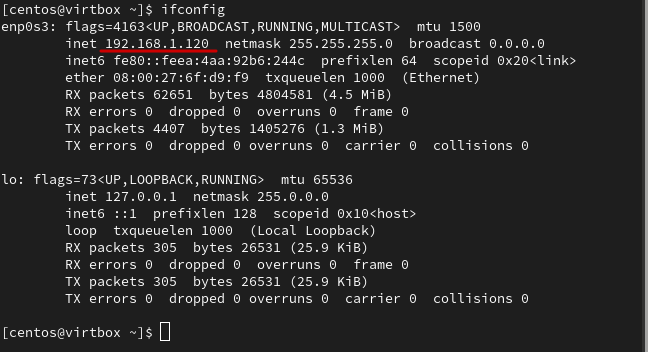
Now, we will add a new IP address, let’s say 192.168.1.120.
sudo ip addr add 192.168.1.120/24 dev enp0s3

sudo ip addr add command for adding IP addressAgain, let’s confirm our new IP address using the ifconfig command:
Conclusion
This is the way through which you can change IP addresses on almost all distributions of Linux. We have also discussed the GUI methods for users with the GNOME desktop environment in this tutorial. Static IP addresses are very much useful for system administration, and we hope you were able to learn and configure temporary IP addresses on your Linux server using this guide.