
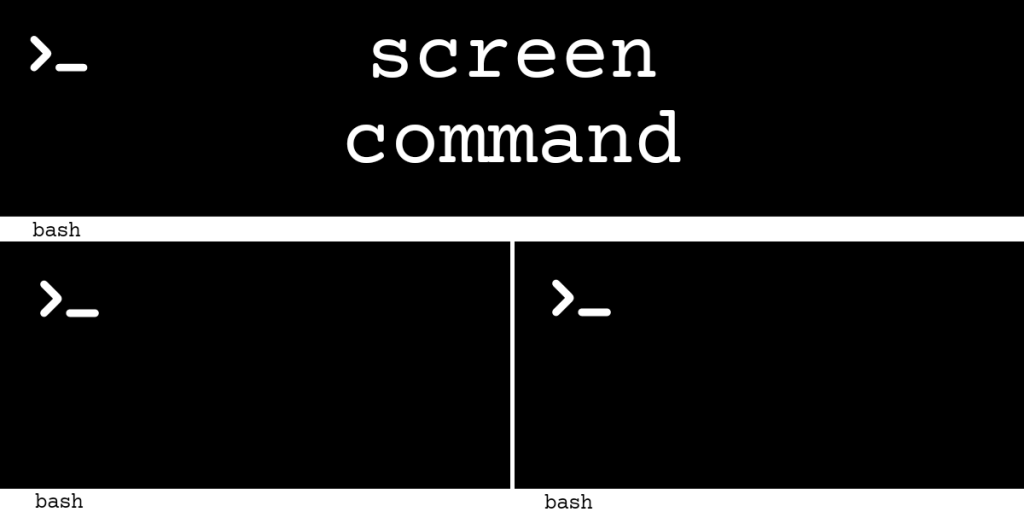
The screen command is a terminal multiplexer. It is similar to the Window Manager for a Desktop Environment except that it works inside the terminal. It can create sessions and split windows which are a very powerful way of doing multitasking in the terminal.
Installing the screen command
The screen command can be installed with the default package manager of the distribution that you’re using. Here are the steps to install the screen command on the two major distributions that most users work with.
1. Installation on Debian/Ubuntu based systems
Screen command can be installed using the apt command:
sudo apt install screen

2. Installation on RedHat/Fedora based systems
The screen package is not present in the default repos. Rather it is present in the EPEL (Extra Packages for Enterprise Linux) repo.
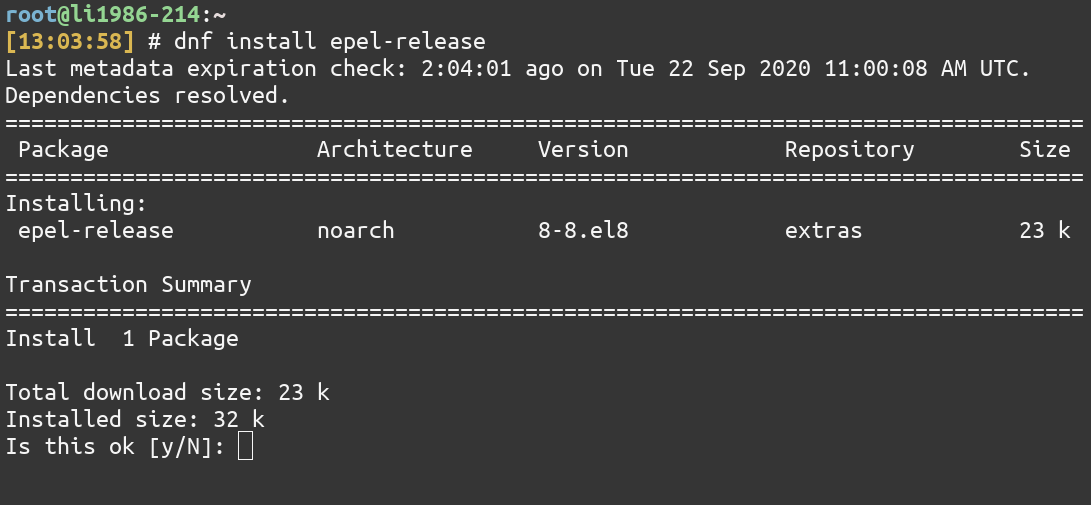
You need to add that repo first which can be done using the dnf command:
sudo dnf install epel-release
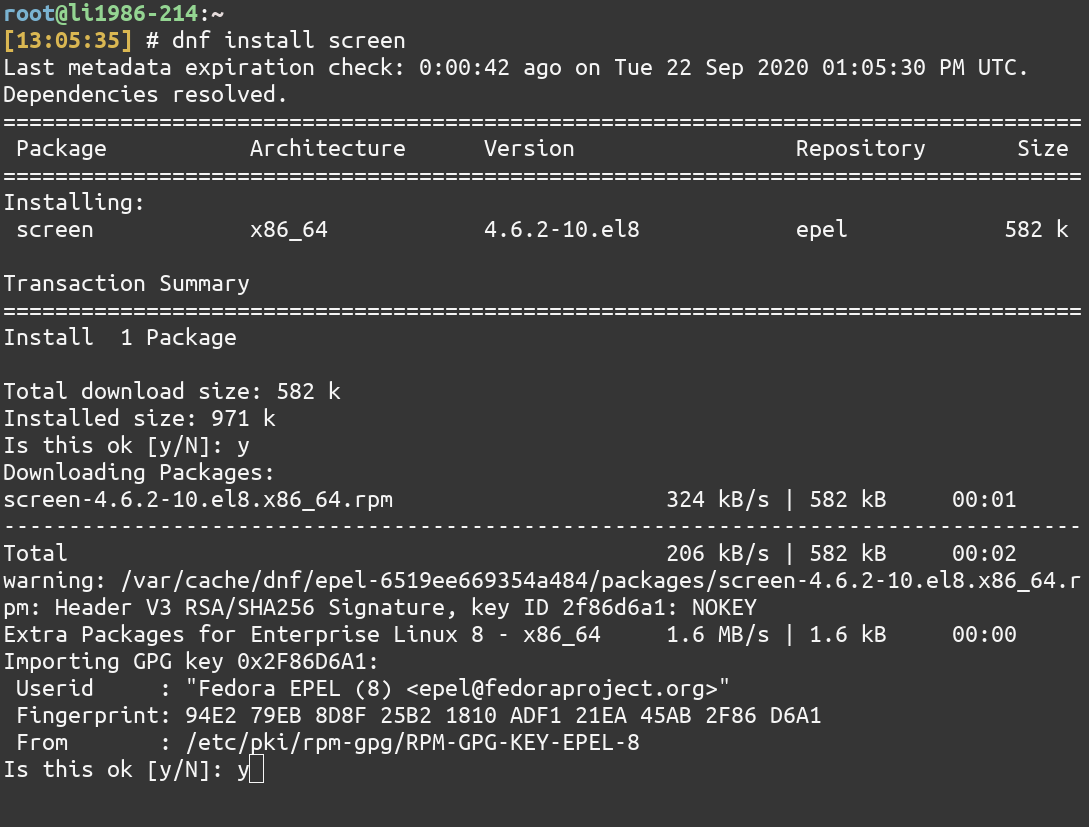
Then to install screen, type:
sudo dnf install screen
Basic usage of the screen command
Before we begin to use the screen command it would be useful to know some terminology related to it. In screen, a session is a collection of virtual terminals which screen manages.
A session may contain multiple windows which are generally independent interactive shells. A virtual terminal can be divided into panes which are rectangular areas inside the terminal created by screen. These panes can contain a window.
1. Using screen without arguments
To use screen just type:
screen
It will start an ‘unnamed’ session. You won’t find any difference from your original prompt but screen is now listening for commands. Pressing CTRL + A + ? brings up the keybindings for screen:
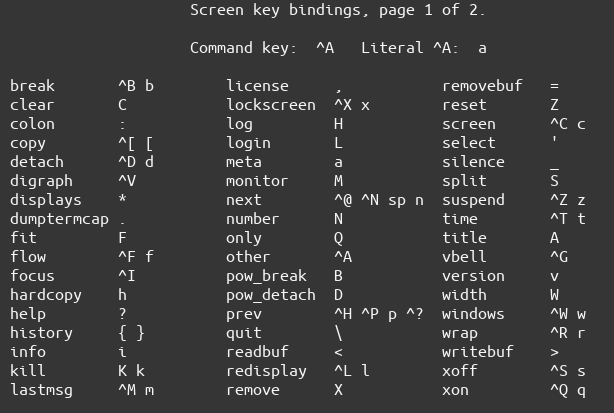
As can be seen above, CTRL + A ( written sometimes as ^A ) is the ‘command key’ for screen. Pressing the command key tells screen that the key(s) about to be pressed is a command for screen.
(The ‘A’ in CTRL + A is not the uppercase one. You don’t need to press the Shift key. By ‘A’ I refer to the lowercase ‘a’ because the man page and the keybindings refer to it this way. For other keys, I will mention the case explicitly.)
There is also a vim like command mode which can be accessed by pressing CTRL + A + :
The difference is that instead of keyboard shortcuts, whole commands have to be typed in the command mode. For example, pressing CTRL + A + X (uppercase ‘x’) is equivalent to pressing CTRL + A + : and then typing remove on the prompt provided at the bottom of the pane.

2. Creating a named session
To create a named session give the name of the session after the -S option:
screen -S newsession
3. Creating a new window inside a session
To create a new window inside the session, press CTRL + A + c (lowercase ‘c’). Pressing CTRL + A + “ (double quotes) presents a selectable list of windows. A window can be opened by pressing Enter on the option for that window in the list.

To change the name of the current window, press CTRL + A + A (Uppercase ‘a’). It will present a prompt at the bottom. Type the new name there and press Enter.

4. Listing active sessions
There may be multiple screen sessions going on at the same time. To list them, type:
screen -ls

The listing contains the PID(Process ID) of the session followed by the name of the session. Below the listing the no of sockets
Note that this command was run inside a screen session (the one with Attached in parenthesis). You can run screen commands inside of a screen session!
5. Killing a session
The method to kill a session depends on whether you are inside or outside the session.
When outside the session that is to be killed, you should either know the name of the session or the PID of the session. They can be obtained from the listing of screen -ls.
After the name or PID of the session is known, type:
screen -X -S 607719 quit

The above command will kill the session with the PID of 607719, print [screen is terminating] and bring you back to the prompt from where you started screen.
You can also specify the PID till the digit that makes the PID unique. For example, if there are two sessions with PID 699389 and 607719, and you want to kill the session with PID 607719, you can get away with just:
screen -X -S 60 quit
The same contraction can be done for names.
quit is the command for screen that kills the session. You can send any command to a session this way (See the keybindings page for all available commands).
When inside a session, you can kill the current session by pressing CTRL + A + \ (backslash).
Screen as a terminal multiplexer
screen is a terminal multiplexer, which means you can split the terminal into panes horizontally or vertically. These panes can further be split horizontally or vertically. You need to be inside a screen session to do this.
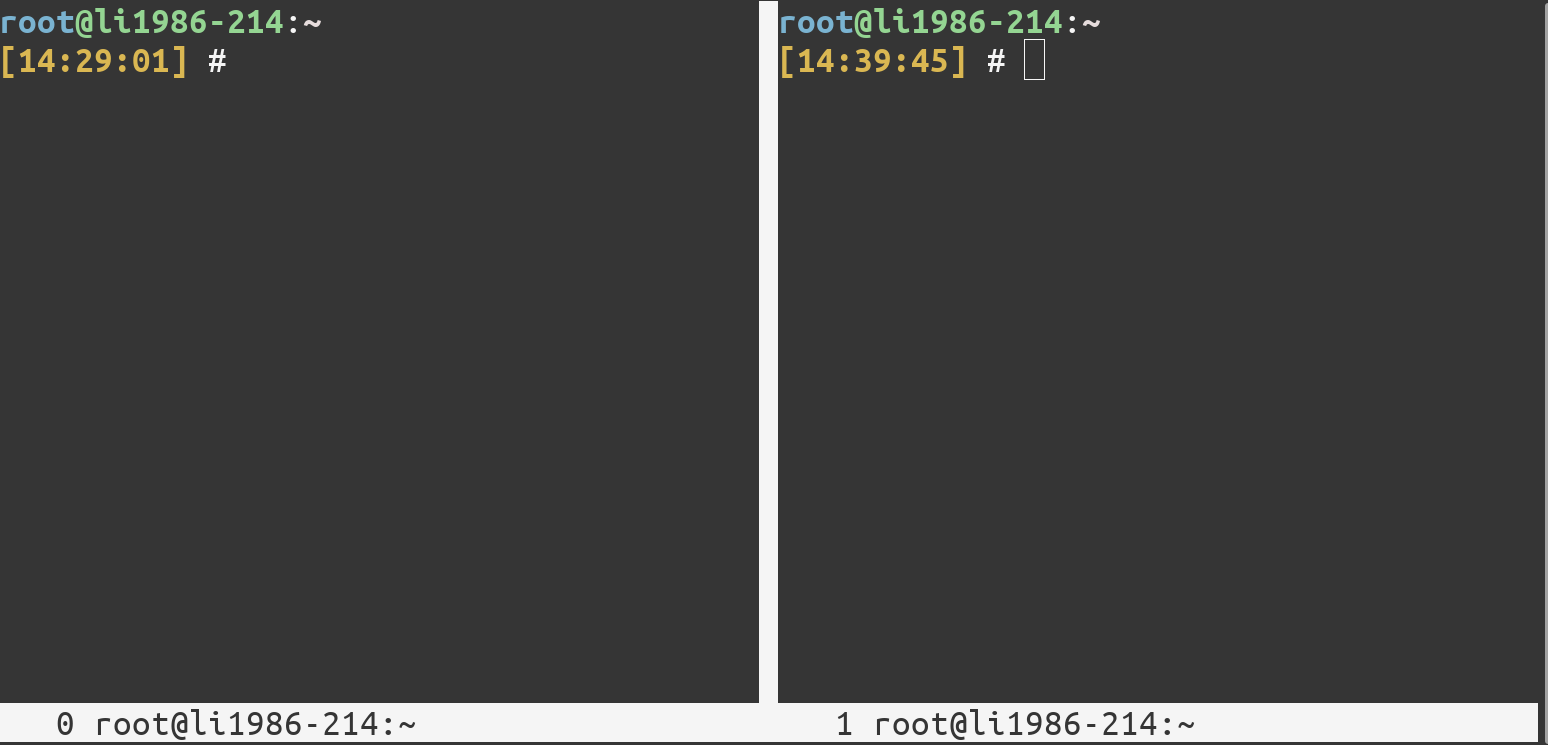
Let’s first split the terminal vertically by pressing CTRL + A +| (vertical bar/pipe character)

The bottom left of the pane indicates the window number and it’s name. screen by default opens a window with number 0.
You can toggle between the panes by pressing CTRL + A + Tab . Press that and you’ll be on the right pane. You can then either open an existing window using the selectable list(CTRL + A +") or you can create a new one(CTRL + A + c). After creating a new window, our terminal looks like this:
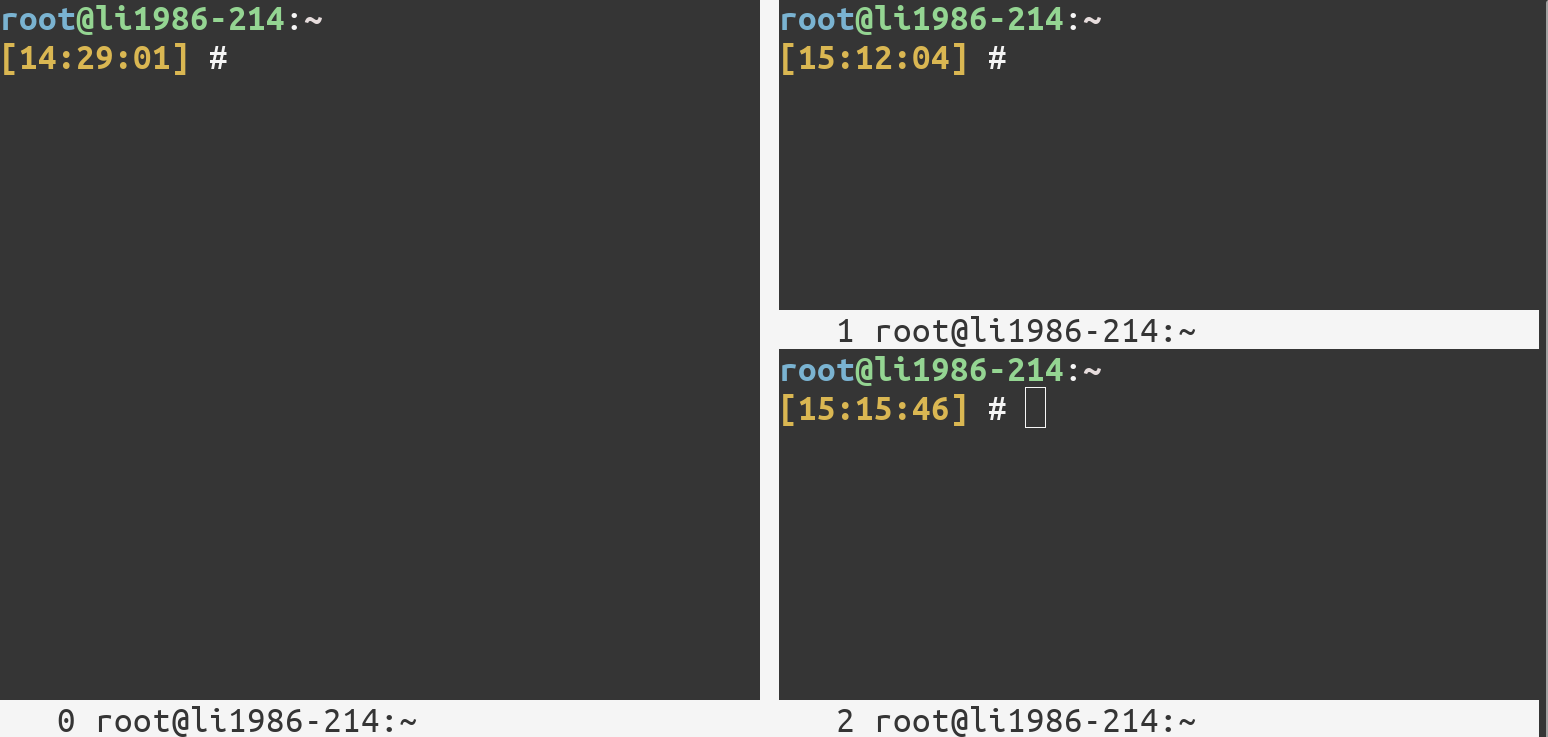
Let’s now split the Window No. 1 (the new window that was created after our vertical split) horizontally by pressing CTRL + A + S (uppercase ‘s’) , move to the new pane (CTRL + A +Tab), and create a new window (CTRL + A + c).
Our terminal now looks like this:
To remove a pane, press CTRL + A + X (uppercase ‘x’) while on that pane.
Detaching and reattaching
The real power of screen lies in its ability to detach from and reattach to a session. Detaching from a session gives you the prompt back from where you ran screen. The whole session then runs in the background as a screen process.
This is especially useful when accessing a machine through SSH. A long-running command can be run inside a screen session on the remote machine. Then we can detach from the screen session and safely close the ssh session from our local machine.
We can then, after maybe a few hours, again SSH into the machine, reattach to the screen session. You’ll find that the command is still running! Under a normal SSH session the command would have got killed.
To detach from a session, press CTRL + A + d (lowercase ‘d’). It will bring you to the original prompt.

Now listing the screen sessions:

To reattach to a session, type:
screen -r -S newsession
If you had any panes set up, they’ll be gone and you need to again split your terminal as per your requirement. The windows will still be there though.
Note that here I used the name of the session instead of the PID.
Screen as a collaboration tool
Screen, surprisingly, can be used as a collaboration tool. I’ll be illustrating how to connect to a common screen session from two remote computers.
Suppose I want to show someone how to edit a configuration file on a server. I’ll create a screen session on the server:
screen -S newsession
Then enter the command mode (CTRL + A + :)and type multiuser on and press Enter
I’ll ask the other person to log in to the same user as the one who created the screen session from a different machine and type:
screen -x
The right terminal is of the person who wants to show how to edit the configuration file. The left terminal is just mirroring what is being written on the right one. This way a person can open vim or nano and show the other person how to edit the file.
Conclusion
Screen is a very useful command and it facilitates multitasking as it gives the ability to run multiple interactive shells inside a terminal. For more info about screen look at its manual.