

There are many ways to transfer files using cloud services but scp (Secure Copy) is a command to securely copy files to and from a remote host. It internally uses SSH to perform it’s operations.
Installing scp Command
scp is present in the OpenSSH Client package. (openssh-server the package provides the SSH Daemon while openssh-client package provides various tools related to SSH.)
For Ubuntu/Debian (and their derivatives)
You can install scp using the apt command:
sudo apt install openssh-client
For Fedora/CentOS (RedHat based distros and their derivatives)
You can install scp using the dnf command:
sudo dnf install openssh-clients #the name has an extra 's'
Note: To transfer files through scp, it should be present on both the sending and the receiving side. If you try to scp to a machine that doesn’t have scp installed, you might get an error saying scp: command not found even though you might have scp installed locally.
Basic usage of SCP
At it’s core, scp command takes the file(s) from the source and copies it to the target.
scp <source> <target>
There are many ways of specifying the source and the target. Some of the common ones are as follows:
Copy from local machine to remote machine
scp path/to/local_file remote_host:path/to/remote_file
Here remote_host can be
- an IP Address
- a Domain name
- a host defined in
/etc/hostsfile - a host defined in
~/.ssh/config
For example, to copy a file me.png in my home directory from my local machine to my ubuntu-server (defined in /etc/hosts), I will type.
scp /home/pulsar17/me.png ubuntu-server:~/me.png

If I am executing this command as the user pulsar17, the same user must be present on target machine for this syntax of target to work.
Copy from remote machine to local machine
To copy from remote machine to local machine just switch the source and the target. The command still has to be run on the local machine.
scp remote_host:path/to/remote_file path/to/local_directory
For this command too, the user executing this must be present on both the local and remote machines.
Copy as a specific user on the remote machine
You can also specify the user while copying. scp will copy the file(s) and set the owner as user.
scp path/to/local_file user@remote_host:path/to/remote_file
The following command will copy the me.png to the remote machine but as the user juniordev.
scp /home/pulsar17/me.png juniordev@centos-server:~/me.png

Through this syntax, I can copy as any user on the remote machine to which I have access.
To copy from a remote machine as a specific user just switch the source and the target.
Useful options
scp has a ton of options. Here i’ll show some useful ones.
scp with -r option
Using the -r option you can copy a directory recursively (all files and subdirectories).
scp -r /home/pulsar17/scripts ubuntu-server:~/
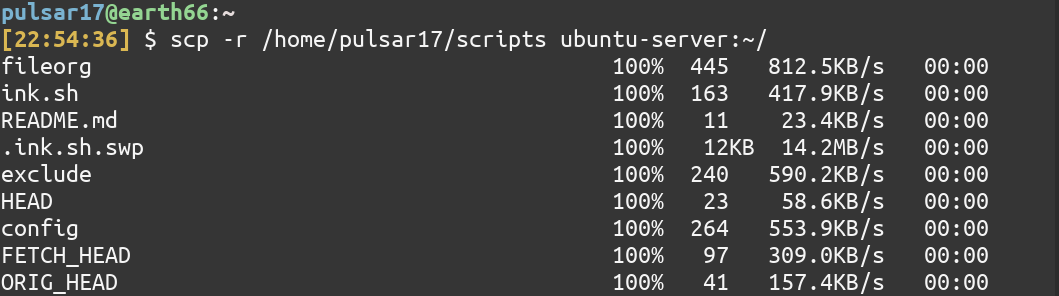
The above command will copy the whole scripts directory to the remote machine.
scp with -p option
This option instructs scp to preserve modification times, access times, and modes from the original file.
scp with -q option
It enables the quiet mode. It also disables the progress meter as well as warning and diagnostic messages from ssh.
scp -q /home/pulsar17/me.png ubuntu-server:~/

SSH configuration for easy use of scp
If you feel that you will need to use scp regularly, you can set up your environment in a way that’ll save time and typing. Following are the 2 ways you can achieve that:
Adding commonly used hosts to config file
There are two places where you can map an IP Address to a name so that you don’t have to type the IP Address again and again on the local machine. These would be /etc/hosts file and the ~/.ssh/config.
If you need to use SSH specific options, it’s better to use ~/.ssh/config. I’ll show how you can configure using both these files. You should use only one of them.
~/.ssh/config
Open the ~/.ssh/config file in the editor of your choice. I’ll be using the nano editor:
nano ~/.ssh/config
Add the following lines to it:
Host ubuntu-server
        User root
        HostName 192.168.1.168
        #Port 22002 You can specify a port too
Save the file and exit nano. You can add multiple hosts in this file. After this configuration, you can replace user@remote_host with the name after the corresponding Host in the configuration file. So, for example, you can use:
# Instead of scp /home/pulsar17/me.png [email protected]:~/me.png just type
scp /home/pulsar17/me.png ubuntu-server:~/me.png
/etc/hosts file
This file contains a mapping of IP Address to hostnames like a key value mapping. To map IP Address 192.168.1.11 to the name my-server, type:
echo 192.168.1.11$'\t'my-server | sudo tee -a /etc/hosts
The $'\t' is to print a literal Tab character in the file.
After doing this you can get away by using the Tab completion feature of bash. While typing the newly mapped name (my-server in this case) in the scp command just enter the first few characters and press Tab , Bash will autocomplete the name for you. (You will still need the user name though. It will only autocomplete hostnames.)
SSH Keys instead of a password
To log in to the remote machine, you can use SSH keys instead of conventional password-based authentication. To set up SSH keys follow this tutorial. You only need to do it once.
Conclusion
scp is a very useful command to copy files securely from one machine to other. In this article, we learnt various options scp and how it’s power can be leveraged by setting up ssh keys and appropriate configuration files.