

Multipass, a cross-platform and open-source Command Line Virtual Manager, empowers you to deploy multiple instances of the Ubuntu Server operating system with ease.
On macOS and Windows, this tool utilizes Hyperkit and Hyper-V respectively to run the VM with a very light resource usage, whereas on Linux, it utilizes KVM to do the same. In this tutorial, we will look at the features of Multipass and also try to set up an Ubuntu VM through the command line.
Multipass is a versatile, open-source Command Line Virtual Manager that allows users to deploy multiple instances of the Ubuntu Server operating system. It simplifies the process of setting up a virtual environment, enabling the creation of fresh, customized development environments with just a few commands. Multipass is available as a Snap package and can be installed on various Linux distributions including Ubuntu, Fedora, and Arch Linux. Once installed, users can easily launch, list, and manage Ubuntu VMs using simple commands.
Exploring the Unique Features of Multipass
This unique Virtual Manager offers the following features:
- It simplifies the entire process of setting up a Virtual environment by automating it entirely, thus reducing the time consumed for development environment to be set up.
- Fresh customized development environments can be set up on any System using just a couple of commands.
- If you don’t want to mess up with your Ubuntu installation by installing packages from unknown sources or just want to run a potentially unsafe command/script, then you can use this tool to generate a separate environment so that your own system is safe.
- On macOS and Windows, it is the quickest way to acquire access to the Ubuntu’s command line.
Also Read: How to install Ubuntu on Windows with WSL2.
Step-by-Step Guide to Installing Multipass on Linux Distributions
This CLI tool is only available as a Snap package because it needs to be sandboxed from your system. And, on Ubuntu Snap is enabled by default, but on other Linux distributions, you might have to install the ‘snapd‘ package before installing Multipass. On Ubuntu, just type the following commands:
sudo snap install multipass
On Ubuntu derivatives (without snap enabled)
On Linux Mint or Pop_OS!, first remove the apt preferences line, which disallows Snaps to be installed on the system.
sudo rm /etc/apt/preferences.d/nosnap.pref
Now, just install the snapd package and then proceed with the installation of Multipass:
sudo apt install snapd
sudo snap install multipass
On Fedora Workstation
On a Fedora workstation, type the following commands:
sudo dnf install snapd
sudo ln -s /var/lib/snapd/snap /snap
sudo snap install multipass
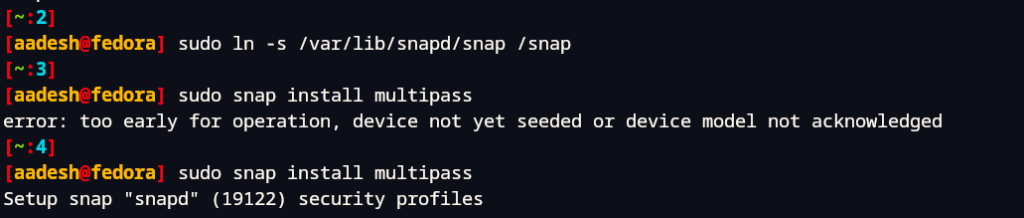
The first time usage of snap can take some time. Make sure to restart your session after installing snap (logging out and logging back in will do the job).
On Arch Linux
On Arch Linux and its derivative distributions such as Manjaro or Endeavour, snapd package is available in the AUR (Arch User Repository). So, if you are using any AUR helper such as YAY or PARU, just type the following commands in your Terminal window to install the package:
yay -S snapd
Once snapd is installed, you have to enable the systemD and link snap to the correct location and then, you can install this VM manager using the following commands:
sudo systemctl enable --now snapd.socket
sudo ln -s /var/lib/snapd/snap /snap
sudo snap install multipass
Also Read: Running Ubuntu Server in a Virtual Box
Mastering the Art of Using Multipass: Commands and Tips
Make sure to restart your session first by logging out and logging in again, ad then type the following commands to list the available images:
multipass find
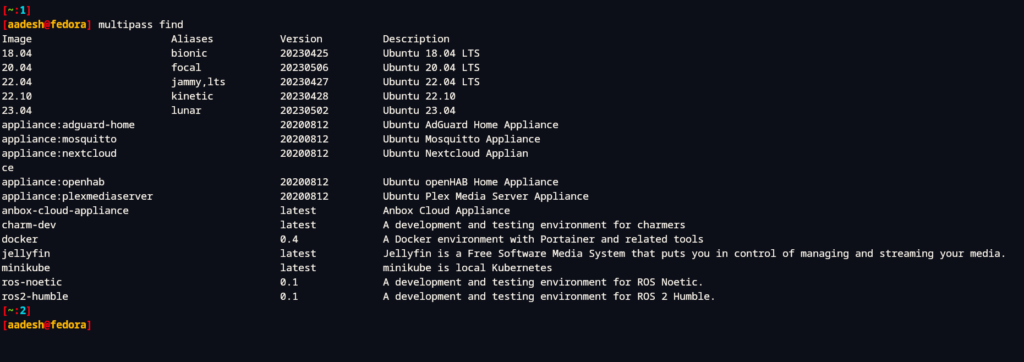
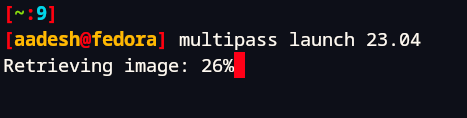
As you can see, several versions of Ubuntu images as well as basic server images such as AdGuard, Nextcloud as well as Jellyfin are available among others. To download and launch any image, just type the following commands:
multipass launch 23.04
In case you encounter a ‘launch failed: Remote “” is unknown or unreachable‘ error, just restart the snap service by typing the following commands:
sudo snap restart multipass.multipassd
Also, if a Virtual manager is running in the background, then this application will also throw an error, so you have to close them before you run Multipass.
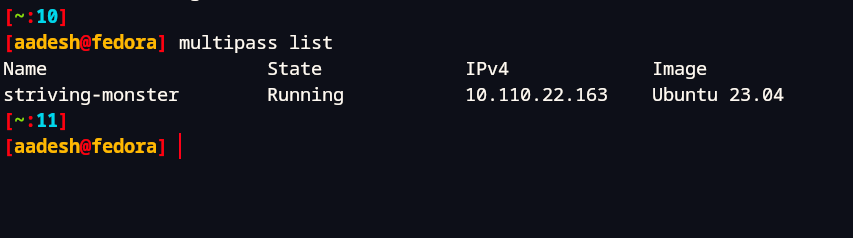
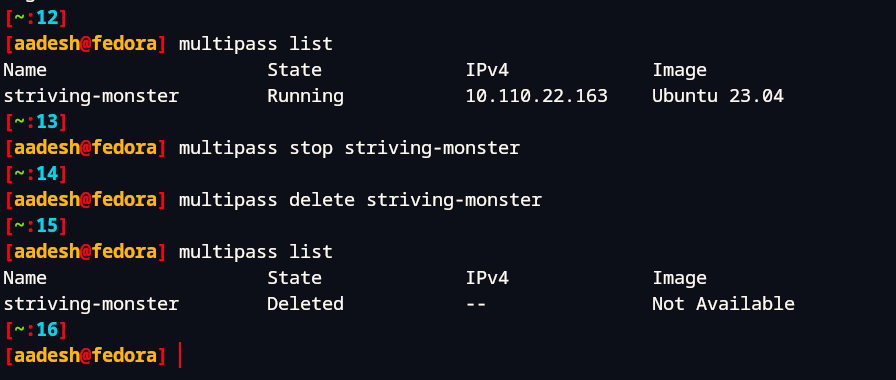
If the launch command ran successfully, then the new instance created will have a default of 1 GB RAM and 5 GB of storage space allotted to itself. In order to list all the instances, you can type the following commands:
multipass list
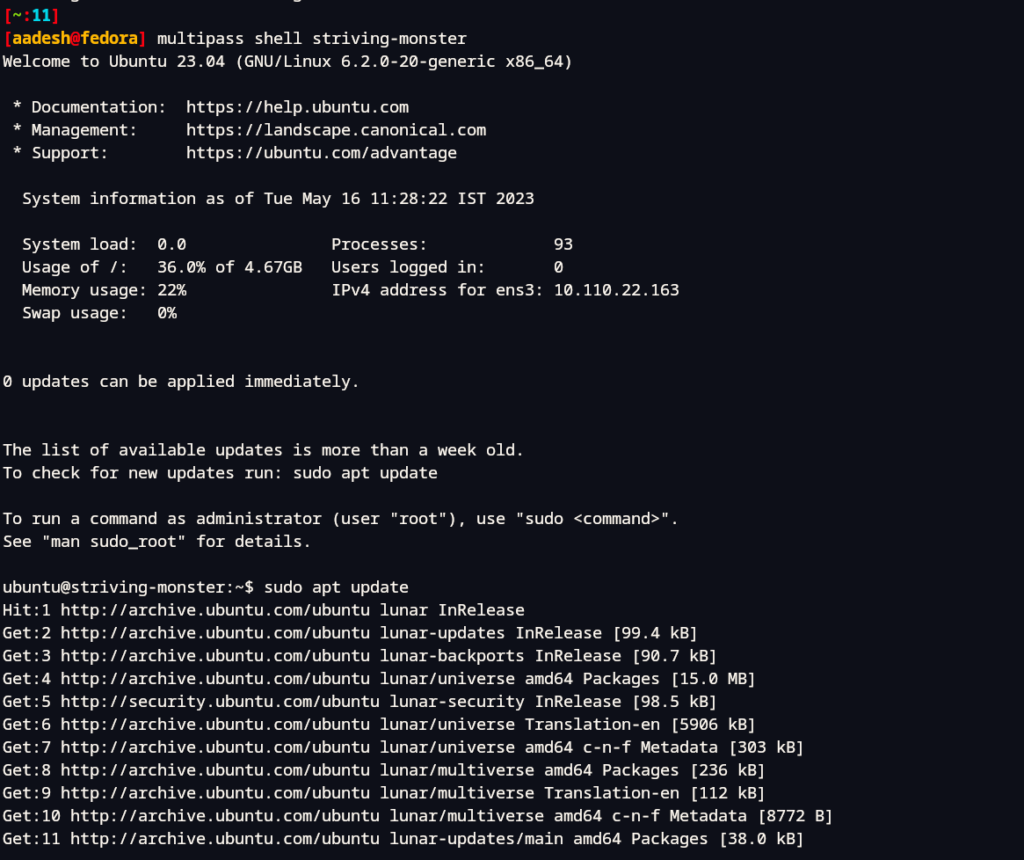
And, in order to access the shell of the VM, you can use the shell command along with the name of your instance like this:
multipass shell striving-monster
In order to stop or start an instance, you can use the start or stop command like this:
multipass stop <VM NAME>
multipass start <VM NAME>
Finally, if you want to delete any instance, you can do so by typing the delete command:
multipass delete <VM NAME>
Final Thoughts: Multipass as a Tool for Your Dev Workflow
It is a great tool, using which you can very quickly start an Ubuntu VM for development purposes or to run a server. The option to add Jellyfin or Plex server is a bonus for anyone who wants to try their hand at creating a Virtual server.
To explore more about the diverse commands of this tool, don’t hesitate to use the –help flag in the Terminal. Have you considered how Multipass could revolutionize your development workflow?