

Checking the accounts on an Ubuntu machine means choosing whether to look at local records or accounts the system can resolve. The getent passwd command looks up records through the machine’s configured account sources, while the /etc/passwd file stores local records.
I’ll show you how to list local names and system-resolved accounts, then use a UID range as a first-pass filter.
TL;DR
Use getent passwd for accounts resolved through the system’s Name Service Switch (NSS), or read /etc/passwd when you only need local records.
- getent passwd prints complete records from configured account sources.
- cut -d: -f1 /etc/passwd prints local login names only.
- A UID filter can narrow the list to accounts conventionally used by people, but UID ranges are policy, not proof.
What Does the Ubuntu User List Contain?
The /etc/passwd file stores local account records, one account per line. Each record has seven colon-separated fields, so the file contains more than usernames.
The table identifies the fields to inspect when a local record needs more than its login name.
| Field | Meaning |
|---|---|
| 1 | Login name |
| 2 | Password marker or legacy password field. An x commonly indicates the protected value is stored elsewhere |
| 3 | User ID (UID), a number identifying the account |
| 4 | Primary group ID (GID) |
| 5 | Comment or GECOS information |
| 6 | Home directory |
| 7 | Login shell or command interpreter |
For example, root:x:0:0:root:/root:/bin/bash has login name root, UID 0, primary GID 0, home directory /root and shell /bin/bash. The x marks the password field. Authentication data is stored separately.
A service account can use a non-interactive shell such as /usr/sbin/nologin. Review the account purpose and local policy before making access or removal decisions.
Use the full record when a name alone is not enough to identify an account. The UID helps distinguish two records with similar names, while the home-directory and shell fields can guide a follow-up check. Use policy records when the classification affects access decisions.
How to List All Users in Ubuntu Step by Step
Choose a lookup scope first: all accounts the host resolves, local entries only, or a UID-based subset.
Step 1: List accounts from the system database
Query the system account database through NSS to see records the host can resolve. This can include directory-backed entries when those sources are configured.
getent passwd
Step 2: Print only local login names
For a compact list limited to local passwd-file entries, extract the first colon-separated field. This avoids displaying UID, home-directory, and shell details.
cut -d: -f1 /etc/passwd
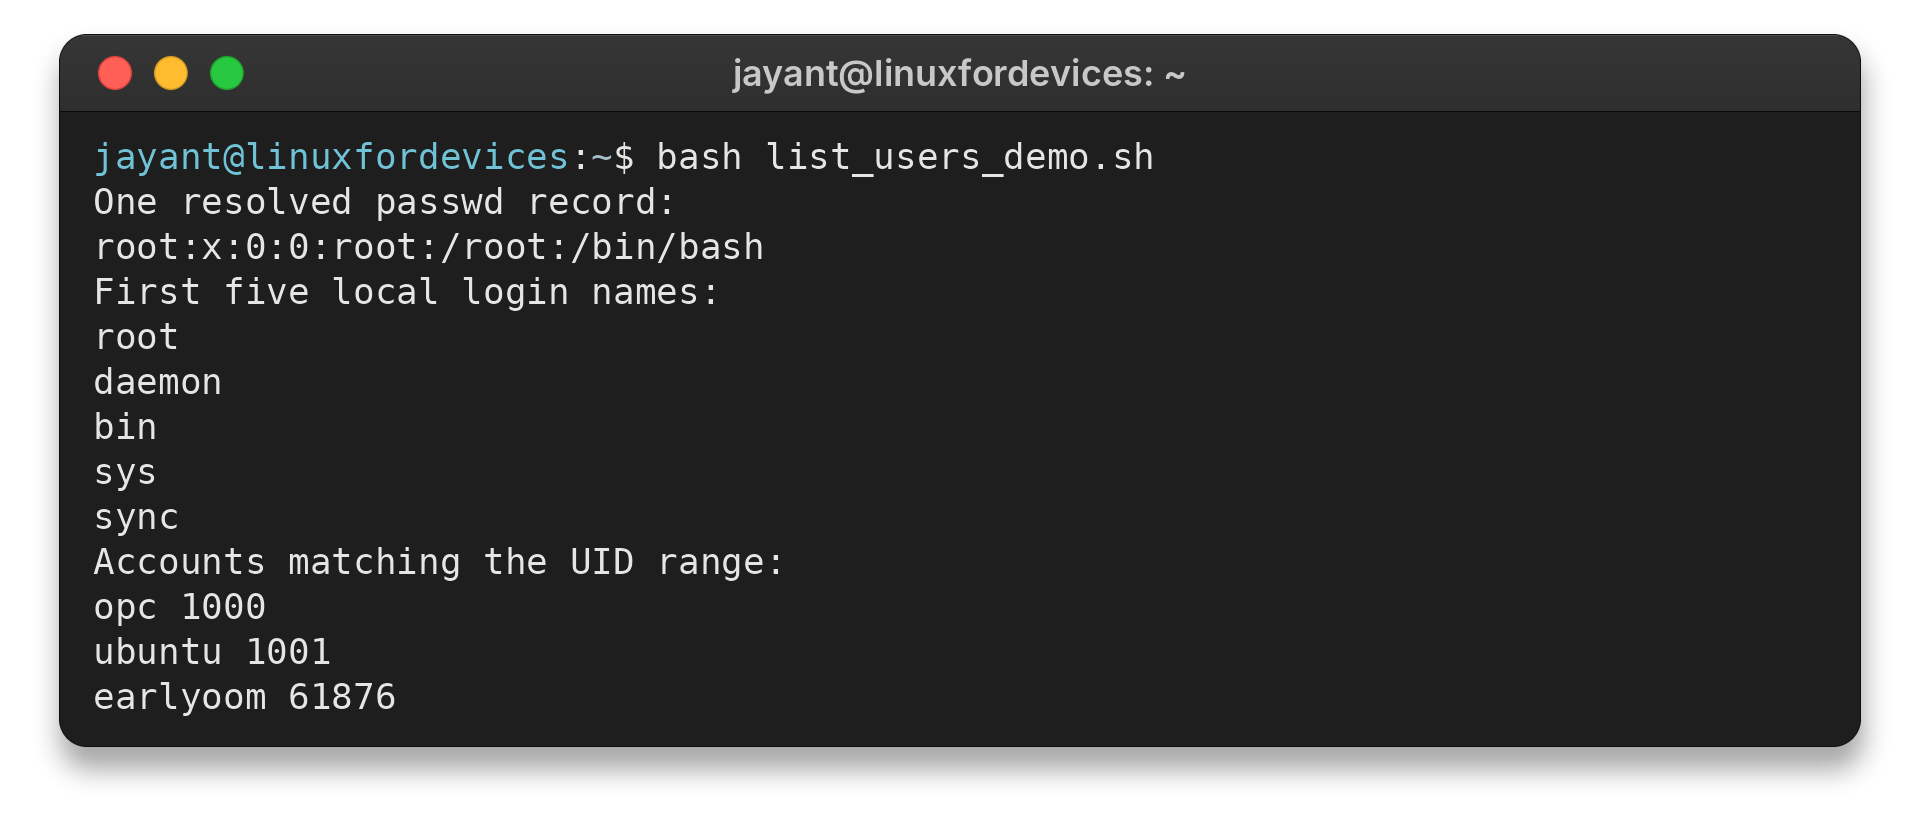
The displayed UID sample includes earlyoom, a service account. Its presence is a concrete reason to inspect the result rather than label every UID match a person.
One resolved passwd record:
root:x:0:0:root:/root:/bin/bash
First five local login names:
root
daemon
bin
sys
sync
Accounts matching the UID range:
opc 1000
ubuntu 1001
earlyoom 61876
getent passwd | cut -d: -f1
After exporting names for a report, record which command produced the file and when it was collected. A saved listing can help compare inventories, but later account changes will not update that copy. Avoid using an old export as proof of current access.
When a downstream script consumes the output, preserve one name per line and quote the file path if you redirect it to a path containing spaces. Do not parse the full colon-delimited line with whitespace tools, since the fields have a different separator.
Some hosts use a different range for locally created accounts, and directory services can assign UIDs according to their own policy. A threshold copied from another machine can therefore omit valid people or include automation accounts. Check the host’s login policy before using a filtered list for an audit.
The shell field can add context, but it is not a dependable identity test on its own. Administrators can assign an interactive shell to a service account or disable interactive login for a person who still has an account. If the purpose is to establish who may authenticate, consult the account source and access policy rather than infer that from a name or shell.
Step 3: Filter for likely regular accounts
Ubuntu’s documentation describes common UID ranges for system and regular users, with regular accounts conventionally starting at UID 1000. Use the UID field to make a first-pass list, but treat the threshold as a local convention rather than a universal definition.
getent passwd | awk -F: '$3 >= 1000 && $3 < 65534 {print $1}'
Here $3 is the UID field. The range starts at 1000 and stops before the commonly reserved nobody UID of 65534. Check local policy before changing either bound.
Include the UID when you need to review why an entry matched the range:
getent passwd | awk -F: '$3 >= 1000 && $3 < 65534 {print $1, $3}'
The second column exposes the number that caused each record to match. Compare it with the UID policy documented for that host.
Step 4: Check one account by name
getent passwd username
getent passwd | cut -d: -f1 | sort
Sorting changes display order only. It does not change which sources were queried, and it can make comparison with the original lookup order harder. Use it for a report intended for scanning, not when source order matters.
Which User List Should You Trust?
Choose a list by the scope you need: local records or accounts available through system lookup. The table maps each question to a command.
- Local records on disk: cut -d: -f1 /etc/passwd.
- Accounts resolved by the host: getent passwd.
- Example account record: getent passwd username.
- Likely regular accounts: filter field three using the host’s UID convention.
For the related task of inspecting a user’s group memberships, see how to find the groups of a user in Linux. To list group records instead, use the guide to listing all groups in Linux.
For scripts, handle an empty keyed lookup explicitly. Avoid piping a broad listing into an unanchored text search, because fields other than the login name can contain the searched string.
Keep a diagnostic read-only. The listing commands shown here do not create, lock or remove accounts. Account changes have separate commands and consequences, so an inventory result should lead to a deliberate review rather than an automatic change.
Confusing results often come from mixing up the source being queried, the meaning of a UID, or the fields in a passwd record. Match the symptom to the intended lookup before treating the output as evidence that an account does or does not exist.
Common Account-Listing Errors
| Case | Symptom | Fix |
|---|---|---|
| Substring search matched the wrong record | A name appears inside a home path or comment | Run getent passwd username with the exact login name |
| Directory account missing from full list | A known remote login is absent from enumeration | Run getent passwd username and inspect /etc/nsswitch.conf |
| UID filter returned a service account | A result has a high UID but is not a person account | Check its purpose and local UID policy before classifying it |
| No output from keyed lookup | The command prints no passwd record | Confirm spelling, then check whether its account source is available |
A listing is often the first input to a cleanup or migration plan, but it should not drive account changes by itself. Confirm ownership with the system administrator or directory source, then follow the documented account lifecycle. Removing a name from a report does not revoke credentials or sessions.
For a machine-readable export, preserve the original delimiter until you have selected the fields your next tool needs. A colon can occur in other data formats, so do not split on spaces or assume that every comment field is empty. The fixed field order is what makes delimiter-aware extraction dependable.
When the list is used in a shell script, quote variables that contain a login name and handle a command that returns no record. These habits prevent a missing name from being mistaken for a successful lookup. Keep a human-readable full record available during troubleshooting so the UID and shell can be inspected.
Use a keyed lookup for a particular account, then compare its returned fields with the source you intended to check. If the host resolves the name but a local-file scan does not, the difference is about source scope, not necessarily a malformed record. Document that scope alongside any exported inventory.
For routine checks, prefer a command that answers one clear question. Print usernames for a compact roster, retain full records for field-level diagnosis, and apply a UID condition only when the local policy gives that number a defined meaning. This keeps the result useful without presenting a heuristic as an account classification.
Conclusion: Choose the Account Source First
Use getent passwd for accounts resolved through NSS, and extract field one from /etc/passwd for local names only. A UID filter can help narrow the output, but confirm the system’s account policy before treating its results as human users.
For authoritative field definitions, consult Ubuntu’s passwd manual page and its user management documentation.
FAQ
These answers cover common questions about account-list scope and filtering.
How do I list only usernames in Ubuntu?
Run cut -d: -f1 /etc/passwd for local usernames. Use getent passwd | cut -d: -f1 when you want usernames from configured NSS sources.
Does getent passwd include remote users?
It can. getent queries the passwd sources configured through NSS, so directory-backed systems may return remote accounts as well as local ones.
How can I distinguish regular users from system accounts?
A UID threshold such as 1000 is a common first-pass convention on Ubuntu, not a definitive test. Check local UID policy and account purpose, because shells and UID ranges can vary.