
Puppy Linux is a family of small distributions with different desktops and package tools. You can boot a selected build from USB without installing it to your internal drive. For a first test, I recommend live boot so you can check essential hardware before deciding whether changes should persist.
What Puppy Linux includes, and what it does not
The Puppy Linux project describes Puppy as a family of distributions that share tools and conventions. The release you download still determines its base, architecture, desktop, and package manager.
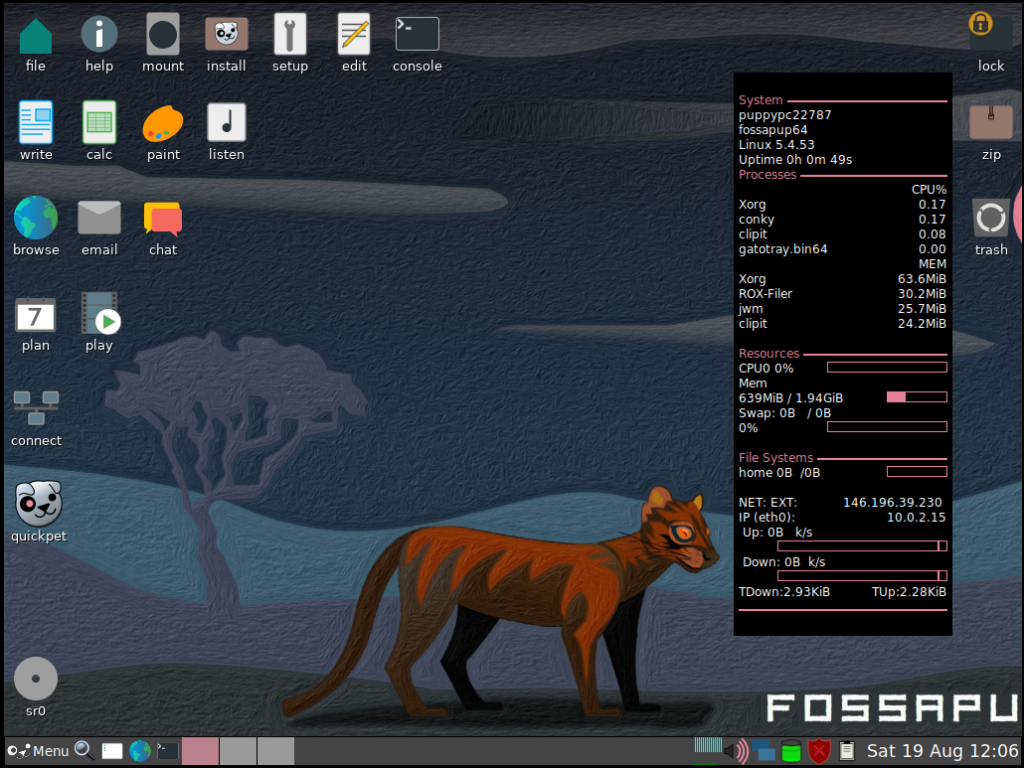
I compared the current TrixiePup64 page with the screenshots below: it lists Wayland and Retro X11 variants plus a 32-bit Retro option, while the screenshots show an older FossaPup desktop and tools.
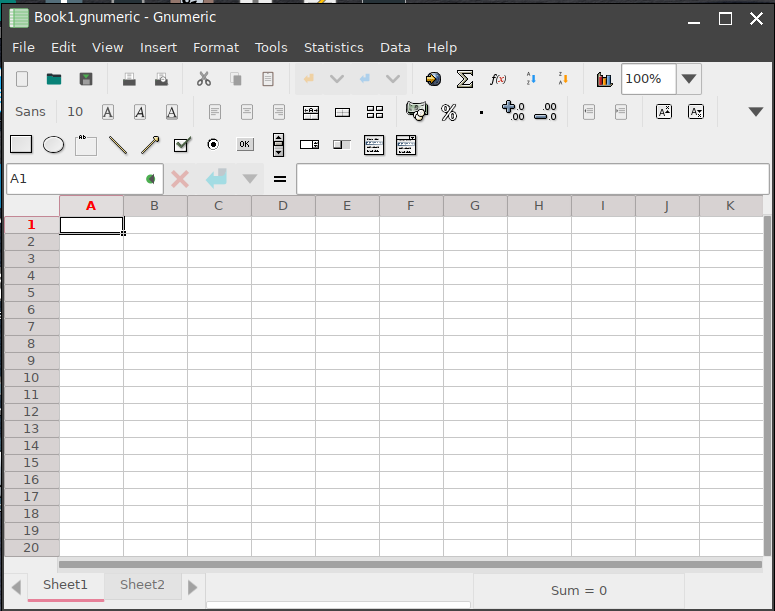
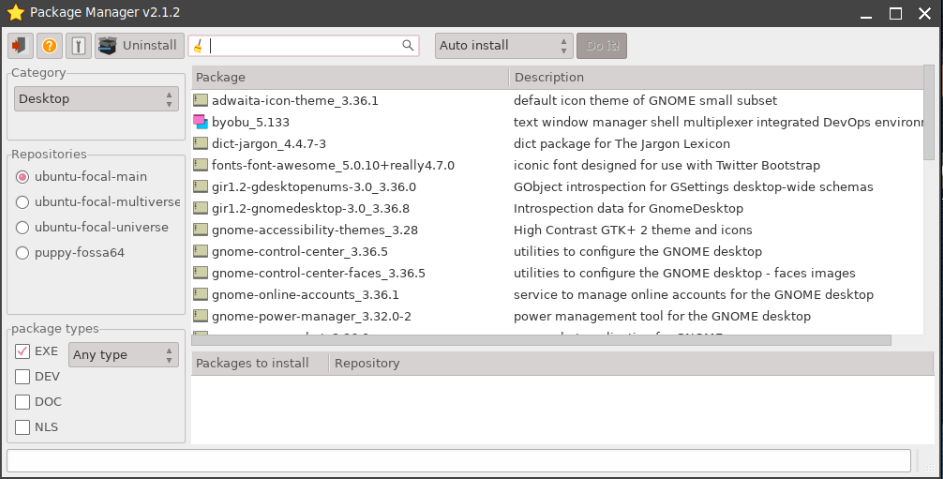
I kept the four screenshots because each shows a Puppy interface from an older build, not a stand-in for every current release.
The included apps vary too. These older Gnumeric and Puppy Package Manager screenshots show one build’s apps and package sources, while current releases make different selections.
If you want a familiar Ubuntu desktop rather than a Puppy-specific build, compare Ubuntu and Lubuntu before choosing a distribution. Puppy is a separate family with its own build choices.
Choose a Puppy build before downloading
Start at the project’s download page, then open its linked Distro Collection. I chose the collection as the starting point because it separates architecture and desktop variants instead of naming one universal “latest” ISO. Choose the build that matches your processor architecture and read its release notes before downloading.
| Check | Why it changes your choice |
|---|---|
| Architecture | The ISO must support the computer’s processor. The collection lists 32-bit and 64-bit options separately. |
| Base and release | A Debian-based Puppy and an Ubuntu-based Puppy can ship different package sources and application versions. |
| Desktop | Wayland, X11, and window-manager choices change the interface and may affect older graphics hardware. |
| Release notes | They state the build’s current boot, hardware, and package details. Do not infer them from screenshots of another Puppy. |
The TrixiePup64 release page is one concrete example: it describes Debian-based Wayland and Retro X11 variants, plus a separate 32-bit Retro variant. Read the page for the ISO you plan to use rather than assuming that the latest-looking name is right for every computer.
I found no single RAM figure that applies to every Puppy build in the project pages. Check the chosen ISO’s hardware notes and use the live session to test your computer.
Try Puppy Linux from a USB without installing it
The project says you can boot Puppy live from removable media without installing it to the computer. That makes a live session the sensible first test when you want to check the desktop, network, display, and input devices.
Download the ISO for your chosen build
Use the release page or official collection entry for the exact Puppy build you selected. Check the architecture and the release notes before moving to the USB step.
Write the image to a spare USB drive
Open a trusted image-writing app on your current operating system and select the Puppy ISO and a spare USB drive. The writer erases the selected USB. Copy off needed files first, then check the target drive before starting.
The project’s installation guide describes its Linux image-writing route and tells users to check the target device before writing. Formatting the flash drive later is a separate task covered in our USB formatting guide for Linux.
Boot from the removable device
Restart the computer and open its one-time boot menu, then choose the USB drive. The key differs by manufacturer, so check the computer’s manual if the menu does not appear.
Let Puppy reach its desktop and check the devices you care about. Do not start an installer, repartition an internal disk, or choose an internal drive as an image-writing target when your goal is only to try the desktop.
Choose what happens to your changes
A live Puppy session and a persistent Puppy setup are different choices. If you decline a save when the build asks at shutdown, changes made inside that session may be lost. Ordinary files you deliberately save to another mounted drive remain on that drive.
A save file or save folder lets a Puppy build restore supported settings and changes on a later boot. The exact prompt and write behavior vary by build and boot mode, so follow the selected release’s instructions and keep important files backed up separately.
| Choice | What persists | When to use it |
|---|---|---|
| Live, no save | Session changes may disappear at shutdown. Files saved to another drive stay on that drive. | First test, or a one-time session. |
| Save file or folder | Supported settings and changes return on a later boot. | You want a portable setup with saved changes. |
| Frugal install | Puppy files live in a directory and can use a save. | You have tested the build and want it available from a boot menu. |
If Puppy does not show a separate data drive, use its desktop tools or consult our guide to mounting a USB drive in Linux. Do not save your only copy of important files inside an experimental setup.
When a frugal install makes sense
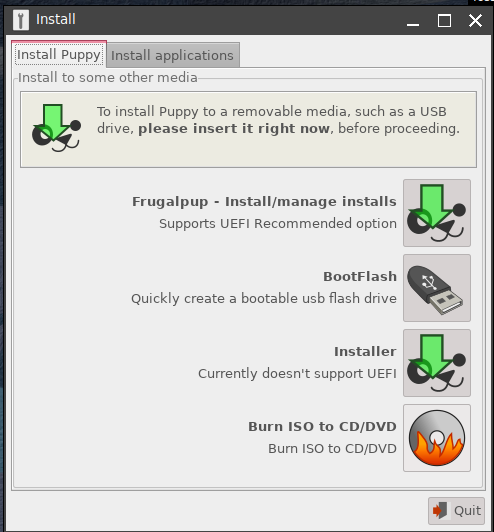
A frugal install places a build’s system files in a directory and uses a bootloader to start them. The Puppy project recommends frugal or USB installation, and describes the USB option as a type of frugal install.
Choose this route only after the live test works and you want Puppy installed to a directory on a drive and available from the boot menu. Follow the selected build’s own installer guide. Do not copy partition steps from a tutorial for a different Puppy release.
You do not need to repartition a disk just to try Puppy live. If your plan does involve changing partitions, read about Linux partitioning tools, make a separate backup, and confirm the target device before applying any change.
- Test the desktop, network, and essential devices from the live session.
- Read the instructions for the exact Puppy build and confirm where its files will go.
- Back up important files before any internal-drive installation or bootloader change.
Boot and compatibility problems to check
If the USB does not appear in the boot menu, start with the device and firmware checks below.
| What happens | Check next |
|---|---|
| The USB is missing from the boot menu. | Confirm the image writer finished and check the computer manual for the one-time boot menu. |
| Firmware rejects the image. | Check the selected Puppy release notes and Secure Boot requirements before changing firmware settings. |
| The desktop starts but a device is missing. | Check the release’s hardware notes and test that device with a supported build. |
Secure Boot is a firmware security setting, not a Puppy package option. Read the risks and device-specific steps in our Secure Boot guide before deciding whether a change is necessary. Do not disable it just because an unrelated tutorial did.
A working desktop also does not prove every device works. Test Wi-Fi, sound, graphics, suspend, and any hardware you depend on during the live session, then check the specific build’s support notes before installing it.
Test Puppy live before you commit
Start with a live boot and use it to check what the chosen build supports before saving changes or installing Puppy:
- Match the ISO to the computer’s architecture.
- Use a spare USB with no files you need.
- Boot live and test the hardware before installing.
Puppy Linux questions
Can I try Puppy Linux without installing it?
Yes. The Puppy Linux project documents live boot from removable media. Boot from a USB or optical disc and do not start the installer if you only want to test the desktop.
Will Puppy Linux save my changes when I shut down?
That depends on the build and whether you create or use a save file or folder. If you decline the save prompt, session changes may be lost. Follow the selected release’s instructions.
Is Puppy Linux one distribution with one desktop?
No. Puppy is a family of builds. Current examples include TrixiePup64 Wayland and Retro X11 variants, and the desktop and package tools differ by build.
Does Puppy Linux need to replace Windows or Linux on my drive?
No. You can boot a live Puppy session from removable media without installing it to the internal drive. A frugal install is a later option when you want Puppy files on a drive and a bootloader entry.