
SNMP (Simple Network Management Protocol) is a Network Monitoring Protocol that is used extensively across many networking devices such as your home routers, switches, hub, printers etc. Almost all modern networking devices come with support for this popular managing protocol.
You can turn on services, restart your services and monitor your network remotely with the help of this network. It typically uses the UDP protocol, which is part of the TCP/IP suite. In this article let us dive deep and truly understand the SNMP protocol and how to install, set up and use SNMP in Linux.
Understanding SNMP and Its Components
SNMP has four parts: SNMP Manager, SNMP Agent, Managed device and MIB. SNMP Manager is used to monitor the network traffic which uses the SNMP Agent. SNMP Agent is stored inside the managed devices and help communicate to the SNMP Manager.
It also stores and retrieves information. Lastly, MiB (Management Information Database) is a virtual information storage. There are three main versions of SNMP, with the third being the latest and most advanced.
Steps to Install and Setup SNMP on Linux
To install SNMP in Linux, first check if it’s already installed using ‘sudo systemctl status snmpd’. If not installed, update and upgrade packages, then install snmp and snmpd using ‘sudo apt install snmp snmpd’. Edit the configuration file, restart the SNMP service, and test with the snmpwalk command.
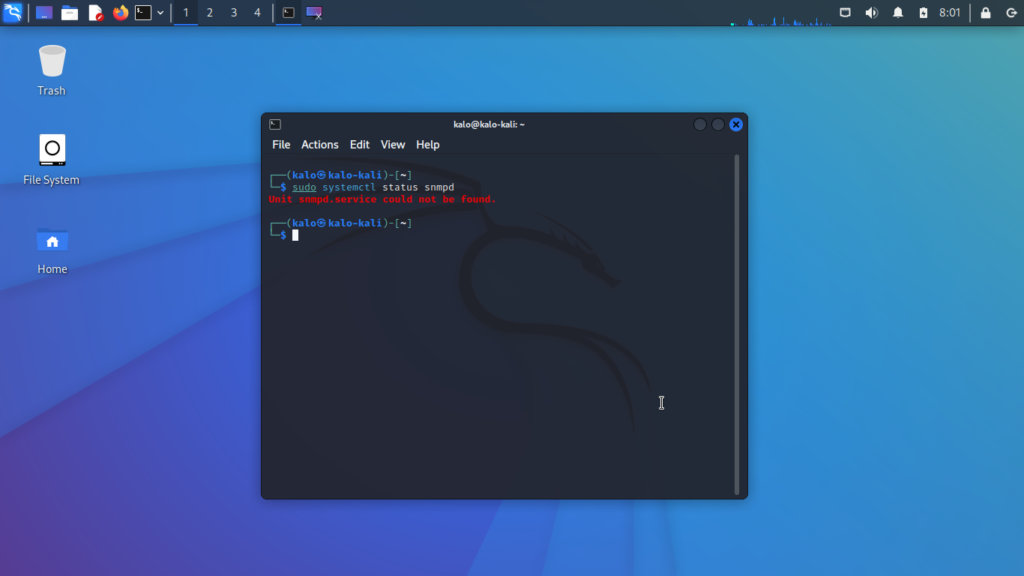
First, we’ll have to check whether we have snmp installed on our system, for this we’ll use the systemctl command. Run the below command to check for the status of the snmp daemon:
sudo systemctl status snmpd
1. Installing SNMP and SNMPd
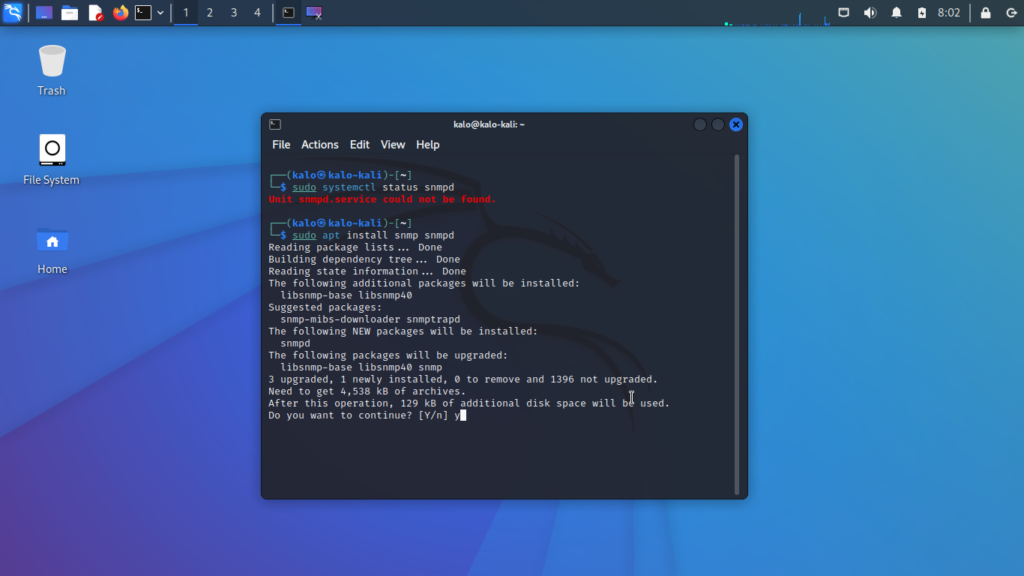
We don’t have the daemon installed in our system. SNMP consists of two parts: snmp and snmpd, so go ahead and install both the packages. Run the below command:
sudo apt update && sudo apt upgrade
sudo apt install snmp snmpd
2. Backing Up and Editing the Configuration File
It is recommended to keep the original config file in a backup folder, so create a backup folder in the home directory and copy the config file there.
mkdir backup
sudo cp /etc/snmp/snmpd.conf /home/{username}/backup/
Now that you have the file backed up you can go ahead and edit the config file as you like. We are using vim as our editor you can use your preferred editor.
sudo vim /etc/snmp/snmpd.conf
Now you can take a look at the default configuration here. The sysLocation is the location of the box and it could be named anything. You can store the address of the machine here. The sysContact stores the contact person’s name. Under rocommunity, you can also change it to the following or something original that you come up with:
#rocommunity public localhost
rocommunity mycommunity default  -V systemonly
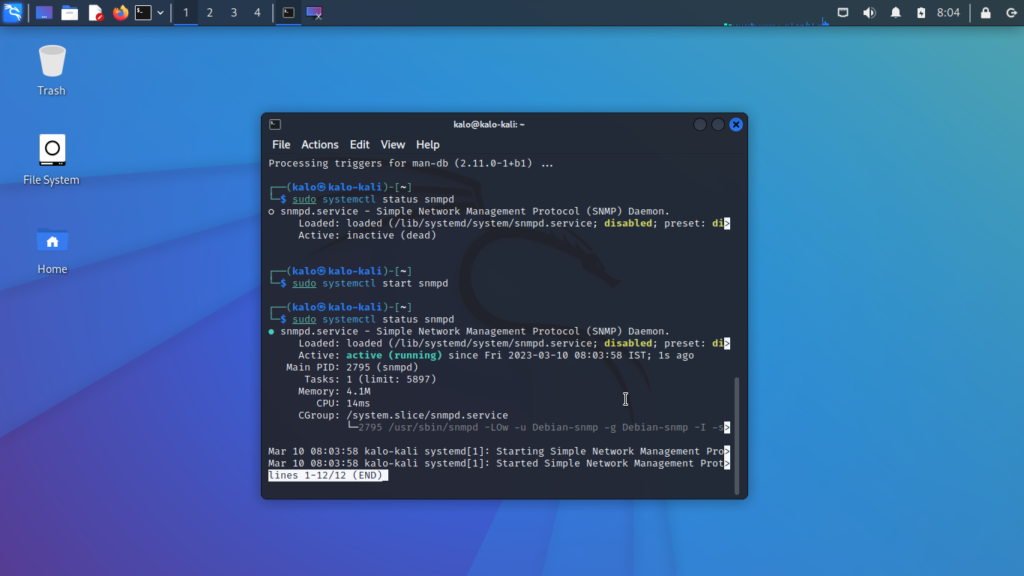
3. Restarting and Checking SNMP Service Status
You can comment out the similar lines with rocommunity6, if you don’t want to use IPV6. Now restart the service by using the following command:
sudo service snmpd restart
Now check the status of the SNMP service:
sudo systemctl status snmp
4. Testing SNMP with snmpwalk
You can now test out if everything is working properly by using the snmpwalk command, give the below command and you could see results popping in your terminal screen:
snmpwalk -c public -v1
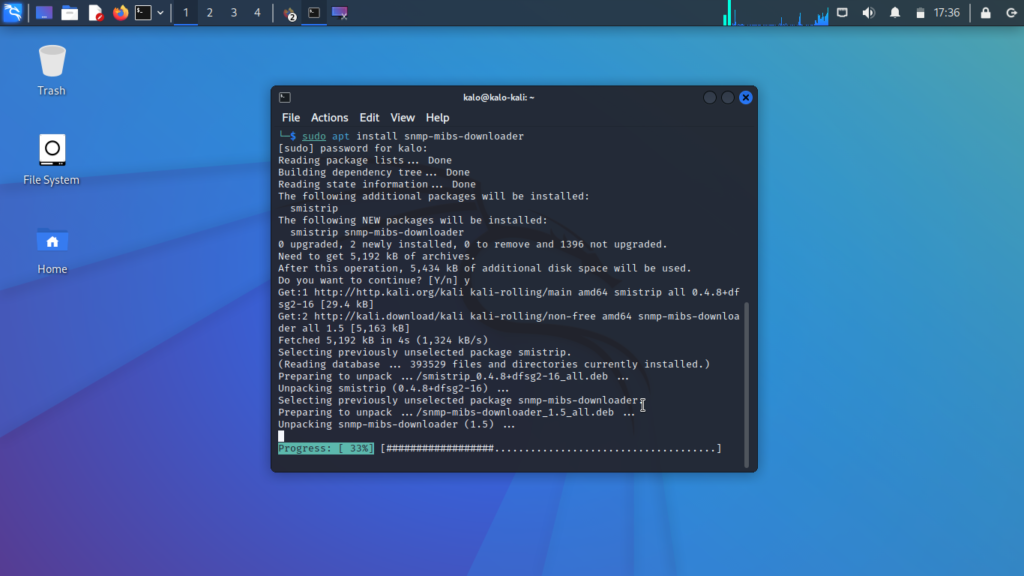
5. Installing Additional MIB Files and SNMP Utilities
You can also use the additional MiB files and actually use the snmp-mibs-downloader package:
sudo apt install snmp-mibs-downloader
After you restart the system you can check if the SNMP daemon is running by running the chkconfig.
chkconfig snmpd on
chkconfig --list snmpd
Just make sure that the states in numbers 2,3,4 and 5 are on. Those are respectively the single-user mode, No-GUI, Research Usage and Multi-user mode. You can also additionally use the net-snmp-utils package for additional utility and configuration however for most users that won’t be necessary. Use the below command to install the package:
sudo apt install net-snmp-utils
Conclusion
I hope you have got to learn something new from this article. SNMP is a very useful tool to monitor your network and requires some amount of pre-requisite knowledge about the config files in order to properly configure it. In this article, we discussed how to check if SNMP is installed on our system, how to install SNMP if its not installed, and finally how to properly configure it for our system. Check out this article about general network configuration in Ubuntu! As always thanks for reading and see you on the next one!
With SNMP properly installed and configured, you can effectively monitor your network and optimize its performance. How will you leverage SNMP to enhance your network management capabilities?