

Spotify is perhaps the most popular streaming platform worldwide. On Linux, this platform has some caveats (such as the controversial use of Electron in the client) but it works really fine if you use it in a web browser.
However, the free tier of Spotify is sometimes annoying to use even with a third-party client on Linux. So how about you create your own Spotify? Without ads, all your files are stored locally so you wouldn’t need an algorithm to determine which song is going to play next.
Navidrome is an exceptional piece of software that you can install and host on an old PC/Laptop or on a Raspberry Pi, which will let you play locally stored media files in a Spotify-like self-hosted website. It is entirely open source and therefore very secure. And of course, you will need MP3 files stored locally to properly use this application, which understandably not many people will have or are willing to do. This also limits exploring new singers or genres of music, unless you use YouTube Music to look for new Music all the time.
In this tutorial, we will try to install Navidrome on a Raspberry Pi on a Debian 12 system, so you can follow along if you use any of its derivative system such as Ubuntu server or Raspberry Pi OS.
Initial System Setup for Navidrome
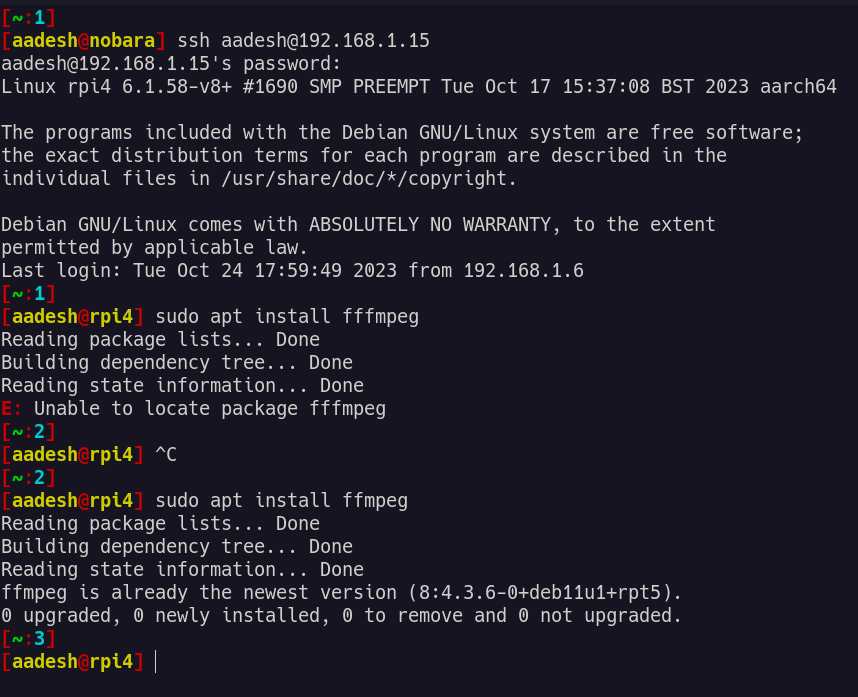
Using SSH, log in to your local server or an old PC/Laptop (if you have a screen attached to an old PC/laptop, then you don’t have to use SSH). Now, from the Terminal, install FFmpeg and a text editor, since Navidrome has a dependency on this FFmpeg and we will need a text editor to edit the configuration file.
sudo apt update && sudo apt install nano ffmpeg
Once installed, we have to now set up proper user and group permissions to the directory structure where we will install the application and store the configuration files.
Configuring User and Group Permissions
Since this application is not available in the repositories of Debian/Raspbian/Ubuntu, we have to install this in the /opt directory. And hence we have to set up the correct user and group permission for the directories in which our application and the configuration file will reside. Type the following commands to create the directories as well as set up the permissions:
sudo install -d -o $USER -g users /opt/navidrome

sudo install -d -o $USER -g users /var/lib/navidrome

If you are using Raspbian, then instead of $USER, just type ‘pi’, and if you’re using Debian or Ubuntu server, then you have to use your username.
How to Download and Install Navidrome
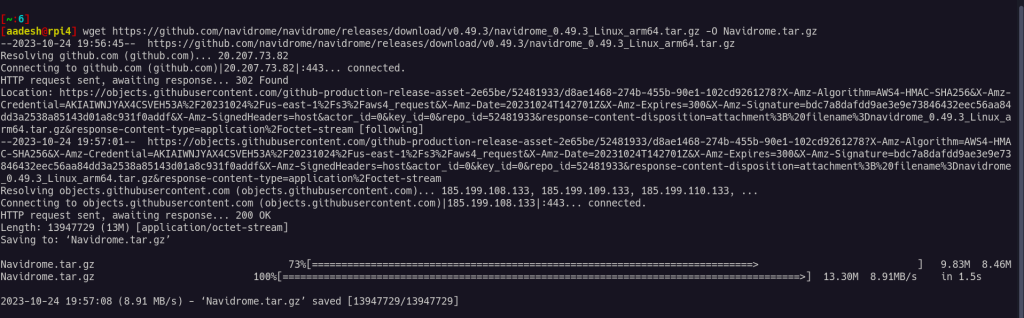
Once the correct file permission is set up, you can download the latest release of Navidrome from their GitHub page. Note that the latest release of Navidrome when this article was being written was 0.49.3, but you have to make sure to change the release version in the commands below to the latest available version.
wget https://github.com/navidrome/navidrome/releases/download/v0.49.3/navidrome_0.49.3_Linux_arm64.tar.gz -O Navidrome.tar.gz
If you are using a Raspberry Pi 3/4 or Pi Zero 2, you have to download the arm64 version, for Raspberry Pi 1 and Zero, download armv6 and for Raspberry Pi 2, download armv7. If you’re downloading this on an old 32-bit computer, then you have to download the i386 version and for a 64-bit computer, download the x86_64 binary.
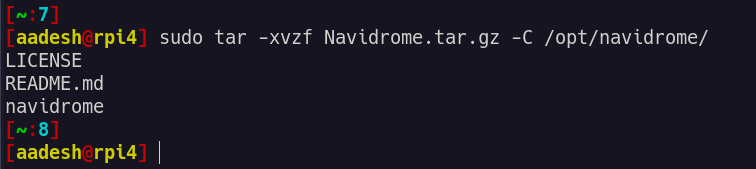
Once the file is downloaded, we have to extract it into the /opt directory. Just type the following command in the Terminal window:
sudo tar -xvzf Navidrome.tar.gz -C /opt/navidrome/
And then finally add this directory to the username and group like we did earlier.
sudo chown -R $USER:users /opt/navidrome
Again, replace the $USER with your username if you are on Debian or Ubuntu, use pi if you are using Raspbian.
Creating and Editing the Navidrome Configuration File
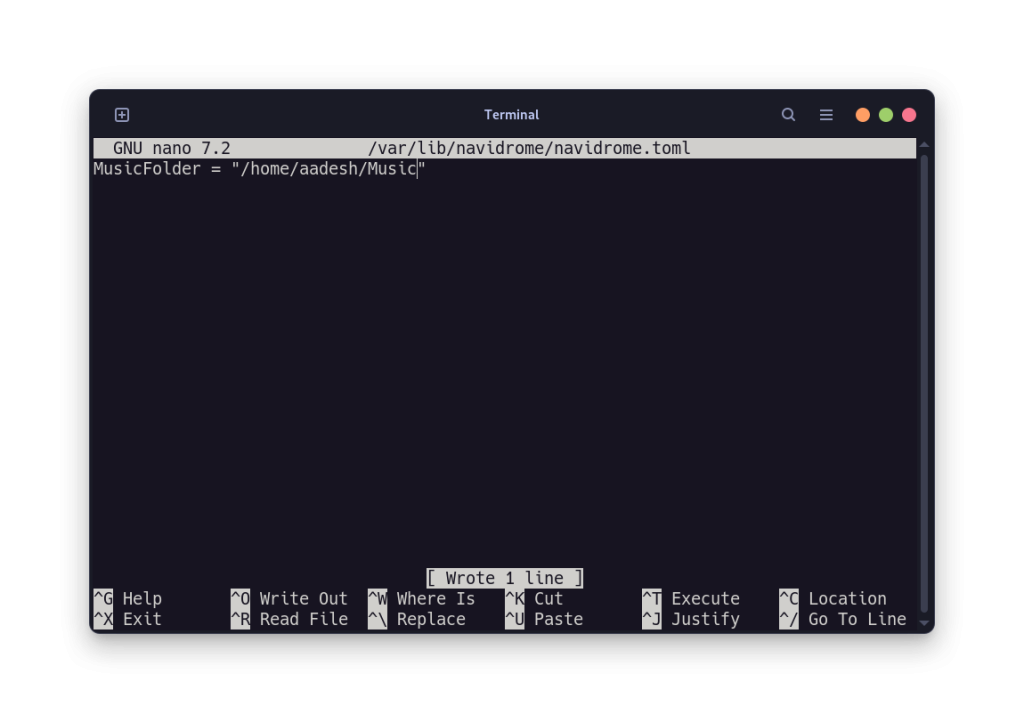
Finally, you can create the configuration file, which will essentially store where your music is located on the local drive:
sudo nano /var/lib/navidrome/navidrome.toml
Once the new file is created and opened, just add the following line to it:
MusicFolder = "/path/to/library"
When done, just save and close the file by pressing Ctrl+O, Enter and then Ctrl+X respectively.
Setting Up Navidrome as a systemd Service
If you want Navidrome to run every time the system reboots, then you have to create a systemd unit which will run and execute the binary file on every reboot. This is relatively easy and all you have to do is to copy-paste a few files in a file. Create a new file:
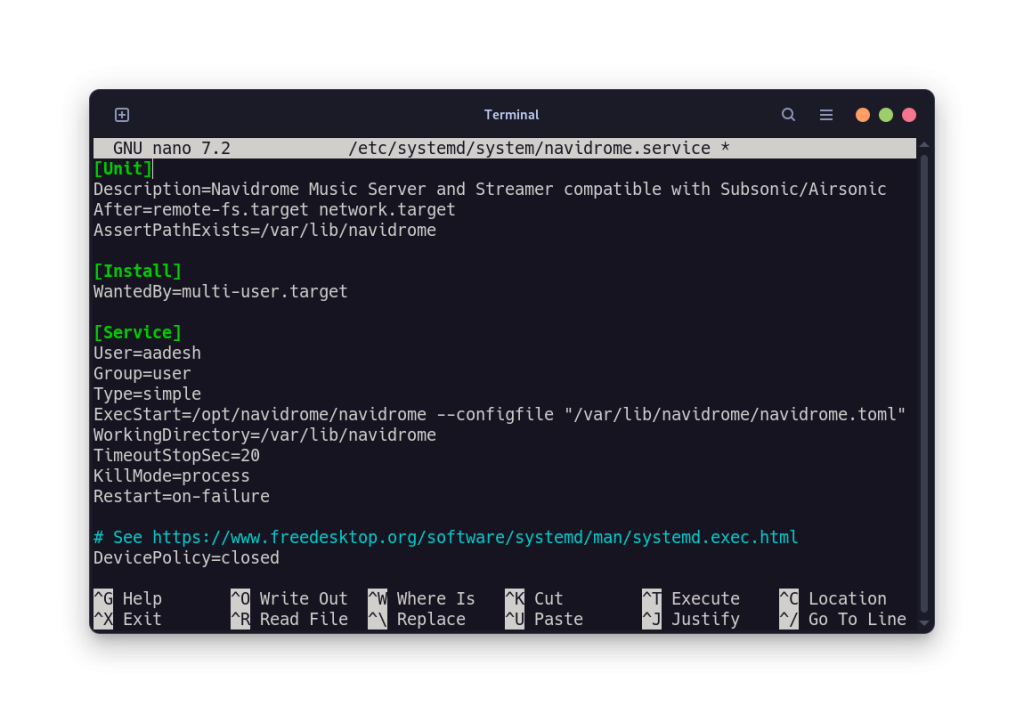
sudo nano /etc/systemd/system/navidrome.service
Now, copy and paste the following lines in the file:
[Unit]
Description=Navidrome Music Server and Streamer compatible with Subsonic/Airsonic
After=remote-fs.target network.target
AssertPathExists=/var/lib/navidrome

[Install]
WantedBy=multi-user.target

[Service]
User=aadesh
Group=users
Type=simple
ExecStart=/opt/navidrome/navidrome --configfile "/var/lib/navidrome/navidrome.toml"
WorkingDirectory=/var/lib/navidrome
TimeoutStopSec=20
KillMode=process
Restart=on-failure

# See https://www.freedesktop.org/software/systemd/man/systemd.exec.html
DevicePolicy=closed
NoNewPrivileges=yes
PrivateTmp=yes
PrivateUsers=yes
ProtectControlGroups=yes
ProtectKernelModules=yes
ProtectKernelTunables=yes
RestrictAddressFamilies=AF_UNIX AF_INET AF_INET6
RestrictNamespaces=yes
RestrictRealtime=yes
SystemCallFilter=~@clock @debug @module @mount @obsolete @reboot @setuid @swap
ReadWritePaths=/var/lib/navidrome

# You can uncomment the following line if you're not using the jukebox This
# will prevent navidrome from accessing any real (physical) devices
#PrivateDevices=yes

# You can change the following line to `strict` instead of `full` if you don't
# want navidrome to be able to write anything on your filesystem outside of
# /var/lib/navidrome.
ProtectSystem=full

# You can uncomment the following line if you don't have any media in /home/*.
# This will prevent navidrome from ever reading/writing anything there.
#ProtectHome=true

# You can customize some Navidrome config options by setting environment variables here. Ex:
#Environment=ND_BASEURL="/navidrome"
Note that again you have to change the user and group in the above file. Finally, start the systemd service:
sudo systemctl daemon-reload
sudo systemctl start navidrome.service
sudo systemctl status navidrome.service
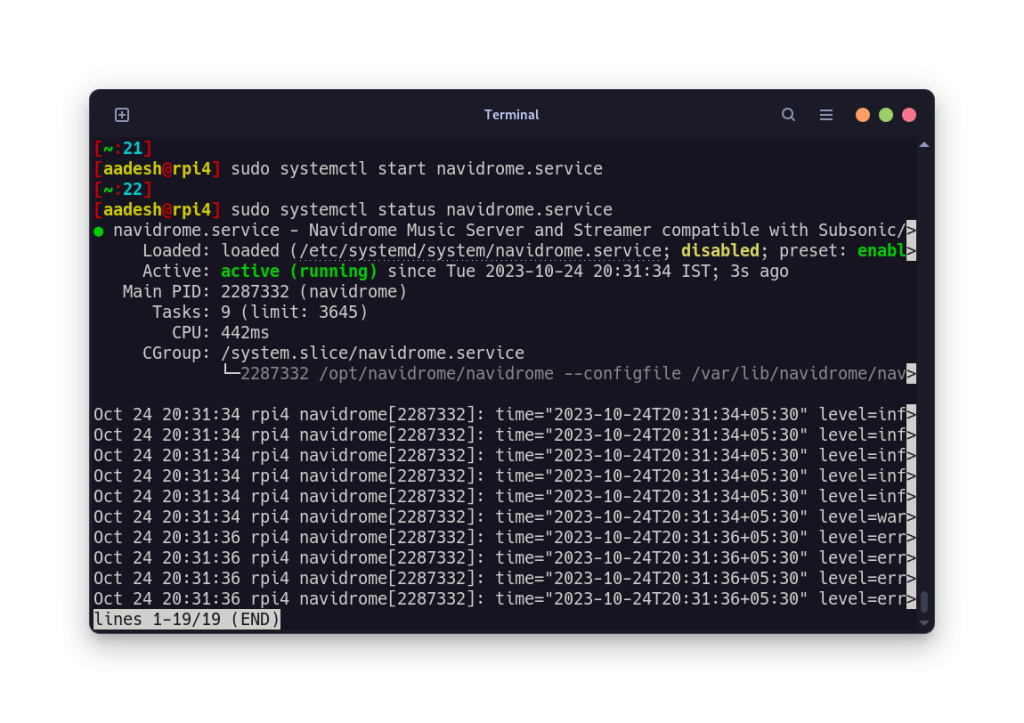
If the service is running successfully, you can enable it using:
sudo systemctl enable navidrome.service
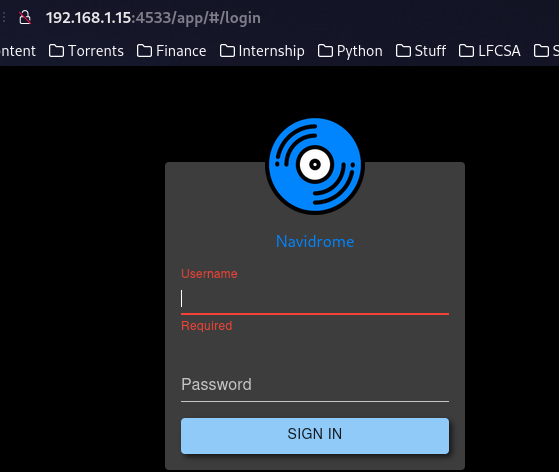
Creating Your Navidrome Admin Account
Now that the service is running successfully, we now have to log into Navidrome from a web browser. Open the following URL in your web browser: https:localhost:4533, and if you are hosting this on a machine connected on your local network, then simply replace the localhost with the IP address of that machine.
Once logged in, you can scan and manage all the music files, add other users so that your family can have different accounts on the service using the same Music files.
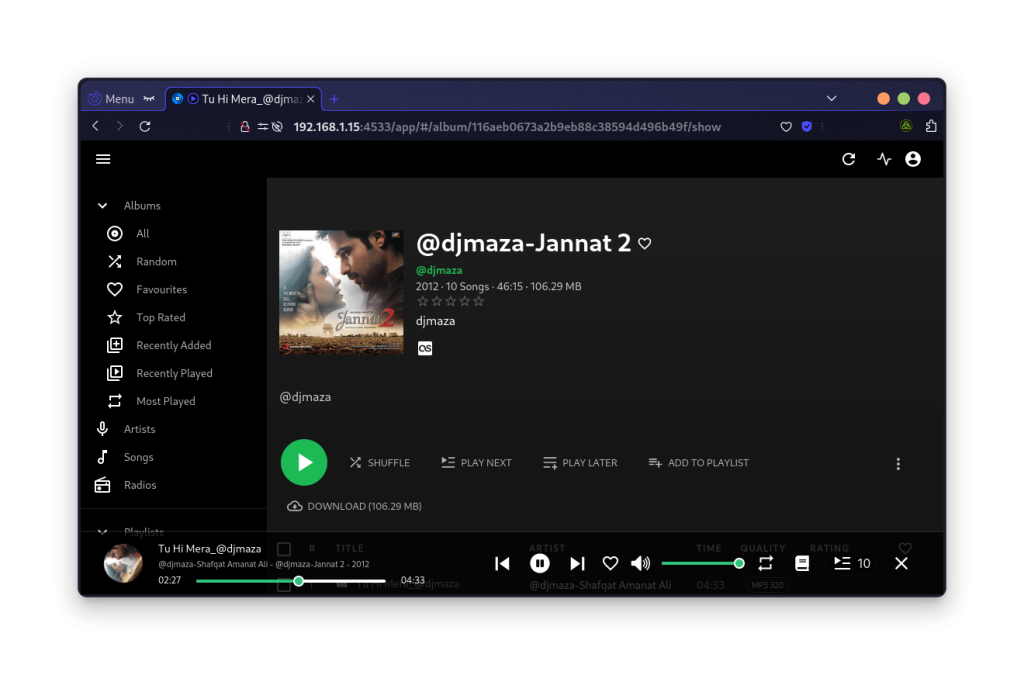
Final Thoughts on Navidrome as a Spotify Alternative
While not a perfect replacement, this application is still an excellent open-source alternative for Spotify if you are looking to set up a home server. This also supports multiple account creation, transcoding media in a supported format in the back end (using FFmpeg), and even custom themes like Nord, Gruvbox, and one Spotify-like Dark theme with green accent color.
What do you think about this application? Would you give up convenience for the sake of protecting your data and being algorithm-free?