

In this tutorial, we will be learning how to use the fuser command in Linux. There are many process management tool for Linux, fuser offers something different. Fuser lets you look for process using a particular file, a directory or a socket. With fuser you can then kill and manage these processes.
General Syntax of the fuser Command
To run the fuser command we will require the details of the file or socket for which we are looking processes for. This is the general syntax of the fuser command:
fuser [options] [file|directory|socket]
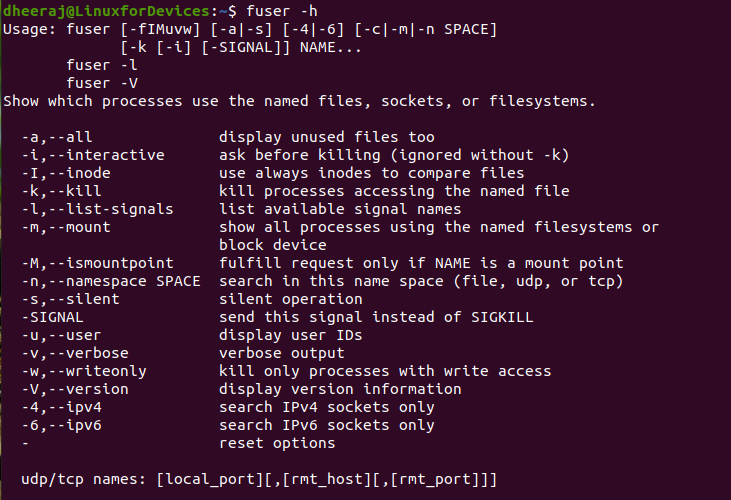
There are a list of options that you can use. You can see all these options by using the --help or -h option.
fuser -h
Listing all the Processes using a directory
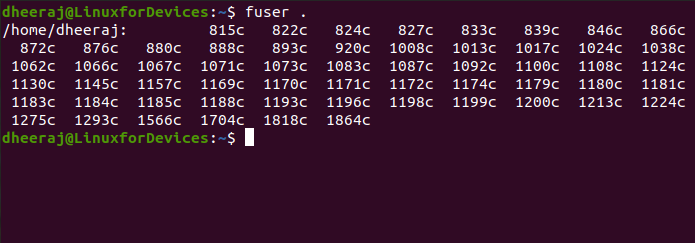
So let’s try running our first fuser command and check what all processes are using our home directory. Since here I am already in the home directory I will simply run the command using . as my directory name.
fuser .
This command lists out the PID of all the processes that are currently using the home direcotyr. When I run this on my machine this is what I see:
The output we see here is not that readable. To have a more verbose output we use the -v option.
fuser -v .
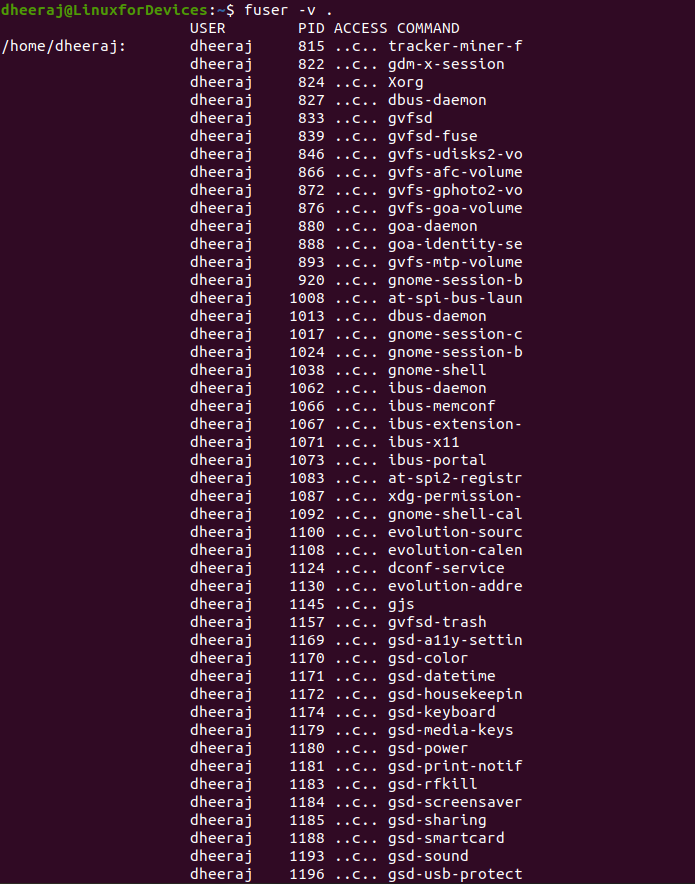
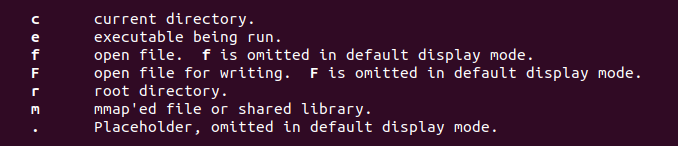
This lists out the user running the process, the process ID, the access type and the command that executes the process. You can check the details about access types by going through the man page of fuser (by running man fuser). Here are the details about all the access types:
Listing all the Processes using a file
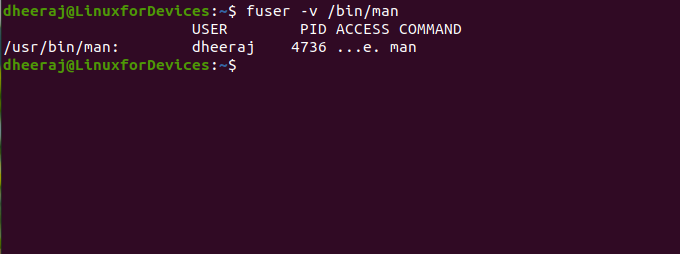
This is very similar to looking for processes using a directory. Simply run the command fuser -v [filename]. Here I am checking processes using an executable in bin directory.
Listing all the Processes using a socket
To look for processors using a socket we need to change the namespace to tcp or udp (by default which is set to file/directory). The genera syntax would be:
fuser -v -n [TCP|UDP] [SOClet]
or
fuser -v [SOCKET]/[PORT]
So here I am looking at processes using a TCP port.

By default this command will be searching processes for both IPv4 and IPv6 sockets. You can add the -4 option to only search for processes with IPv4 sockets and -6 option to only search for IPv6 sockets.
You can also search for specific ports with their name for example running fuser -v http/tcp will show processes using the http socket(80).
Killing Processes using the fuser Command
Through fuser you can also kill processes using a file, directory or socket. We need to use -k or the kill option.
fuser -k ./
The command above will kill all the processes using the current directory.
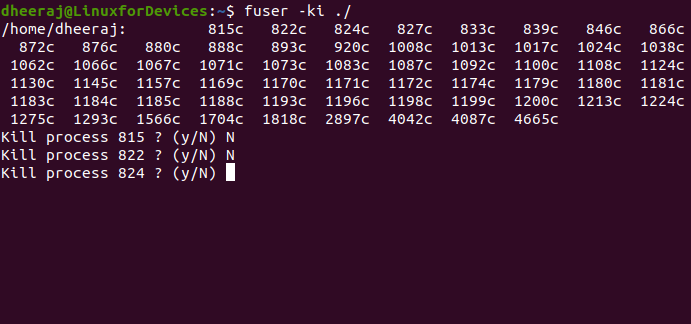
Here, if we wish to not kill all the processes we can use the -i option. This is the interactive option and it will prompt you before killing any process.
fuser -ki ./
You can also send a signal to the process by adding the -SIGNAL option as a parameter to kill the process. You can check the list of signals by running fuser -l.

To send any signal, you need to run the command fuser -k -SIGNAL where “SIGNAL” is the name of the signa you need to send. In the following command I am sending the ILL signal to all the processes using the home directory.
fuser -k -ILL .
Conclusion
I hope after reading this article you would be able to use the fuser utility to manage and monitor processes. You can also check out tutorial on other process management tools like top, htop, ps and pstree. Thank you for reading this article! Have a great day ahead! Cheers!