

Dig command short for ‘domain information groper’ is a networking command-line tool in Linux. Dig is used by administrators to perform domain name lookup and troubleshooting. It is popular because of its popularity, ease of use, and flexibility. dig is part of the BIND domain name server software suite.
Installation
If you don’t have dig on your Linux system, you can install it easily.
$ yum install bind-utils      #CentOS
$ apt-get install dnsutils    #Debian/Ubuntu
Simple dig command
If you perform a simple dig command on any website, like we have performed here for linuxfordevices.com
$ dig linuxfordevices.com
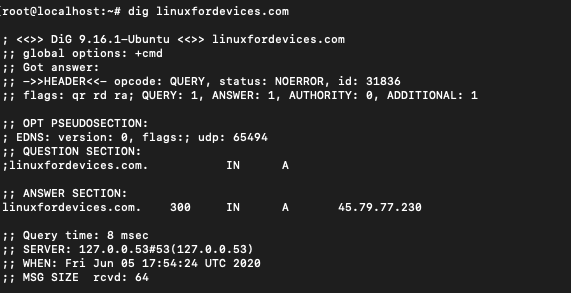
It gives you a large and complicated output. Let’s understand what the output means:
- Anything after ;; is to be read as a comment. The first line tells us the version of dig we are using. In this case 9.16.1
- The question section tells us what are we querying for. ‘IN’ stands for internet and ‘A’ stands for address.
- The answer section is the main part of the output. It gives the internet address for our lookup as 45.79.77.230
- The last section represents some stats for the lookup we performed.
Reduce the output size
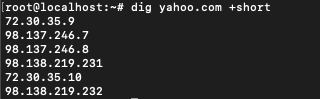
A lot of the information provided as output in $ dig command is not that useful. We can avoid all of it by using +short along with the $ dig command.
$ dig linuxfordevices.com +short

This command displays only the IP addresses of the host from the lookup. The default dig command produces the output in a verbose manner. Sometimes a domain can have multiple IP addresses.
Querying mail records
By default dig outputs only ‘A’ records. We can change this by using MX with the dig command. It will produce Mail Exchange records .
‘A’ and ‘MX’ are not the only types of records. There are several types of record like ‘TTL’, ‘SOA’, ‘NS’. Later we will see the command to query all the records together.
$ dig linuxfordevices.com mx
This produces a list of mail servers that are responsible for receiving mail on behalf of the server. In other words, it will list the SMTP servers. SMTP stands for simple mail transfer protocol.
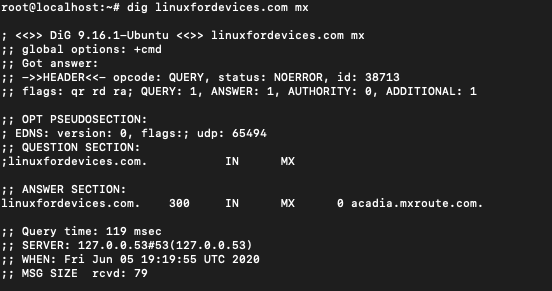
We can see that now instead of ‘A’ the record type is showing ‘MX’ which represents ‘Mail Exchange’. Instead of producing all the extra information we could have used +short to get a condensed output.
$ dig linuxfordevices.com mx +short

Query the name server
You can query the name of the server that is authoritative for that particular domain. A domain can have more than one name server which can indicate primary and backup servers for a domain.
$ dig linuxfordevices.com ns
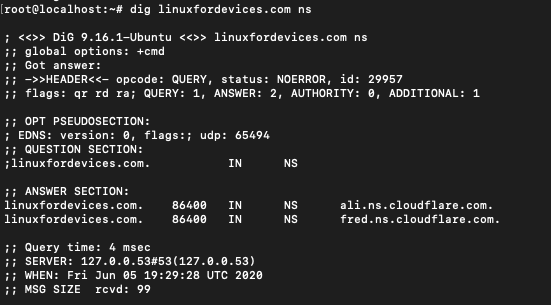
For our website we can see that there are two name servers.
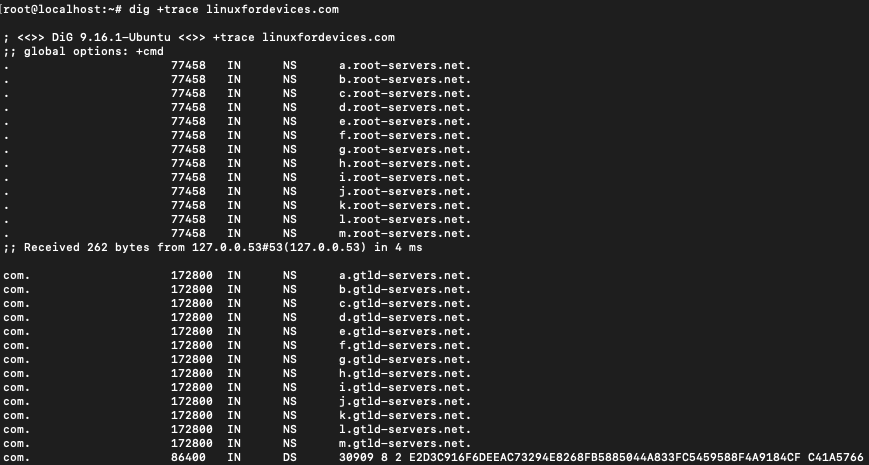
Trace the DNS path
This command lets you trace the path your query took in a hierarchal manner. It will show the list of all the root servers that were used to resolve the lookup.
$ dig +trace linuxfordevices.com
To get the output In a more condensed manner, use +short
$ dig +short +trace linuxfordevices.com
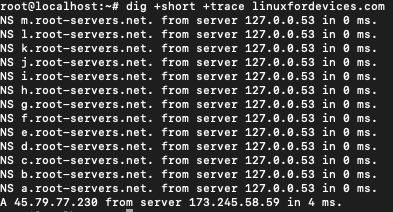
This shows the path that the query went through before it reached the final address. 45.79.77.230 in this case.
Customizing the dig output
The +noall flag is often used along with dig command to clear all the display flags that are on by default. Along with the +noall flag, +answer flag can be used to just show the answer section.
$ dig linuxfordevices.com +noall +answer

As we can see that only the answer section of the query is visible. The +question flag can be used to display the question section of the query.
$ dig linuxfordevices.com +noall +answer +question

The first line is the question section and the second line is the answer section. Compare this with the output of the simple dig command above.
+stat flag can be used to turn on the stats part of the output.
$ dig linuxfordevices.com +noall +answer +stats

Other flags that can be used are +comments, +cmd, +authority etc.
Reverse DNS lookup
A reverse DNS lookup can be performed by providing an IP address. The output gives the domain name and other information.
$ dig -x [ip-address]
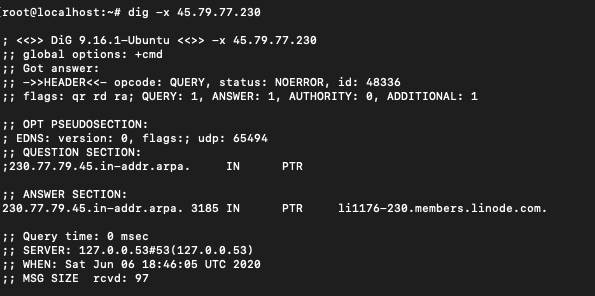
IP address 45.79.77.230 belongs to linuxfordevices.com and we performed a reverse DNS lookup using it. We can get the output in a concise manner using +short
$ dig -x [ip-address] +short

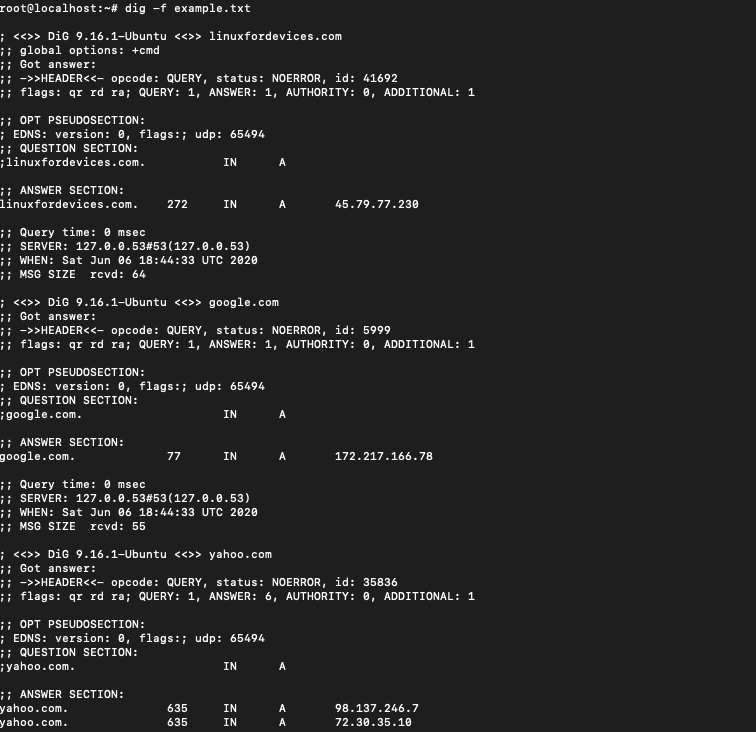
Querying from a file
DNS query can be performed in bulk from a file. Sometimes it saves a lot of time and manual effort to list all the domains in one file for querying. For this we will have to create a file with some domain names first. Linux cat command can be used for this purpose.
$ cat > example.txt
linuxfordevices.com
google.com
yahoo.com


The command that can be used for running a DNS query on the file is:
$ dig -f example.txt
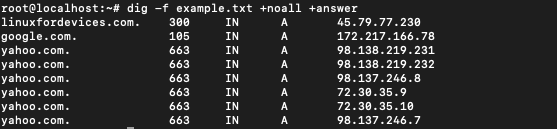
The output is too voluminous and will be difficult to handle in case we have too many domains in our file. To get the output in a concise manner we will just get the answer section.
$ dig -f example.txt +noall +answer
Querying all DNS record types
So far we have only seen a few records types. These are ‘A’, ‘MX’, ‘NS’. We have been able to query them individually by specifying the type explicitly. Using ANY keyword with dig command we can query all the types of records in a single query.
$ dig linuxfordevices.com ANY
To generate the output in a concise manner:
$ dig linuxfordevices.com ANY +noall +answer
This command like we saw earlier, will only generate the answer section of the query.
One important thing to note is that these are not the only records under DNS. There are other record types under the dig command such as TTL, SOA. We can query these explicitly by mentioning the record type along with dig command.
TTL stands for Time To Live and is used to specify the time before which the automatic refresh is to be performed.
$ dig linuxfordevices.com TTL
SOA stands for Start of Authority and contains administrative information.
$ dig linuxfordevices.com SOA
Conclusion
The dig command in Linux is very useful for gaining information about servers and performing DNS lookups. You can read more about the dig command on the man page.