
There are numerous media player applications available for you to use on Linux desktops such as MPV, Lollipop and the good old VLC media player. They’re easy to use and feature complete, although MPV does require you to learn some keyboard shortcuts.
In this article, we will take a look at the open source Cavalier music and audio visualizer, which is based on the CAVA terminal visualizer and is written in C# with GTK4 and LibAdwaita.
CAVA is a popular visualizer for people who use the cmus music player primarily on a window manager. The developers say that CAVA is not accurate and is just designed to look aesthetic and responsive, and it does the job well.
Also Read: Clapper — An easy-to-use frontend for MPV
Features of Cavalier
This application offers the following features:
- It has a beautiful and customizable interface.
- It has 11 drawing modes, including bars, waves, levels and particles, so you have a lot of choice on how this app looks.
- You can completely change the roundness of items, their offset, and the drawing area margin in the settings.
- You can also make this application to display sharp corners, which in my opinion just looks better.
- Window controls can be disabled in the settings for a clean interface.
- The Application is resizable, and therefore you can decide the screen space Cavalier takes while media playback.
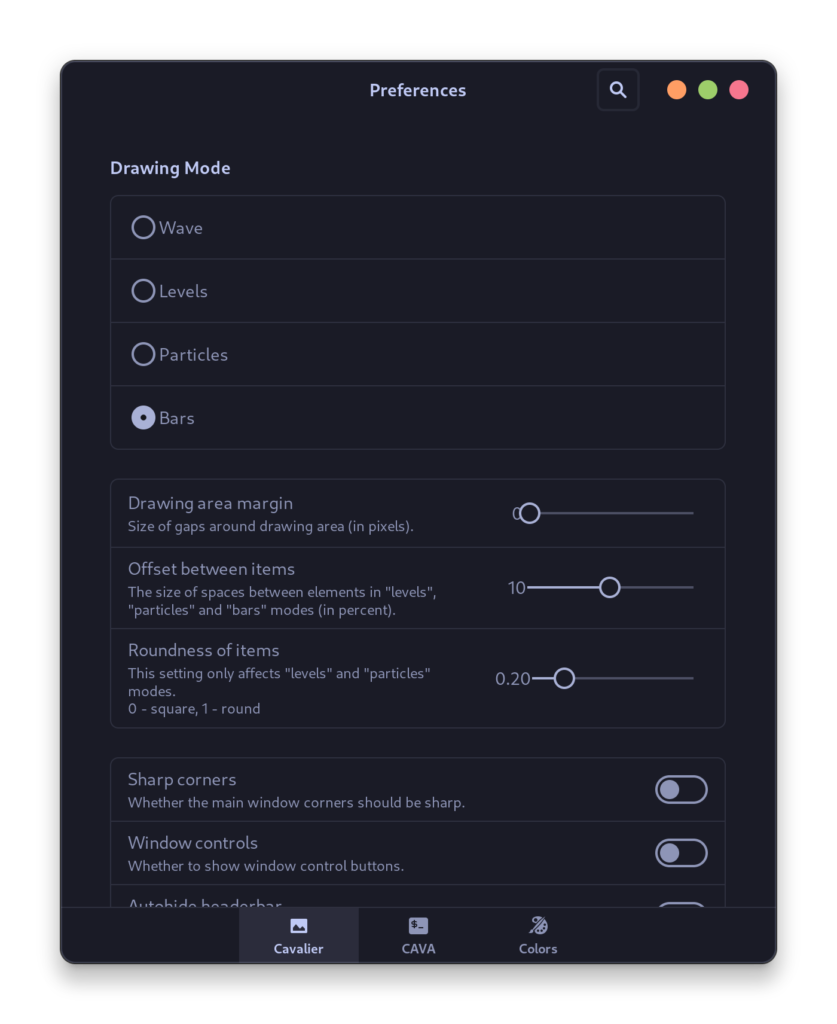
- A lot of Keyboard shortcuts are available which you can utilize for faster navigation.
- A Graphical CAVA settings editor is also available, in which you can increase or decrease the number of Bars in the visualizer, change the audio channels and add various levels of noise reductions if you want.
- You can absolutely change the colors of the bars as per your preferences and also modify the background color of the application.
- The foreground and background can each use a single color, a gradient or an image.
- You can also import and export your settings in case you want to back up your configurations (or copy someone else’s from the internet).
- Release 2024.1.0 added
--fgand--bgcommand-line options, so you can launch Cavalier with custom colors from a terminal or a script.
Installing Cavalier in Linux
Cavalier is available as a Flatpak on Flathub, as a Snap and in the Arch User Repository, so it should be easy to install and set up on most Linux distributions. Pick the method that matches your distro and stick with one of them.
Install Cavalier with Flatpak
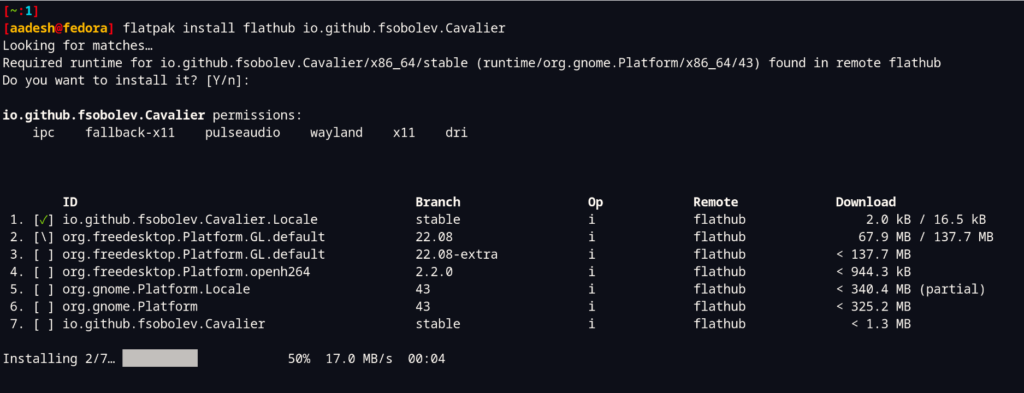
To install it as a Flatpak, first make sure you have added the Flathub repository on your system and then type the following command:
flatpak install flathub org.nickvision.cavalier
The app started under the developer fsobolev with the Flatpak ID io.github.fsobolev.Cavalier. That repository was archived in June 2023 and the project moved to the NickvisionApps organization, so older guides still show the old ID.
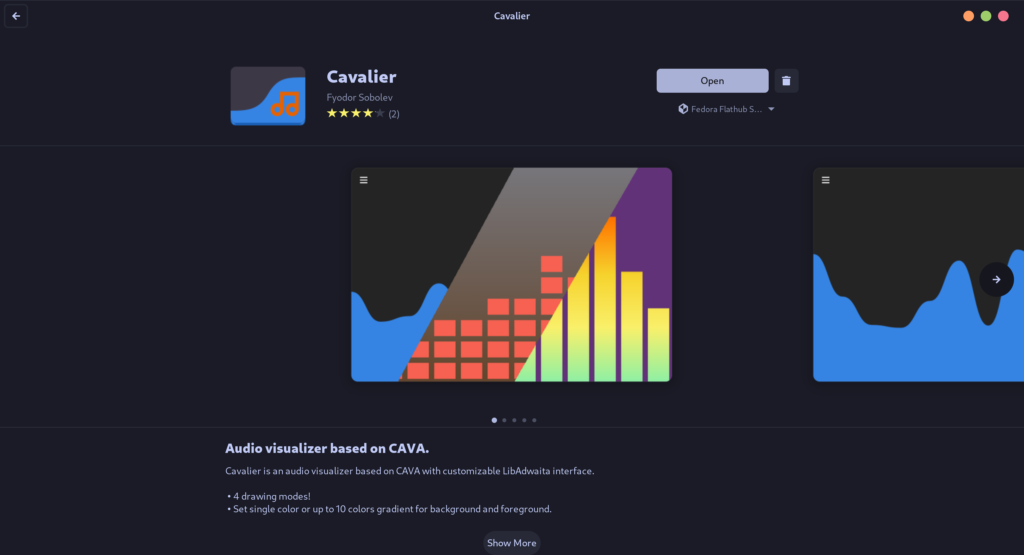
If you have a Graphical Software store which supports Flatpak, then you can also install it directly from there.
Install Cavalier with Snap
If your distro uses Snap (Ubuntu does by default), run the command below. The Snap Store listing describes the same CAVA-based visualizer, so the features match the Flatpak build.
sudo snap install cavalier
Install Cavalier on Arch Linux
And if you are using an Arch based distribution such as Manjaro or EndeavourOS, you can install it directly from the Arch User Repository (AUR). Just open a Terminal and type the following command:
# For yay users:
yay -S cavalier

# For Paru users:
paru -S cavalier
How to Use Cavalier
Just launch the application from the application grid/menu or launcher and then play any media either locally or from YouTube using a web browser. And you will see a beautiful interface on your screen.
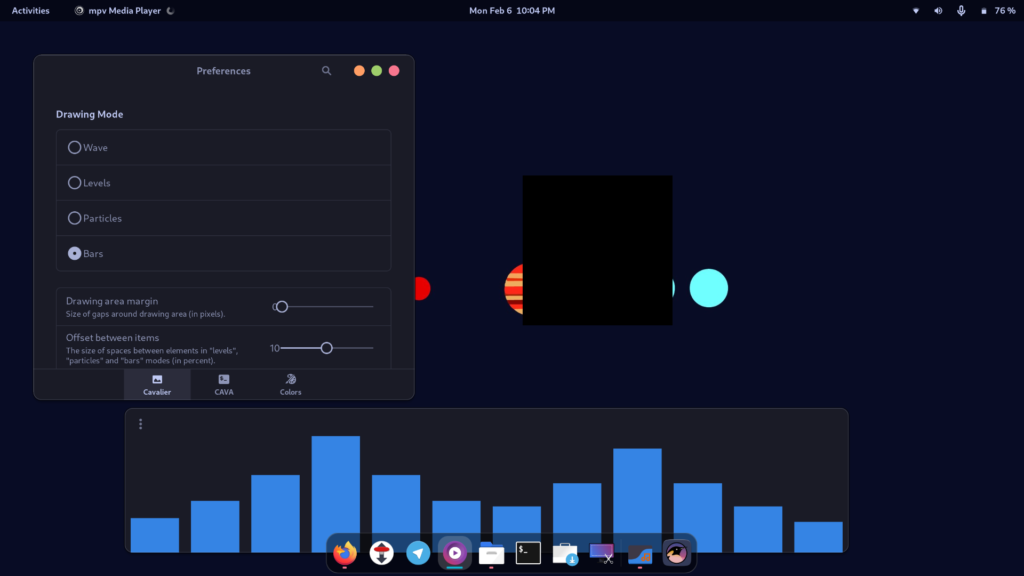
You can of course customize everything about this player using the preferences’ menu (by pressing Ctrl + P).
Cavalier on Linux: Fixing audio input and high CPU usage
If Cavalier shows a flat line while music plays, check the audio input method first. Releases have switched the default between PipeWire and PulseAudio, and you can choose a backend yourself with the CAVALIER_INPUT_METHOD environment variable.
Cavalier can also push your CPU harder than you expect. People report online that it makes modest laptops run hot, and my own laptop fan ran the whole time. Lowering the frame rate and the number of bars in the CAVA settings should reduce the load.
If you want a laptop to stay cooler in general, auto-cpufreq manages CPU speed and power for you.
Key Takeaways
- Cavalier Linux is a GTK4 audio visualizer built on CAVA.
- It is written in C# with LibAdwaita and uses the MIT license.
- It has 11 drawing modes plus gradient and image backgrounds.
- Install it with Flatpak, Snap or the AUR package.
- The current Flatpak ID is org.nickvision.cavalier.
- Press Ctrl + P to open preferences.
- Pick PipeWire or PulseAudio with CAVALIER_INPUT_METHOD.
- Expect higher CPU use on laptops.
Frequently asked questions
What is Cavalier on Linux?
Cavalier is an open source audio visualizer for Linux desktops. It draws animated bars, waves and other shapes from your music using the CAVA engine inside a GTK4 window.
How do I install Cavalier on Linux?
Run flatpak install flathub org.nickvision.cavalier or use sudo snap install cavalier. On Arch based distributions such as Manjaro and EndeavourOS, install the cavalier package from the AUR.
Is Cavalier the same as CAVA?
No. CAVA is the terminal audio visualizer that does the processing. Cavalier is a graphical GTK4 app that uses CAVA to draw the visuals inside a desktop window.
Does Cavalier work with PipeWire?
Yes. Cavalier can read audio through PipeWire or PulseAudio, and you can pick the backend with the CAVALIER_INPUT_METHOD environment variable if the default input shows no movement.
How do I open Cavalier settings?
Press Ctrl + P inside the app to open preferences. There you can change drawing modes, colors, bar count, roundness and CAVA settings such as noise reduction.
Is Cavalier free and open source?
Yes. Cavalier uses the MIT license and its source code lives on GitHub under the NickvisionApps organization, so you can read it, build it and report bugs.
Summary
Do note that this application seemed resource intensive to me, and my laptop’s fan was running the entire time when this application was in use, so it might not be good for you if you daily drive a laptop. On a powerful PC, you can run this tool easily without worrying about anything.
I was worried about how this application will deal with the local files since it is installed via Flatpak, but this application seems to work flawlessly there.