
EndeavourOS gives you an Arch-based system with a graphical installer, while leaving the post-install experience close to Arch Linux. Use it when you want to choose a desktop environment during setup and are comfortable learning the package-management tools that come after the first boot.
This walkthrough covers a clean installation from the current EndeavourOS ISO. Back up the target drive first. The automatic erase option destroys the selected disk, and manual partitioning changes existing partitions.
What to prepare before you install EndeavourOS
- A USB drive for the installer ISO
- A reliable internet connection if you want the online installer and desktop choices
- A backup of files on the drive you plan to install to
- Enough free space for the system, your desktop environment, and updates
The EndeavourOS download page provides ISO files, checksums, signatures, mirrors, and torrent options. Download the ISO and its matching verification material from the official site. The project recommends checking the SHA512 sum or GPG signature before you write the image to USB.
Download and verify the ISO
Open the official EndeavourOS download page and choose a nearby mirror, torrent, or magnet link. A torrent client needs DHT support, and the project also publishes the matching checksum and signature files.
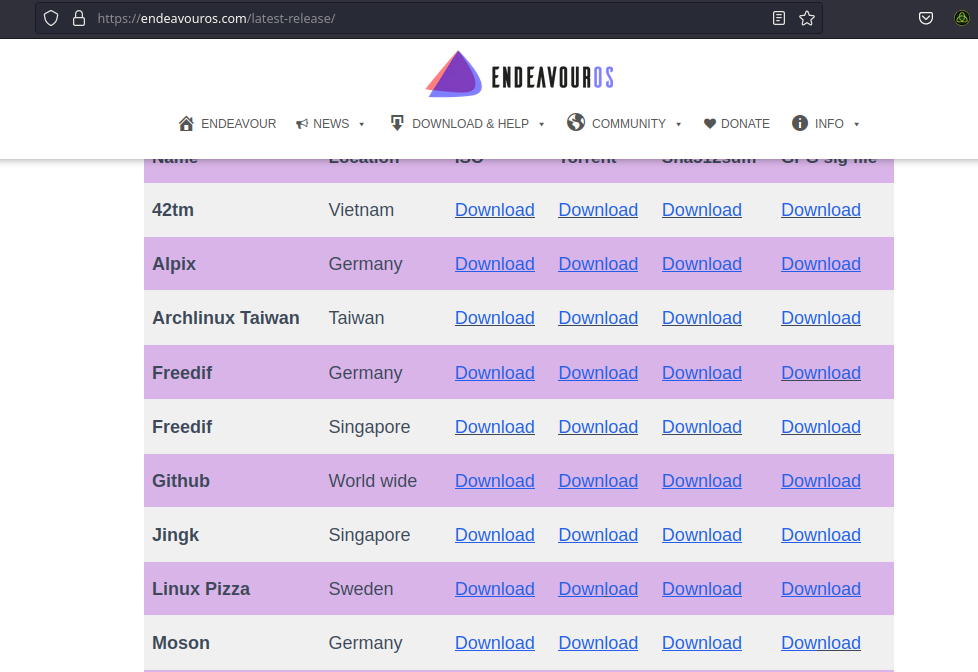
The screenshot shows the download decision, not a permanent release name. Use the current filename and matching verification file shown by the project when you download.
Create the installer USB
Write the ISO with a tool that supports bootable Linux images. Ventoy lets you copy the ISO to a prepared USB drive, while a dedicated image writer creates a USB for one image. The official Discovery documentation also covers creating installation media.
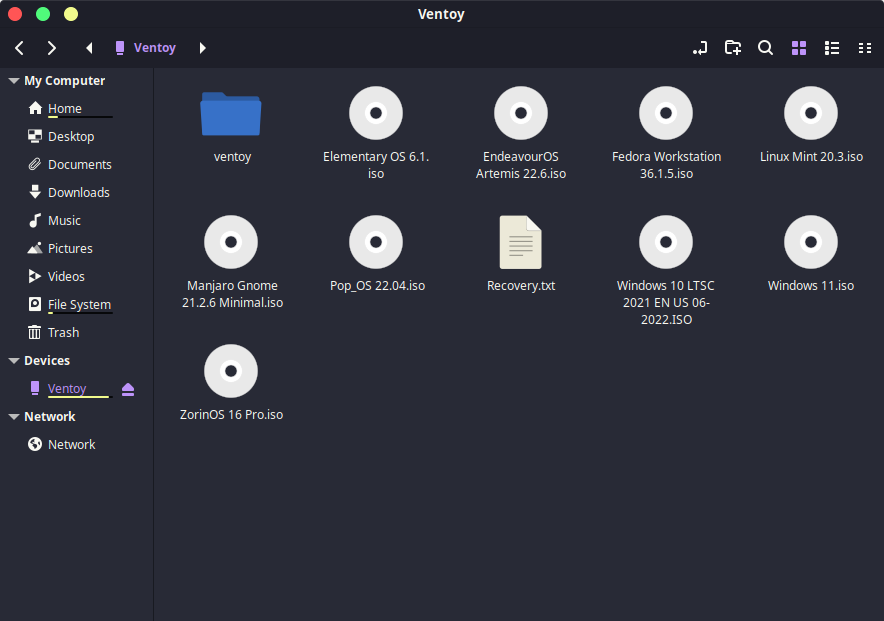
After writing the drive, restart the computer and use its one-time boot menu to select the USB device. The key differs by manufacturer.
Keep UEFI enabled where your hardware supports it. If Secure Boot prevents the USB from starting, consult your firmware documentation before changing it. This Secure Boot guide explains the firmware-side decision.
Choose the EndeavourOS installer path
The live ISO starts in a desktop session with the EndeavourOS welcome application. The online installer downloads packages and offers more desktop choices. The offline path uses the components included on the ISO, so it is useful when you do not have dependable network access.
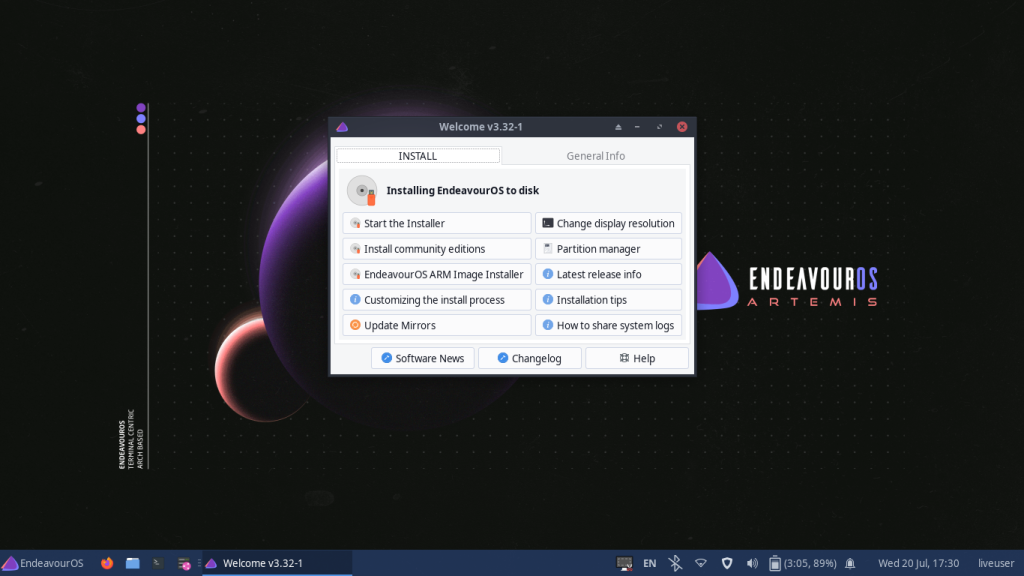
Connect to the network before choosing the online path. The welcome screen also exposes project resources and update controls. Read the current installer text rather than relying on labels from an older ISO.
Set language, location, and keyboard layout
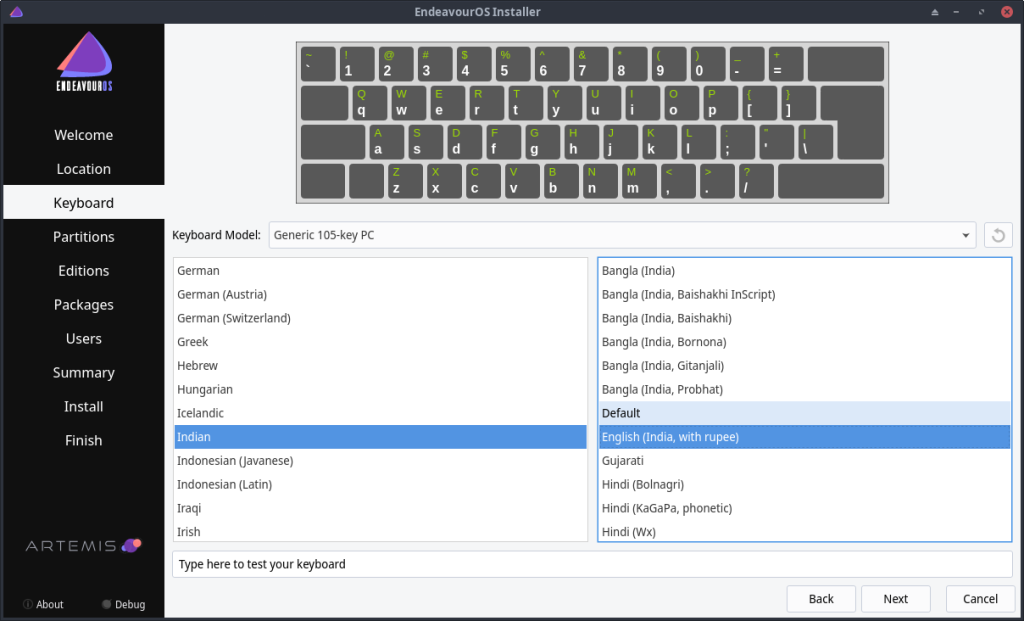
The installer asks for language, time zone, and keyboard layout before it writes anything to disk. Choose the layout you will use to enter your account password. A wrong layout can make a correct password appear invalid on the first login.
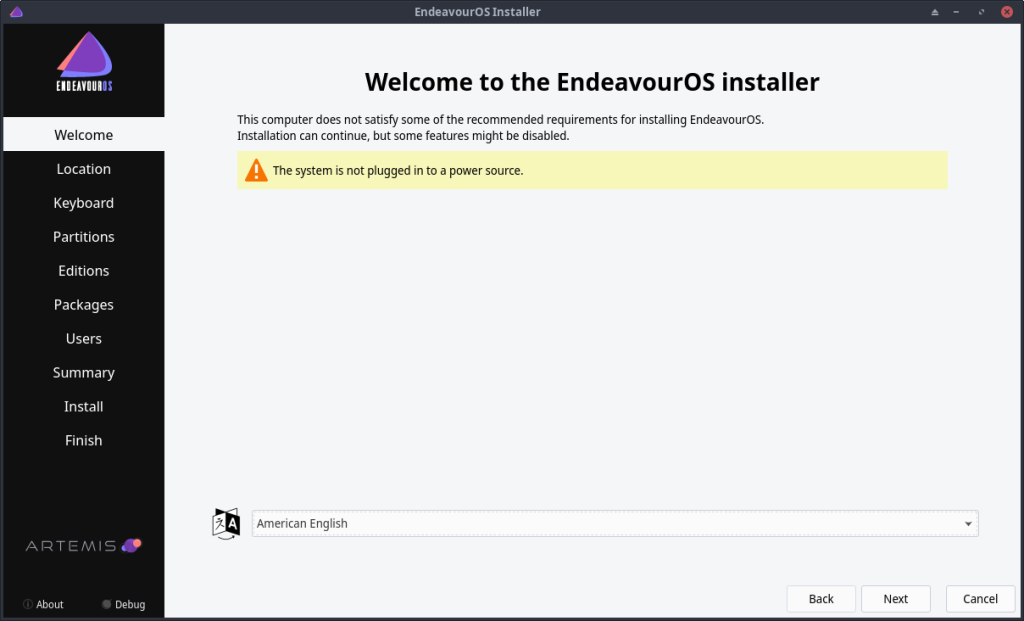
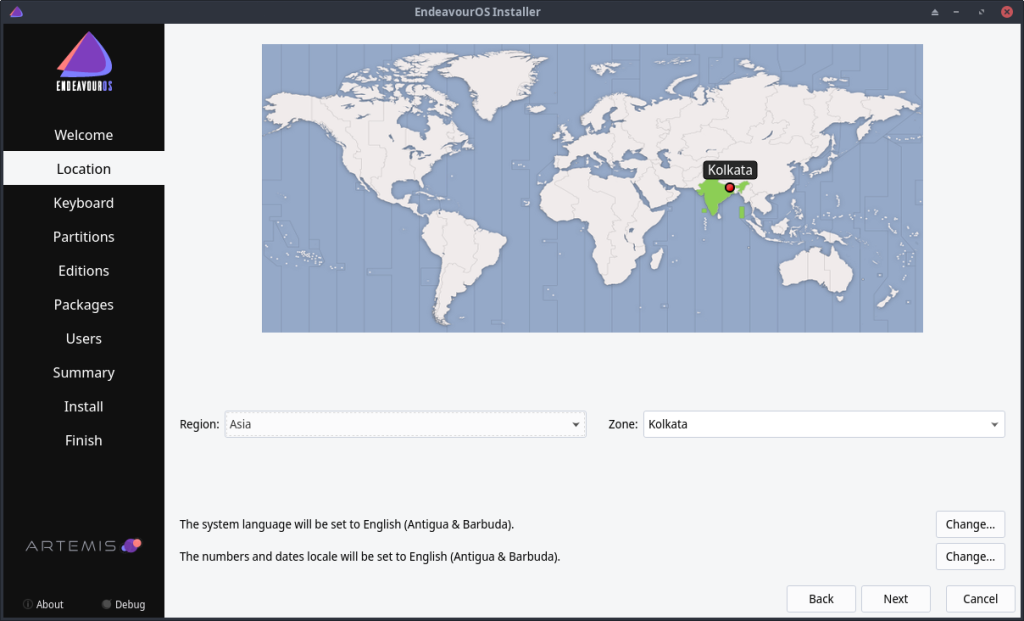
Continue to the location page and select the closest city or the correct time zone. The map and dropdown lead to the same system setting.
Choose the keyboard layout next and test it in the installer if a test field is available. This is especially useful for non-US layouts and laptop keyboards with an alternate key arrangement.
Partition the target drive carefully
For a computer dedicated to EndeavourOS, the erase-disk option is the shortest path. It removes the selected drive and lets the installer create the required layout. Use manual partitioning when you are preserving another operating system, choosing a separate home partition, or following an existing storage plan.
| Partition | Typical role | Common choice |
|---|---|---|
| EFI system partition | UEFI boot files | Reuse an existing EFI partition for a dual boot, or create one for a clean UEFI setup |
| Root | System files and installed packages | Choose a filesystem supported by your plan |
| Home | Personal files and user configuration | Optional separate partition |
Do not copy a fixed partition size from a screenshot into every computer. Storage needs depend on your applications, games, local files, snapshots, and whether another operating system shares the disk. For a deeper primer, see how Linux disk partitioning works.
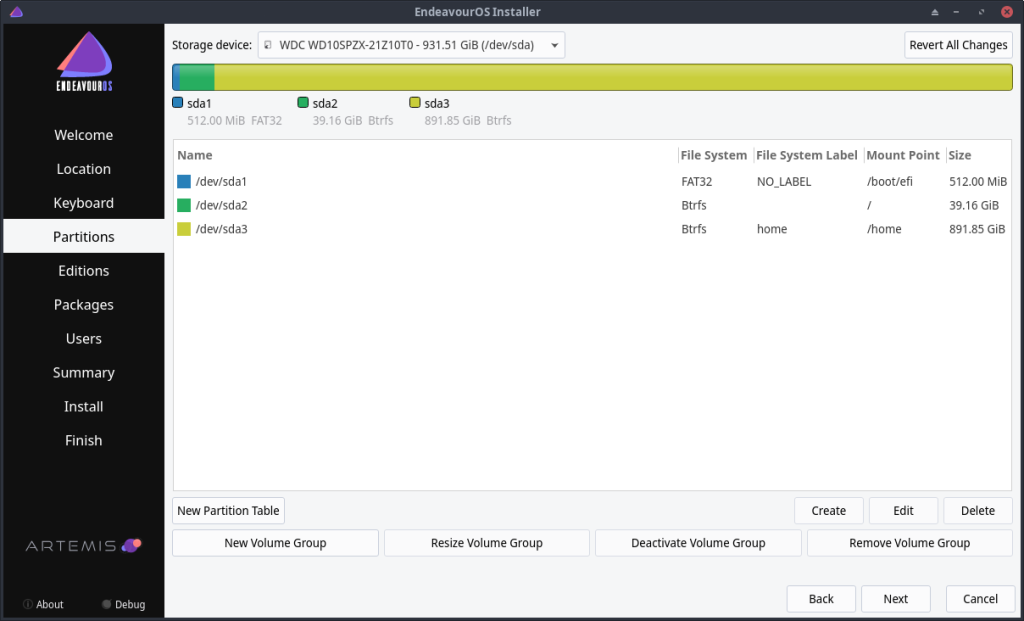
The installer screen is the last place to catch an incorrect target drive before formatting begins. If you are dual booting, stop and recheck the mount points and the partition selected for formatting.
Select a desktop environment and optional packages
The online installer can offer desktop environments, window managers, theming options, and additional packages. Pick the desktop you want to maintain after installation. You can install more software later, but changing desktop environments later also brings extra configuration and packages.
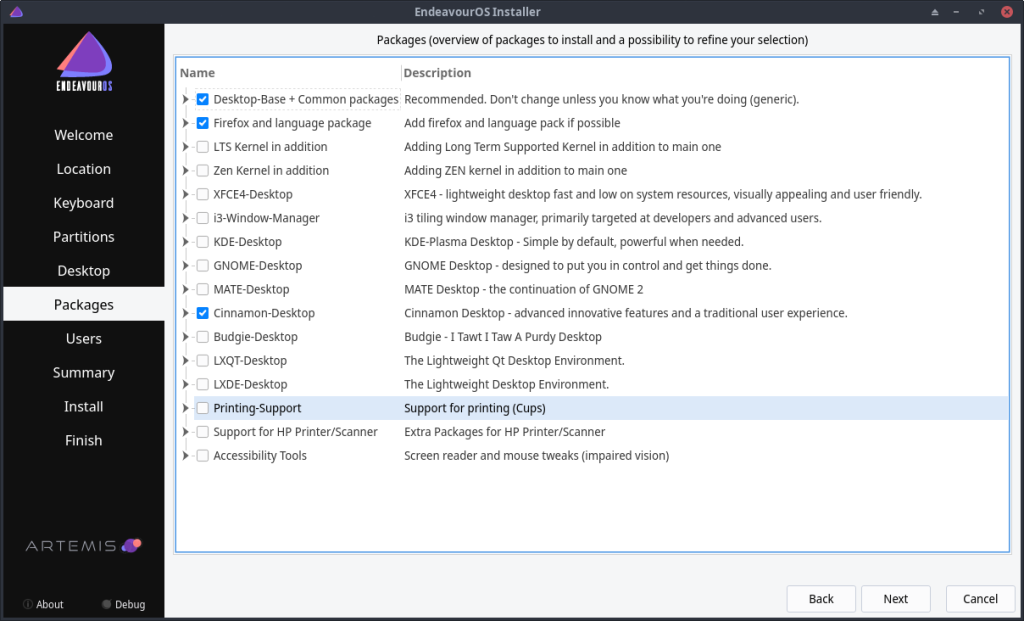
Keep the selection focused for the first install. You can add applications later through the package manager. If you want to understand the base Arch approach instead, compare this guided route with installing Arch Linux with archinstall.
Create your account and confirm the summary
Create a user account, choose a strong password, and check whether the installer offers administrator privileges for that account. Then read the final summary line by line. Confirm the target disk, desktop environment, boot mode, locale, and account details before selecting Install.
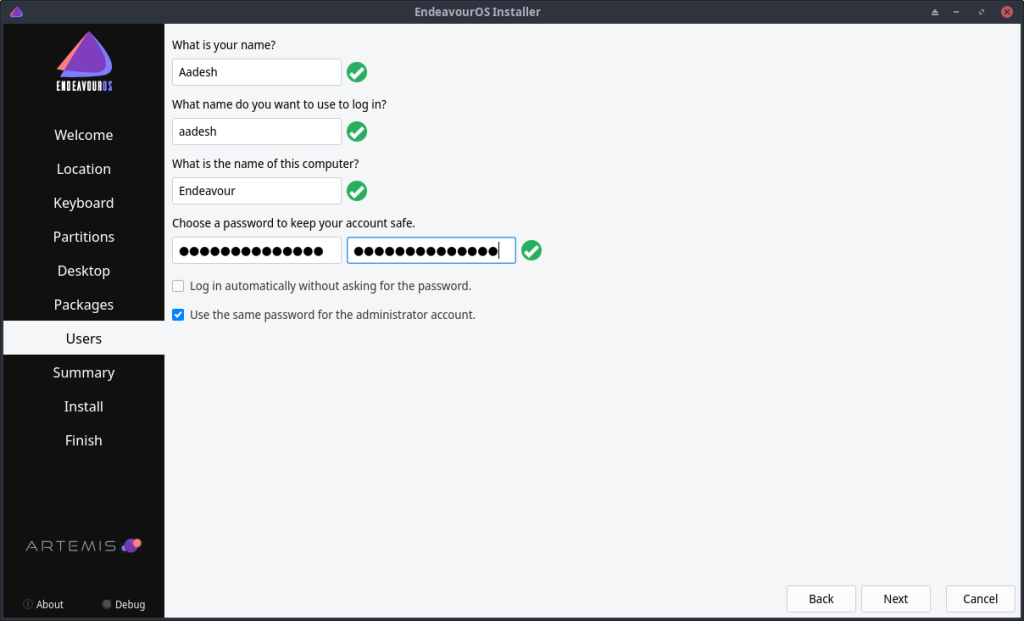
When the install finishes, reboot and remove the USB drive when the installer tells you to. The first boot should load the desktop environment you selected. If it returns to the installer, remove the USB or adjust the boot order.
What to do after the first boot
Start by checking for updates and opening the welcome application’s app-install section. Review every optional application before installing it. The screenshots below show the welcome application areas that help you add common software and change desktop-related settings.
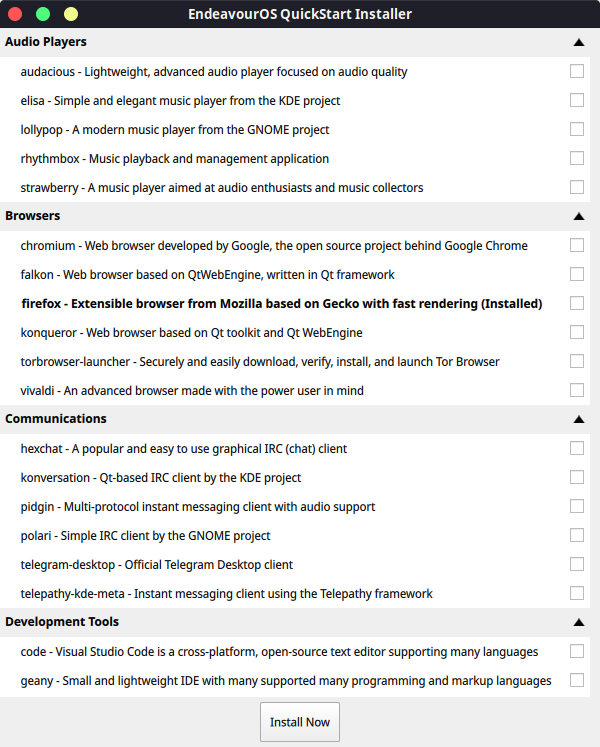
Use the app selection as a starting point, not as a reason to install every option. Smaller initial setups are easier to update and troubleshoot. Learn the basics of package management on Linux before adding unfamiliar packages.
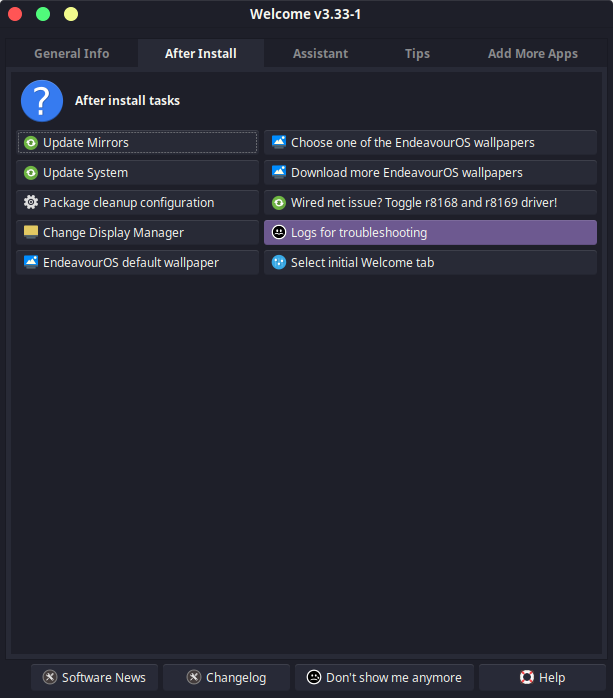
Once the system is stable, learn the terminal tools that make an Arch-based distribution easier to maintain. The Linux command-line guide is a useful next step, and ext4 versus Btrfs can help when you revisit your storage choice.
Installation checklist
- Downloaded the ISO and its matching verification material from EndeavourOS
- Created a bootable USB and selected it from the firmware boot menu
- Confirmed the target drive and partition plan before formatting
- Selected the desktop environment and account details you intend to use
- Removed the USB after installation and completed the first boot
- Checked for updates before adding extra software
EndeavourOS is a practical route into an Arch-based desktop when you want a graphical installation path without losing the opportunity to learn the underlying tools. Verify the ISO, inspect the disk summary, and keep the first software selection deliberate.