

In this tutorial, we will discuss how to install MongoDB on Ubuntu/Debian. Let’s first discuss the difference between MySQL and MongoDB.
MySQL is an open-source RDBMS (Relational database Management System). It is supported by Oracle Corporation. In MySQL, the data is stored in the form of relations (Rows and Columns).
MongoDB is an open-source non-relational database management system developed by MongoDB, Inc. The data is stored in the form of collections and documents as Binary representation called BJSON (Binary JSON). MongoDB is fast and can handle highly diverse data types. The most important feature is that it can handle BigData. Look at the following table given below:
| RDBMS | MongoDB |
|---|---|
| Database | Database |
| Table | Collection |
| Row/Tuple | Document |
| Column | Field |
Steps to install MongoDB on Ubuntu
To install MongoDB on Ubuntu/Debian, we have to add the official repositories to the apt sources. We will use the apt packet manager, Let’s look below to the following steps.
Importing the MongoDB Public Key
Here, you need to import the public key used by the packet management system. To download the public key, wget command is used. The output is then piped to the apt-key add command to install the keys.
# wget -qO - https://www.mongodb.org/static/pgp/server-4.2.asc | sudo apt-key add -
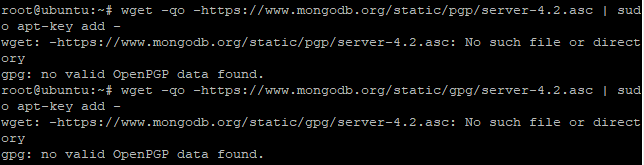
If you don’t get an “OK” as the output (like in the above screenshot), try installing gnupg package as shown below.
Install gnupg and its related libraries using the following command:
# sudo apt install gnupg
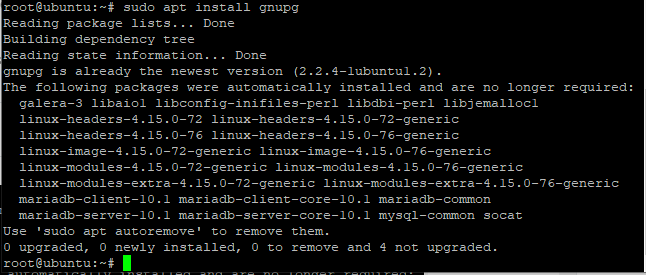
After successfully installing the libraries, import the key again using the same command as we used earlier. The command is as follows:
# wget -qO - https://www.mongodb.org/static/pgp/server-4.2.asc | sudo apt-key add -

You can see the output is OK.
Add New Repository to Install MongoDB on Ubuntu/Debian
Here, we need to create a new repository file using the following command.
# echo "deb http://repo.mongodb.org/apt/debian buster/mongodb-org/4.2 main" | sudo tee /etc/apt/sources.list.d/mongodb-org-4.2.list

While executing this command, it might be possible that it would show an error such as the package is missing or referred to by another package. In this case, you need to remove the existing MongoDB repository file using the following command:
# sudo rm /etc/apt/sources.list.d/mongodb*.list
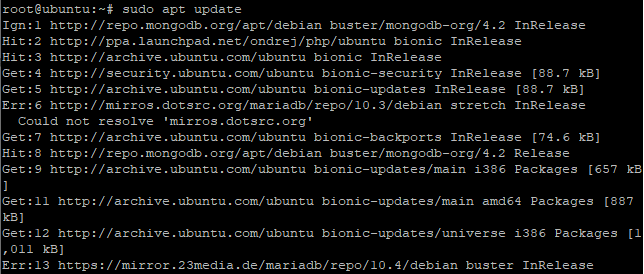
# sudo apt update
After executing the following command, follow the steps from the beginning as described above.
Prepare the Ubuntu/Debian System for Installing MongoDB
Here, we have to update the packages installed on Debian or Ubuntu OS. We will use the apt command as it combines all the functionalities in one command.
# sudo apt update
Run apt to Install MongoDB on Ubuntu or Debian
After updating the packages, the next step is to install the mongodb-server package. This can be done using the following command:
# sudo apt install -y mongodb-org
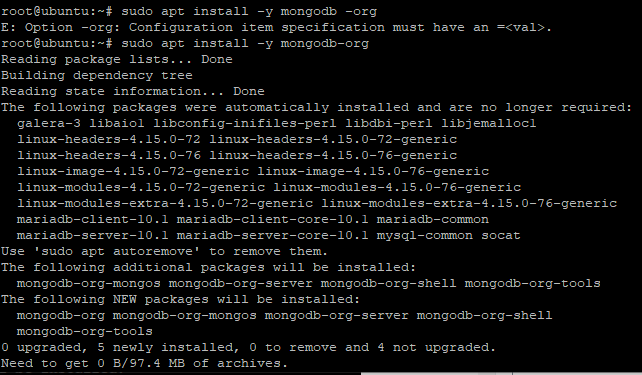
After executing this command, it would install the following packages:
- mongodb-org: It is the meta package that automatically install four components mainly mongodb-org-mongos, mongodb-org-mongos, mongo-org-shell, mongo-org-tools
- mongodb-org-server: contains the mongod daemon and a configuration file.
- mongodb-org-mongos : It contains the mongos daemon
- mongodb-org-shell: contains the mongo shell through which we can perform administrative tasks
- mongodb-org-tools: contains several tools for importing and exporting data such as mongoimport bsondump, monodump, mongoexport, mongofiles and so on
That’s all. This is how you install MongoDB on Ubuntu. Now all you need to do is start the service.
Start the MongoDB services
In this step, you need to start the services of MongoDB using the following command:
# sudo systemctl start mongod
OR
# sudo service mongod start
Using this command, MongoDB will be successfully installed in the system.
Check MongoDB Daemon Status
After starting the services, you can also check the status of the services.
The command for this is as follows:
# sudo systemctl status mongod
OR
# sudo service mongod status
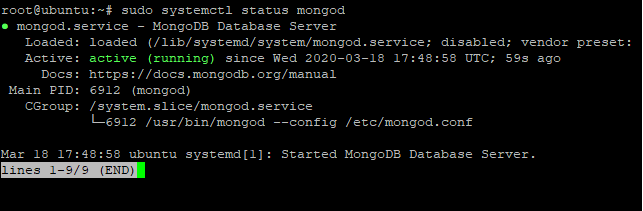
You can notice the highlighted section specifying as “active”. This shows that MongoDB is working properly.
Reload MongoDB Service
While executing the start services, you might encounter the following error:
Failed to start mongod.service: Unit mongod.service not found.
In this case, you need to reload the services again using the following command:
# sudo systemctl daemon-reload

This command will reload the services again. After this, run the start command again.
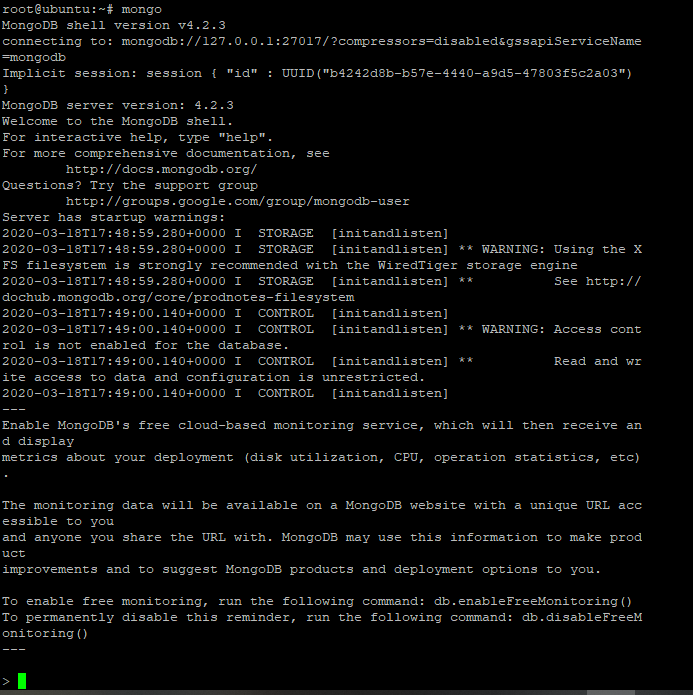
Run MongoDB
After successfully installing the MongoDB, to start and work upon MongoDB run the following command:
# mongo
Stop MongoDB Service in Ubuntu
If you want to stop the services manually, use the following command given below:
# sudo systemctl stop mongod
OR
# sudo service mongod stop
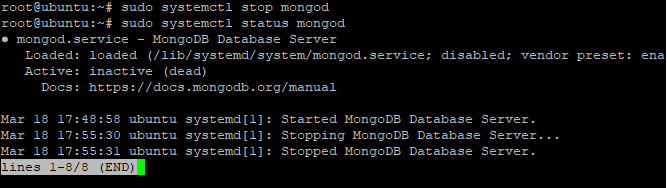
Here, you can also verify whether the services have stopped or not by using the status command as given in the figure above. The status shown is inactive.
Restart MongoDB Service
If you want to restart the services, use the following command given below:
# sudo systemctl restart mongod
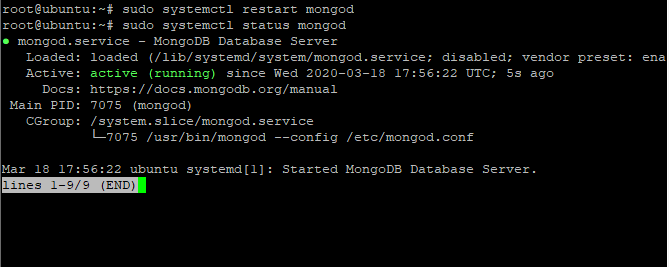
To check whether the services has started or not, use the status command as discussed earlier. You can also see this in the figure given above. The status is highlighted i.e. active.
Create users in MongoDB
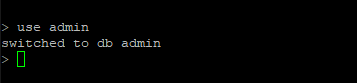
This is regarding security purposes. User authentication is important as anyone can steal your data if your database isn’t secured with the password. For this, we need to connect to the admin database as shown in fig.1. After this, create the users and assign it a password.
It can be done using the following command:
> use admin
After connecting it to the admin database, you need to create users using the following commands:
db.createUser(
  {
    user: "mongoAdmin",
    pwd: "changeMe",
    roles: [ { role: "userAdminAnyDatabase", db: "admin" } ]
  }
)
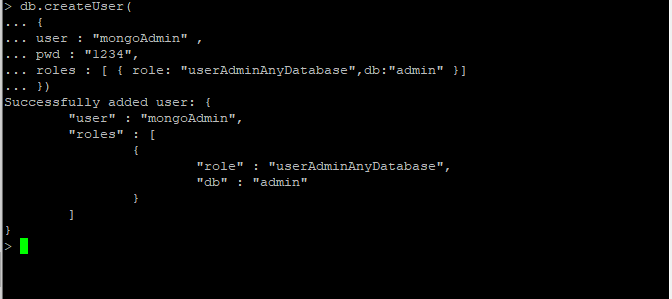
“mongoAdmin” user will be created with the password assigned.
Log in with the user id and password:
mongo -u mongoAdmin -p --authenticationDatabase admin
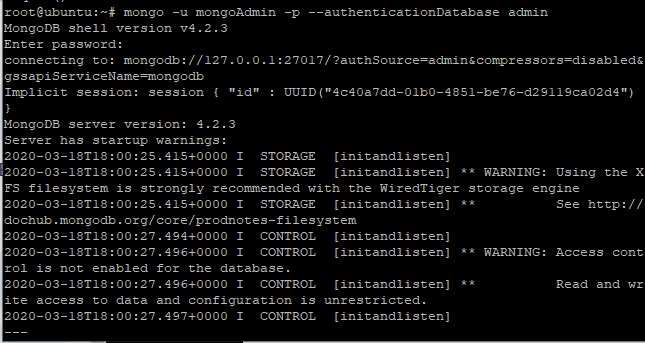
Now, your database is secure.
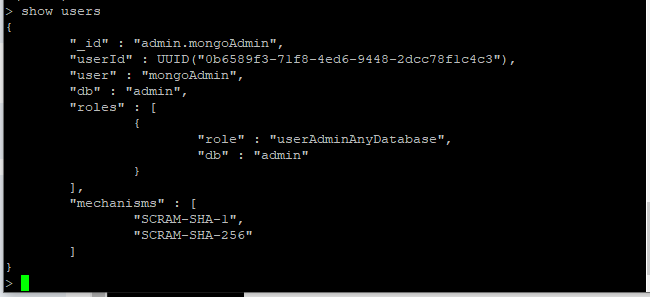
View users in MongoDB
A simple command is used to view all the users in the database. The command is as follows:
> show users
Clean Uninstall MongoDB in Ubuntu/Debian
Till now, we have discussed how to install MongoDB in Debian/Ubuntu. Now, we will discuss how to uninstall the same.
Stop the MongoDB service
First, you need to stop the MongoDB services. For this, use the following command:
# sudo service mongod stop

Uninstall and Purge MongDB Packages
After stopping the services, run the purge command to remove all the packages of MongoDB. The command for this is as follows:
# sudo apt --purge remove mongodb-org*
Remove the data directories
You also need to remove MongoDB databases and log files. To do so, use the following command listed below:
# sudo rm -r /var/log/mongodb
# sudo rm -r /var/lib/mongodb

Following these steps would completely remove the MongoDB from your system.
Conclusion
That’s it now! We have our very own MongoDB server installed on our system. For future updates to the package, all you’d need to do is to update the apt repository using apt update and then run apt upgrade. The mongodb-server package will be upgraded to the latest one automatically without you needing to go through this entire process again.