

If you play games on Linux desktop or Steam Deck, then you might have come across tools like Proton or WINE, which helps Windows-only applications to run on that platform. And although you can enable Proton from Steam, you don’t have any methods through which you can add forks of WINE on your system, which sometimes fixes bugs and issues and also adds support for more games as well as features which cannot be legally implemented in the Vanilla Proton.
You can install and manage such forks of WINE such as GE-Proton, Luxtorpeda, Boxtron or Roberta and GE-WINE (or WINE-GE) on your system easily using ProtonUp-Qt.
In this tutorial, we will learn about the usage and installation procedure of this tool and also show you how to add it in different launchers.
Features of ProtonUp-Qt
This application can perform the following actions for you:
- Manage and update all the forks of WINE for a wide range of compatibility using an easy to use Graphical User Interface.
- It downloads the translation layer in such a manner so that all the launchers such as Lutris and Heroic Games Launcher can easily access it.
- It also offers a section in which you can check the ProtonDB rating of all your installed games.
- A single place to configure different forks to enhance your gaming experience.
Installing ProtonUp-Qt on Linux
You can build this app from the AUR if you are using any Arch based distributions. Here’s the following command you have to type in your Terminal (assuming you have the AUR helper on your system):
yay -S protonup-qt
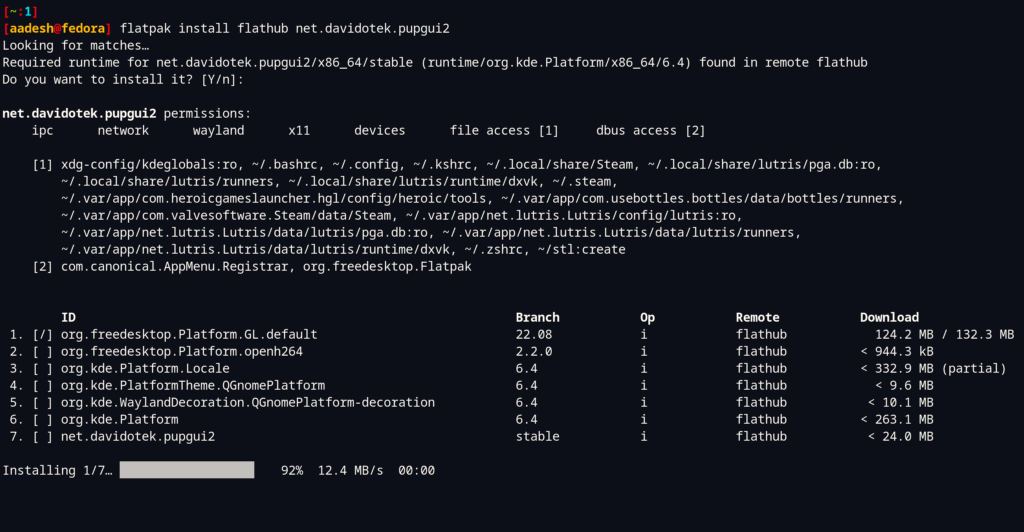
If you are using any other distros such as Ubuntu or Linux Mint, then you can install it using Flatpaks if you have it enabled on your system, simply type the following commands in your Terminal:
flatpak install flathub net.davidotek.pupgui2
You can also use AppImage package from their GitHub page in order to add the app to your system.
Configuration and additional steps
Now, launch the application from your Grid/Menu, and then you will see the following interface:
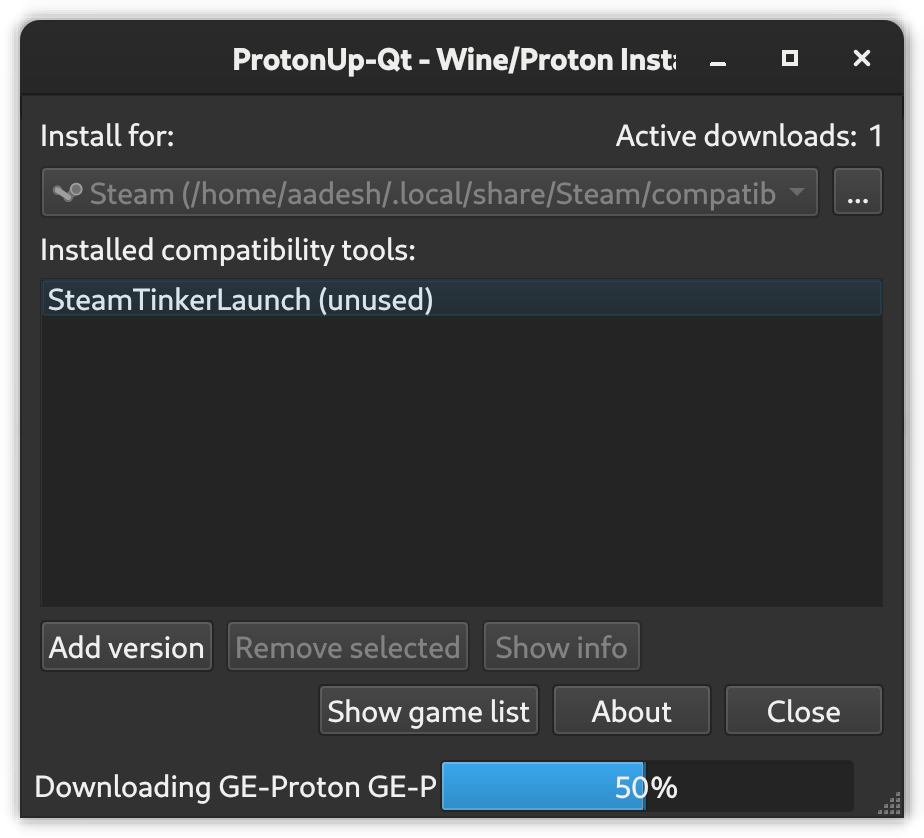
As you can see in the dialog box, I have SteamTinkerLaunch already installed on my system, but if you need to install any compatibility tool, just click on the ‘Add version’ button and then select what you want (for example, the latest GE-Proton release).
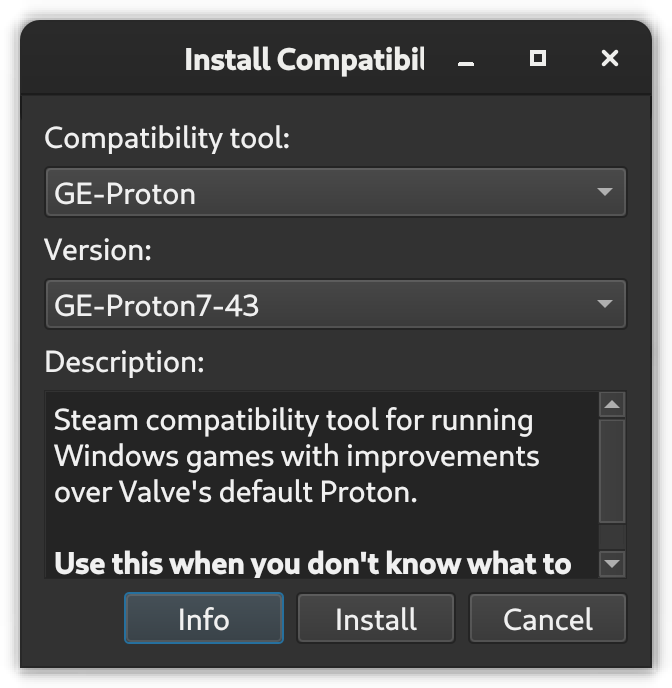
As you can see, It also provides a small description of the layer you want to install. Just hit install and then open your preferred game launcher (Steam, Heroic or Lutris). And then add your installed compatibility layer in the game launch options. To do this in Steam, go to Steam > Settings > Steam Play and enable all the checkboxes, note that you will have to restart Steam if you want Steam to update the compatibility layer list.
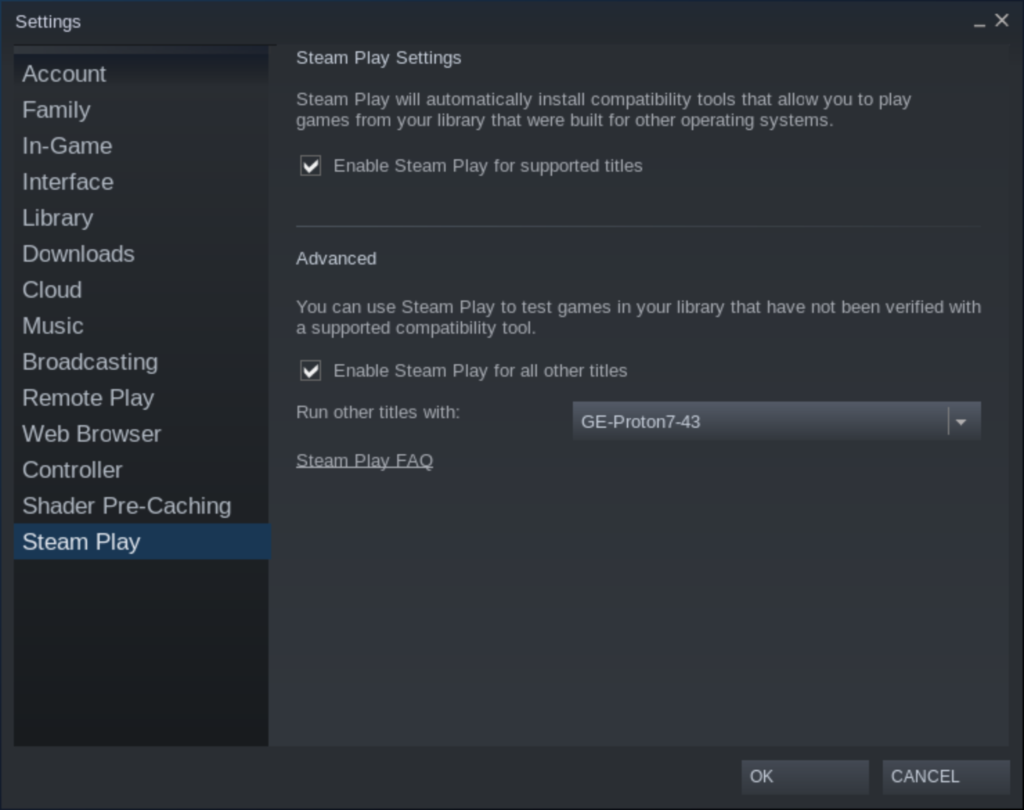
You can also add these settings to every individual game/Apps by modifying their properties from both the Big Picture Mode or the Desktop Mode.
Summary
The year of the Linux desktop is here, and with these tools streamlining the game compatibility on this platform, more and more people will switch to it.
I agree that it is still a bit much that you have to configure every game that is not supported on this niche OS, but keep in mind that these games were not built for this platform at all and Valve’s Proton is an Open Source tool which you can get for free that will run your games. How awesome is that? You can check out more about the project on their GitHub page.