
JavaScript is the programming language of the web. Despite its name, it is not related to Java. Modern websites extensively use Javascript. There are various frameworks and libraries based on JavaScript. To make the development easy with JavaScript, an IDE (Integrated Development Environment) can be used. It’ll make writing code much easier.
WebStorm is the javascript IDE from JetBrains. WebStorm was released in 2010 and catered to developers who wanted extensive support for javascript. Later, it added support for JavaScript frameworks like React, Vue, Angular, and many other related technologies.
Some of the features of WebStorm are:-
- WebStorm is specifically designed for JavaScript and its associated technologies.
- The IDE is smart enough to suggest code snippets, templates, and potential errors as well. It has integration with popular linters like ESlint, Stylelint, etc.
- WebStorm is context-aware and understands the types in your code, making auto-completion highly accurate. Due to this, the auto-completion is very accurate.
- If you want to know more about some function or variable in your code. You can just hover over it and WebStorm will show you documentation of it.
- WebStorm has integrations with testing tools like Jest, Mocha, Karma, etc. which may help to analyze code and find errors.
- It has an integrated terminal that lets you execute commands.
- You can also create custom HTTP requests in your IDE.
Prerequisites before installing WebStorm on Linux
The following prerequisites should be taken care of before installing WebStorm on Linux:-
- Ensure that your Linux distribution is compatible with WebStorm. If your Linux distro supports Gnome, KDE, or Unity DE then WebStorm would work on your system.
- A stable internet connection is required for downloading WebStorm.
- The minimum hardware requirements for WebStorm are:-
- A modern CPU
- 2 GB of free RAM
- 3.5 GB of Storage Space
- 1024×768 resolution screen
The above-mentioned are the minimum requirements to run the IDE. We recommend having better systems for complex tasks and development.
- You should have administrative access to your system for installing the IDE.
How to Install WebStorm on Linux?
WebStorm is a powerful IDE designed specifically for JavaScript development. It offers features like code auto-completion, integrated testing tools, and a user-friendly interface. To install WebStorm on Linux, you can use methods such as Snap package manager, JetBrains Toolbox, or downloading a standalone Tarball file. Ensure your Linux distribution is compatible and that you meet the minimum hardware requirements for a smooth installation experience.
There are multiple methods to install WebStorm on Linux. In the article, we’ve listed the following ways:-
- Installation via snap package manager
- ToolBox App
- Standalone Tarball from the official website
Installing WebStorm on Linux via snap
The WebStorm package is available on the snap package manager’s repositories. We can use snap to install WebStorm. If Snap is already installed on your system, you can use the following command:
sudo snap install webstorm --classic
Installing WebStorm on Linux via ToolBox App
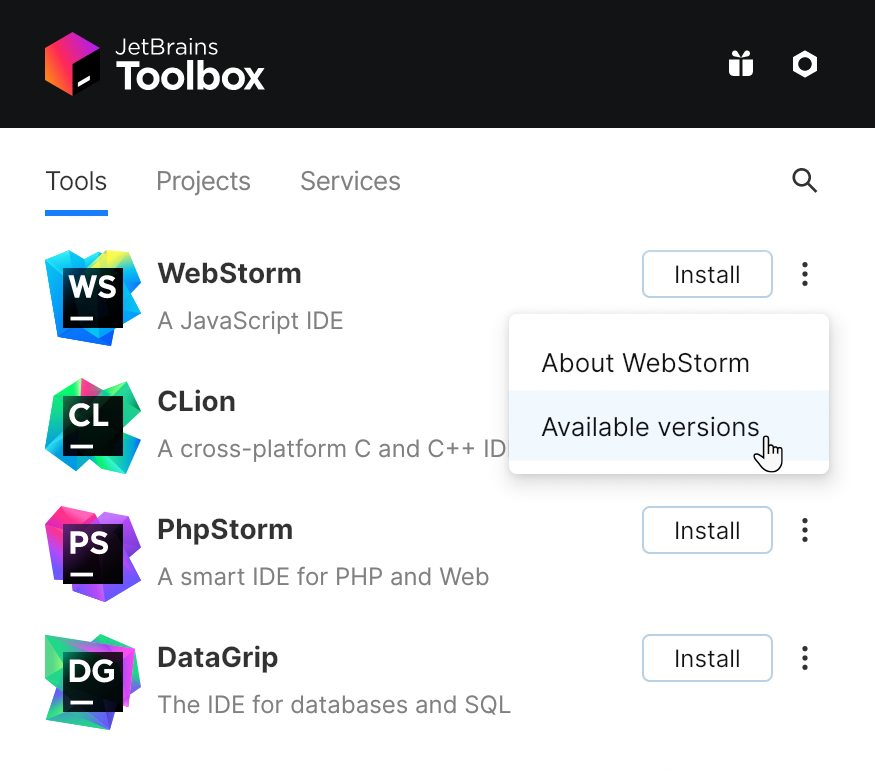
ToolBox App contains all the IDE of JetBrains. We can first download the Toolbox App from the official site. From the Toolbox App, we can install WebStorm. The steps to do so are:-
- Download the .tar.gz file from the Toolbox App web page.
- Then Extract it using the following command:-
sudo tar -xzf jetbrains-toolbox-1.17.7391.tar.gz -C /<directory_name>
Choose a directory that allows file execution. Generally, the default directory is opt or home but you can choose according to your preference.
- To run the Toolbox App, execute the jetbrains-toolbox from the extracted file.
- Select WebStorm from the list and go through the installation process.
Installing WebStorm on Linux Standalone via Tarball file
The steps to install WebStorm on Linux via its tarball file are:-
- The WebStorm Tarball is available on the official site. Download it, according to your system specifications.
- Open the terminal in the downloaded directory.
- Then extract the downloaded file using the command:-
sudo tar -xzf Rider.tar.gz -C /opt
The default directory is opt but you can change it too. The directory should support file execution.
- Run
WebStorm.shfrom the directory where the files were extracted - Go through the installation process and configure your IDE.
How to use WebStorm on Linux?
WebStorm has a user-friendly UI. The welcome screen looks as follows:-
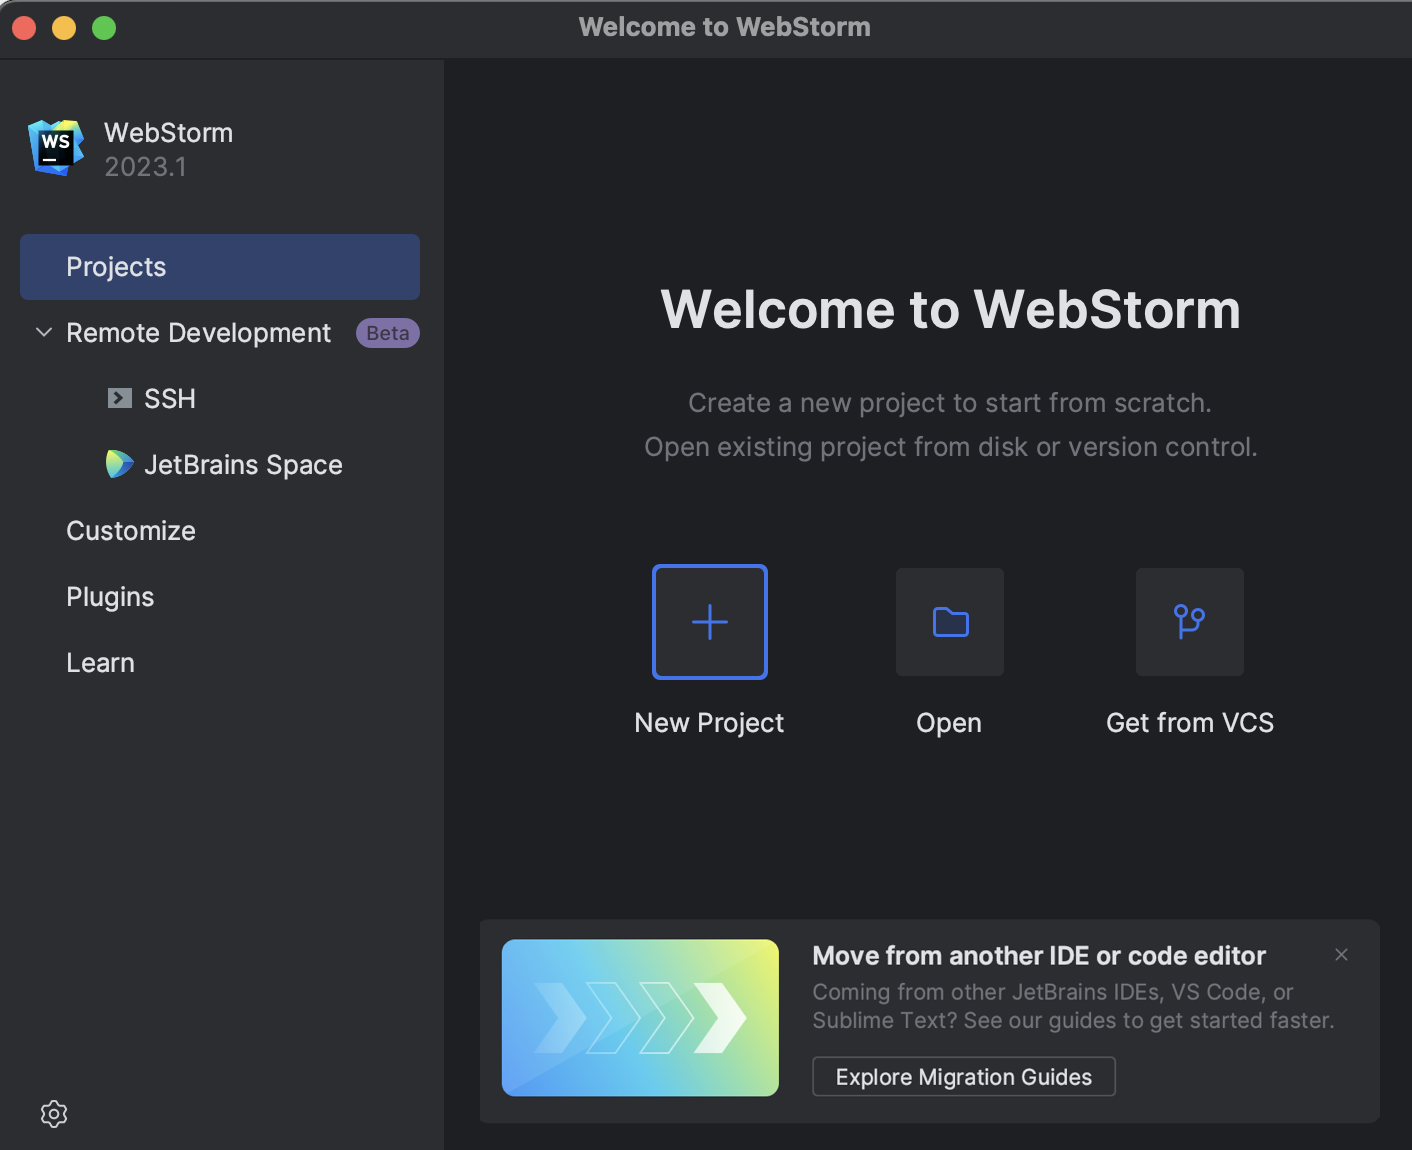
All the options a beginner might need are right there. To create a new project use the New Project option. You can also open an existing project or clone it from a VCS like Git Hub.
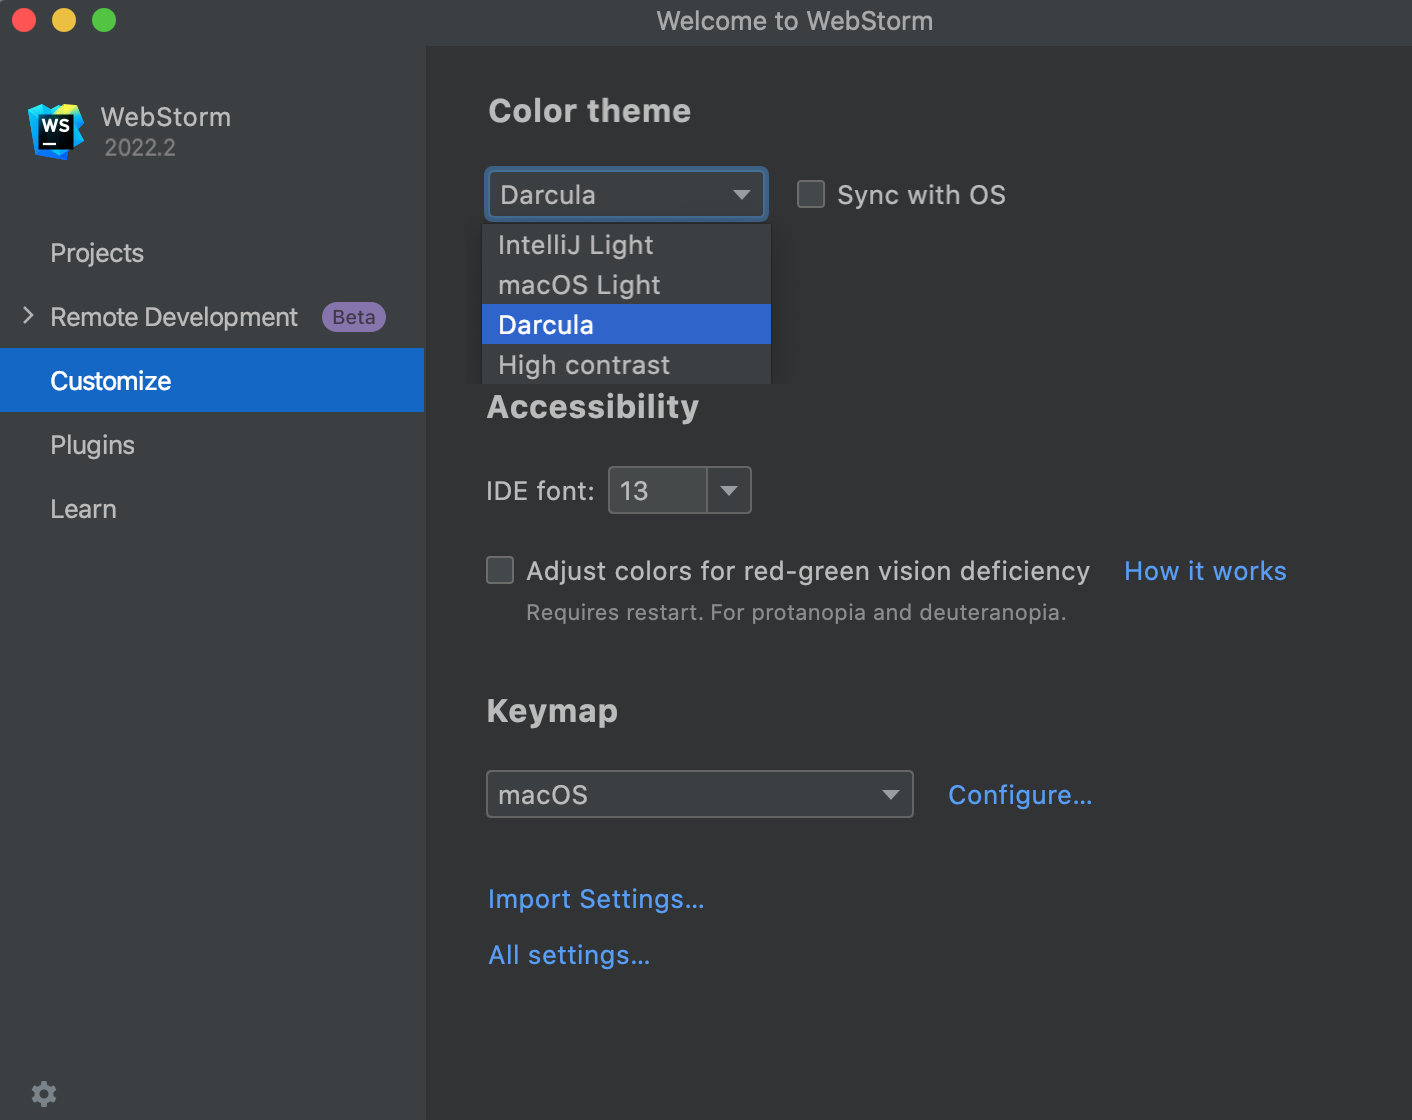
Before Creating Projects, you may customise your IDE. To customise WebStorm use the Customise section on the Left tab. The Customize section will let you customize a lot of settings. But for beginners, we recommend tinkering with the theme and keybindings.
Conclusion
For javascript developers, WebStorm can be an amazing IDE. It is made by JetBrains which speaks of the quality of IDE. WebStorm is constantly updated to provide new features, performance improvements and bug fixes. The integrations with testing, VCS, and popular tools used in the industry make it very convenient. It’ll fit in your workflow easily.
Be sure to check out the prerequisite section for a smooth installation. The installation process is not very complex either. We’ve listed all the steps. And if you’re a beginner we’ve also written a quick walkthrough.