
Linux Mint is one of the best distributions for beginners. Linux Mint is based upon Canonical’s Ubuntu Operating System, so it is quite stable as well. It is understandable that you may first want to try it out in a Virtual Machine before using it as a primary operating system on your PC. In this article, we will learn how to install Linux Mint in Virtualbox.
1. Install VirtualBox
Let’s first install VirtualBox on our Machine. If you’re on Windows, head over to the official VirtualBox’s download page and download the exe file and install it from there. However, if you’re on Linux, use the following commands to install it on your distribution :
On Ubuntu and Ubuntu-based systems :
sudo apt install VirtualBox
On Arch Linux and Arch-based distributions :
sudo pacman -S VirtualBox
On Fedora Workstation :
sudo dnf install VirtualBox
Now that we have installed the software, let’s create a Virtual Machine.
2. Enable Virtualization and Download the ISO
You may need to do this if virtualization is not enabled by default. While most systems have it enabled, if you experience issues creating a virtual machine, make sure you follow this step.
- Reboot your system and make sure in the boot menu that virtualization is enabled (You can access the boot menu by pressing either F2, F10, F12, or Delete key when your manufacturer information comes on the screen).
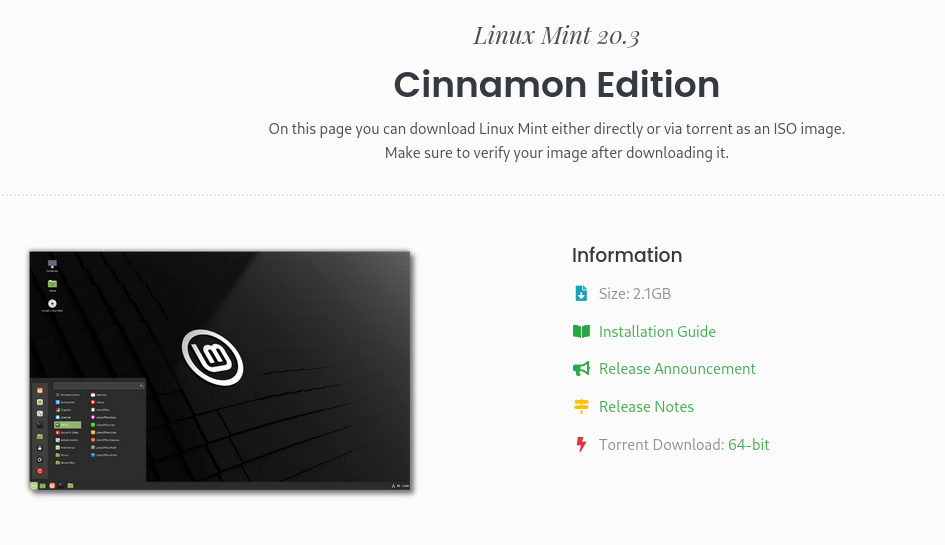
- Now, download the Linux Mint’s ISO from its official website. You can choose any flavor you like.
3. Create a Virtual Machine
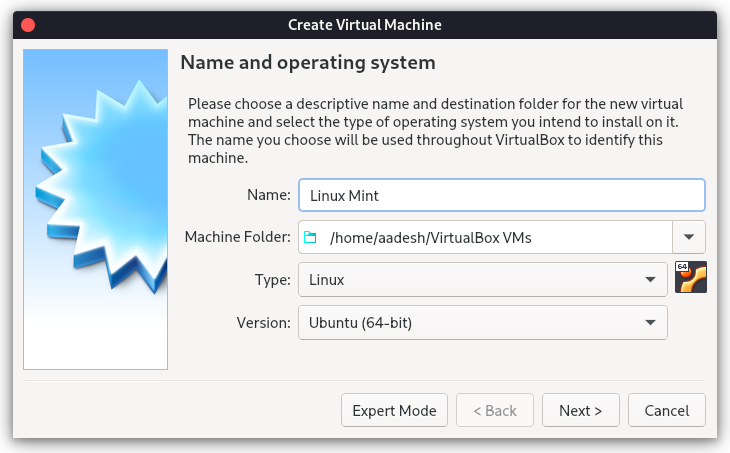
- Open the VirtualBox application, and click on the new button. Fill out the details of the VM we are creating (Type Linux Mint) and hit next.
- Allocate the Memory Usage for your VM and hit next (Warning: Do not allocate 100% of your RAM as it can cause your system to crash, 50% or lesser is recommended).

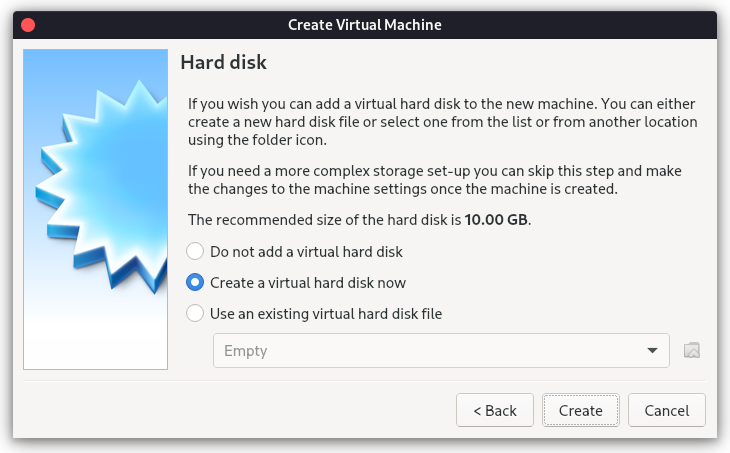
- In the Hard Disk Settings, leave the default selected option as it is and select Create.
- In the next menu, leave the default option (VDI) selected.
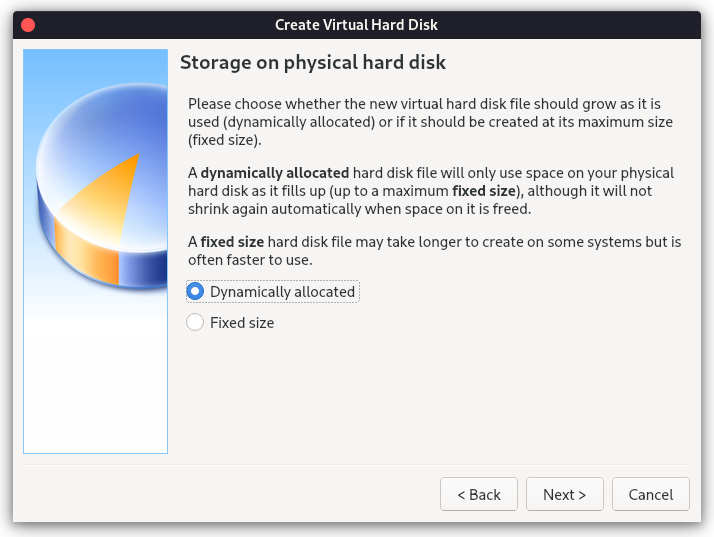
- Again, in the next menu, leave the default option (Dynamically allocated) selected and click Next.
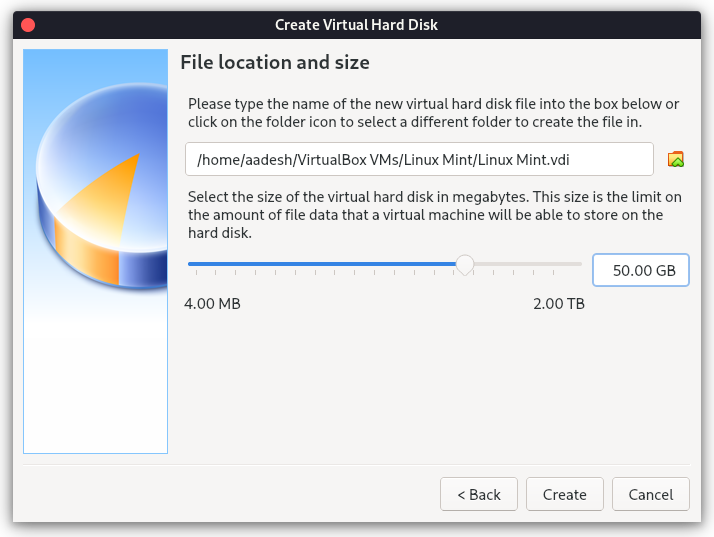
- Now, in the next Menu, you will have to select the size of the disk you want to allocate to your VM. If you’re just trying out a new distribution, 30 GB is fine. But if you’re going to use this VM for software installation I’ll recommend you anywhere between 30-100 GB, depending on the size of your software programs. I’m going with 50 GB for this demonstration. Click Create after choosing your value.
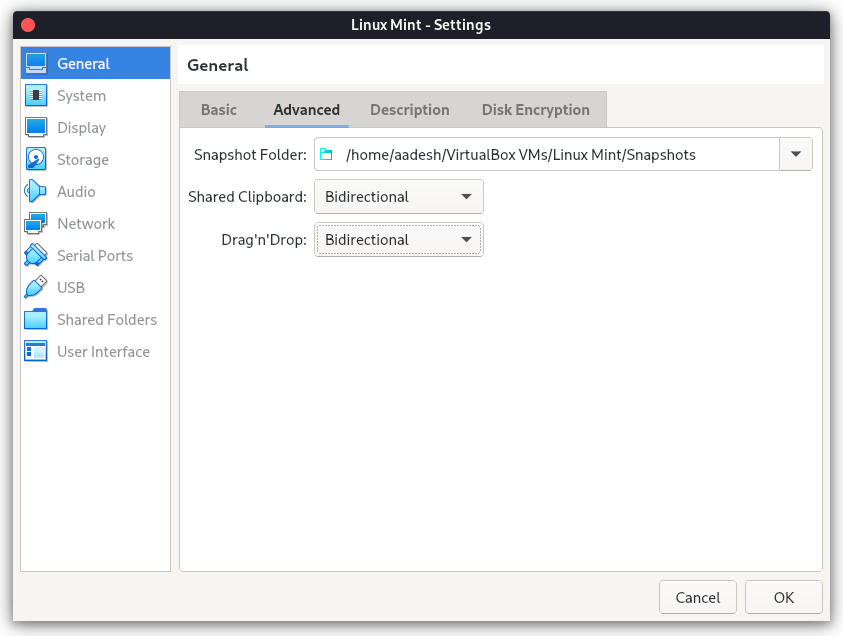
While your machine is created, it ain’t ready yet! Click on the settings button on the top to configure more options.
- In the dialog menu, go to General > Advanced and select ‘Bidirectional’ for both, Shared Clipboard and Drag and Drop.
- Now, this part is optional, but you can enable Disk Encryption if you want. This ensures an extra security layer for your VM.

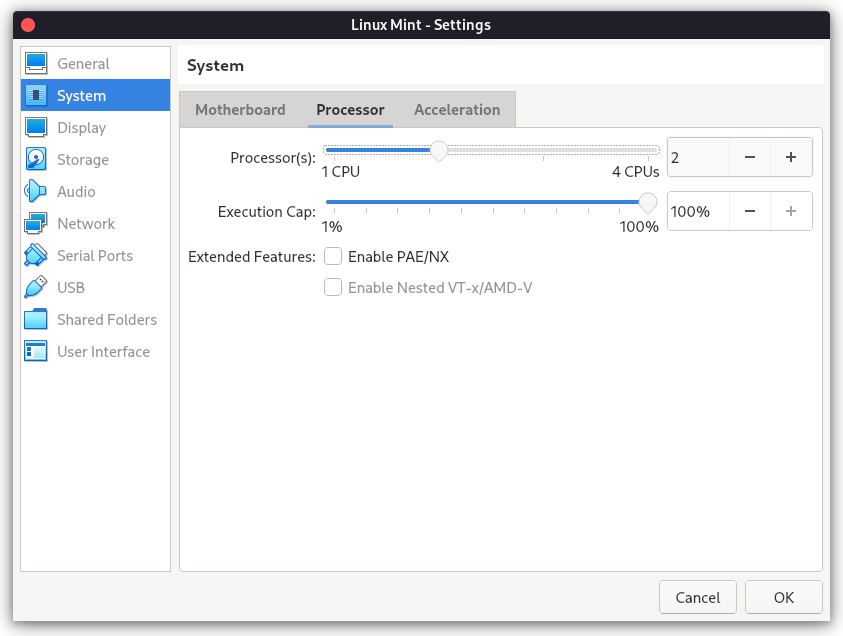
- In the System settings, allocate at least 2 GB of RAM and at least 2 cores of your CPU to the VM.
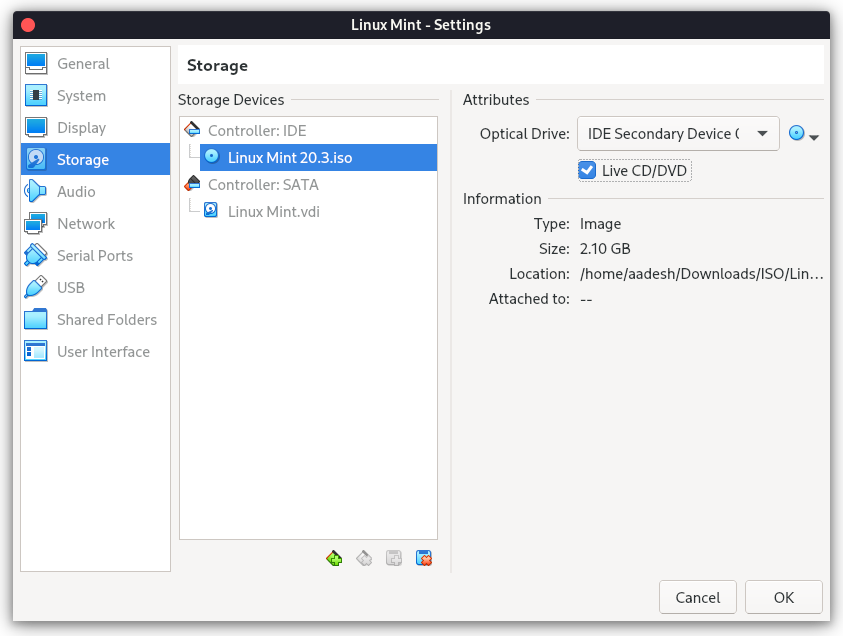
- Now, this is an important part – click Storage Settings > click ‘Empty’ > check the Live CD/DVD checkbox > click on the CD icon and navigate to your downloads folder > select the Linux Mint ISO and hit Ok.
4. Install Linux Mint On Your Virtual Machine
Now, you are ready to start your Linux Mint Virtual Machine.
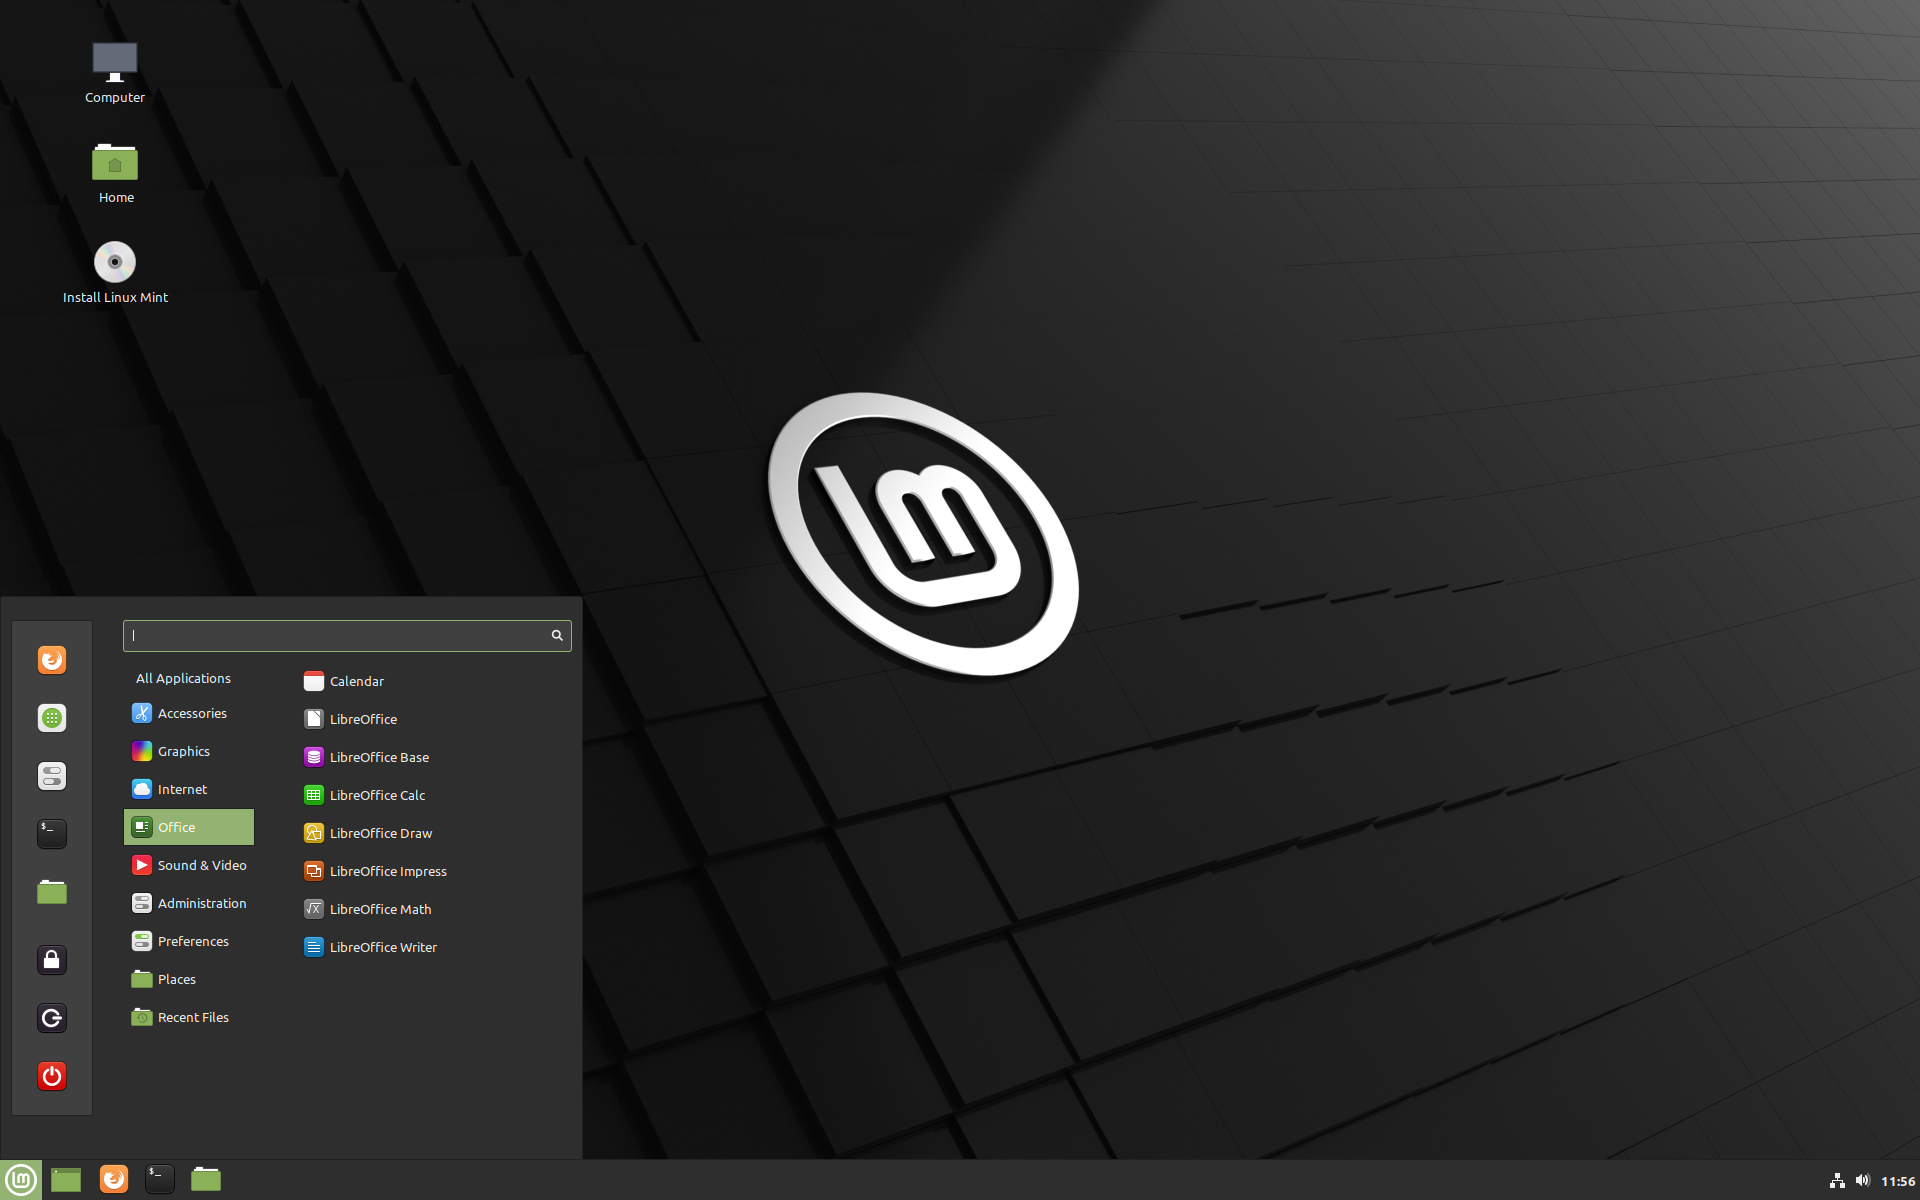
- Click on Start at the top and a new window will open up, making it full screen for better usability.
- When asked about the open-source or proprietary drivers, select Open source and press Enter.
- Once Linux Mint Live CD is fully booted up, launch the installer and proceed with the installation steps as you would normally do on bare metal. Choose your Language, Allocate Disk space, enter your Locale & Timezone and add your hostname and password, etcetera when asked.
- And finally, once the installation is finished, restart your VM.
Also, don’t forget to detach the installation media from the Settings > Storage menu. Don’t worry about the resolution of your VM if it is set up incorrectly on the first boot. You can set it to “custom” with the help of the xrandr command as follows :
xrandr -s <resolution>
#example : xrandr -s 1980x1080
And update your installation by running the following commands in the terminal :
sudo apt update && sudo apt full-upgrade
Final Words…
We hope you were successful in installing Linux Mint in your Virtual Machine using this article as a guide, Linux Mint is definitely one of the best distributions recommended for beginners.