
The No Such Partition Grub Rescue error is also known as the ‘Death Screen of Linux’. And this error mainly occurs when your grub configuration is messed up for some reason. In this article, we will try to solve this problem of ours using a live CD image of the same OS and try to fix your installation.
Pre-requisites
- You have a live CD/DVD/USB of the Operating System (must be of the same version).
- You have a stable internet connection.
- And you do not have a Wubi (Ubuntu inside Windows) installation on your system.
Let’s get started!
6 Easy Steps to Fix No Such Partition Grub Rescue Error
We need to re-install grub because it is either deleted or corrupt. And to re-install, we will copy the grub file from the live USB to your grub directory. Note that this will remove any custom configuration you have made to the grub file. Follow these steps to fix your grub file.
1. Locate your Root/boot partition
Boot from the Live USB stick and, in the terminal, type the following commands to gain administrative privileges :
sudo su
Now, type the following commands to know your disk partitioning structure :
fdisk -l
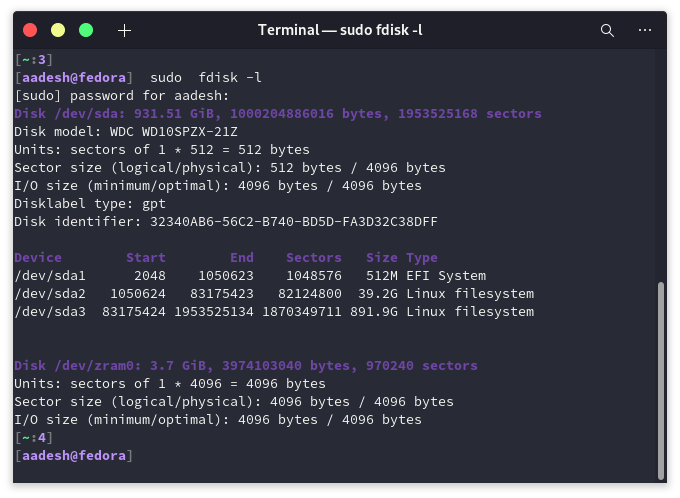
In the output, you will see text like /dev/sda1 or /dev/sda2 etc. If you have a separate Boot partition (EFI filesystem), note its location (usually it is 500 MB). And, if you don’t have a separate boot partition, then locate your root (/) partition. If you don’t know where your root is located, then you have to guess. Typically, it’s 30-50 GB in size.
2. Mount the Root/Boot Partition
To modify the changes in our root/boot partition, we will have to mount it first. To do that, type the following commands in your terminal :
sudo mkdir /mnt/temp
sudo mount /dev/sda2 /mnt/temp
Your sdX number can be different from mine, use the number where your root partition is located. And for separate boot partition, mount it as follows :
sudo mkdir /mnt/temp /mnt/temp/boot
sudo mount /dev/sdXY /mnt/temp  # Mount the main partition.
sudo mount /dev/sdXZ /mnt/temp/boot  # Mount the /boot partition.
3. Be CHROOT
Now that we have mounted the partition, we will have to mount several items in preparation of the chroot, run the following commands :
for i in /dev /dev/pts /proc /sys; do sudo mount -B $i /mnt/temp$i;  done
sudo cp /etc/resolv.conf /mnt/temp/etc/resolv.conf
sudo chroot /mnt/temp
If everything went well, you will see ‘root’ in the terminal prompt.
4. Update apt and Purge GRUB2 packages
Run the following commands as chroot to update apt :
apt-get update
Now, purge the old damaged grub files using these commands :
apt-get purge grub grub-pc grub-common
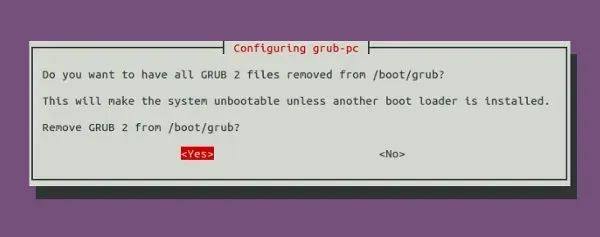
A prompt will appear asking for your confirmation to remove GRUB2 press and then press enter.
5. Re-install GRUB bootloader
We need to keep a few things in our mind before we we-install GRUB :
- While installation, it will ask you to add extra kernel options, if you don’t know about it then you probably don’t need it too. Just press the Tab key to navigate to Ok and press Enter.
- Installation notes will appear before your screen. Again, press Ok to continue.
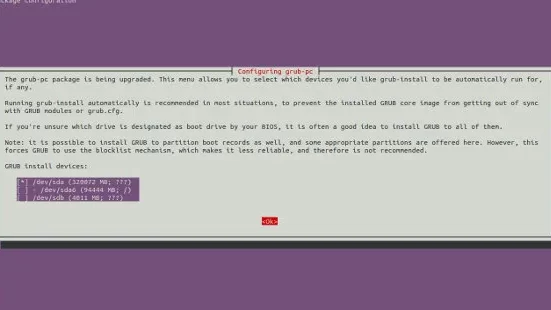
- It will now ask you to select the drive where it will install the GRUB bootloader. DO NOT select a partition (sda1, sda2) – select a drive (sda, sdb) using the spacebar. The selected drive will be highlighted using an asterisk (*).
Now, use the following commands to install GRUB again :
apt-get install grub-common grub-pc
Now, update GRUB and exit out of chroot:
update-grub
exit
6. Unmount all the Partitions
If you have only mounted the root partition before, run the following commands :
for i in /dev/pts /dev /proc /sys; do sudo umount /mnt/temp$i ; done
And if you have also mounted the /boot partition, then run the following commands :
for i in /dev/pts /dev /proc /sys /boot; do sudo umount /mnt/temp$i ; done
Finally, reboot the system and remove the live USB stick.
Summary
The recovery process was a little exhaustive, but it works. Hopefully, you were able to access your PC after this troubleshooting process.