
A fake webcam on Linux is a virtual camera that sends a video file to an application expecting camera input. On Ubuntu and Debian, v4l2loopback creates the device while FFmpeg converts and feeds the frames for software testing, demonstrations, accessibility workflows, or a consented placeholder video.
How a Linux virtual webcam carries video
The v4l2loopback kernel module creates a Video4Linux2 (V4L2) device such as /dev/video10, while FFmpeg supports V4L2 devices and becomes the producer that writes frames for a meeting or recording application to consume as camera input.
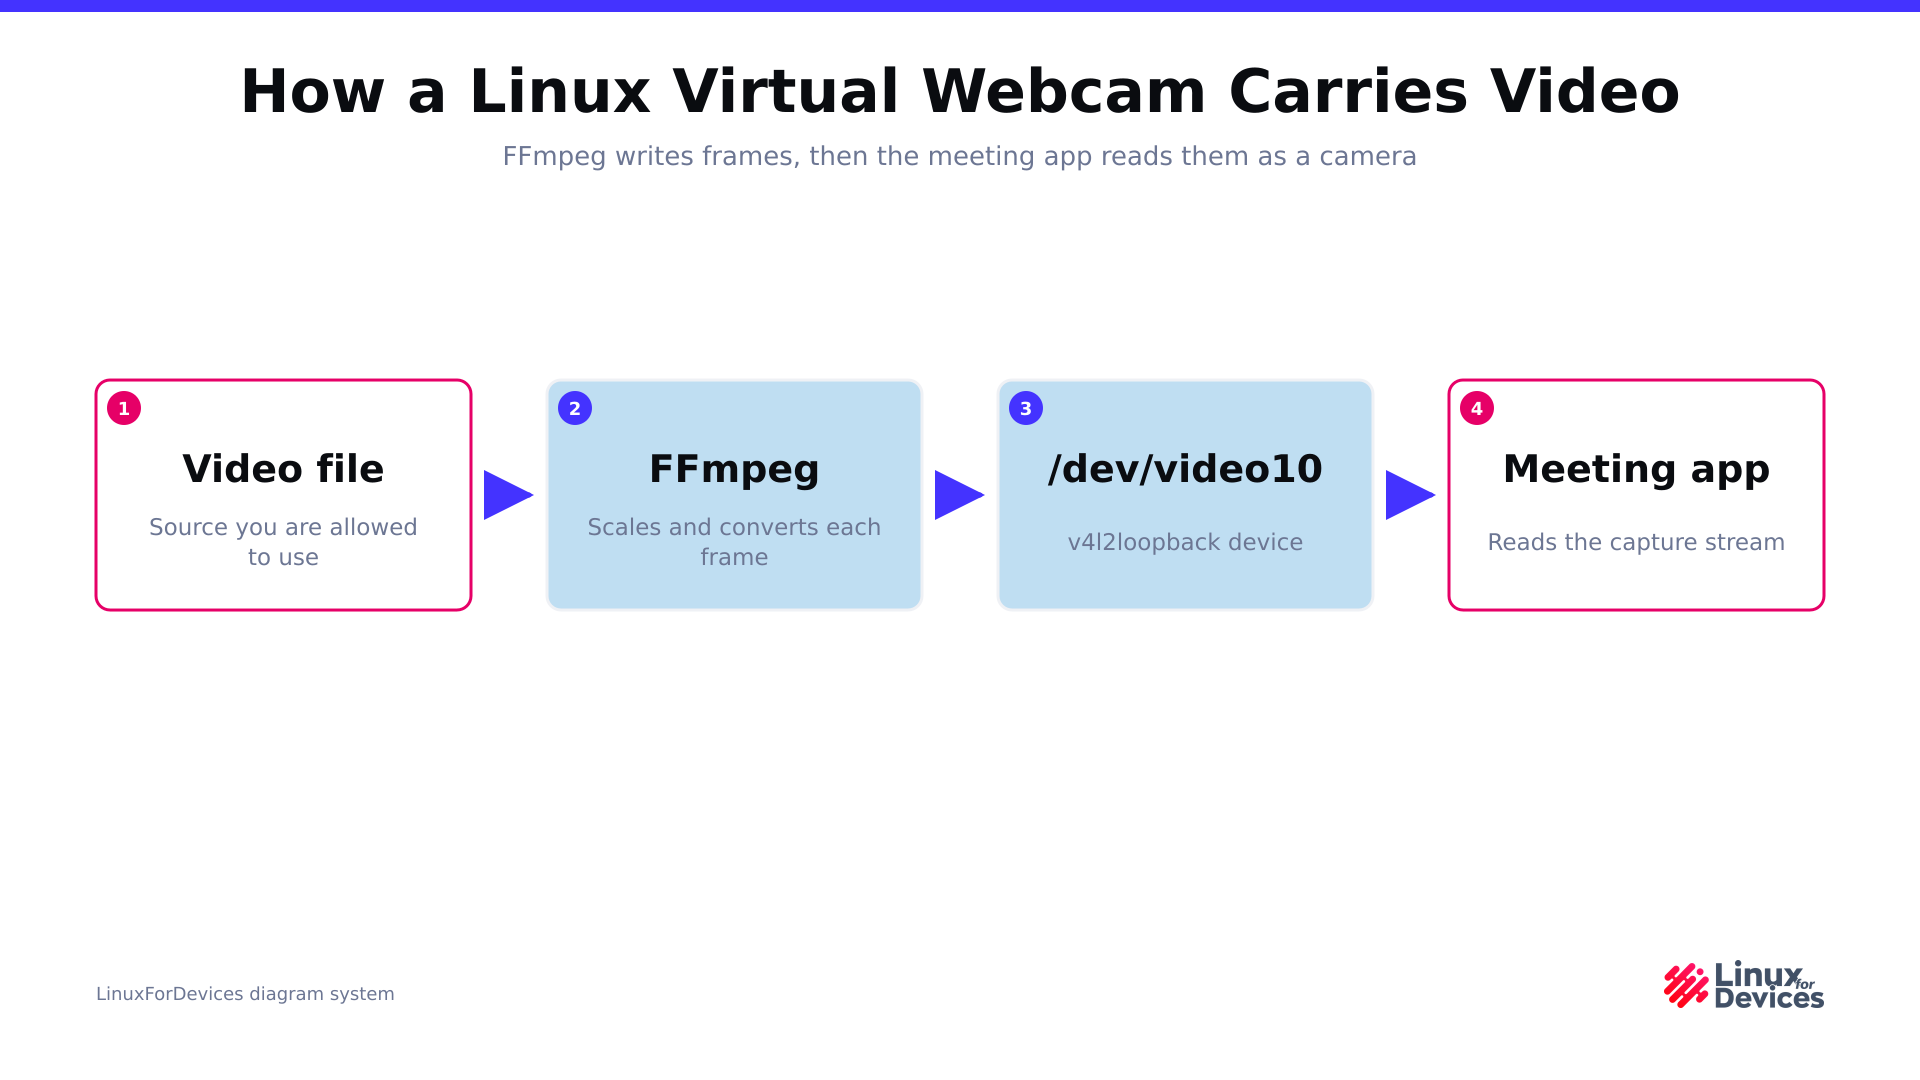
The device does not store the video. It passes frames between the two processes, so stopping FFmpeg stops the feed even if /dev/video10 still exists.
Check the requirements before loading the module
Use a video you own or have permission to display, tell other participants when a prerecorded source could be mistaken for a live camera, and handle sound separately because this setup sends video only.
| Component | Job | Boundary |
|---|---|---|
| v4l2loopback-dkms | Creates the virtual V4L2 device | Its module must build for the running kernel. |
| FFmpeg | Decodes, scales, and writes the video frames | It does not route the file audio into the webcam device. |
| v4l-utils | Inspects /dev/video10 and its capabilities | It verifies the device, not whether a meeting app has permission to use it. |
The commands below target current Ubuntu and Debian systems that provide these package names. If you need the package-manager basics first, use the Linux package management guide rather than substituting an unreviewed install script.
Install FFmpeg and v4l2loopback on Ubuntu or Debian
Install the media tools, the Dynamic Kernel Module Support (DKMS) package, and running-kernel headers so DKMS can compile v4l2loopback for that kernel.
sudo apt update
sudo apt install ffmpeg v4l2loopback-dkms v4l-utils linux-headers-$(uname -r)
The Ubuntu v4l2loopback-dkms package builds the module during installation. If Secure Boot rejects it, complete your distribution’s module-signing and Machine Owner Key enrollment flow before changing firmware policy, then use the Linux reboot procedure when enrollment asks you to restart.
Read the Secure Boot guide before considering a firmware change because disabling that control changes the machine’s boot trust boundary and is not a routine fix for one module.
Create a predictable virtual camera device
Choose a device number that is not already used by a physical camera. The following command reserves /dev/video10, labels it Virtual Webcam, and enables the capability mode required by many Chromium browser camera applications.
sudo modprobe v4l2loopback video_nr=10 card_label="Virtual Webcam" exclusive_caps=1
The video_nr option removes device-number guesswork, card_label supplies the name shown in camera menus, and the project’s module options reference explains how exclusive_caps switches the advertised capability after a producer attaches.
Confirm that /dev/video10 is the loopback device
Inspect the exact device before writing a video to it. The output should identify the v4l2 loopback driver, the Virtual Webcam card type, and Video Output capability.
sudo v4l2-ctl --device=/dev/video10 --all | expand -t 4
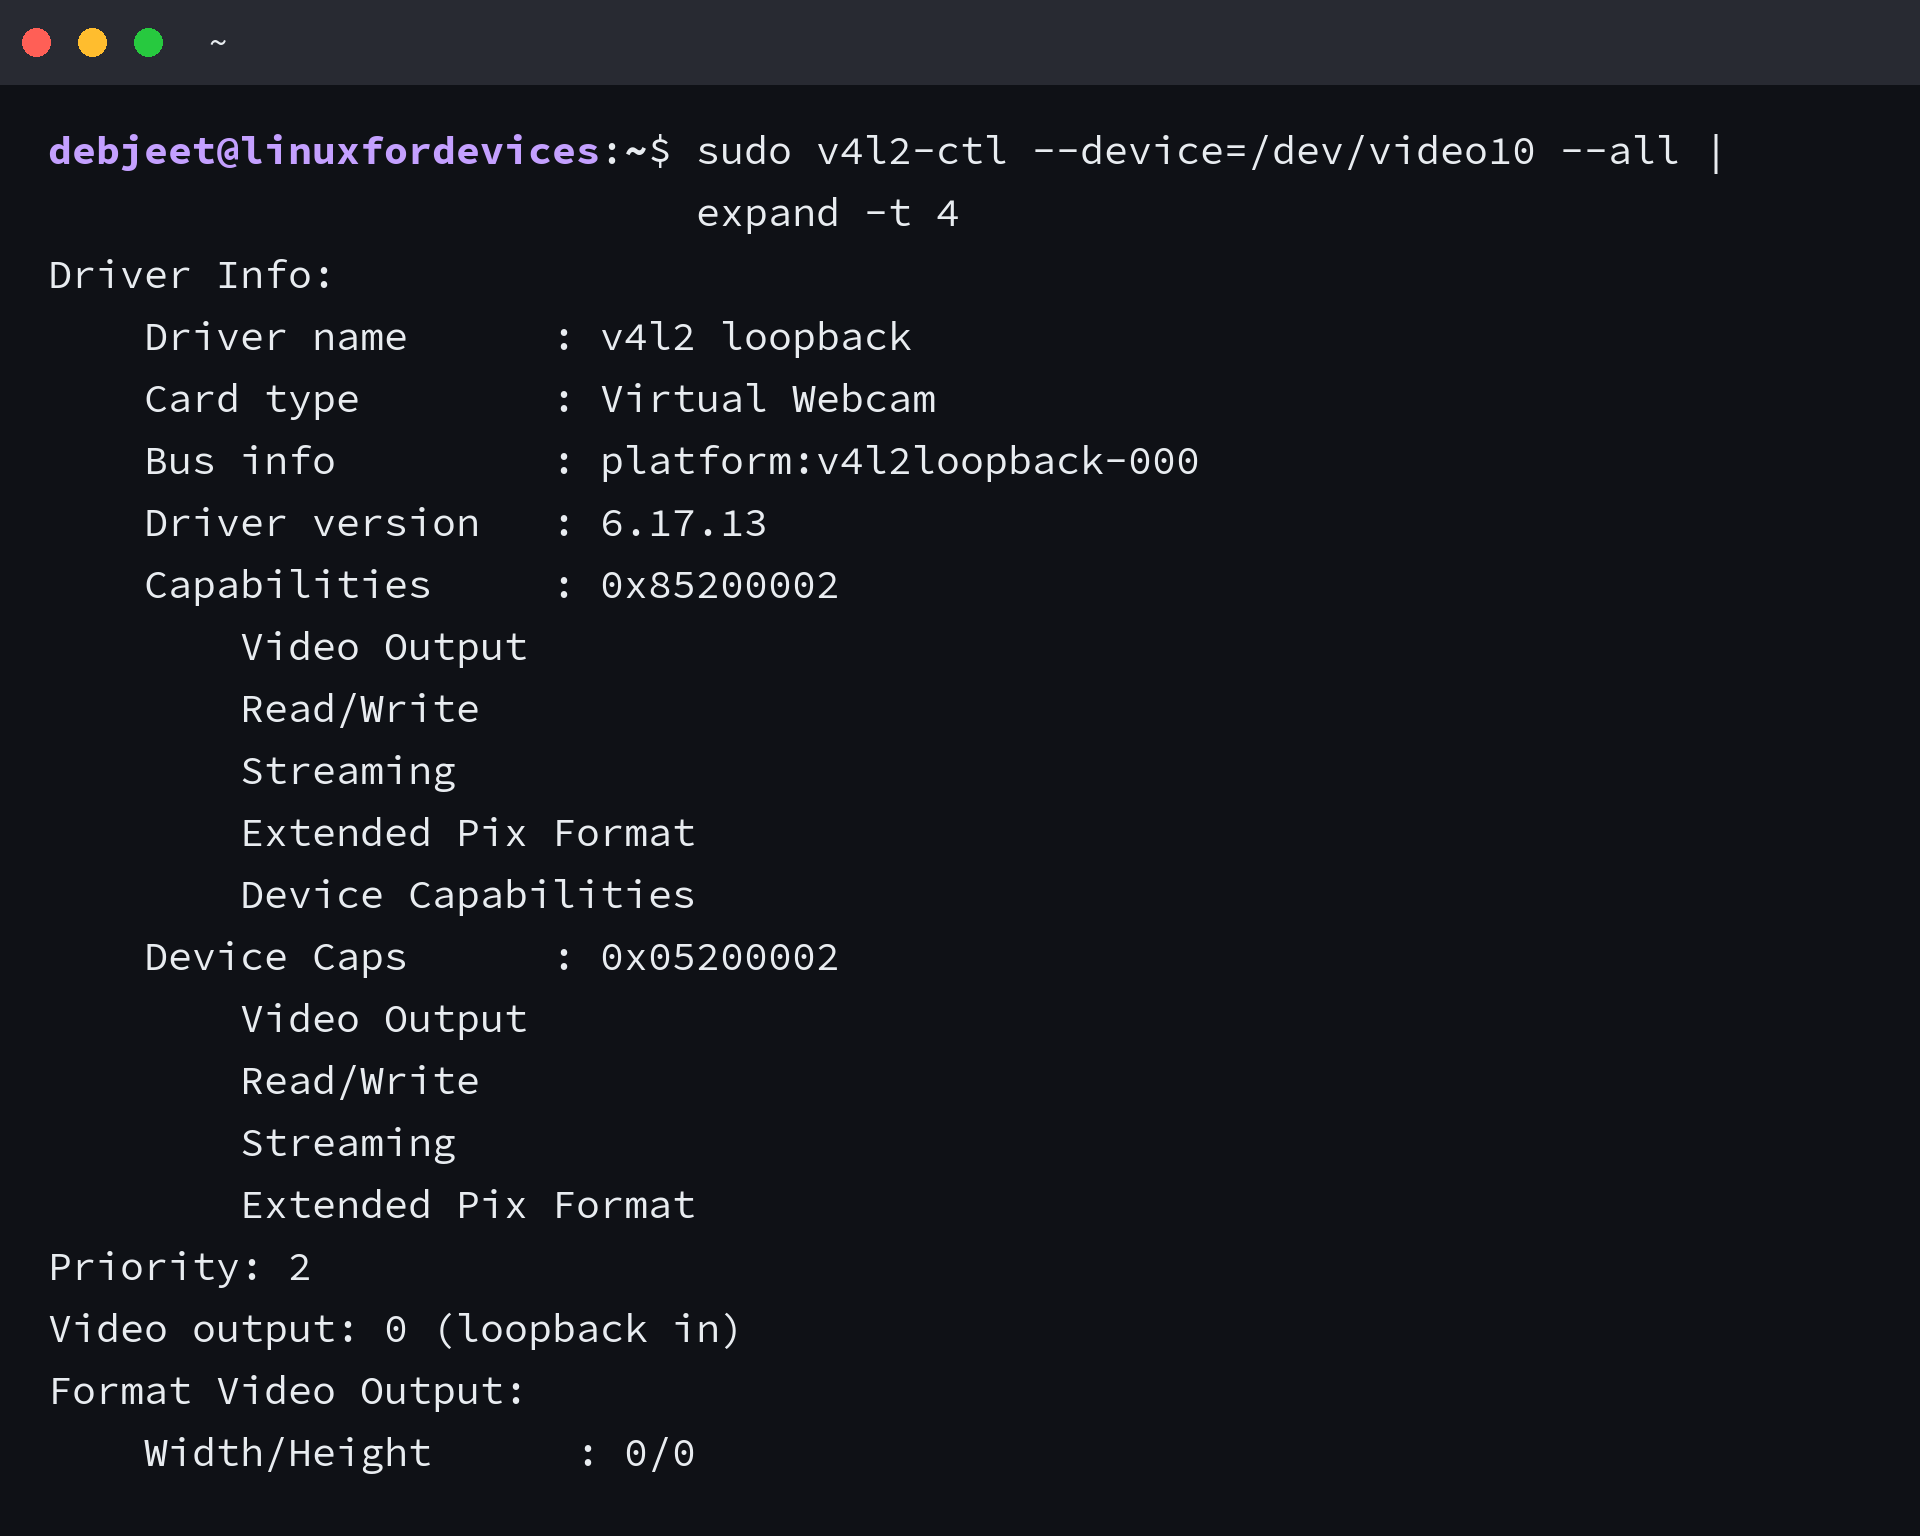
Width and height can show 0/0 before the producer negotiates a format because FFmpeg has not supplied frames yet.
Send a video file to the virtual webcam
Open a terminal in the folder that contains your source and name the file virtual-webcam.mp4, or replace that filename in the command. The Linux command-line guide covers navigation if you need to reach that folder first.
ffmpeg -stream_loop -1 -re -i virtual-webcam.mp4 -vf "scale=1280:720,format=yuv420p" -f v4l2 /dev/video10
The -stream_loop -1 option repeats the source indefinitely, -re reads it at its native rate, and the filter fixes the frame size while converting the pixel format to yuv420p for camera-consumer compatibility.
Press Ctrl+C in this terminal when you want to stop the feed. If FFmpeg reports Permission denied for /dev/video10, use the permission repair in the troubleshooting table instead of running the entire stream as root.
Select Virtual Webcam in your application
Start FFmpeg before opening the camera menu because exclusive_caps hides the device until a producer attaches, then select Virtual Webcam and check it in a private preview.

The visible clip confirms that the meeting application is reading the loopback device rather than the physical camera. If the menu was already open, close and reopen it after FFmpeg starts so the application refreshes its camera list.
Fix common virtual webcam failures
Most failures occur because the kernel module did not load, your user cannot open the device, or the consumer rejects the negotiated format, so match the message or visible state before changing the setup.
| Symptom | Likely cause | Next action |
|---|---|---|
| modprobe reports Module not found | DKMS did not build for the running kernel | Install the matching linux headers, run sudo dkms autoinstall, then load the module again. |
| modprobe reports Operation not permitted | Secure Boot rejected the module | Sign and enroll the module key through your distribution’s supported flow, then reboot if that flow requires it. |
| FFmpeg reports Permission denied | Your session lacks access to /dev/video10 | Add your account to the video group with sudo usermod -aG video “$USER”, then sign out and back in. |
| Virtual Webcam is absent from the camera menu | No producer is attached, or the app cached its device list | Start FFmpeg first, then restart the camera preview or the application. |
| The preview is green, distorted, or rejected | The consumer cannot use the source format | Keep the scale and format=yuv420p filter, then retry with a smaller frame size such as 640:480. |
| Video works but file audio is missing | V4L2 carries the video frames only | Share application audio or configure a separate audio route that fits your desktop environment. |
The permission repair changes group membership rather than weakening the device mode for every account. Review Linux users, groups, and permissions before applying it on a shared machine.
A senior objection is that Open Broadcaster Software (OBS) supplies a virtual camera with a graphical scene editor, and OBS is the better choice when you need multiple sources, overlays, live switching, or a preview canvas instead of one repeatable file-to-device pipeline.
Stop the feed and remove the device
Stop FFmpeg with Ctrl+C before removing the module. Then unload v4l2loopback so /dev/video10 disappears and applications cannot keep selecting a dead camera source.
sudo modprobe --remove v4l2loopback
If removal fails while a producer or consumer holds the device open, close the meeting preview and any FFmpeg process before trying again.
Virtual webcam questions
Why does Virtual Webcam appear only after FFmpeg starts?
With exclusive_caps enabled, the device advertises output capability before a producer attaches and capture capability afterward. Start FFmpeg, then reopen the application’s camera menu.
Why does FFmpeg say Permission denied for /dev/video10?
Your login session does not have access to the video device. Add your account to the video group, sign out, sign back in, and retry without running the stream as root.
Does the virtual webcam carry audio from the video file?
No. v4l2loopback carries video frames, so route or share audio separately through your conferencing application or desktop audio system.
These checks separate device discovery, permissions, and audio routing so you can repair the failing boundary without replacing the full setup.
Finish with one private preview
Use a short clip, start FFmpeg, select Virtual Webcam in a private preview, and confirm the frame size before a live session. Stop with Ctrl+C and unload the module when the test is complete.