

Bliss OS is an open-source operating system developed based on Android. BlissOS 15 is based on Android 12L operating system, but the other versions also include the base Android 11 to 13, which can be highly customizable giving users a different experience from the already known systems, where they can also install different applications compatible with the Smartphone OS. Of course, Android uses the Linux Kernel but is fundamentally different from other Linux based OS and hence there will be some caveats and differences when you compare it to distributions like Fedora or Ubuntu.
The user interface is presented in two different forms: Tablet and Desktop. The Desktop Form is useful for PC users who are in the habit of using the mouse frequently.
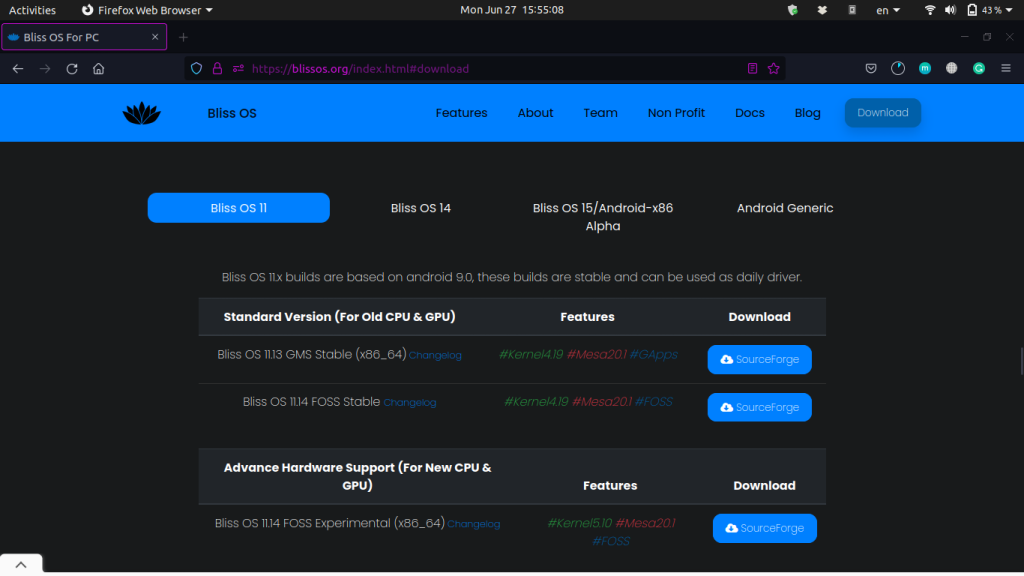
Download Bliss OS img file
Visit this link and download the Bliss OS ROM ISO file. Also, if you don’t have the Balena Etcher, then this is a good time to download and install it into your system. To do that, visit this and download Etcher for your system. Also, keep closing to the USB stick as we will need that in the next stage.
Installing Bliss OS: Android OS for PC
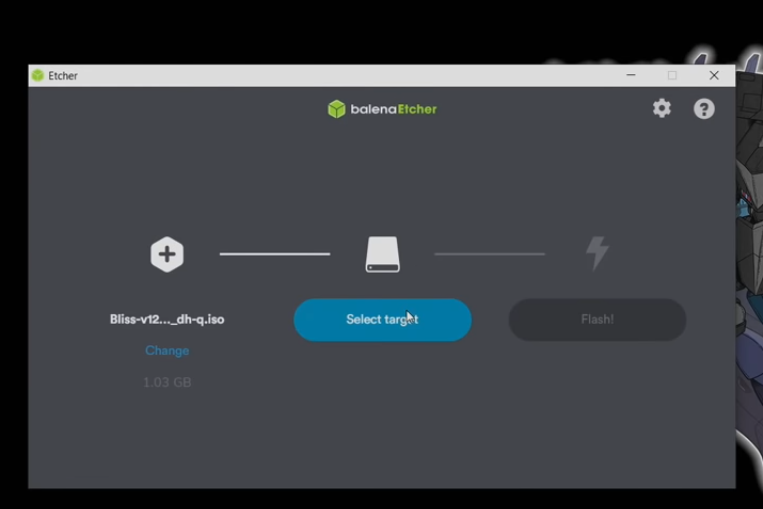
So now we’ve got everything downloaded, let us launch Balena Etcher. We’re going to select the image file we just downloaded. Now we will have to select the USB Drive. Make sure you’re selecting the correct drive and click flash. This is gonna flash the image to the USB Drive and when we’re finished with this we can move over to the PC we want to run this on. You can run this in live mode from the USB but if you do want to install this to the internal hard drive we’ll also go over those steps, it’s really easy to do. Now grab your USB Drive and move back to the machine you want to install this on.
So we have the USB drive we just installed bliss OS – we will plug it into the PC and when you’re booting this up you will have to enter the boot menu. To enter your boot menu some use F12 some use F11 some use F2 and some even use the lead so you might have to do some research.
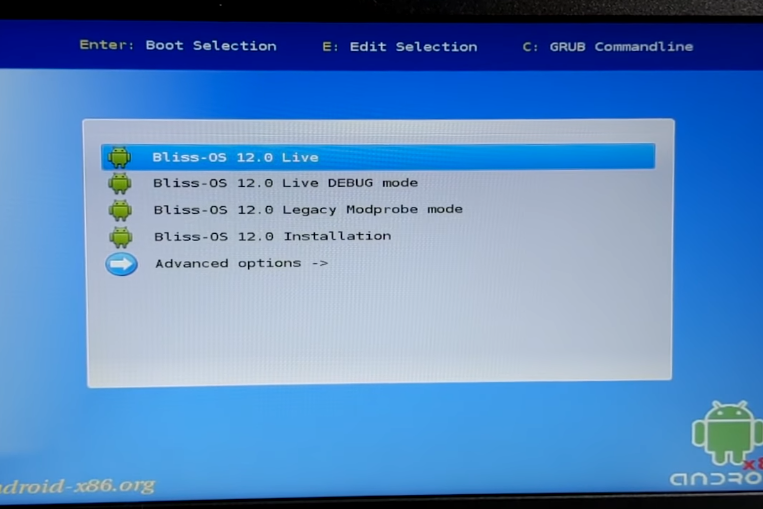
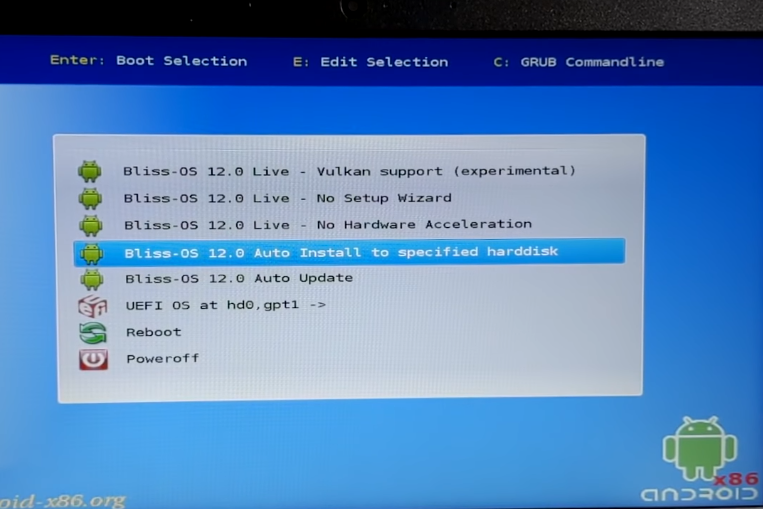
So as soon as we get into the boot menu I’m going to choose my USB drive this is listed as a SanDisk Ultra so we will scroll down to it using the arrow keys on the keyboard, and I’m going to press ENTER. It’ll start to boot from that USB Drive you’ll be presented with the android x86 grub screen, then select the very top option.
It is the one we recommend doing before you do any kind of installation, this will run Bliss OS 15 in live mode from the USB but keep in mind nothing is stored on the USB so if you sign in to Google Play or download any apps they will be deleted when you reboot.
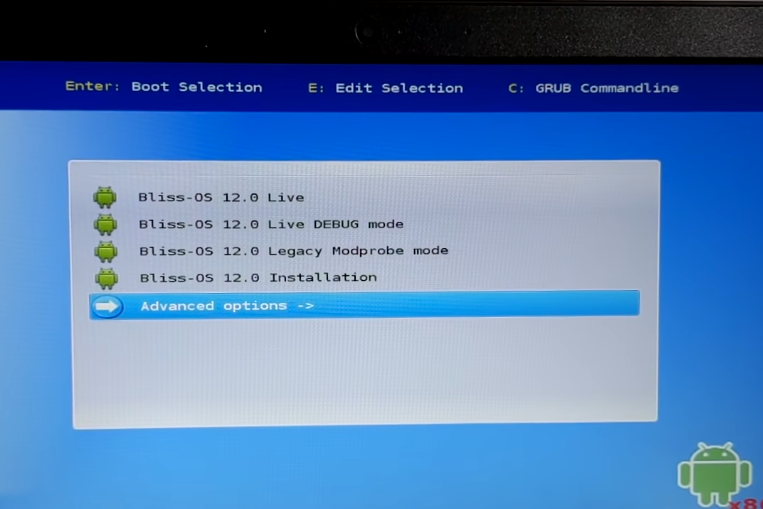
If you want to go ahead and install this to an internal hard drive, scroll down to Advanced Options, and you’ll find an option here listed as auto-install to a specified hard disk. Once we’re in this menu we’ll see every drive that’s connected to this PC, the very top one is my removable drive that’s my USB stick that I have bliss OS installer located on and the one right at the bottom is marked hard disk that’s my internal 64-gigabyte storage on this mini laptop.
I’m going to install it to the internal storage, this will wipe all of your data. If you’ve chosen the auto-installation, the Installer will erase the whole hard drive. This is the last confirmation are you sure you want to do this, I’m going to select yes, and it’s going to format my internal hard drive and install Android ten to it.
When it’s finished, you’ll get the option to run bliss OS now or reboot, I recommend doing a reboot. We’re going to highlight reboot press, okay. Exit and pull the USB stick from the computer, now this is installed on my internal hard drive I can go ahead and choose the first option or just let it say, and it will automatically boot into Android ten.
After a few seconds so the very first boots going to be a lot longer than any other time you boot this up it just has to get everything ready on the hard drive but as long as you see the startup animation you should be good to go just let this finish up, and it’ll boot us right into Android ten.
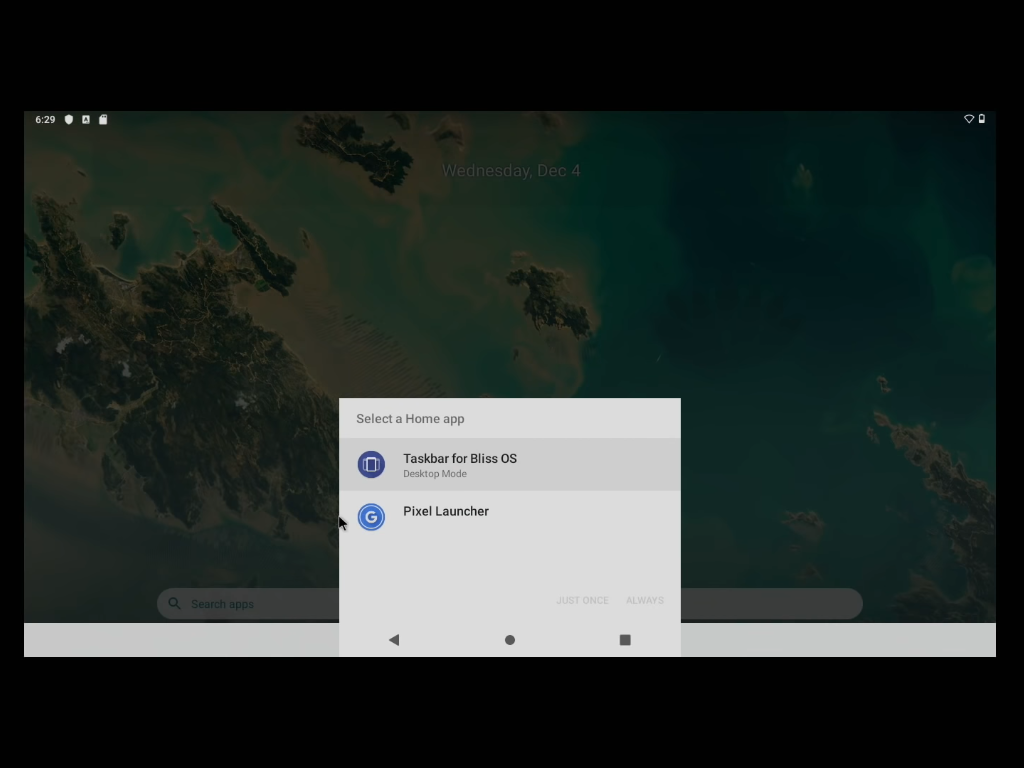
On the first boot you’re going to be asked to select the home app, I use the task bar for bliss OS.
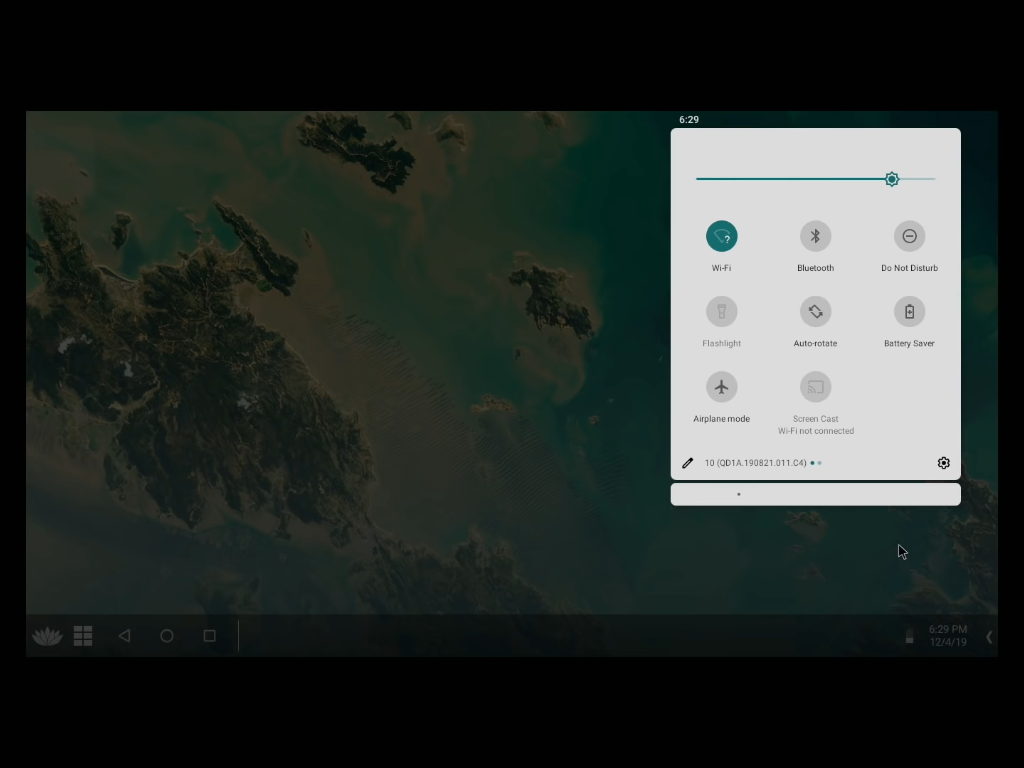
If you want to connect to Wi-Fi it’s just like an Android device we’ll go into settings, Network now connect to Wi-Fi.
Now you can head down to the little Bliss icon in the bottom left-hand corner to open up the Google Play Store, and you’re going to have to sign in just like you would with any kind of Android device you can start downloading your favorite games here. Keep in mind a lot of these do require touch screens so if your laptop or PC doesn’t have a touchscreen built-in you might have a hard time playing it, but there are a lot of games that do support controllers and if you have Bluetooth built-in you can connect an Xbox One controller very easily.
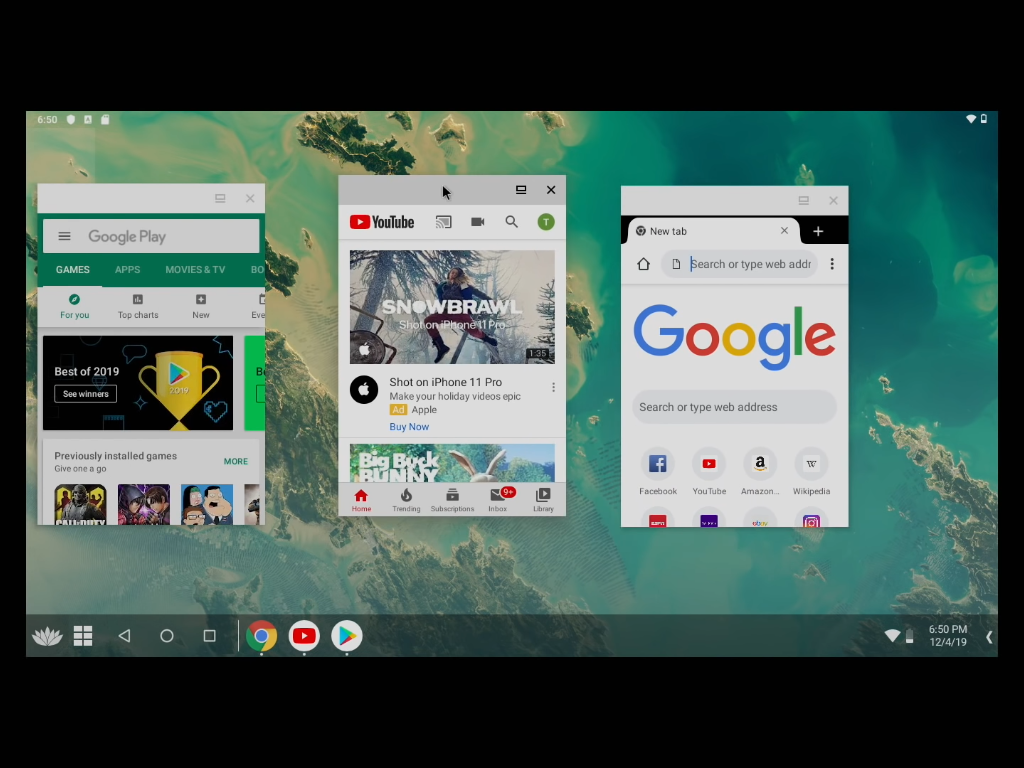
Bliss OS also supports multi-windows, so you can go ahead and open up several apps at the same time. You can resize the app or open up a new one if you want to.
Summary
That’s it for Bliss OS, a nice android OS for pc. Now that you have the knowledge necessary to run android on your PC, it’s high time to play some fast-paced action games. Because of the controller support, you can essentially turn an old PC to a Smart TV and watch content from the streaming Apps to your Monitor. It also incorporates many optimizations with drivers that help run the open source OS smoothly on devices containing x86 CPUs.
References
Bliss OS XDA Thread
Bliss OS official GitHub page
Also Read
Bazzite – The Ultimate Linux distribution for Gaming
Waydroid – Run Android applications natively on your PC