

In Kubernetes, scheduling means to make sure that All Pods are attached to Nodes so that Kubelet can run them. For every pod that the scheduler discovers, the scheduler becomes responsible for finding the best Node for that Pod to run on. Kubernetes Scheduler is by default a scheduler for Kubernetes so that, if you want, you can write your own Components and use them instead.
The Scheduler selects an Optimal node to execute lately created pods or unscheduled pods. Though, containers in pods and pods themselves have different requirements, these filters outdo such nodes that don’t meet specific pod’s requirements. This leads to an approach to API where it lets you specify a node for A pod when you create it.
What Keywords are Essential to Know?
You might be wondering what is a pod, Node, kubelet, etc. Don’t worry, I will explain everything in this article. A pod represents a set of containers in your cluster. A container is an isolated environment for your Specific Application/Project. A cluster in Kubernetes comprises a Single Master Node and the rest are Normal Nodes.
A node is generally a Workstation or a PC from where you develop your Application or perform/access cloud Services. A Kubelet is the primary agent that gives an Isolated Environment that runs on each node. The kubelet works in terms of a PodSpec. A PodSPec is a YAML/JSON object that describes a Pod. These terms are enough under the context of the Article to know. Now let us start the Installation of Kubernetes-Scheduler.
How to Install Kubernetes-Scheduler on Linux?
Well, I am using Linux Mint on my PC, which is a Debian based distribution. But don’t worry, I will also provide commands for various other important Distributions.
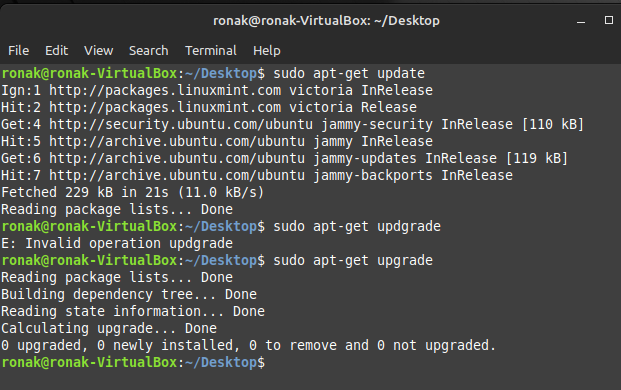
Initially, we have to update and upgrade the system repositories to cover all the required and latest versions of all the files.
Type the following command to update and upgrade the repositories:
sudo apt-get update
sudo apt-get upgrade
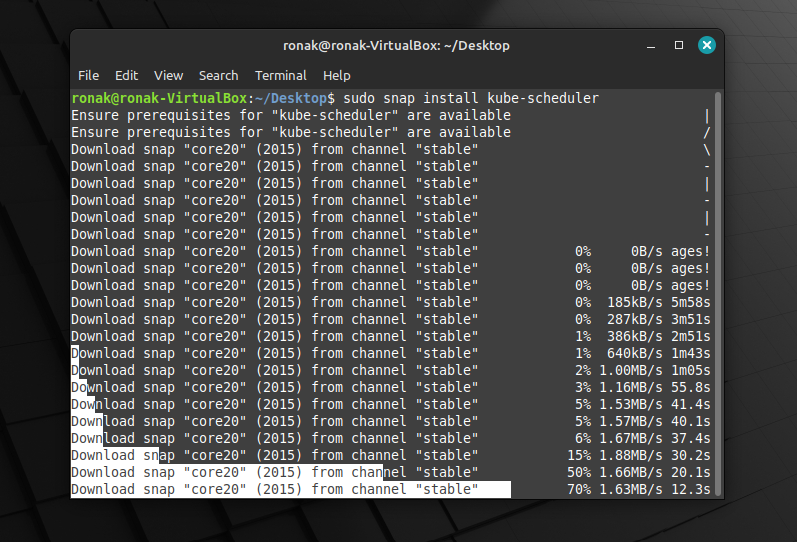
To install the Kube-scheduler on Linux distribution, you can only download it via snap and core package installer. It is a Canonical Snapcraft application used for installing applications in alternative to apt, dnf, and aptitude package installers. If your Linux does not come with Snap, don’t worry, you can download Snap just by typing the below command:
sudo apt install snap
sudo snap install core

After the Installation process of snap and core is completed, you can download the kube-scheduler just by typing the below command:
sudo snap install kube-scheduler
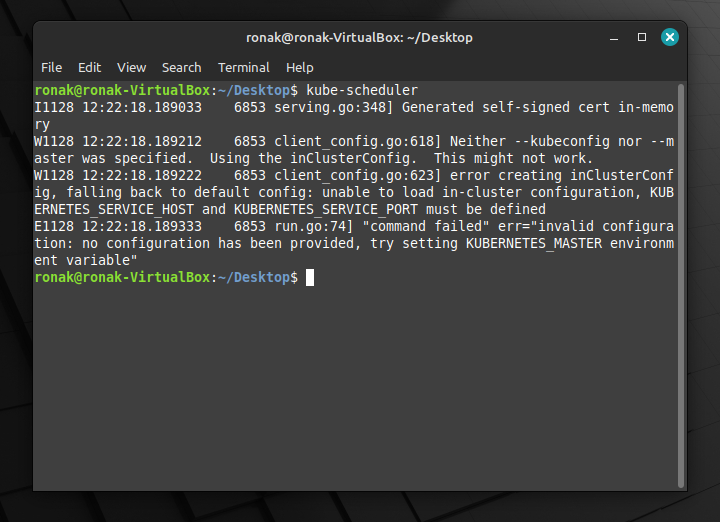
To check whether the Kube-scheduler is installed correctly or not, just type ‘kube-installer’ inside your terminal:
To configure your kube-scheduler, it comes with various flag-based configurations. Some important configurations are:
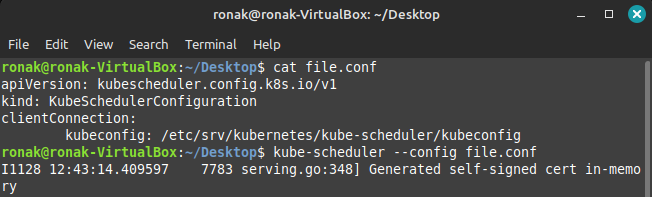
--config string
--client-ca-file string
--bind-address string     Default: 0.0.0.0
You can try your own IP address, at this moment I have used my localhost address which gives an error. You can try your own, it won’t give you an error.

The “–config” needs a config file in which configuration regarding the application is needed. The “–client-ca-file“, if set, any request presenting a client certificate signed by one of the authorities in the client-ca-file is authenticated with an identity corresponding to the Common Name of the client certificate. The “–bind-address string” asks for the IP address of the node on which to listen for web clients. For additional configurations, see: https://kubernetes.io/docs/reference/scheduling/config/
However, to install kube-scheduler in Arch-Linux, please follow the below command:
git clone https://aur.archlinux.org/snapd.git
cd snapd
makepkg -si
sudo systemctl enable --now snapd.socket
sudo ln -s /var/lib/snapd/snap[spacebar]/snap
sudo snap install kube-scheduler
To install Kube-scheduler in CentOS, you will need the yum package installer to install various packages that are needed to install Kube-scheduler, please follow the below command:
sudo yum install epel-release
sudo yum install snapd
sudo systemctl enable --now snapd.socket
sudo ln -s /var/lib/snapd/snap /snap
sudo snap install kube-scheduler
What features come with the Kubernetes scheduler?
- Filtering the nodes that don’t meet or satisfy the requirements of the pod’s resource requirements or constraints.
- Ordering the nodes in a specific fashion, which is also known as scoring in this context, helps us to understand which nodes work better and more efficiently under the scheduling process.
- Configuring the Kube-scheduler allows us to customize the scheduler’s behavior for better arrangement of Nodes under the Cluster.
- Custom Plugins: it allows the users to write and register built-in or customized plugins as if needed for the cluster
- Standard resource: It helps various resources like CPU, memory, and storage that are used to schedule pods that meet requirements.
- It provides additional scheduling logic and allows more complex scheduling of Multiple-level Queues, round-robin, priority, First come, First served, etc. when computing with a cluster containing thousands of workstations.
Summary
Kube scheduler is a control plane component that assigns pods to nodes in a cluster. However, it comes with lots of specifications which you can refer to from the reference section below. I hope you were successfully able to install and use Kube-Scheduler on your distribution using this guide. If you have any doubts, then you can leave your questions in the comments down below.
Reference
For more information, visit:https://kubernetes.io/docs/reference/command-line-tools-reference/kube-scheduler/
To follow more tutorials on Linuxfordevices, visit:https://www.linuxfordevices.com/tutorials