

XMRig is an optimized, high performing, open source, cross-platform RandomX, KawPow, CryptoNight and GhostRider unified CPU/GPU miner for Monero and CrytoNote coins and a RandomX benchmark. It is an open source software so we can either download the binaries to use the miner or we can compile our own from its source. Both the binaries and source can be found on the official GitHub repository for Windows, Linux, macOS, and FreeBSD. Mining backends CPU (x86/x64/ARMv7/ARMv8) OpenCL for AMD GPUs, CUDA for NVIDIA GPUs via external CUDA plugin. Xmrig is a popular choice for Monero mining. The standard fee of the application is 1% of mined coins. The fee can be increased or completely turned off.
What is Crypto Mining
Bitcoin, Monero and several other cryptocurrencies use mining to generate new coins and verify transactions. This involves many computers around the world working together to check and keep the blockchains safe, which are virtual records of cryptocurrency transactions. Computers on the network receive new coins in return for contributing their processing power. It’s a virtuous circle: the miners maintain and secure the blockchain, the blockchain awards them coins, the coins provide an incentive for the miners to maintain the blockchain.
Few notes before using Xmrig
Before we dive into the installation process, let’s first take a look at some of the things you will have to consider for installing and using Xmrig on our Linux PC to attain an optimal performance.
- Crypto mining can be a financial activity.
- Mining requires you to have a decent PC as well as a powerful GPU.
- A Major hurdle for crypto mining is power consumption, so check the expenditure to earning ratio.
- GPU (Graphics Card) is required for a higher hash rate.
- Crypto mining reward is backed by a decentralized network.
Make sure to keep these considerations before proceeding with the installation.
In this module, we will see how to install Xmrig on our Linux PC.
Installing Xmrig
here are two ways through which you can install Xmrig on our Linux PC. We will discuss all methods one by one.
- Downloading from Xmrig official website
- Using Snap
Let’s see each method one by one.
Method 1: Downloading from Xmrig official website
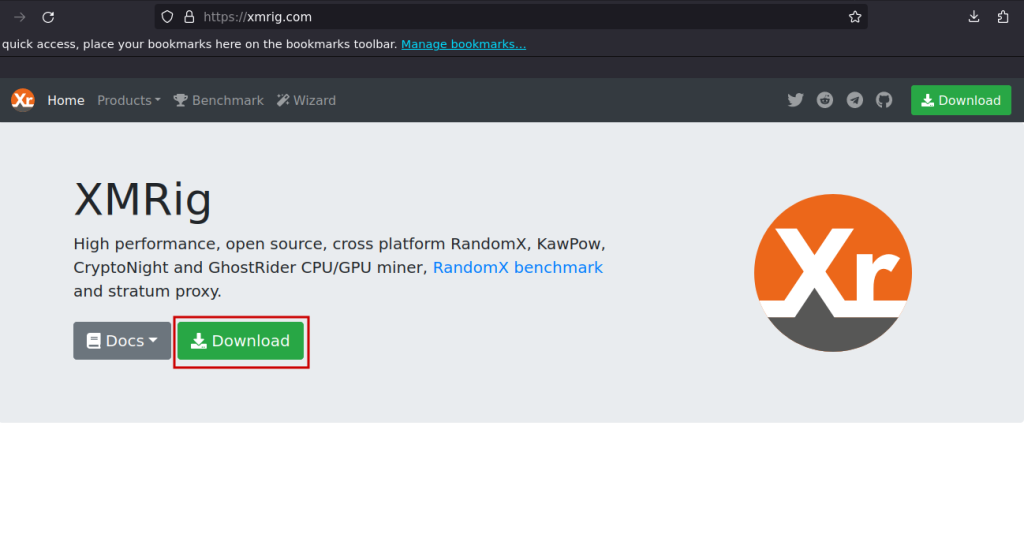
Open your browser and search for Xmrig website. And click on Download button as indicated below.
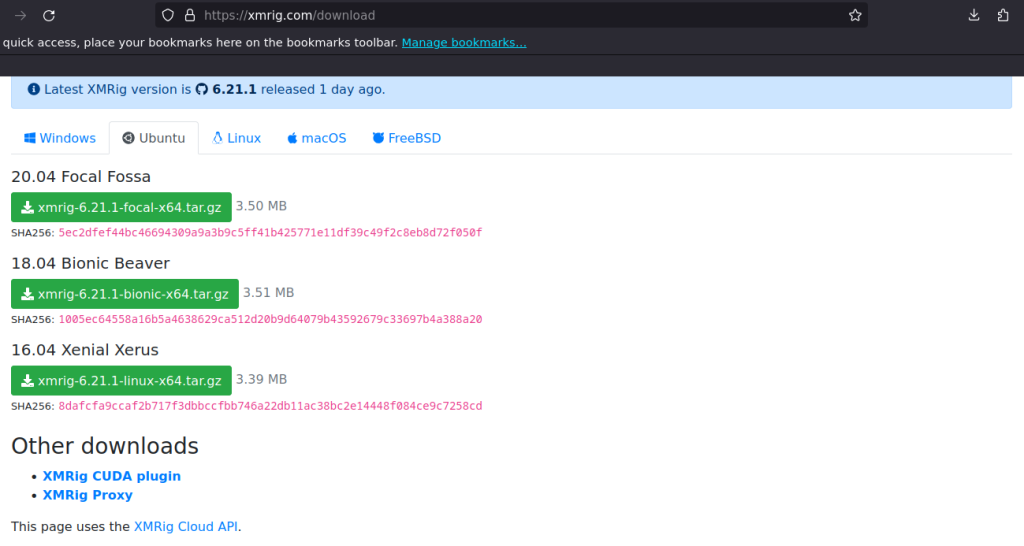
Select a right Tab according to your Operating System among Windows, Ubuntu, Linux, FreeBSD. We here only look for Ubuntu and Linux (in general).
Ubuntu
For now, Select Ubuntu tab for Ubuntu OS. For other Linux distributions, skip this Ubuntu section. Under this Ubuntu tab, click on one of three available options among 20.04 Focal Fossa, 18.04 Bionic Beaver or 16.04 Xenial Xerus to proceed to download.
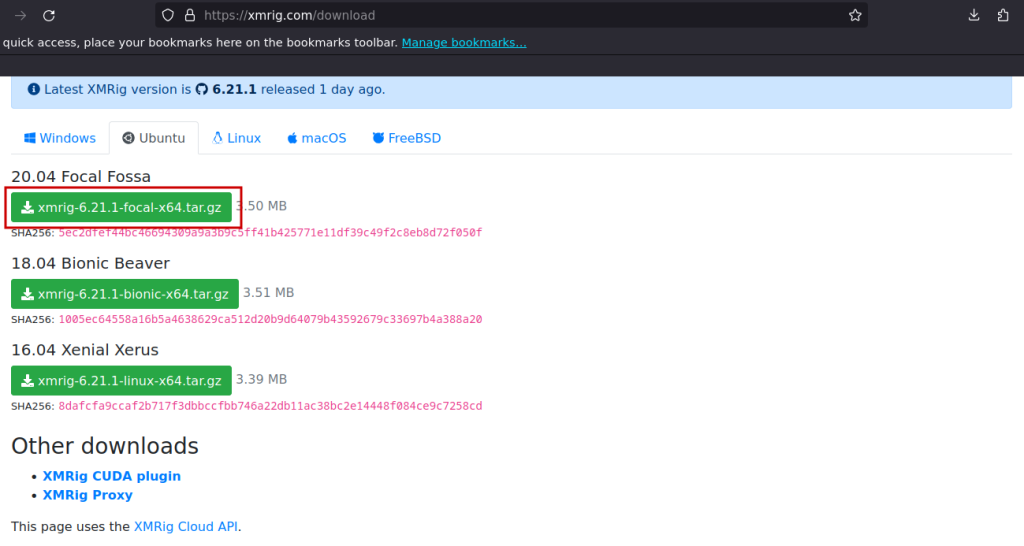
Clicking on download option for 20.04 Focal Fossa, assuming you have Ubuntu 20.04 Focal Fossa OS.
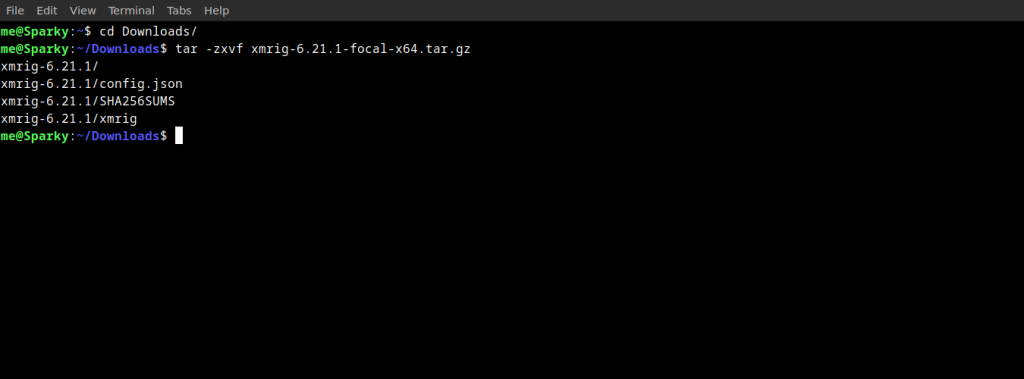
After downloading the above file, we have to decompress it. Open your Terminal, and run the below command:
cd Downloads/
tar -zxvf xmrig-6.21.1-focal-x64.tar.gz
After this, skip to the XMRIG setup section at the bottom.
For other Linux distributions
Select the Linux tab if you are using any other Linux distro.
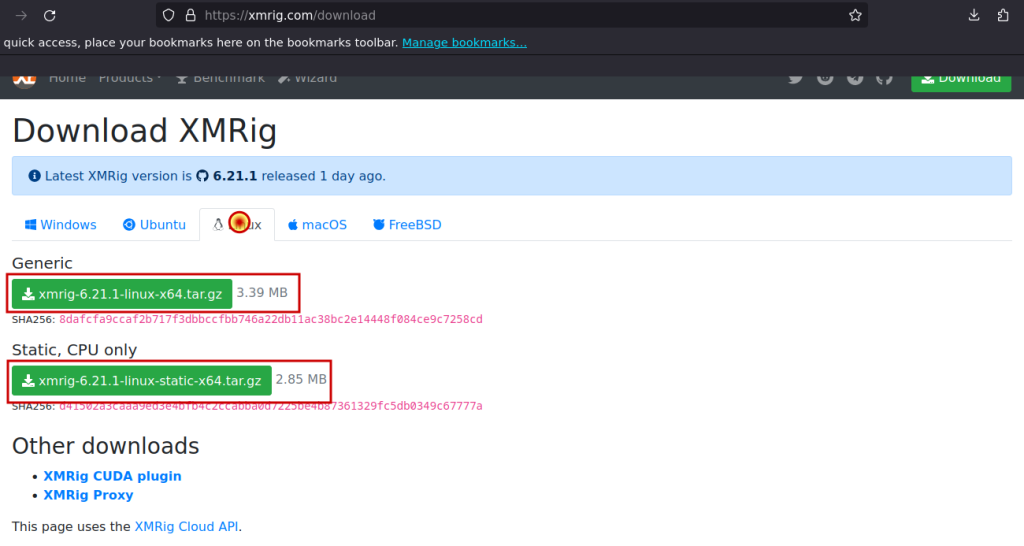
There are two options for download:
- Generic: This will utilize both CPU and GPU. So if you have a GPU is installed, download this option if you want to utilize your CPU as well as GPU at some point of time.
- Static: Static will not work for GPUs, whether it is installed or not. Static only works with the CPU. Download this option, if you want just CPU mining or Generic does not work for you.
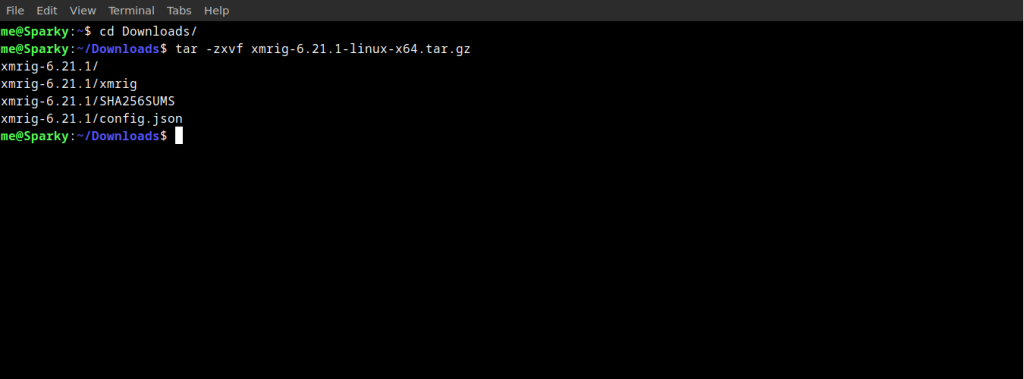
We’re going to use the Generic one for demonstration purposes. After downloading the above file, we have to decompress it. Just open a fresh Terminal tab, and run the below command:
cd Download/
tar -zxvf xmrig*.tar.gz
After this, go to Xmrig setup section below at last.
Method 2: Using Snap
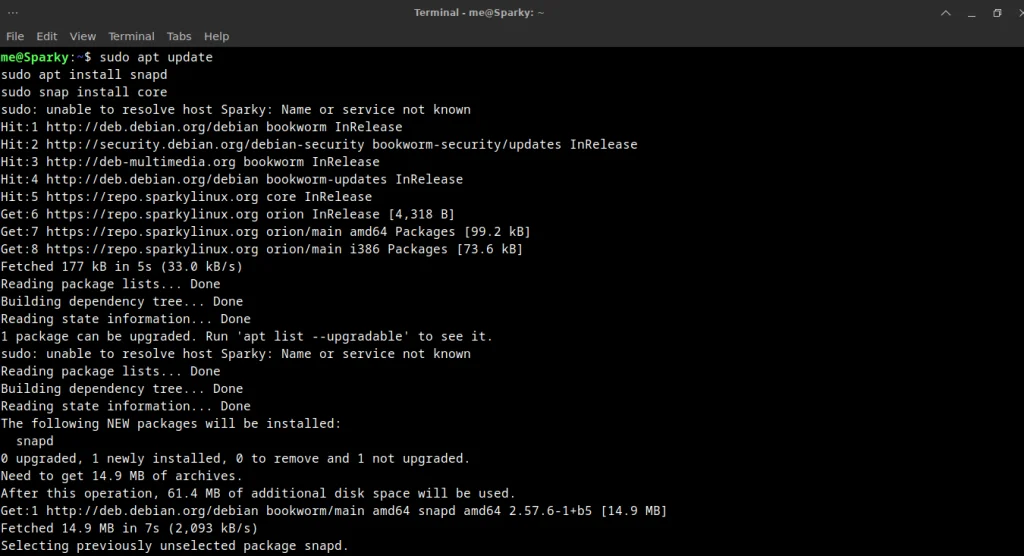
If you don’t have installed snap on your Linux PC, follow this guide and install using the commands according to your OS. For Debian, follow below given command:
sudo apt update
sudo apt install snapd
sudo snap install core
Now, Install Xmrig using snap:
sudo snap install xmrig
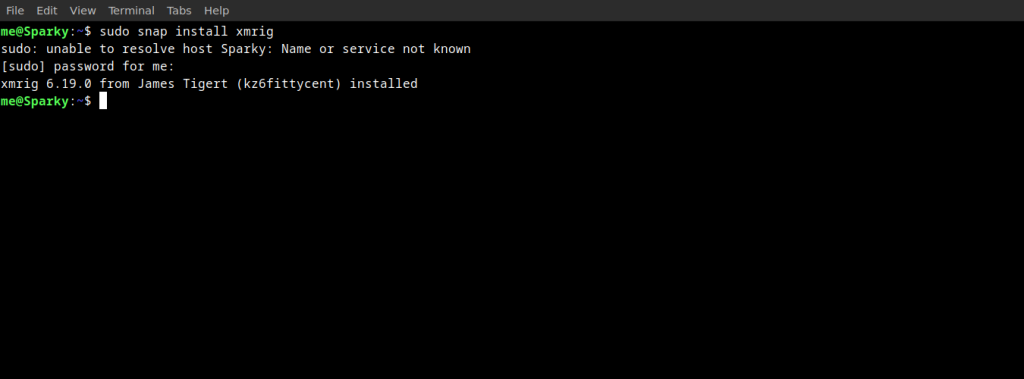
Now, we have successfully installed Xmrig using snap on our PC. But we can not use to mine crypto before setting it up properly.
Setting up Xmrig
Let’s see how to set up Xmrig to be used for crypto mining.
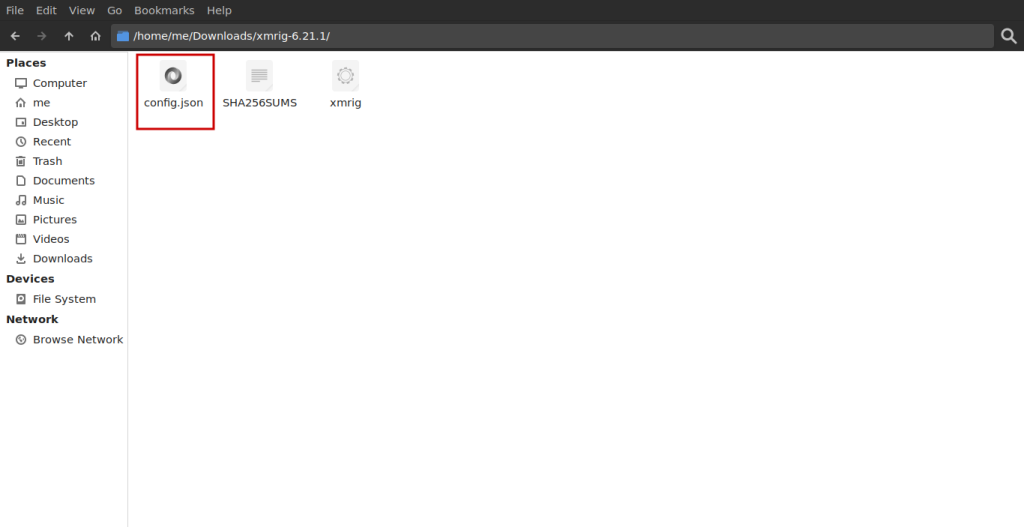
After the installation is complete, we need to create a configuration file config.json so that xmrig can mine crypto. We can use wizard feature from xmrig website to create our config.json file and download it. You can also use this getmonera page or xmrig doc page for more help.
Then, open decompressed directory and replace already available config.json file with you own newly downloaded config.json file.
Open a fresh Terminal tab, and run the below command:
cd Downloads/
cd xmrig-6.21.1/
./xmrig
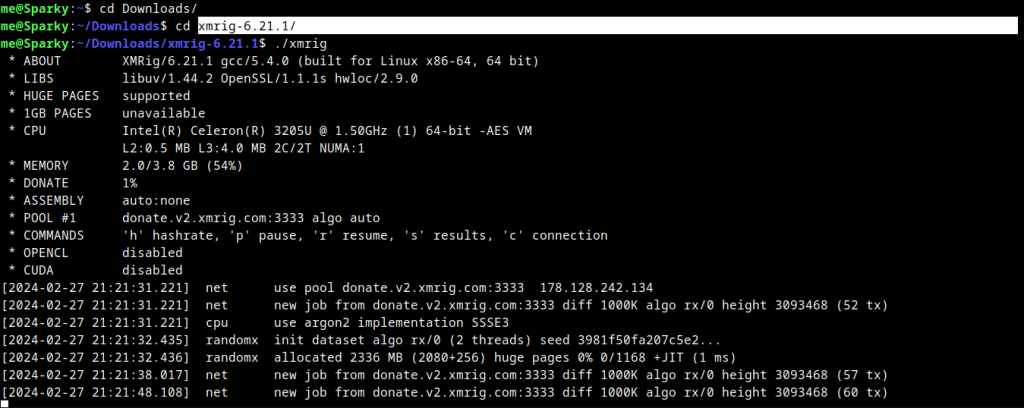
Now, we are successfully able to run xmrig to mine the Monero coin. Crypto mining is associated with finance, so please make config.json file correctly.
Wrapping Up
In this module, we discussed Xmrig which is mostly used for mining Monero coin, and how to install it on our Linux system. We installed Xmrig on our Linux in two different ways, one way by downloading a zip file of Xmrig from their official website, secondly using snap.
We hope this article helped you to get you started in the mining journey.
Also Read
- What is a Crypto Exchange?
- How to Invest in Crypto?
- Ethereum vs. Lower Value Cryptocurrencies: A Comprehensive Comparison