
In this tutorial, we will be learning how to use the RPM Package Manager (RPM command) to install software packages. RPM is a free open-source package manager tool that comes preinstalled in RHEL, Fedora, and CentOS-based distributions. It’s similar to the apt package manager that accompanies Debian and Ubuntu-based distributions. It’s an easy to use tool which can build, install, uninstall, verify, query, and update software packages.
Querying Existing Packages with the rpm Command
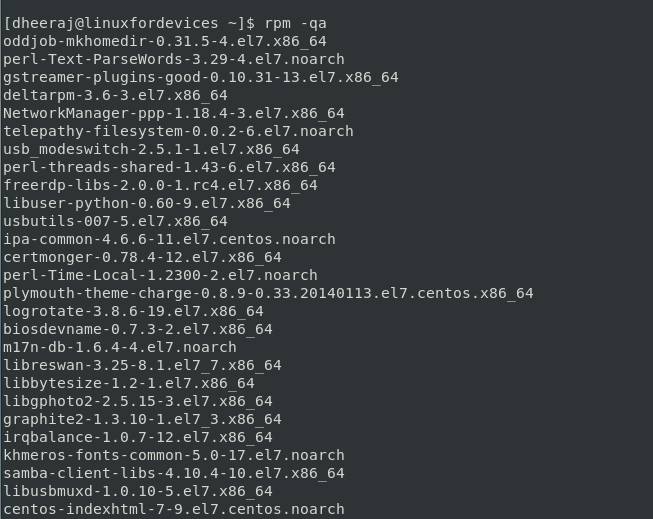
First, let us check all the installed packages on our machines. Whenever, we will be “querying” any package we will be using -q flag. So to check all the installed packages run the rpm command with the q and a (all) flag:
rpm -qa
This command will show all the installed packages and should be looking something like this:
To check installation of a specific package, we can run rpm -q [package-name]. For example, here I am checking the installation of firefox on my machine:
rpm -q firefox
If the package is installed in the machine, you would get the details of the packages installed as shown in the screenshot below. However, if the package is not installed you would simply see a message like package firefox is not installed.

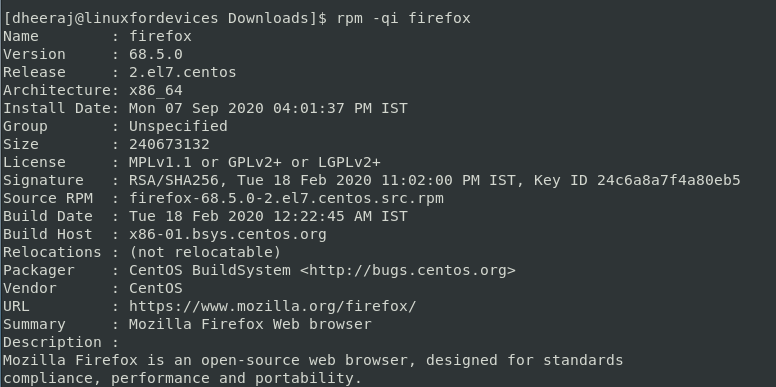
Also if you want to see complete details about an installed package like, you can run rpm -qi [package-name]. Here I will be checking the info on my firefox installation.
rpm -qi firefox
Installing and Updating Packages with the rpm Command
To install a package through RPM, we need to have its .rpm file. These .rpm packages should be available on most of the software installation page. I will be installing the very popular text editor here called Atom, I have downloaded it’s .rpm package file which I will be using in the tutorial below.
1. Getting Package Details
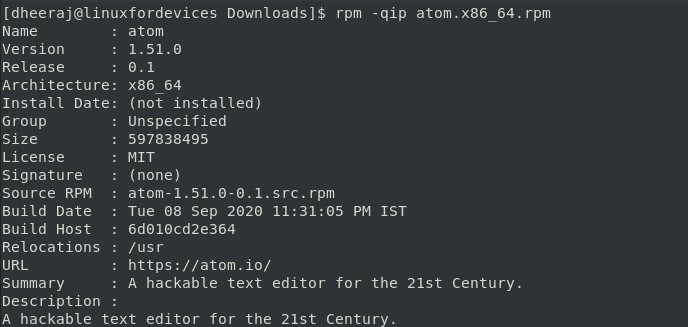
First we will be checking the package details again with the help of the query (-q) flag. It is important to also use the package flag (-p) here since we are querying an external package file. The command to get info on a package is rpm -qip [package-file-name].
rpm -qip atom.x86_64.rpm
2. Checking Dependencies
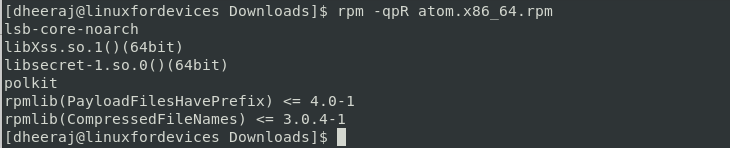
RPM unlike many other package manager like yum or apt will not install dependencies on it’s own. So it’s important to check dependencies of a package and then install them separately to avoid any errors. To check the dependencies you have to use the requires flag(-R), command goes like this:
rpm -qpR [package-file-name]
3. Checking Signature of a Package
Before every installation, you should check the signature of a downloaded package to check it’s integrity and make sure it’s secure. To check a package file for signature, simply run the following command:
rpm --checksig [package-file-name]

4. Installing the Package
Finally, now we install the package simply with the -i option. The command goes something like this:
rpm -i [package-file-name]
You can also use the verbose option (-v) and the hash output option (-h) for a better, more verbose output.

If you don’t have dependencies installed for a package, rpm will fail you installation showing an error. To bypass that error and install a package without dependencies you have to use the --nodeps flag. The command should look something like this:
rpm -i --nodeps [package-file-name]
5. Updating a Package
To update an already installed package with an rpm file, we simply have to use the update option (-U) and the command will be looking something like this:
rpm -U [package-file-name]
Here also you can use the verbose (-v) and hash output (-h) option for better output.
Uninstalling Packages using rpm command
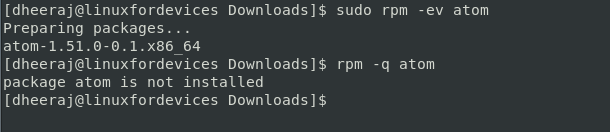
Uninstalling a package is easy with the rpm command, we only be using the erase option (-e) and we will be through. The command should look something like this:
rpm -e [package-name]
To uninstall the package forcefully without checking dependencies we will have to use the –nodeps flag, we can run the following command:
rpm -e --nodeps [package-name]
To check if we have successfully uninstalled the package, we can simply run the following query command:
rpm -q [package-name]
Conclusion
I hope after going through this tutorial, you will be able to use the RPM tool for package management. This tool also offers a few more functionality which you can check on their official documentation page or simply run rpm --help in the command line for the help page. Thanks for reading this article! Cheers!