
In this tutorial, we will learn how to install PostgreSQL on CentOS, which is now upstream to th Red Hat Enterprise Linux (RHEL) distribution.
Let’s first discuss what is PostgreSQL! Have you ever visited the PostgreSQL’s official site? If not, then do visit it first. Don’t worry folks.
I have provided the link: PostgreSQL. You might be thinking why I asked this question? It’s because if you log on to the site, you will see PostgreSQL is The World’s Most Advanced Open Source Relational Database.
Basically, The software that comes under the category of open source has its source code available for modifications.
Talking about what is PostgreSQL, is an open-source relational database management system that supports a wide variety of SQL standards such as:
- Complex SQL queries
- Triggers
- Views
- Transactions
- Multiversion Concurrency Control(MVCC)
- Streaming Replication
- Hot Standby
- Foreign Keys
- SQL sub-subjects
It also supports four standard procedural languages. Did you know about them? These procedural languages are-
- PL/pgSQL
- PL/Tcl
- PL/Perl
- PL/Python
It also supports some non-procedural languages such as PL/PHP, PL/V8, PL/Ruby, PL/Java, and so on.
PostgreSQL is used to process structured data. Basically, it works on OLTP (Online Transactional Processing). Where Oracle, IBM DB2, and SQL Server all provide paid services i.e. you have to buy the license to use various services while PostgreSQL is open-source, you don’t need to pay anything. Wow! It’s superb. I hope you now understand why PostgreSQL is widely used.
Let’s discuss how to install PostgreSQL on CentOS. We will install the latest version of PostgreSQL on CentOS 8 (the latest operating system).
Install PostgreSQL on CentOS 8 using Official Repositories
Here, we will discuss how to install PostgreSQL server and client from Postgr eSQL repositories. I might say this method is one of the easiest ways to install PostgreSQL. I hope you too find it easy.
Install the repository RPM
The first step is to install the repository RPM. RPM stands for Redhat Package Management. You might be thinking from where did I get this link? Folks, it’s simple. Just visit the official website of PostgreSQL and you would find the download option. Just select your operating system and download it! I have provided the link below :
On this link, you can get the link of any version of PostgreSQL for any version of OS.
After getting the link, use it with the DNF command. DNF command is a software package manager that installs, updates and removes packages on RPM-based Linux distributions. The best part about the DNF command is that it automatically computes dependencies and also determines the action requires to install packages. Just run the following command to install it on your OS:
# dnf install -y https://download.postgresql.org/pub/repos/yum/reporpms/EL-8-x86_64/pgdg-redhat-repo-latest.noarch.rpm

Disable the module
After installing the RPM, the next step is to disable the built-in PostgreSQL module in the system. For this, we will again use the DNF command. I have already discussed the uses of the DNF command above. Let’s discuss the command for disabling Module:
dnf -qy module disable postgresql

Install PostgreSQL server on CentOS Linux – Client Packages
Okay, till now we have installed the PostgreSQL related repositories and disabled the modules. The next step is to download the client packages. We are installing the latest version i.e. 12 of PostgreSQL. Similarly, we will use the DNF command to install the client packages. The command for this is as follows:
# dnf install postgresql12

Install PostgreSQL database server on CentOS 8 – Server Packages
So, after installing the client packages we have to install the server packages. For this, we use the DNF command to install PostgreSQL on CentOS. You can also use the yum command.
# dnf install postgresql12-server
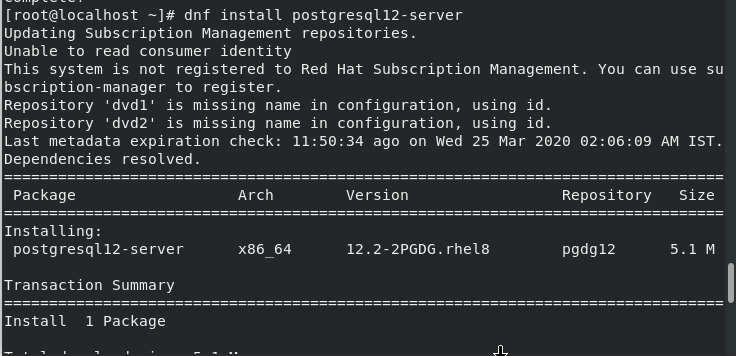
This command will successfully install the server packages required for PostgreSQL.
Initialize the PostgreSQL Database
After installing the server packages, the next step is to initialize the database. This can be done by running the setup file of Postgres located in /usr/pgsql-12/bin/ directory named PostgreSQL-12-setup file. This file will initialize the database. Type the following commands in your Terminal window:
sudo /usr/pgsql-12/bin/postgresql-12-setup initdb

If the response for this is OK on your screen too, that means you have successfully installed the PostgreSQL.
Enable PostgreSQL Service
After successfully initializing the database, the next step is to enable the services. This can be done using systemctl command with enable keyword. I have described the command below:
# systemctl enable postgresql-12

Start PostgreSQL Service
After enabling the PostgreSQL services, the next step is to start the services. For this, we will use systemctl command with the start keyword. I have described the command below:
systemctl start postgresql-12

Begin with the PostgreSQL
After successfully installing and initializing the services, Let’s begin with PostgreSQL. It will also verify that PostgreSQL has been successfully installed or not. If you want to find out the version, you can use this command to do so. Let’s look at the command given below:
# sudo -u postgres psql

In the above image, you can see the version of PostgreSQL i.e. 12.2.
Set the user authentication
Security is the major concern of every database. We store our jewelry ornaments in Bank because we know that the ornaments will be safe. No one can steal them. Banks have the best security. Similarly, we store our data in a database because it provides the user authentication feature. Let’s learn how to set the password for Postgres user. The command for this is as follows:
\password postgres

Now, you can set the password for your database.
Exit PostgreSQL database
There is always a command to exit from the database. We use exit() in MySQL, quit() in MongoDB. But here it is something different. We will use “\q” to make an exit from the database. The command for this is as follows:
\q

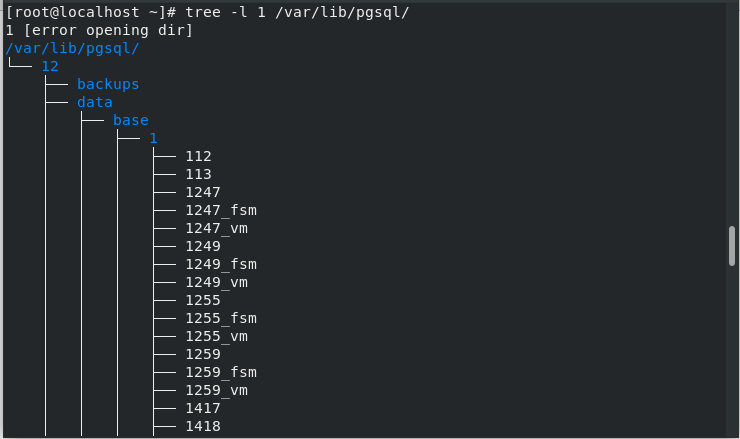
Structure of the PostgreSQL directory
If you want to look at the directory of PostgreSQL, we can use the tree command to check it. Using tree command will print the structure in tree format. Let’s discuss the command to view the structure of PostgreSQL directory:
tree -l 1 /var/lib/pgsql/
Steps to Install pgadmin4
After you install PostgreSQL on CentOS, we will move on to the installation of pgadmin. It is the management tool for PostgreSQL and derivative relational databases. The best feature of pgAdmin is that it can run as both web applications and desktop applications. Don’t get confused between PostgreSQL and pgAdmin, both are different things.
PostgreSQL is the database while pgAdmin is a sort of client. You can manipulate schema and data of the PostgreSQL through pgAdmin. Let’s discuss how to connect to pgAdmin.
Install the package
After you install PostgreSQL on CentOS, some supporting packages are also installed. Simply use DNF Command to install the pgAdmin packages. I have already discussed the significance of the DNF command. Below, I have discussed the command to be used to install pgAdmin:
sudo dnf install pgadmin4
It will install all the related packages to pgAdmin.
Start the HTTP services
Here, we need to start or enable HTTP services. As we will access the pgAdmin4 through the browser, so it’s important to enable the HTTP services. We will use systemctl command to start the services. The command used to enable the services is:
# systemctl start httpd

Configure pgAdmin
Firstly, you need to rename the pgAdmin configuration file. We will use cp command as it will copy the content of the file from one to another and rename it.
What we’re essentially doing is copying the sample configuration file and using that as our base to start with our configuration so we don’t have to redo everything from scratch.
# cp /etc/httpd/conf.d/pgadmin4.conf.sample /etc/httpd/conf.d/pgadmin4.conf

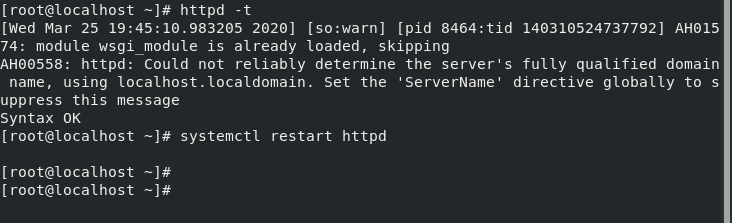
Restart the HTTP services
As we have made the changes, therefore we need to start the HTTP service again and check whether the HTTP syntax is correct or not. The output of checking the syntax should be OK. We will restart the HTTP services again using systemctl command. Below, I have described both the commands:
# httpd -t
# systemctl restart httpd
Declare the path of logs
Here, we need to set the path of the logs and library. But before this, we need to make the directories. For this, we will use the mkdir command. This command is used to define the directories. The command is given as follows:
# mkdir -p /var/lib/pgadmin4/
# mkdir -p /var/log/pgadmin4/

After making directories, you need to edit the configurations. We will use the vi command to open the file. Here, we will declare the path of the log file, SQLITE, session database and storage directories. The command to load the file is:
# vi /usr/lib/python3.6/site-packages/pgadmin4-web/config_distro.py

Add the following code shown below in the file:
LOG_FILE = '/var/log/pgadmin4/pgadmin4.log'
SQLITE_PATH = '/var/lib/pgadmin4/pgadmin4.db'
SESSION_DB_PATH = '/var/lib/pgadmin4/sessions'
STORAGE_DIR = '/var/lib/pgadmin4/storage'
Make sure you have save the file. To save the file, press Esc key followed by “:wq“. This command will save the content and exit from the text editor. If you use “:wa” , it will only make the exit without saving the contents of the file. Be careful while using the commands.
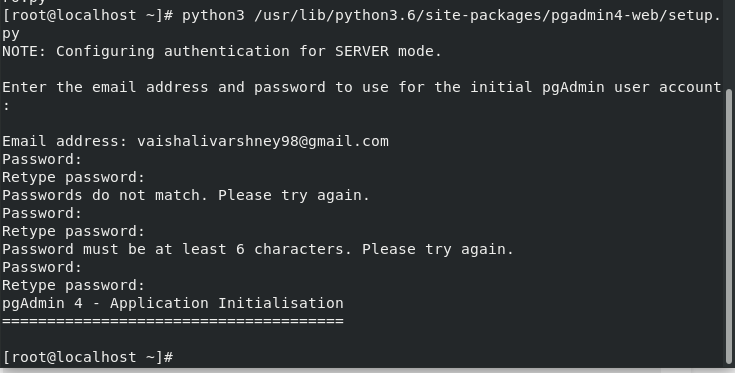
Create user authentication
Here, you need to create the user authentication to log in to the pdAdmin. Be careful while adding email id and passwords. These user details you have to use while login to the pgAdmin page. I have provided the command below:
# python3 /usr/lib/python3.6/site-packages/pgadmin4-web/setup.py
Accessing the web interface
As of now, we have successfully installed pgAdmin. Let’s connect to the pgAdmin login page through the web browser. All you need to do is type the address to access the web interface. I have provided the command below:
http://SERVER_IP/pgadmin4
OR
http://localhost/pgadmin4
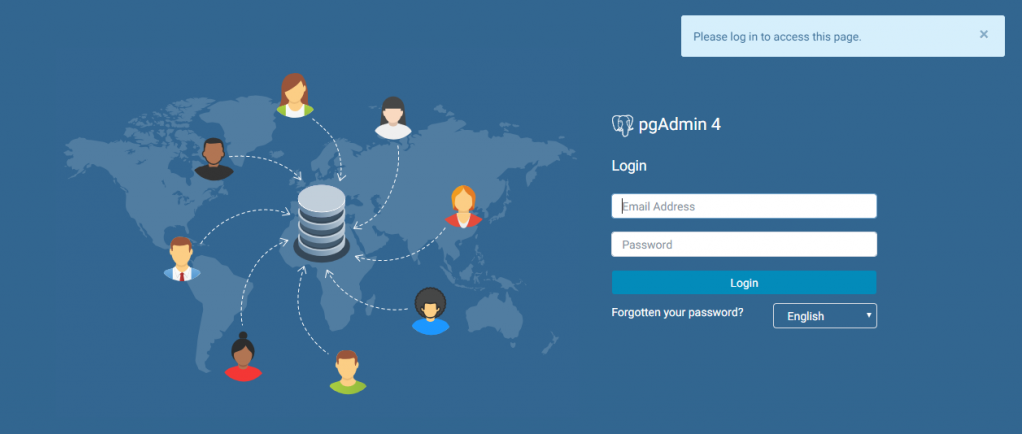
Hence, you have successfully installed pgAdmin on your system
Conclusion
That’s it. Here we are complete this tutorial on how to install PostgreSQL on CentOS. If you face any issue, do let us know in the comment.
References