
Ubuntu can run on a Windows computer without replacing Windows. Windows Subsystem for Linux 2 (WSL 2) is a Windows feature that runs Linux in a lightweight virtual machine with a Linux kernel.
This guide walks through setting up Ubuntu, including its first-run Linux user, and checking that it runs on WSL 2.
TL;DR: Install Ubuntu on WSL2
On a supported Windows installation, open PowerShell as an administrator, install WSL, launch Ubuntu to create its Linux user, then check that the distro uses WSL 2.
- Run wsl –install for the default Ubuntu distribution, or list choices with wsl –list –online.
- Install a named choice with wsl –install -d Ubuntu-24.04 only if that exact name appears in your list.
- Verify the result in PowerShell with wsl -l -v.
What is WSL 2?
Windows Subsystem for Linux is a Windows feature that runs Linux distributions alongside Windows. WSL 2 uses a Linux kernel inside a lightweight virtual machine managed by Windows, so Ubuntu has its own Linux filesystem and command line without replacing the Windows installation.
Microsoft’s simplified install command supports Windows 11 and Windows 10 version 2004, build 19041, or later. Ubuntu’s current WSL guide lists Windows 10 version 21H2 or later and Windows 11, and requires hardware virtualization with Virtual Machine Platform enabled. If the installer cannot enable virtualization, check that it is enabled in UEFI or BIOS.
Unlike a full desktop installation, this workflow opens Ubuntu in a terminal. WSL can also run Linux graphical applications on supported Windows setups, but a GUI is not needed to install or use Ubuntu’s shell.
How to install Ubuntu on WSL2 step by step
Install WSL first, choose the Ubuntu distribution, then finish its first launch. The commands below run in Windows PowerShell, not in the Ubuntu shell.
Step 1: Open PowerShell as an administrator
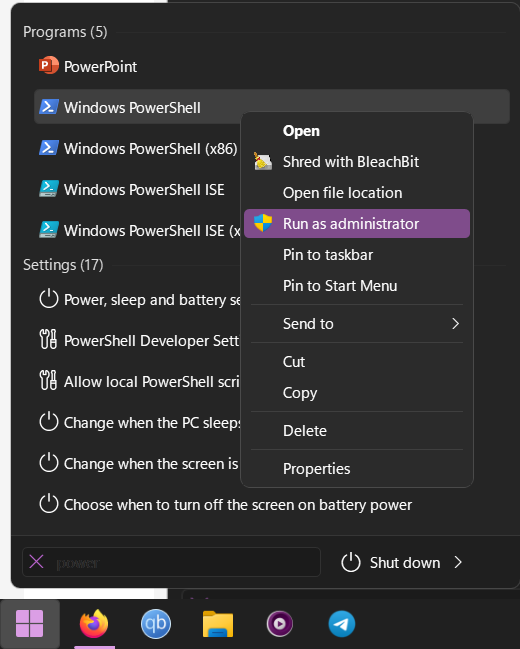
Search for PowerShell in the Start menu and choose Run as administrator. Windows asks for elevated permission because enabling WSL changes optional Windows components.
Step 2: Install WSL and Ubuntu
Run the single-command setup in the elevated PowerShell window. On a new WSL installation, it enables required components and installs Ubuntu as the default distribution.
wsl --install
When Windows asks you to restart, save your work and reboot. Depending on which components are already enabled, the command may restart the machine or proceed directly to installing Ubuntu. The existing screenshot shows an installation in progress, not a guarantee of the exact messages or completion time on another PC.
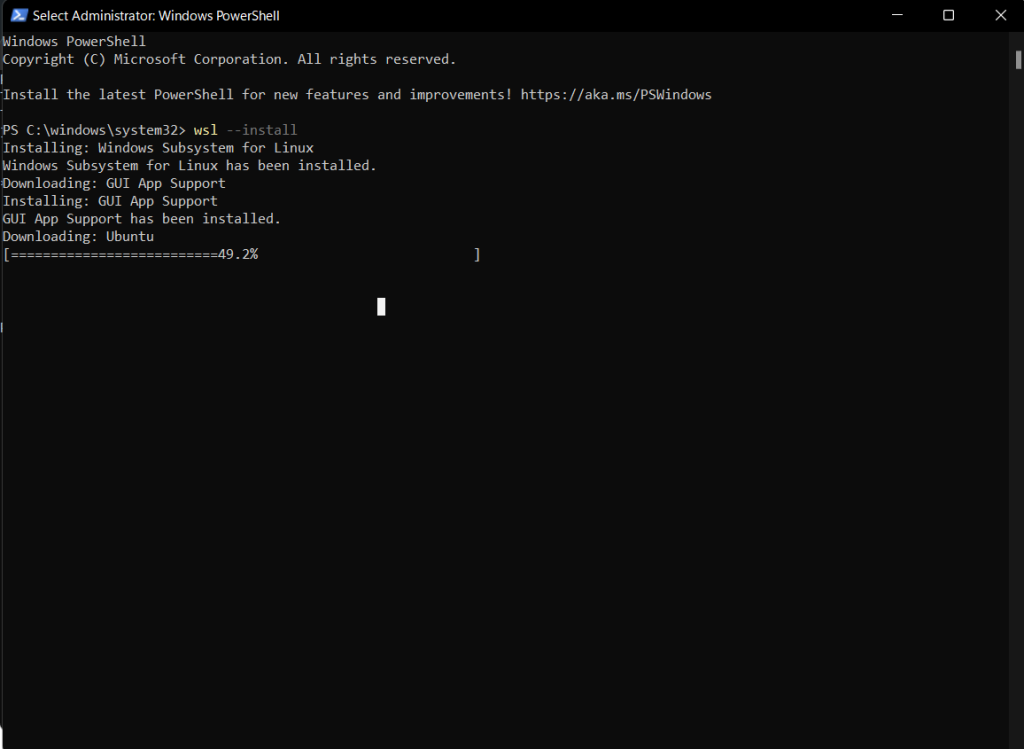
If WSL is already installed, the wsl –install command may print its help text instead of starting setup. In that case, list available distributions and install Ubuntu by its exact name.
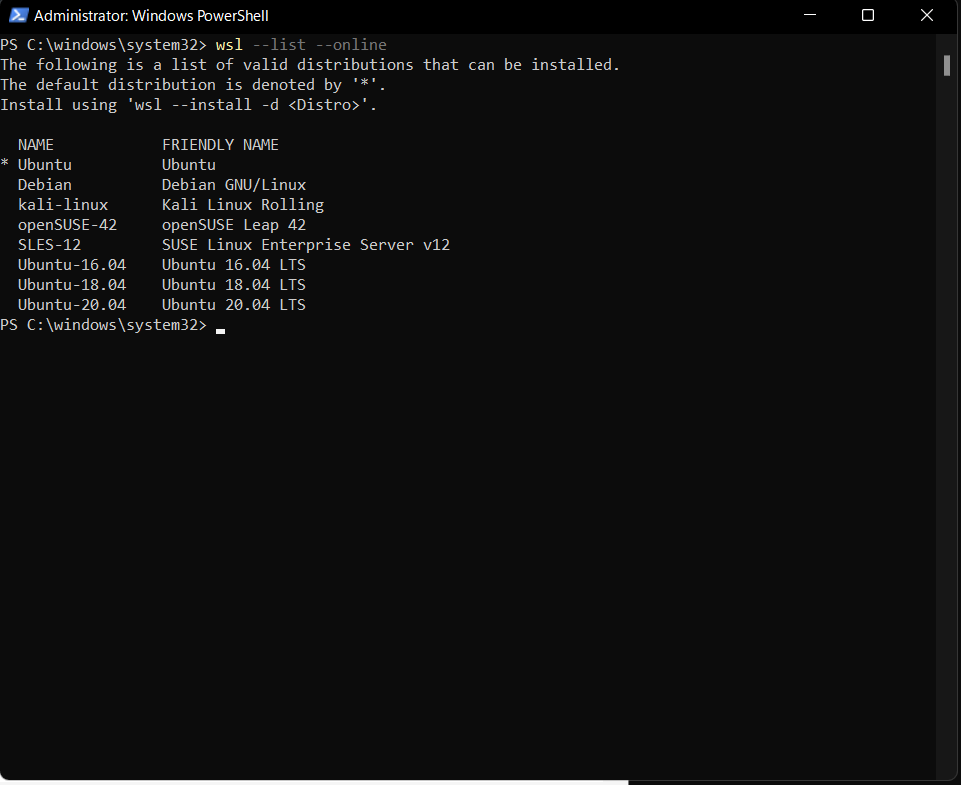
wsl --list --online
wsl --install -d Ubuntu
The online list changes as distributions are added or retired. Use the name shown in the list, such as Ubuntu or a versioned Ubuntu entry, rather than assuming a release name is available.
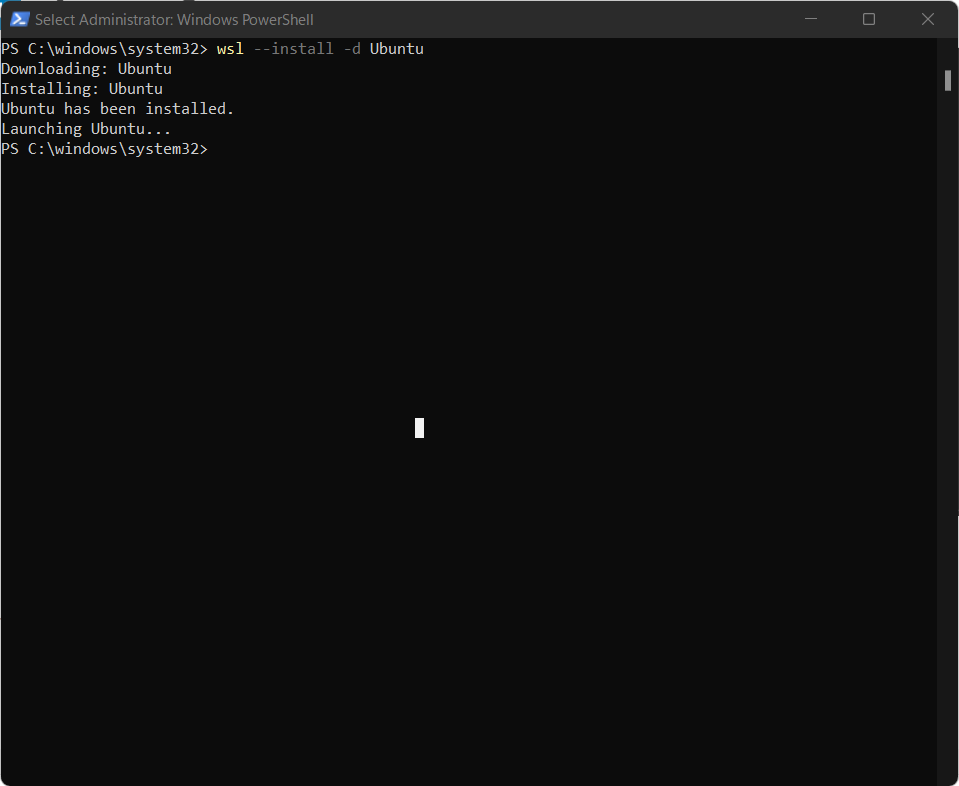
Step 3: Create the Ubuntu user
Launch Ubuntu from the Start menu if it did not open automatically. Its first startup unpacks the distribution and prompts you to create a Linux username and password.
This account belongs to Ubuntu and is separate from your Windows login. While entering the password, the terminal does not display characters or placeholder marks. Type it and press Enter, then confirm it when asked.

Ubuntu opens at a Linux prompt after setup. Update its package index and install available upgrades before adding tools.
sudo apt update && sudo apt full-upgrade
The first command refreshes package metadata. The second applies upgrades and may ask for your Ubuntu password or confirmation. The retained screenshot shows package work in progress, so wait for the command to finish and return to the prompt.

After the upgrade finishes, install other software with Ubuntu’s apt package manager. This retained example shows Ranger being installed on Ubuntu 20.04, so its package counts and download details are specific to that older system.

Check WSL2 and fix common setup issues
Use the verbose distro list to confirm that Ubuntu is installed and running as WSL 2. Run this in PowerShell after Ubuntu setup:
wsl -l -v
Find Ubuntu in the list and read the VERSION column. A value of 2 confirms that distro uses WSL 2. If it shows 1, convert that distribution with wsl –set-version Ubuntu 2, replacing Ubuntu with the exact distribution name shown on your machine.
| What you see | What to do |
|---|---|
| wsl –install prints help | WSL may already be installed. Run wsl –list –online, then install a listed Ubuntu name. |
| Ubuntu is VERSION 1 | Run wsl –set-version Ubuntu 2 from PowerShell, using the listed distro name. |
| Virtual machine or virtualization error | Enable hardware virtualization in UEFI/BIOS and ensure Virtual Machine Platform is enabled, then restart Windows. |
| Install remains at zero percent | Microsoft documents wsl –install –web-download -d Ubuntu as an alternate download path. Substitute a valid distro name if needed. |
Do not run wsl –unregister as a troubleshooting shortcut. It removes that distribution’s data. To check the installed Ubuntu release after opening the Linux shell, use the Ubuntu version check guide.
Conclusion: verify the Ubuntu distro version
The setup is complete when Ubuntu opens, its Linux user works, and wsl -l -v lists the distribution with VERSION 2. From there, use Ubuntu’s package manager to add tools, such as the Ranger file manager.
For the next task, see how to change an Ubuntu username, install a Debian package file, or list installed packages with apt. If you later remove software, use the Ubuntu apt removal guide and check what will be removed before confirming.
Microsoft’s WSL installation guide and Ubuntu’s Ubuntu on WSL documentation cover options beyond this basic installation.
How do I check whether Ubuntu is running on WSL 2?
Run wsl -l -v in PowerShell and check that Ubuntu has 2 in the VERSION column.
Does wsl –install install Ubuntu?
On a new WSL installation, wsl –install enables the required features and installs Ubuntu as the default distribution. If WSL is already installed, list available distributions and install Ubuntu by its exact listed name.
Is the Ubuntu password the same as my Windows password?
No. The username and password created on Ubuntu’s first launch belong to the Linux distribution and are independent of your Windows account.