

In this tutorial, we will be installing and configuring the CentOS firewall. We will be using a very powerful and popular Firewall management tool called firewalld. Firewalld is built over iptables (which was previously used to filter network traffic) and comes preinstalled in all newer versions of CentOS, RHEL, and Fedora.
Fundamentals of Firewalld
Firewalld or firewall daemon filters network traffic with the help of zones. These zones have a set of rules which then defines the level of security. These are the nine predefined zones with increasing order of reliability:
- drop: All incoming network packets are dropped without any reply.
- block: All incoming network packets are dropped but are rejected with an ICMP message as a reply.
- public: These are for use in public areas. You do not trust other users on your network.
- external: For use on external networks with masquerading enabled especially for routers. Only selected network traffics are allowed.
- dmz: For computers in your demilitarized zone that are publicly-accessible with limited access to your internal network. Only selected incoming connections are accepted.
- work: For use in work areas. You mostly trust the other computers on networks, however, only selected incoming connections are accepted.
- home: For use in home areas. You mostly trust the other computers on networks with very few restriction on incoming traffic.
- internal: For use internal areas. You mostly trust the other computers on networks with very few restriction on incoming traffic.
- trusted: All network connections are accepted.
You can refer the firewalld official documentation for more details on zones.
Any network interface on your machine can be added to these zones. For example you can put your Ethernet interface in work zone where you can trust other users on the network and let’s say your wireless network interface in public zone which is much more secure and restricts most incoming traffic.
Installing CentOS firewalld
Let’s get right into the first step of working with the CentOS firewall – The installation.
1. Checking previous instance of firewalld
Firewalld comes preinstalled on CentOS 7 and newer. You can test your installation by running the following command on the terminal:
rpmquery firewalld
If you have firewalld installed, it should be looking something like this:

2. Installing firewalld using yum
If after running the previous command you see an error stating that the package firewalld is not installed, don’t worry. Just run the following command:
yum install firewalld
3. Starting and Enabling firewalld
And to start and enable firewalld from runtime, run the following few commands:
systemctl disable --now iptables.service
systemctl disable --now ip6tables.service
systemctl disable --now etables.service
systemctl disable --now ipset.service
systemctl unmask --now firewalld.service
systemctl enable --now firewalld.service
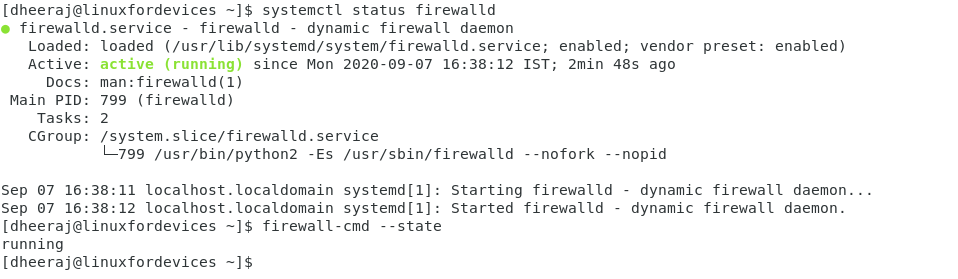
To check if firewalld is running, run the systemctl command:
systemctl status firewalld
firewall-cmd --state
You should probably see something like this:
Configuring firewalld
Once we are ready with the installation, let’s see how can we configure and use firewalld.
1. Checking Existing Configuration
So before we dive in to configure our firewall, let’s see what existing configuration do we have. So let’s run our first command:
firewall-cmd --list-all
This command will list all the active zones in our configuration. Take a look at what I see when I run this command:
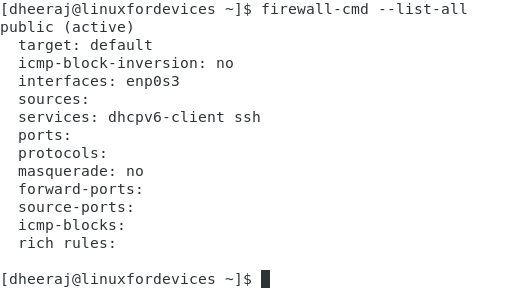
So there are few things that we can check in the output. The first line says the zone which is public (active). Then we see the list of all interfaces attached to that zone. In this case, we have ‘enp0s3’ (which is our ethernet interface) in the public zone. Then we look at services, these are all the services that are allowed in that zone, so we have dhcpv6-client and ssh related services allowed in the zone.
Ports will have the details of all the allowed ports on the network zone and then similar to this we have protocols which are all the allowed protocols like smtp, tcp, udp etc.
To check all the services that can be added to a zone, we can run the following command:
firewall-cmd --get-services
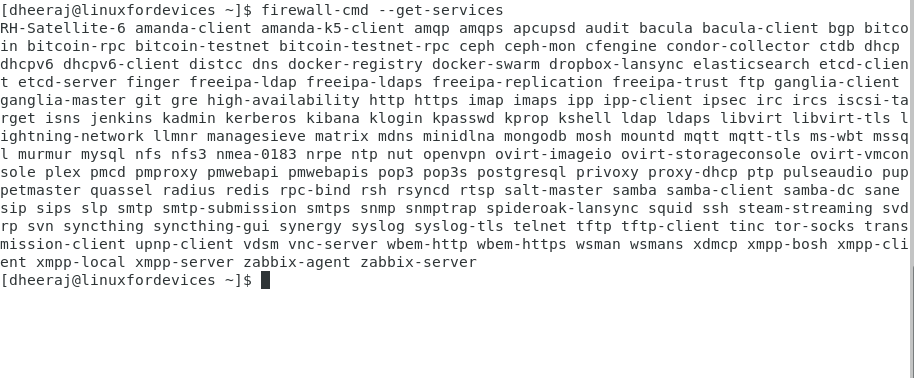
You can add or allow any of these services to any zones according to your need. We will be discussing that in the next part. If you need more details on these services, you can explore the .xml file which is available for each services in the directory /usr/etc/firewalld/services/.
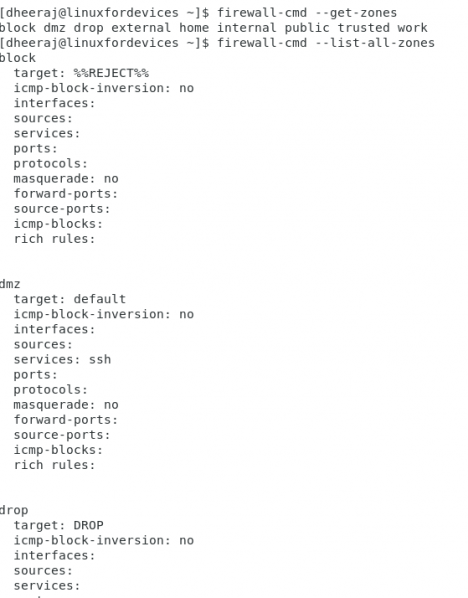
To list all the predefined zones and configuration attached to all the zones, you can run the following two command:
firewall-cmd --get-zones
firewall-cmd --list-all-zones
2. Adding interface to a zone
So first let’s see what all interfaces we have on our machine by running the following command:
ip a
This command will list all the interface on your machine. When I run this command, it looks something like this:

After we’ve checked the interface, we can add the interface to a zone with the following command:
firewall-cmd --permanent --zone=ZONE --add-interface=INTERFACE
You can also change the zone of an interface with the following command:
firewall-cmd --permanent --zone=ZONE --change-interface=INTERFACE
Similarly to remove an interface from a zone, you can run the above command with --remove-interface tag. It’s important to use the --permanent tag to keep changes after a restart.
To check zone of an interface, you can run:
firewall-cmd --get-zone-of-interface=INTERFACE
3. Adding services/rules to a zone
You can allow a service by adding them to a zone by the following command:
firewall-cmd --permanent --zone=ZONE --add-service=SERVICE
To allow a port, similarly, you can run the following command:
firewall-cmd --permanent --zone=ZONE --add-port=port-id/protocol
You can also add series of port with the above command, for example you can use --add-port=100-200/tcp to add all TCP ports between 100-200. To remove a service or port you can run the following command:
firewall-cmd --permanent --zone=ZONE --remove-service=SERVICE
firewall-cmd --permanent --zone=ZONE --remove-port=port-id/protocol
To allow certain specific source ip-address or a set of ip-address, you can run the following command:
firewall-cmd --permanent --zone=ZONE --add-source=source[/mask]
Similarly, you can remove source ip-address by using --remove-source tag. To check all the latest change, you can run the following command:
firewall-cmd --get-active-zones
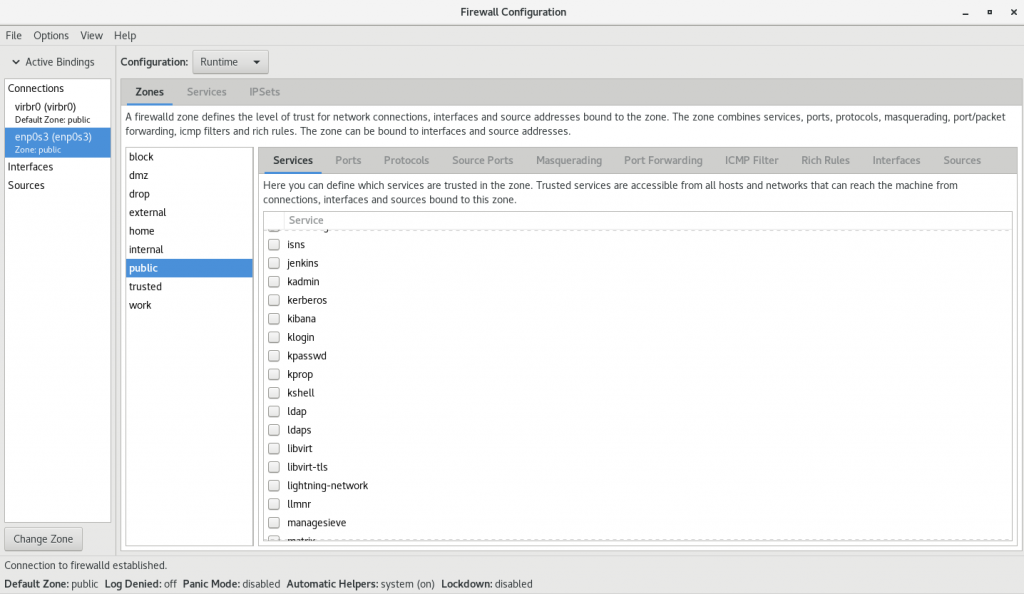
You can also use GUI to configure firewalld if you’re using a desktop environment, simply run firewall-config and it should be looking something like this:
Conclusion
This was just an introduction to firewalld. Firewalld is a very powerful and easy-to-use tool and you can refer the official documentation for more details. I hope you learned something from this tutorial. Thanks for reading this article! Cheers!