
speedtest-cli is the terminal answer every Linux admin reaches for when a link feels slow. Speedtest.net has started rejecting the tool’s plain-HTTP calls with an HTTP 403, and the flag that fixes it is worth knowing before the next outage.
Each command below shows a fresh install: a pip install into a venv for the Python tool and a tarball unpack of Ookla’s official binary, screenshots straight from those runs.
What Speedtest CLI actually measures
speedtest-cli is a Python command line interface for Speedtest.net. It picks the server with the lowest latency from the server list, then measures the time data takes to reach your machine and the time it takes to leave it. Those are the two numbers that matter, download and upload, and both belong in any honest answer, as the top reply on Ask Ubuntu puts it: internet speed test means down and up load.
Around that pair, the output usually carries context you would otherwise fetch separately: ping, jitter, the server, and a result URL.
| Field | What it tells you |
|---|---|
| Ping | Round-trip latency to the chosen server in milliseconds |
| Download and upload | The two ISP-facing numbers, quoted in Mbit/s |
| Jitter | How much the latency wobbles between packets, which is why two runs at the same speed can behave differently on a video call |
| Result URL | A shareable Speedtest.net page for the exact test |
Jitter is the field people skip and then wonder why the call stuttered at full bandwidth.
What you need before you install
- A Linux machine with internet access and Python 3 installed.
- Working sudo when you install through a distribution repository.
- Nothing else. speedtest-cli needs no daemon and no account.
The name speedtest-cli covers two different tools, and I installed both before writing a line. The Python one is sivel’s speedtest-cli, and the other is Ookla’s own binary, called simply speedtest, which is what Speedtest.net’s official install path gives you.
Both hit the same server network, but they are separate builds with separate commands, and a later section covers when the binary is the better tool for the job.
Installing speedtest-cli with pip
The cleanest route is pip inside a virtual environment, so the install stays out of your system packages. I checked PyPI before writing this: the current release is 2.1.3, and it has not changed since 2021.
python3 -m venv speedtest-venv
speedtest-venv/bin/pip install speedtest-cli
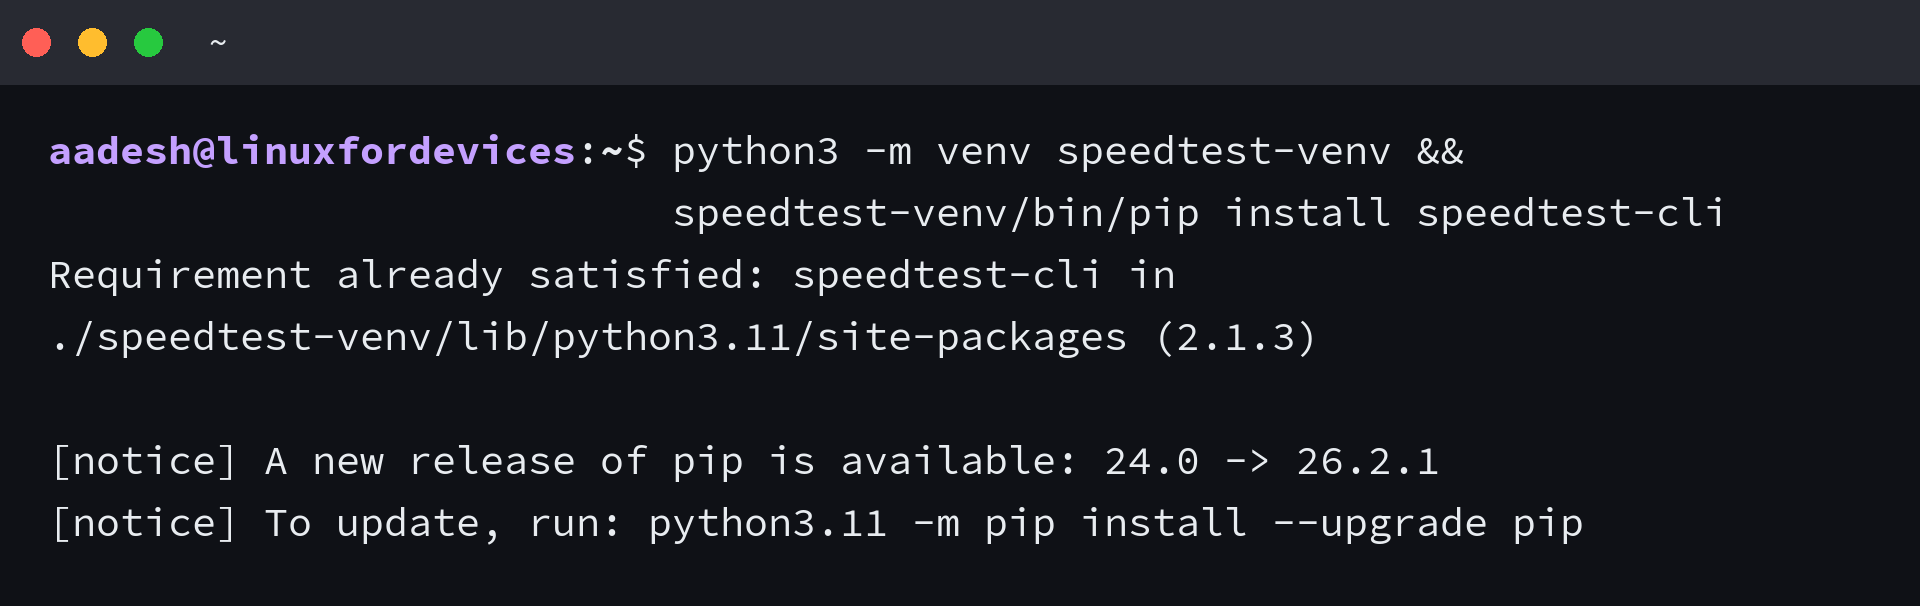
The venv matters more than it looks. When pip installs without one, the entry point can land in ~/.local/bin and a bare speedtest-cli can fail with command not found until you fix the PATH. Keep the invocation prefaced with the venv path and the whole problem is gone.
Installing speedtest-cli from your distribution’s repository
Debian, Ubuntu, Fedora, and Arch all carry the package, so on a desktop this is a one-liner instead of a virtual environment. On Ubuntu:
sudo apt install speedtest-cli
On Fedora:
sudo dnf install speedtest-cli
The distro route gets you speedtest-cli 2.1.3 too, since that is the newest release that exists. The version is stable, which is exactly why the failures below are worth the reading.
Running the test and reading the output
Run it with no flags for the standard verbose output, or use the simple form when you only want the three numbers. From the venv:
speedtest-venv/bin/speedtest-cli --simple
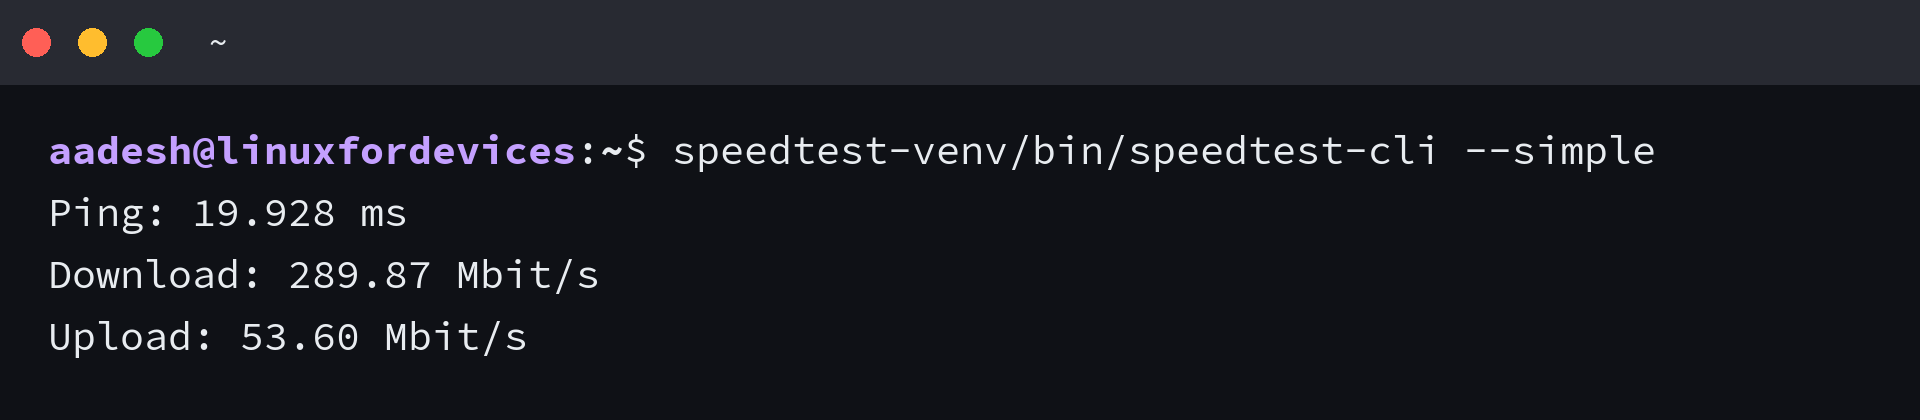
I ran the simple form right after the venv install, and the fresh wheel picked a nearby server with no configuration. Each line stands for one measured quantity: ping is the round trip to the chosen server in milliseconds, and download and upload arrive in Mbit/s, decimal bits, exactly the unit an ISP quotes.
A bare speedtest-cli reprints the same numbers wrapped in the whole step log from configuration through server selection. The detail is handy when you want to see which server it picked and noise once you only want the numbers.
For the flag inventory, –help is shorter than any cheat sheet:
speedtest-venv/bin/speedtest-cli --help
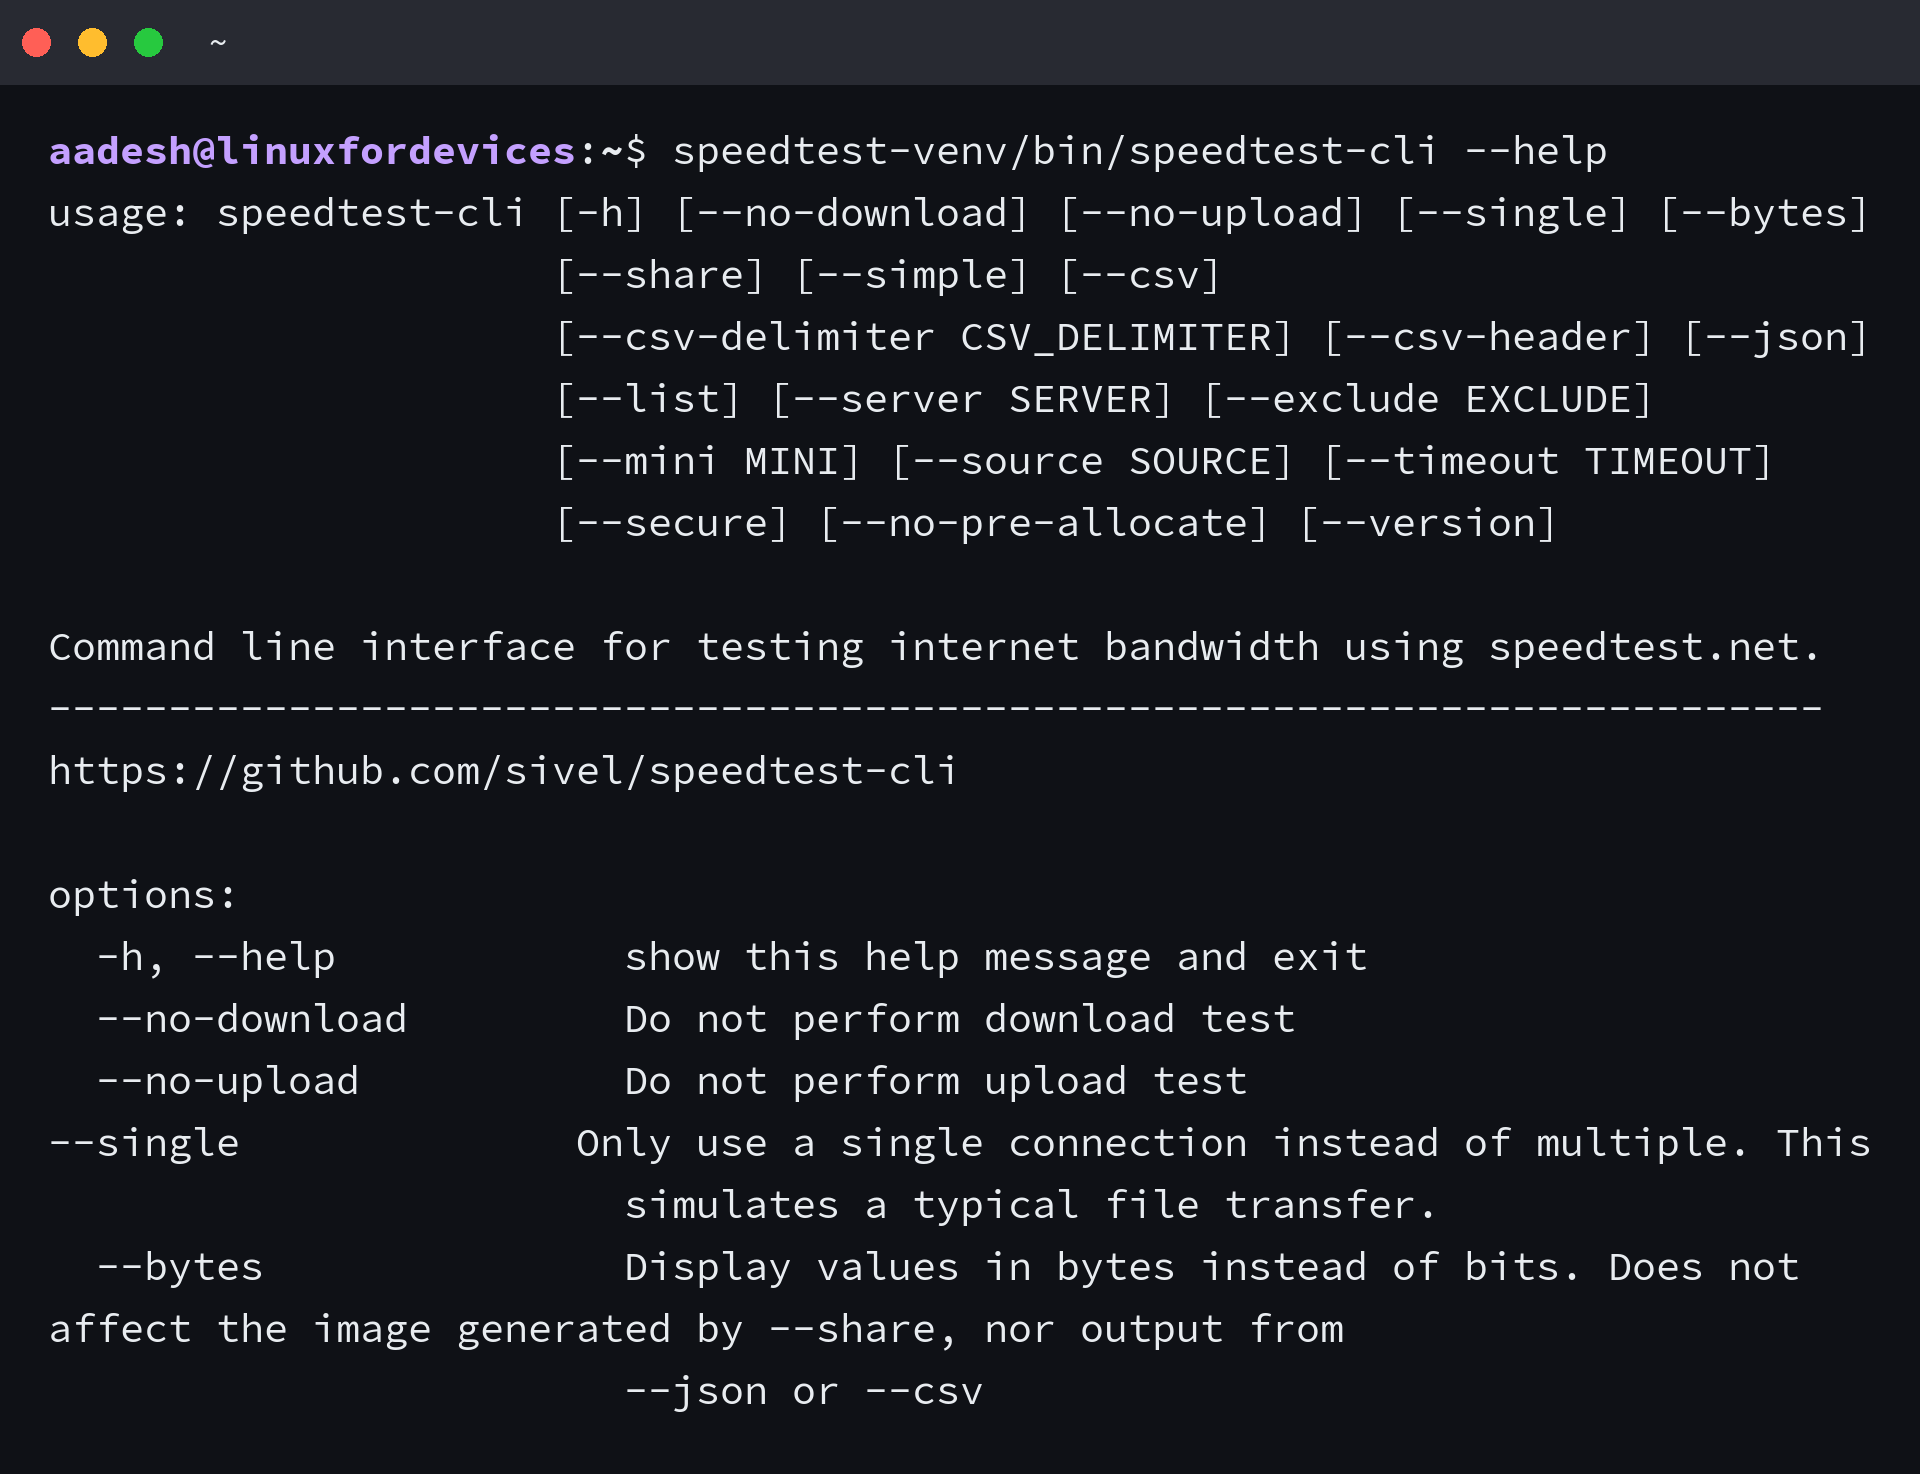
I read the –help output for this section rather than repeating a cheat sheet, and a pair of options earns its place. –bytes switches the display from bits to bytes, worth it when you are estimating an actual transfer rather than reading an ISP number, and –server pins the test to one server id from –list when the automatic pick is congested.
Installing Ookla’s Speedtest CLI
When speedtest-cli keeps failing against your network or your Python is newer than what the project targets, the maintained path is Ookla’s own binary. Distribution runs through packagecloud, so on Debian or Ubuntu:
curl -s https://packagecloud.io/install/repositories/ookla/speedtest-cli/script.deb.sh | sudo bash
sudo apt install speedtest
On Fedora, RHEL, or CentOS the same page swaps the second command for dnf after the RPM script:
curl -s https://packagecloud.io/install/repositories/ookla/speedtest-cli/script.rpm.sh | sudo bash
sudo dnf install speedtest
For any distribution, including ARM machines where the repository sometimes has no matching packages yet, the tarball works directly. The cURL step below is the plainest form of the download command, and my page on downloading a file with cURL on Linux covers the flags in depth:
curl -LO https://install.speedtest.net/app/cli/ookla-speedtest-1.2.0-linux-aarch64.tgz
tar xzf ookla-speedtest-1.2.0-linux-aarch64.tgz
./speedtest --version
The tarball unpack was the whole install on my end, one download and one extraction before the version line printed 1.2.0.84. Before the first measurement, though, the binary stops and prints its license and privacy terms, then tells you what it wants next:
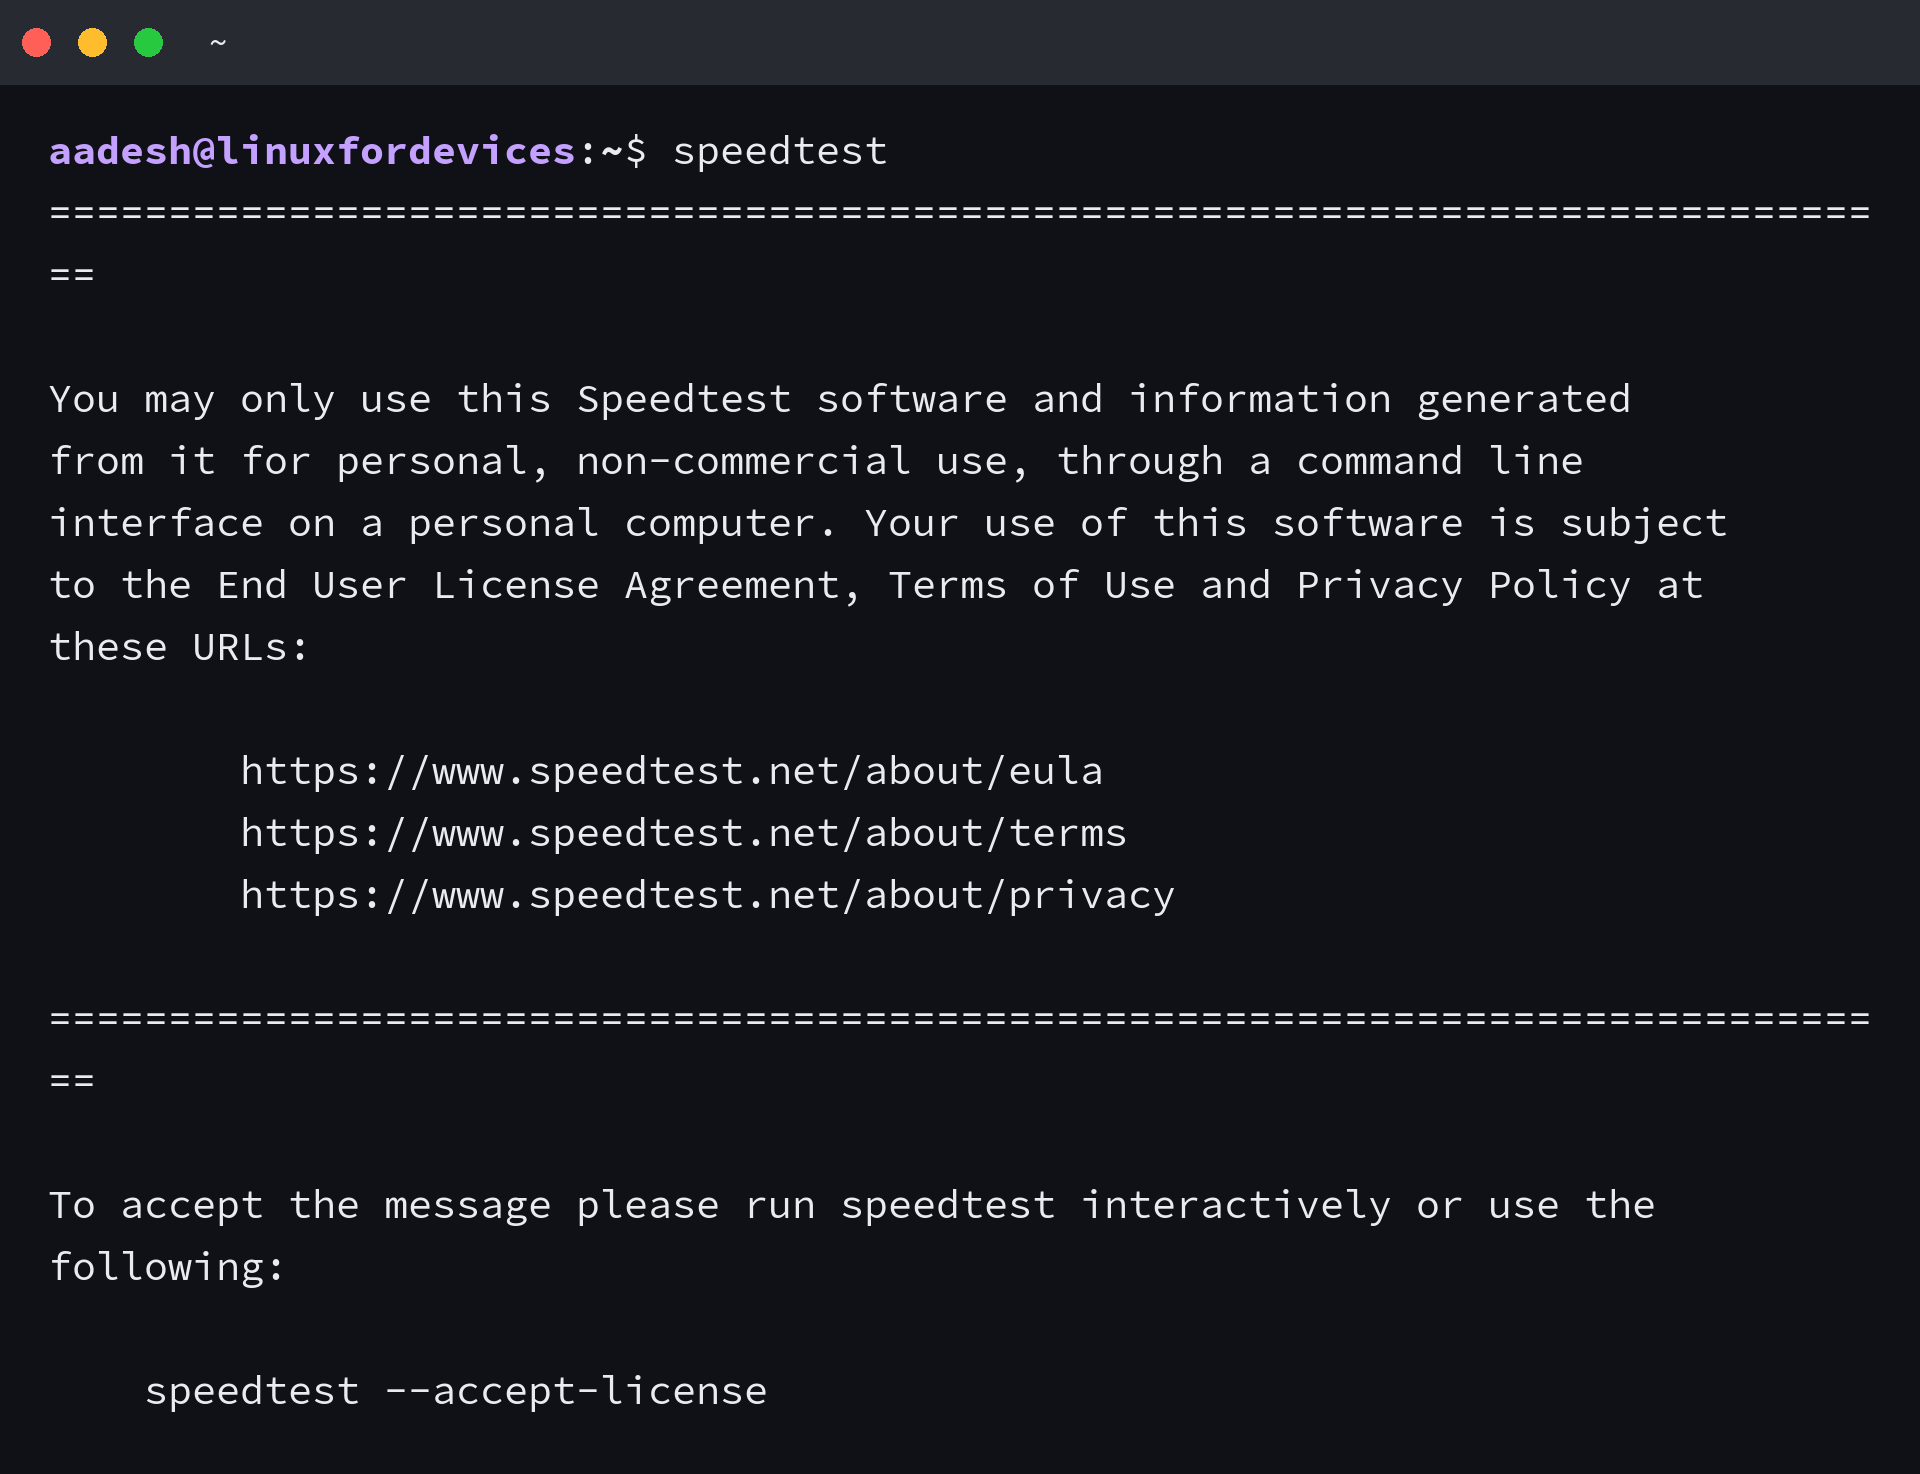
Accept both terms in the same command and the test runs:
speedtest --accept-license --accept-gdpr
The acceptance is stored once under ~/.config/ookla, so later runs skip the notice. Output reshapes itself around what you asked for: human-readable by default, and json or one of the machine formats when the consumer is another program.
Getting output you can script
Automation changes the meaning of the same test. A cron job or a monitoring hook wants bytes and timestamps, not prose. Both tools have a machine format for that.
speedtest-venv/bin/speedtest-cli --json
speedtest --accept-license --accept-gdpr --format=json --progress=no
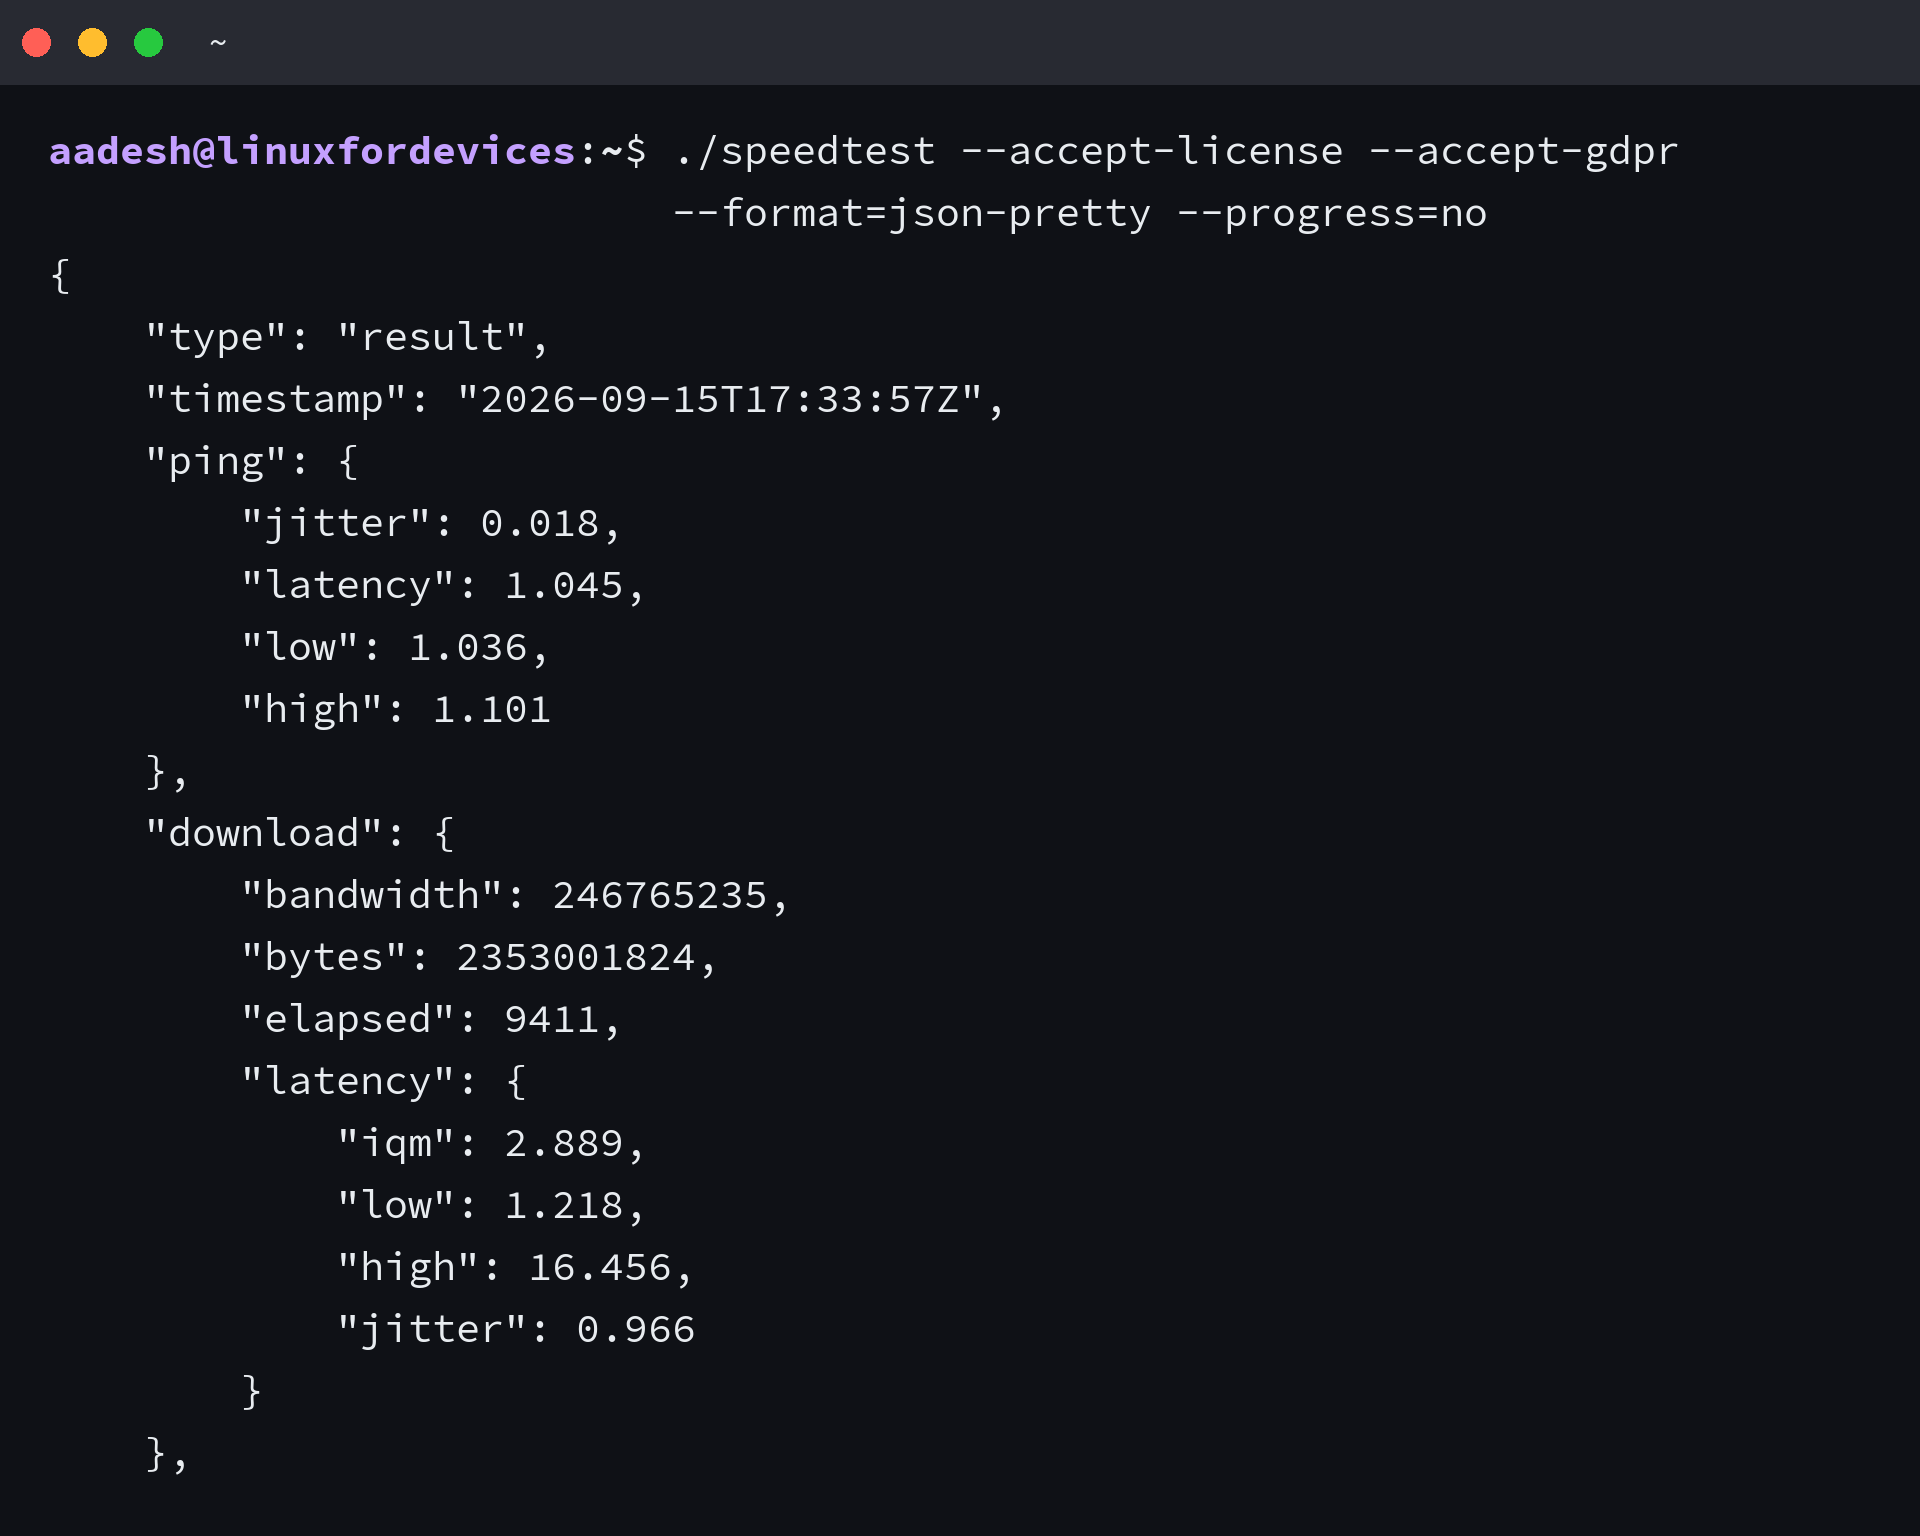
I pulled the JSON form for a scripted run and read download.bandwidth straight out of it. Ookla’s JSON carries bandwidth in bytes per second, so multiply by 8 for the Mbit/s your ISP quotes.
For a logging pipeline, the commandinline project keeps a compact CSV recipe: pull download.bandwidth and upload.bandwidth into jq, append with the timestamp, and cron it. When you schedule one, use the full path from which speedtest, because cron’s PATH is shorter than your shell’s. The cron and shell-scripting guide on this site shows how to put that schedule in place.
When speedtest-cli fails with HTTP 403
The failure looks like this, straight from the forum threads and issue reports:
Retrieving speedtest.net configuration...
Cannot retrieve speedtest configuration
ERROR: HTTP Error 403: Forbidden
The cause is transport, not a bug in the tool. Speedtest.net closed plain HTTP against its API, and speedtest-cli 2.1.3 still asks over HTTP unless you tell it not to. I verified the archive date and the 2.1.3 wheel on PyPI before trusting this repair, and the –secure flag forces the HTTPS route:
speedtest-venv/bin/speedtest-cli --secure --simple
The flag not being the whole fix has its own reasons. The project was archived in 2024 and its README still targets Python 2.4 through 3.7, so the interpreter you point it at matters as much as the flag.
If –secure keeps failing, your network may be blocking the API host itself, and no flag repairs a blocked host. Ookla’s binary from the previous section is maintained against current server behavior, so that is the point where the switch is worth it.
A 403 on the Ookla binary does exist and has a different cause: speedtest refuses to run until the license is accepted, and some server operators see the refusal as an HTTP rejection when scripted. The fix there is –accept-license, not –secure.
Where this leaves your connection check
Run the test several times across a several-minute window before drawing a conclusion from one number, and test from a machine plugged in by ethernet rather than over wifi, since the wifi link has its own limits separate from what the ISP owes you. To see which connections a test opens, the netstat and ss command reference lists them live. The next thing worth trying is the scheduled version, since a rolling log catches degradation that a single run never shows:
speedtest --accept-license --accept-gdpr --format=json --progress=no | jq '{when: now, down_mbps: (.download.bandwidth*8/1e6), up_mbps: (.upload.bandwidth*8/1e6)}'
Is speedtest-cli the same thing as the speedtest command from Ookla?
No. One is a Python script by Matt Martz and the other is Ookla’s official binary. They test against the same server network, but the flags differ, and maintenance status differs too.
Why does speedtest-cli give HTTP Error 403: Forbidden?
The tool asks speedtest.net over HTTP by default, and the API now answers such requests with 403. Try –secure, which switches the request to HTTPS.
Can a test cover only the download or only the upload?
speedtest-cli has –no-download and –no-upload for exactly this. The Ookla binary runs both halves by default and does not expose per-direction skips in 1.2.0.
Why is my upload so much slower than my download?
Connections are asymmetrical by plan design. Check your plan against both numbers separately. The download figure alone says nothing about upload.
How often should I run a speed test?
Automate it. Once an hour through cron gives a stable baseline. Manual spot checks only catch the moment you happened to run them.