
![How To Install Kali Linux On Windows[dual Boot]](https://www.linuxfordevices.com/wp-content/uploads/2022/03/How-to-install-kali-linux-on-Windowsdual-boot-1024x512.png)
Hello folks, In this article, We will discuss how to dual boot Kali Linux with Windows 10. If you have windows pre-installed and want to install Kali Linux, You can install it on a virtual machine as explained in the following article: Install Kali Linux on Virtualbox in 3 Easy Steps.
Another option is to install it next to windows. Dual-booting means you can choose at the startup which operating system to use. It will open one operating system at a time. Here, We will discuss how to dual boot Kali Linux with windows.
Before the installation procedure, we will see system requirements, installation pre-requisites, and some basic options needed for the dual boot.
Also read: Create Custom Wordlists Using Crunch in Kali Linux
System Requirements
Kali Linux can be installed with a requirement of as low as 512 MB of RAM but only with an SSH server and no desktop.
To install kali with a desktop, You will need at least 4 GB of RAM and 20 GB of space.
Installation Pre-requisites
- A PC/Laptop with Windows pre-installed
- 4 GB USB device( 8GB recommended)
- Intel or AMD dual-core processor
- Rufus software for flashing the USB
- Disable secure boot in the BIOS menu
- Disable Fast startup from the power option(in the control panel)
1. Free up Space From Hard Disk
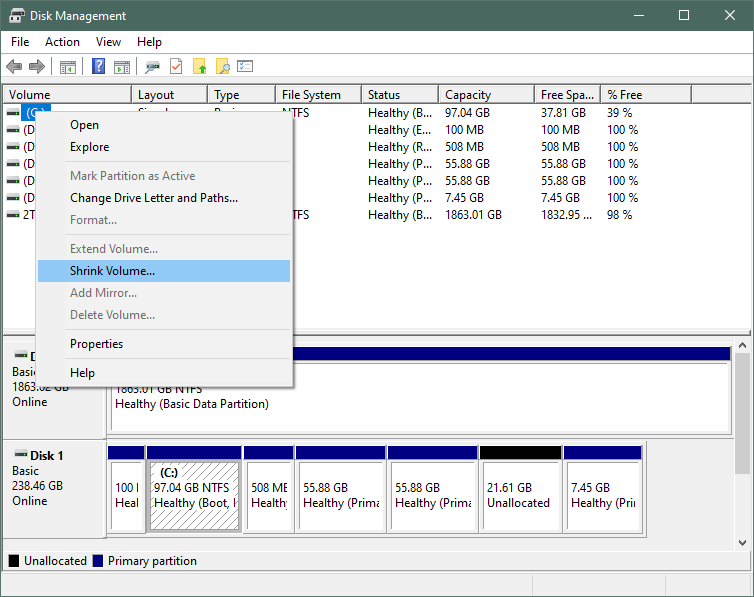
For installing Kali Linux, You need to free up some space from your hard disk. I assume your windows is taking 100% of your space, so, we need to resize the windows partitions and shrink the volume.
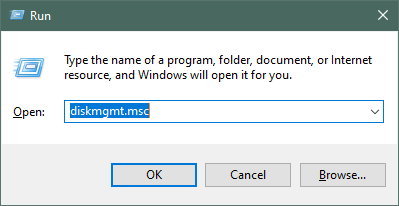
Open Disk Management through search or press Windows+R. Type diskmgmt.msc and press Enter.
Now, Right-click on the disk partition you want to shrink. Click on Shrink volume. Here the disk partition with a size 97GB is the Windows partition.
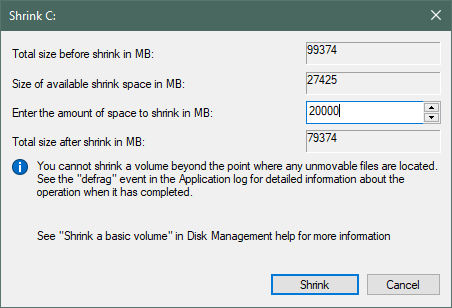
Now, Enter the amount of space to shrink. Here, We are freeing up 20GB of space from the windows partition by shrinking the volume. IT also shows the size of available shrink space.
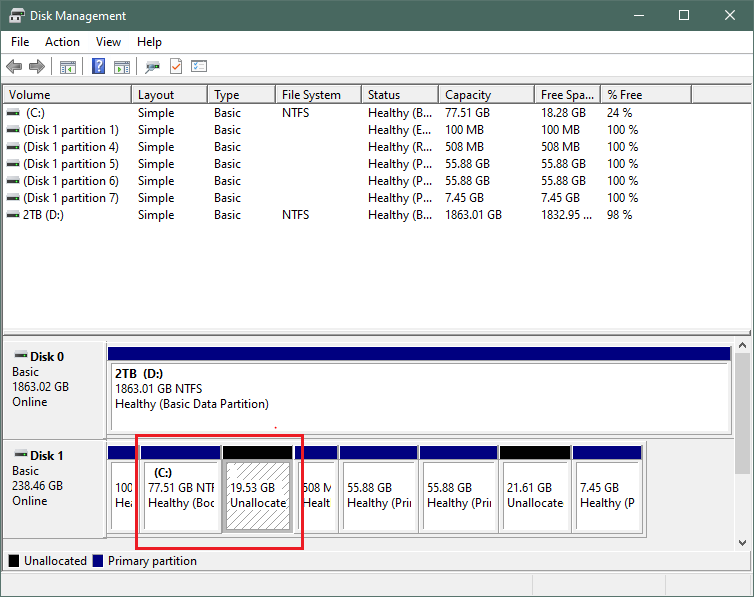
20GB of unallocated space is created and the windows partition size is reduced to 77GB as shown below.
2. Installing the Pre-requisites
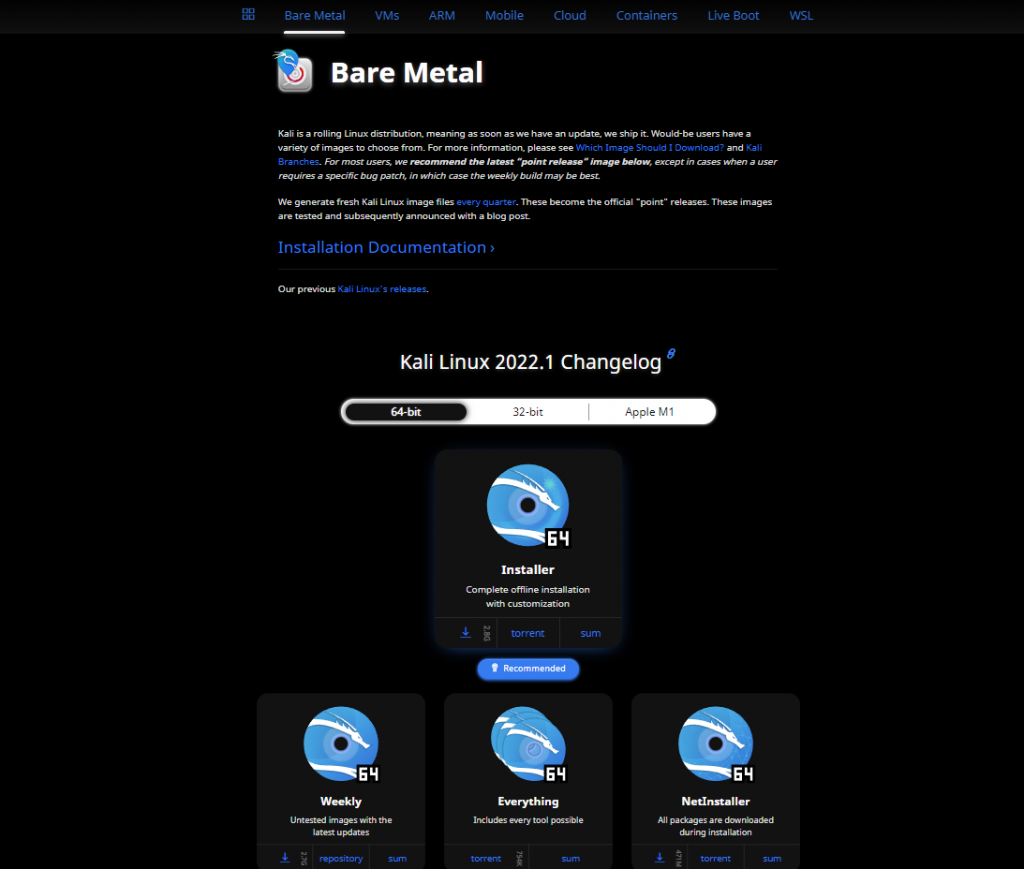
To download the Kali Linux iso file, Go to the official website of Kali Linux or click here to directly install the amd-64 image file. Wait till the download completes. There are other options like weekly( weekly release), everything( contains every tool possible).
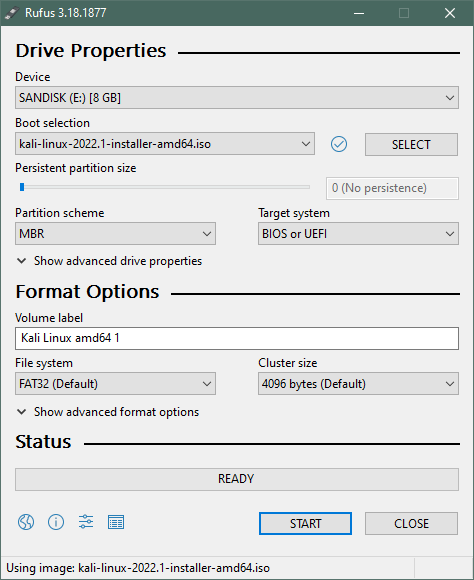
Now, Install Rufus software to create a bootable USB flash drive. Click here to directly download the software for windows from the official website. Now Open Rufus and select the USB drive and the ISO file. Click on Start and wait till it completes.
3. Create a Bootable USB
4. Install Kali Linux
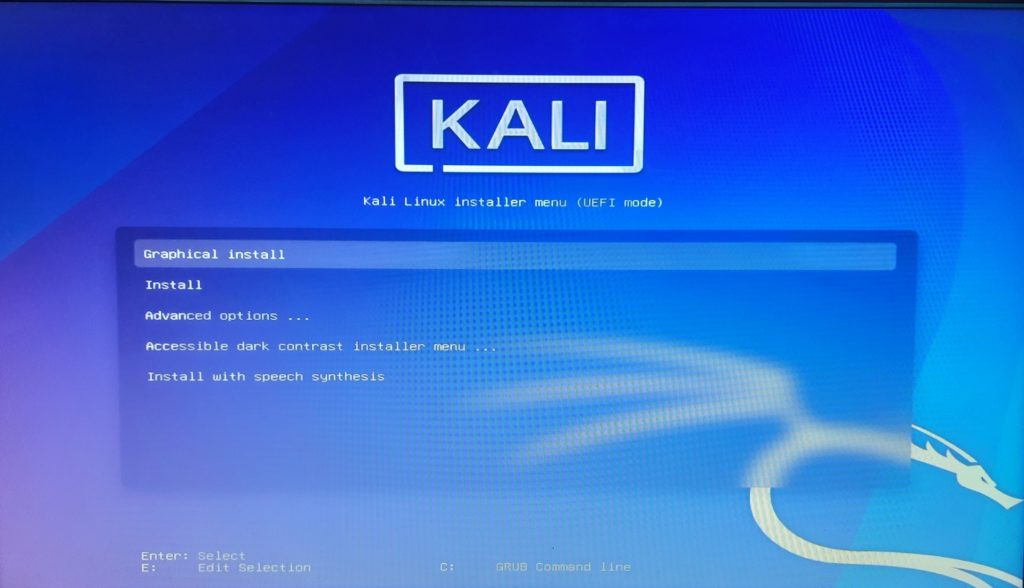
After flashing the USB drive, Shut down the system and boot into the installation media from the boot menu. Press F12 ( or F11) for the boot menu. Select the installation media(USB drive) and press Enter. Select Graphical installer and press Enter.
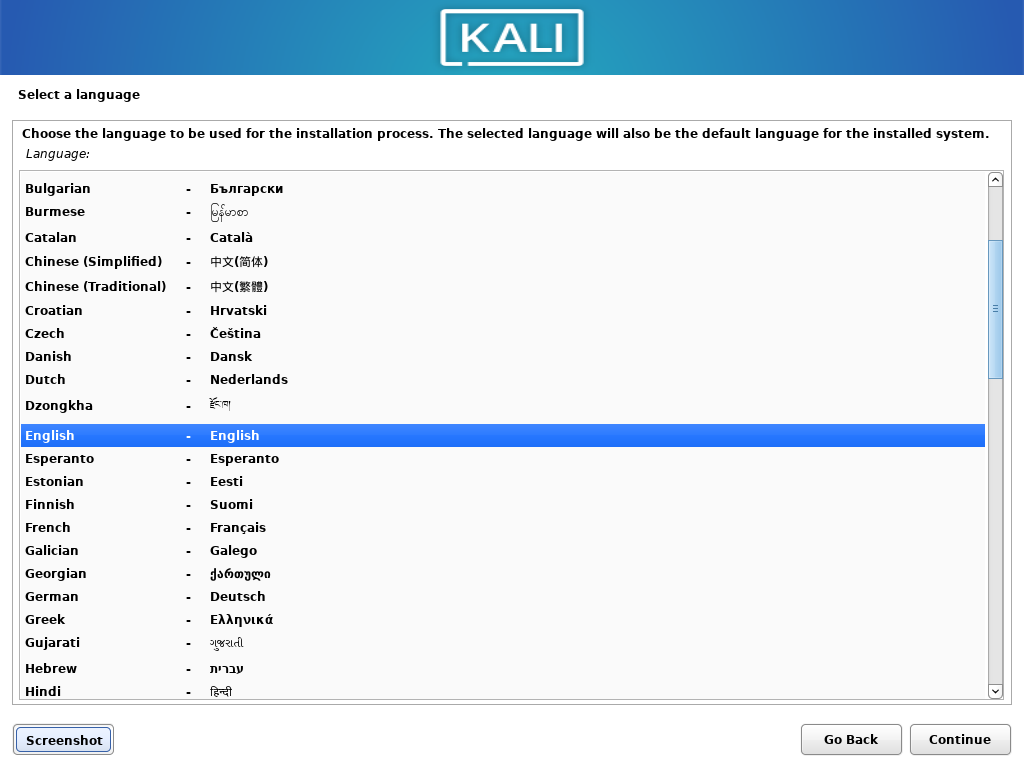
Select a language, location, and keyboard layout and click Continue.
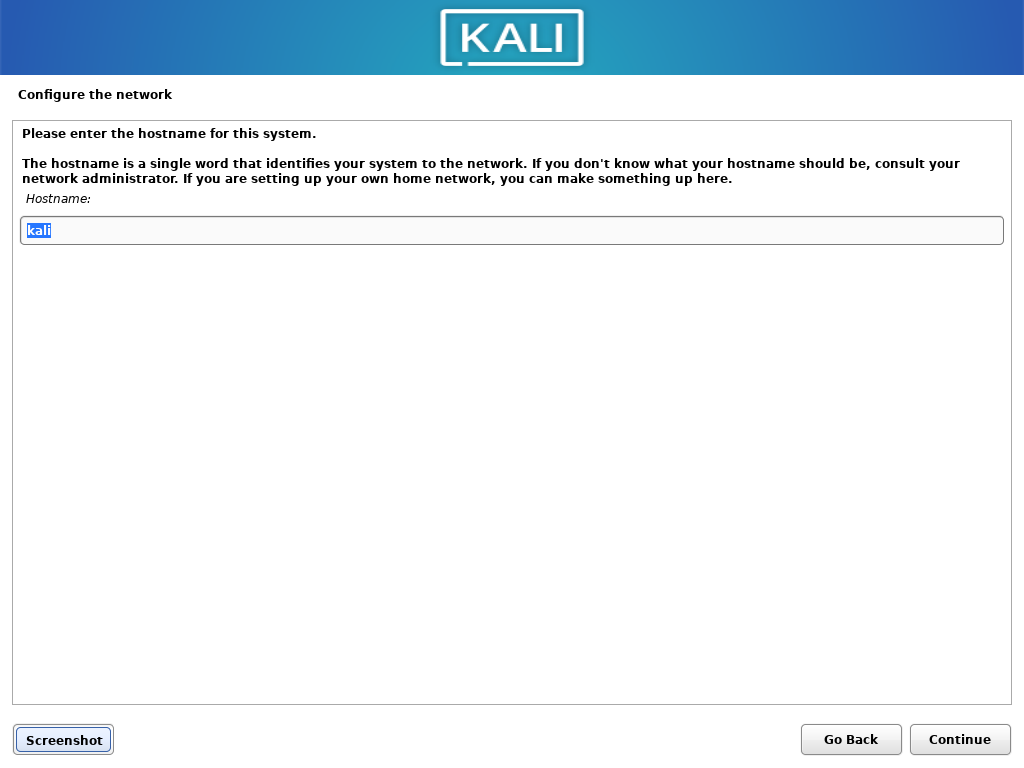
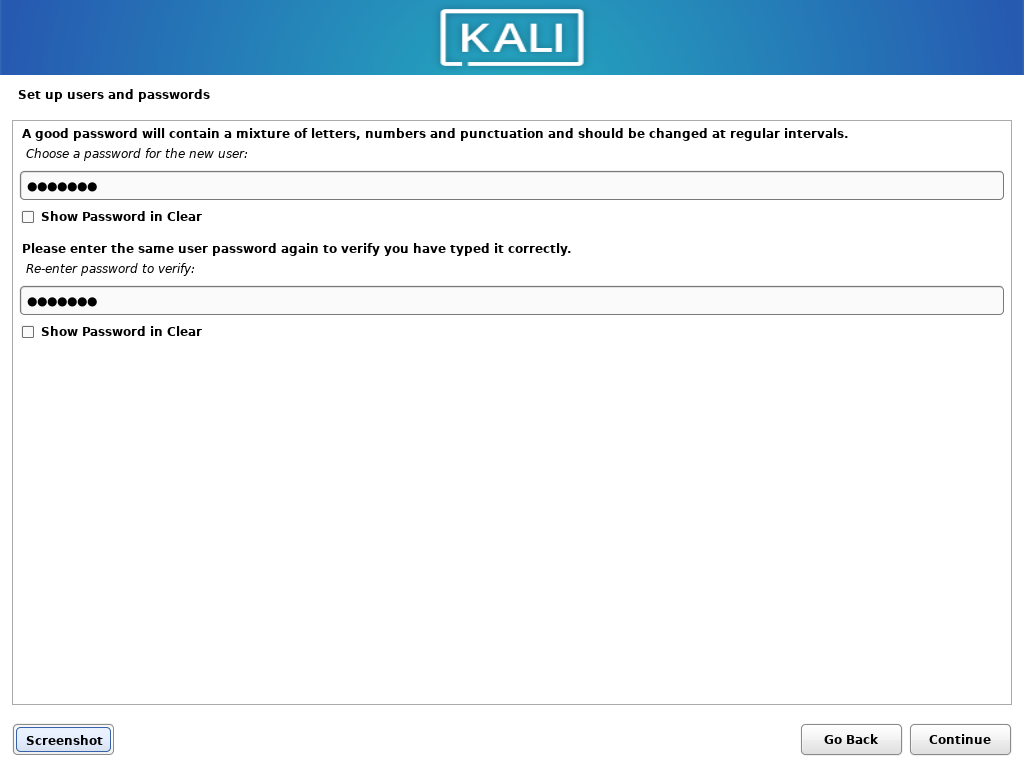
Now, Enter the hostname, full name, Username and choose a password.
This password will also be your root password. Choose a password and click on Continue.
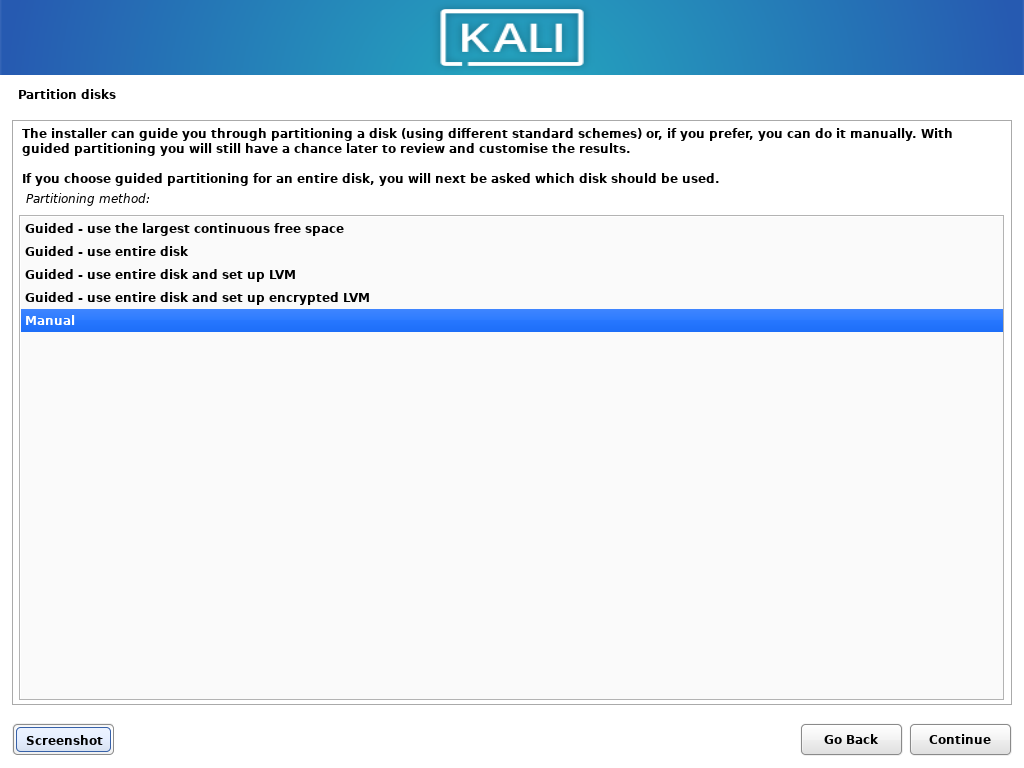
After setting up your username and password, Choose your preferred timezone. Then, You will be provided with a partition disk menu.
Setting Up Partitions (Critical)
This is the most important step. Perform this step carefully without overwriting any partition of windows. It may corrupt your windows partition. So, Choose Manual from the partition disk menu and Click on Continue.
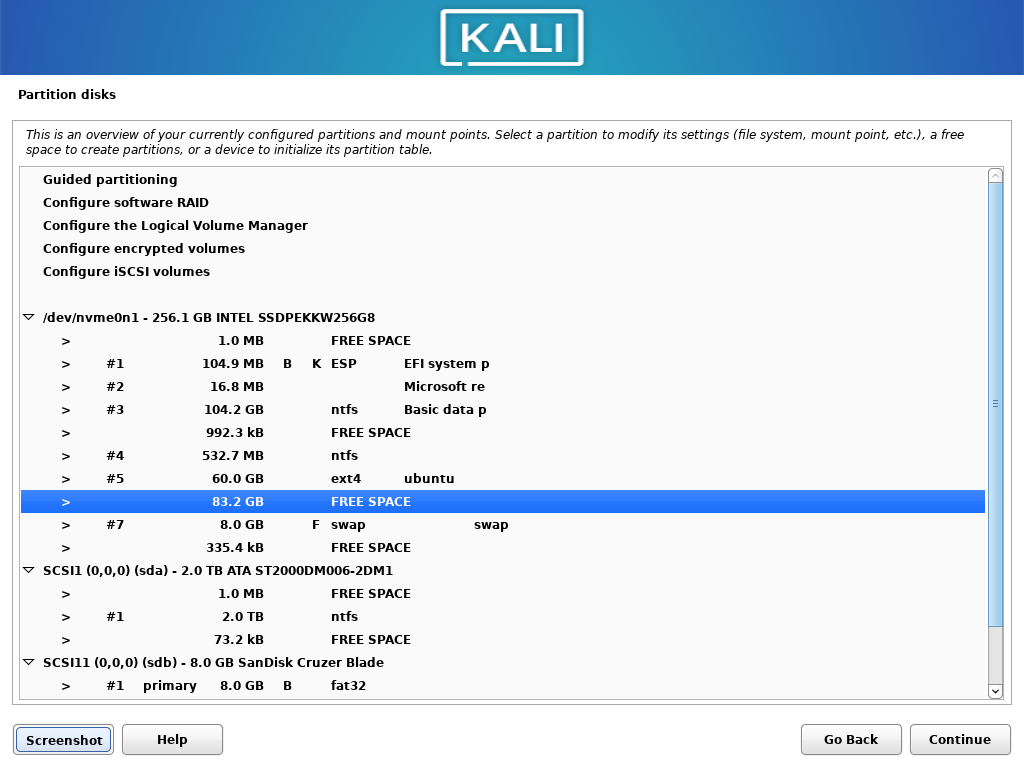
Now, Select the unallocated free space(83GB in my system) and press Enter. Click on Create new partition and press Enter. Choose your disk partition size(minimum of 20GB) and press Enter. Then choose whether you want this partition at the beginning or end of the free space. Choose beginning and press Enter.
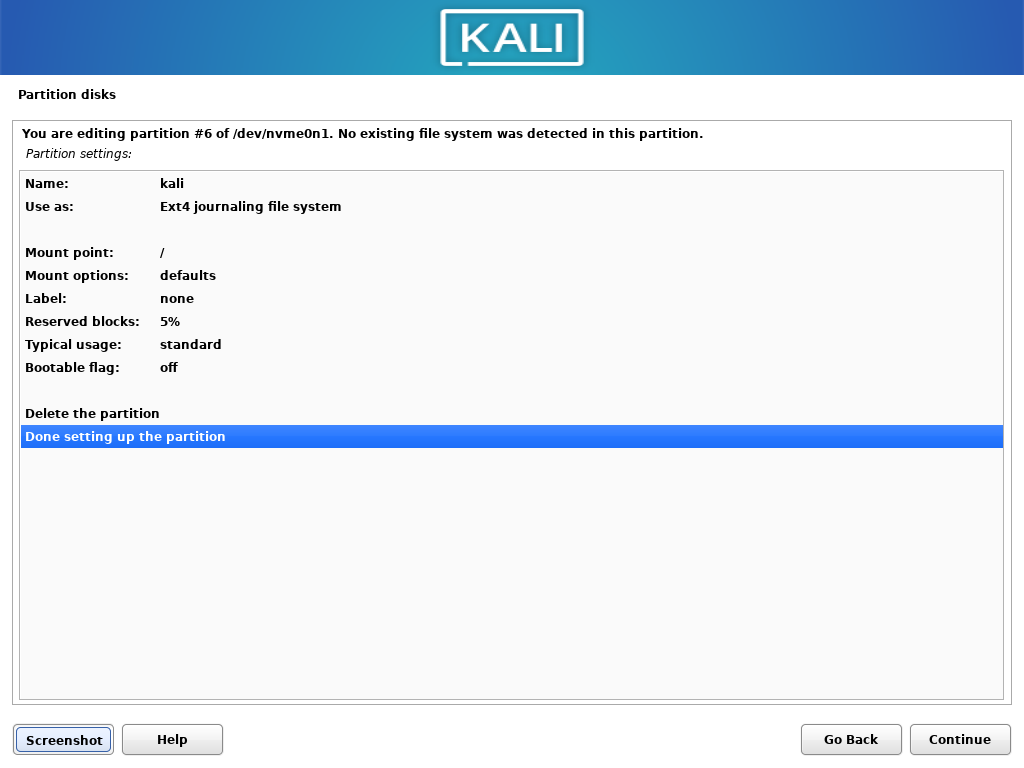
After choosing all the appropriate options, The partition will be shown like this. Double- Click on Done setting up the partition.
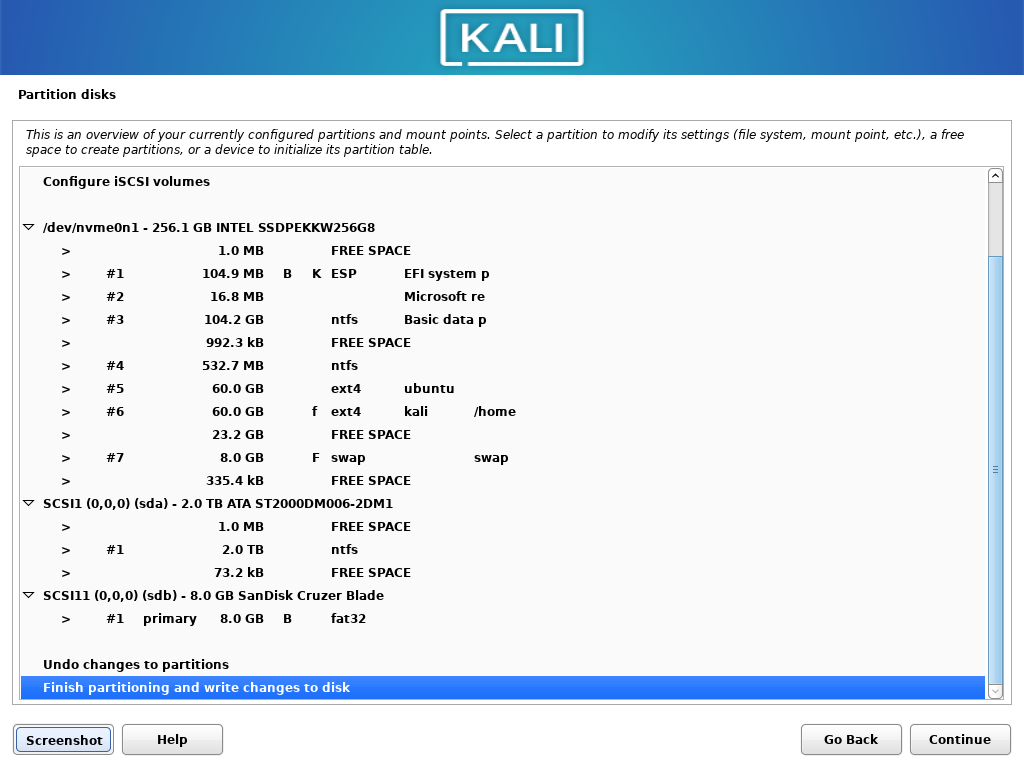
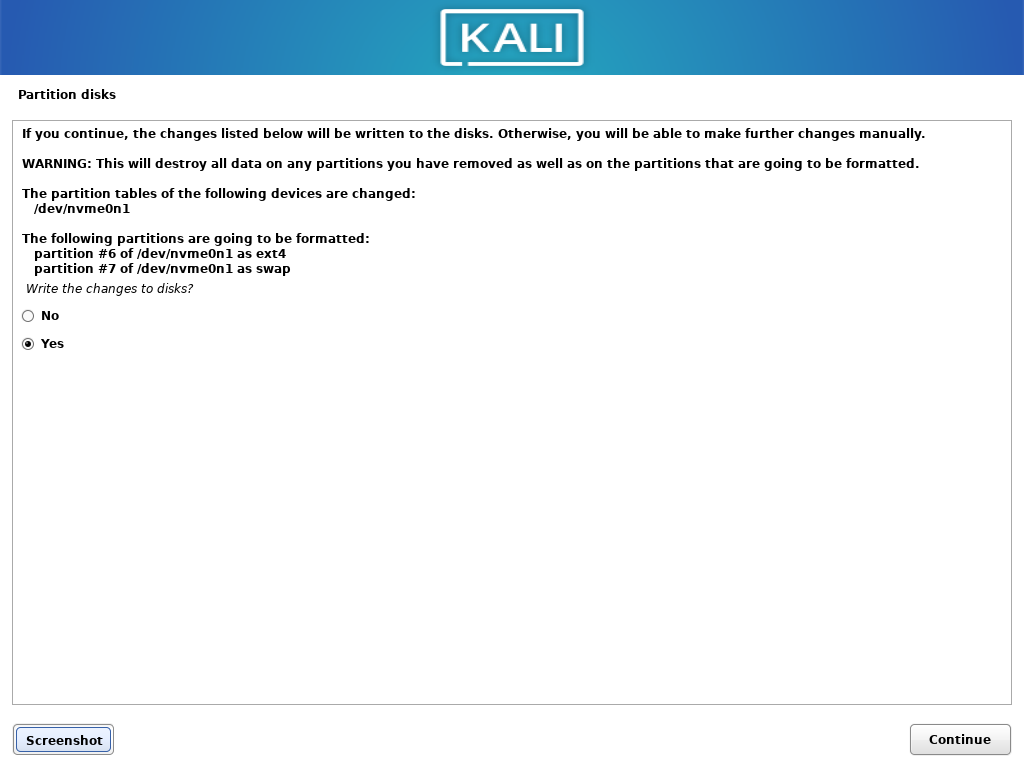
From the free space available, create another partition of 8GB and mount point as swap. After creating the partitions, Double-Click on Finish partitioning and write changes to the disk. On the next option, Click on Yes to confirm writing changes to the disk and click on Continue.
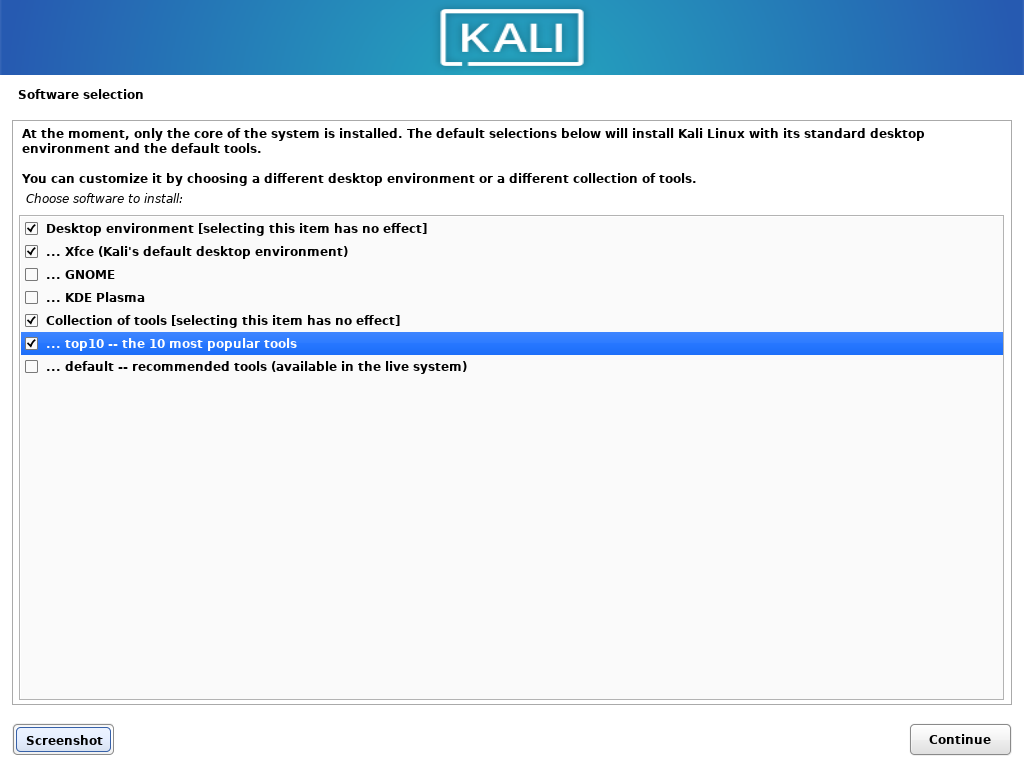
After Disk partitioning, in the Software selection menu, You can choose to install a different desktop environment (default is Xfce) and choose a different collection of tools. Click on Continue.
Wait till the installation completes.

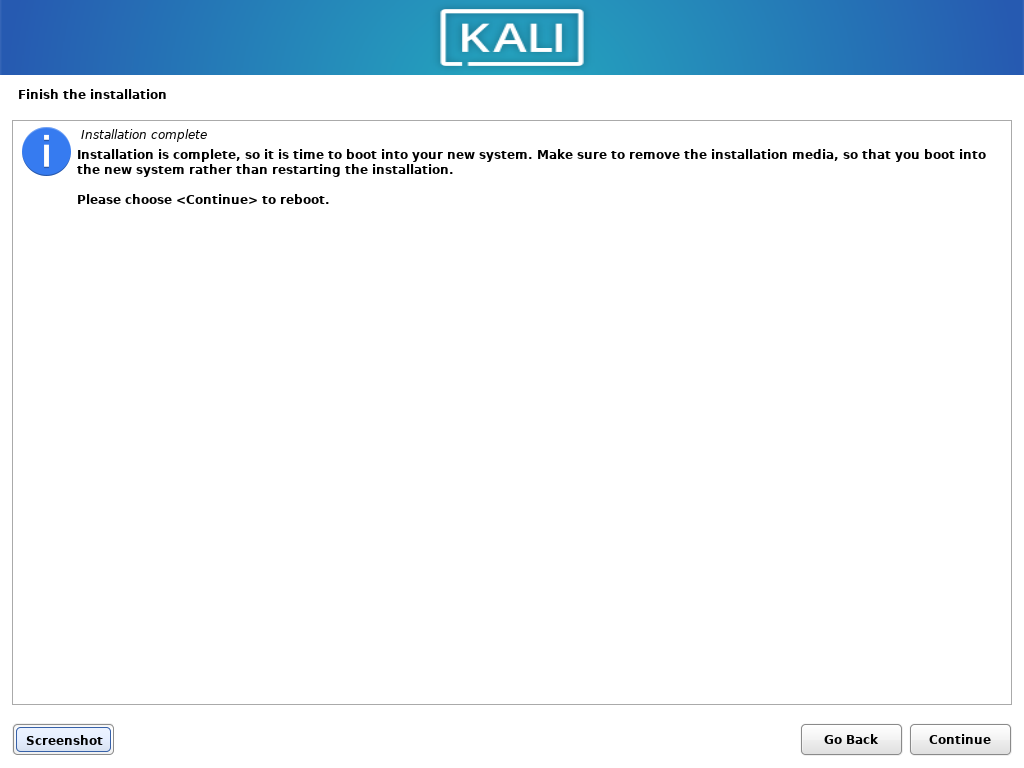
After the installation is completed, click on Continue to reboot to your newly installed kali Linux. Make sure you remove the installation media after clicking on Continue.
Now boot into Kali Linux from the boot menu. You can also change the desktop environment when you are logging in.
Conclusion
So, We discussed how to install Kali Linux along with windows by creating a dual boot environment. Thank you for reading!