
Setting up a GNOME tiling window manager doesn’t mean switching to i3 or Sway instead. A handful of extensions bring keyboard and mouse-driven tiling to the stock desktop, without the learning curve a dedicated tiling window manager demands. This guide covers Tiling Shell, the extension most people land on, plus the alternatives and the GNOME Tweaks settings worth knowing, plus where GNOME’s own window snapping already does the job.
What GNOME’s built-in tiling can and can’t do
Out of the box, GNOME only supports edge tiling. Drag a window to the left or right edge and it snaps to half the screen, or to the top to maximize. There’s no quarter tiling, no custom layouts and no keyboard cycling through a tiled grid.
Ubuntu is the exception. It has shipped the Tiling Assistant extension by default since 23.10, adding quarter tiling and a snap prompt. Fedora and most other GNOME distros stay at plain edge tiling unless you add something.
That’s the gap extensions like Tiling Shell fill. It’s a lighter step than switching to a dedicated tiler like Sway.
Features of Tiling Shell
Not only does this extension allow you to ’tile’ new and open windows, you can also edit the layout in which the open windows will maximize. This feature is similar to the ‘Snap Assist’ feature in Windows 11 in which you can hover over the Maximize button, and it shows you a location on the screen where it will be tiled.
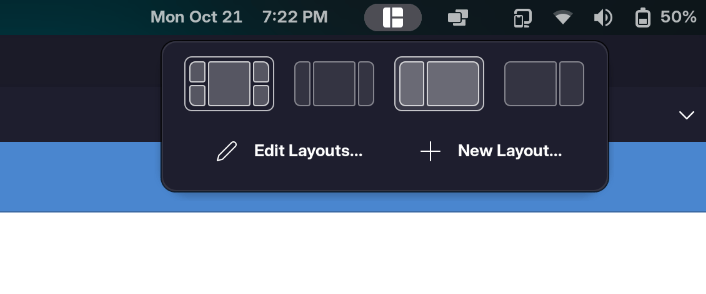
While Windows offers you a fixed layout, you can edit the layout of the maximizing windows using this extension as per your convenience. Yes, the initial set up might feel gruesome, but the end result is really functional.
Tiling Shell has grown since its first release, and its own listing now covers multiple monitors, a Fancy Zones style drop target and automatic tiling, so it covers more ground than the manual snap-only tool it started as. Let’s install this extension on our PC!
Installing Tiling Shell on GNOME
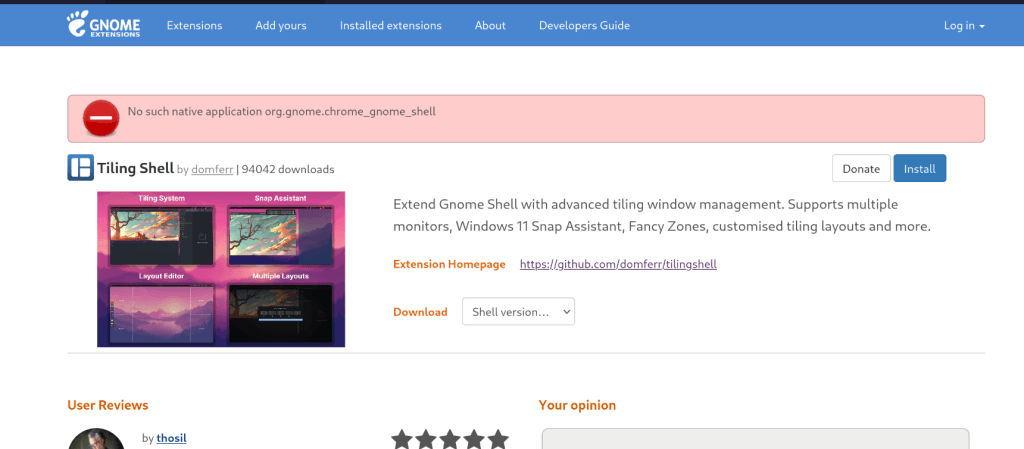
Regardless of your distribution, install the GNOME Shell integration browser extension (Firefox, Librewolf or even Chrome) and then proceed to the official GNOME extensions site to install Tiling Shell on your PC.
This browser add-on used to be called Chrome GNOME Shell. You can also check out the GNOME Extension Manager application, which skips the browser step entirely.
From here, just click on the install button and it should be enabled automatically on your PC. If not, just log out and log back in in order for the extension to get loaded.
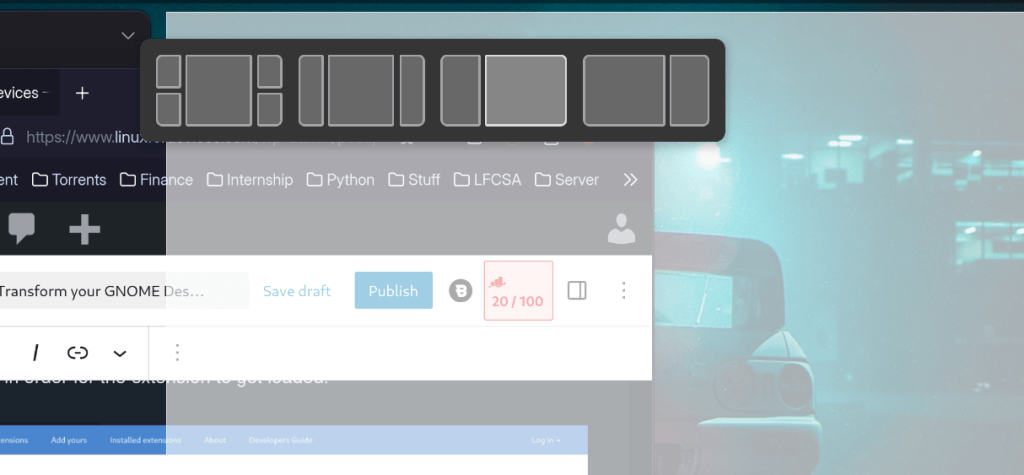
Once installed, you can just click on any window and then press the Ctrl key on your keyboard in order to move it to a dedicated ‘zone’, and once you drop the window in that zone, it will be perfectly tiled. You can also drag the window to the top of your screen and, through a pop-up view, adjust that window to any portion of your screen.
We haven’t explored how functional this extension is with the help of the keyboard. We leave that for you to discover, or check out their GitHub page to learn the useful shortcuts.
Other GNOME tiling window manager extensions worth knowing
Tiling Shell suits people who still want to drag windows with a mouse some of the time. If you’d rather every window tile itself the moment it opens, a few other extensions are worth a look before you settle on one.
Pop Shell
Built by System76 for Pop!_OS, Pop Shell adds automatic tiling on top of GNOME along with floating window exceptions and a colored border for the active window. It isn’t always on extensions.gnome.org promptly, so some distros need a manual clone and build from its GitHub repo.
Forge
Forge leans closer to i3, with auto-tiling, tabbed windows and configurable hotkeys for splitting and resizing. Some of its newer features carry a bug warning in the settings panel, since Forge flags experimental options that can occasionally crash GNOME Shell rather than hiding that risk from you.
PaperWM
PaperWM replaces GNOME’s grid of workspaces with a single scrollable row of tiled windows per monitor, closer to a horizontal timeline than a traditional tiling grid. It ships its own list of extensions it conflicts with, which is worth reading before combining it with anything else.
Picking one
Start with Tiling Shell if you still want to drag windows sometimes. Pick Pop Shell or Forge if you want tiling to happen without dragging at all. PaperWM suits anyone who already thinks in columns rather than a grid, since it drops GNOME’s usual workspace switcher entirely.
Multi-monitor and Wayland behavior
Tiling Shell, Pop Shell and Forge all work on both Wayland (GNOME’s modern display protocol) and X11 (the older one some distros still default to), since each ships as a standard GNOME Shell extension rather than a separate compositor.
Tiling Shell tiles each monitor independently. PaperWM ties its scrollable tiling to per-monitor workspaces too, though its own documentation notes rough edges when a workspace spans monitors of different sizes. On mixed-scaling setups, a mouse-driven extension like Tiling Shell tends to cause fewer surprises than a fully automatic tiler.
GNOME Tweaks settings that round out the tiling feel
A tiling extension only gets you part of the way. Two settings inside GNOME Tweaks make the rest of the desktop behave more like a tiling window manager (WM) without installing anything else.
Turn on Focus on Hover, found under Windows then Focusing in GNOME Tweaks. With it on, whichever window your mouse sits over becomes active automatically, cutting out the extra click a click-to-focus setup normally needs between switching windows.
It’s also worth revisiting your keyboard shortcuts. Binding a launcher key, a terminal shortcut and a close-window shortcut that don’t clash with your tiling extension’s own bindings goes further toward a tiling window manager feel than the tiling itself does.
Static workspaces help too. Switching GNOME from dynamic to a fixed workspace count under Multitasking keeps workspace numbers predictable, which matters once you’re jumping between them with keyboard shortcuts instead of the mouse.
Extensions that conflict with tiling extensions
Tiling extensions rewrite how GNOME places and resizes windows, so anything else that touches window shape or the desktop layer tends to clash. Desktop-icon extensions are a common culprit, since they create invisible windows that confuse a tiling extension’s window count.
Rounded-corner extensions and other tools that change a window’s shape can cause visual glitches once a tiling extension starts resizing that same window. Dock and panel replacements sometimes fight over the same keyboard shortcuts a tiling extension wants for moving windows between workspaces.
If tiling stops behaving right after adding a new extension, disabling extensions one at a time to isolate the conflict is faster than troubleshooting settings that were never the problem.
A GNOME Shell restart, logging out and back in on Wayland or Alt+F2 then r on X11, also clears up plenty of tiling glitches that look like a conflict but are really just a stuck extension state.
Is a tiling extension worth it for you
Not everyone needs one. Plenty of GNOME users get by on the built-in edge tiling plus the Super and arrow key shortcuts GNOME ships with, snapping two or three windows into place and switching apps with a pinned dock shortcut instead of cycling through tiles.
That workflow skips the extra layer a tiling extension adds: no layout editor, no zones to learn and one less extension that can break on a GNOME upgrade.
If your day mostly involves two or three apps at a time rather than a wall of terminals and editors, GNOME’s defaults plus a tidy keyboard shortcut setup might already cover it.
The extensions in this guide earn their place once you’re routinely juggling more windows than that, or want tiling to happen automatically rather than by dragging.
A developer running a terminal, an editor and a browser side by side gets more out of Tiling Shell than someone who mostly reads email and browses in one window at a time.
Key takeaways
- GNOME’s built-in tiling only covers left, right and top edges, no quarter tiling
- Ubuntu ships Tiling Assistant by default since 23.10, adding quarter tiling
- Tiling Shell adds custom zone layouts, a Windows 11 style snap assistant and automatic tiling
- Install Tiling Shell through extensions.gnome.org or the GNOME Extension Manager app
- Pop Shell, Forge and PaperWM automate tiling more aggressively than Tiling Shell
- Turning on Focus on Hover in GNOME Tweaks completes the tiling window manager feel
- Desktop-icon and dock-replacement extensions are the most common source of tiling conflicts
- A tiling extension is worth adding once you’re juggling more than two or three windows at once
Frequently Asked Questions
Does GNOME have a built-in tiling window manager?
Not a dedicated one. GNOME only supports edge tiling by default, snapping windows to halves or full screen, with no quarter tiling unless your distro adds an extension like Ubuntu’s Tiling Assistant.
Is Tiling Shell better than Pop Shell for GNOME?
Tiling Shell suits mouse-driven, layout-based tiling with an editor, while Pop Shell focuses on fully automatic tiling similar to i3. Neither is objectively better, the right pick depends on how much manual control you want.
Can I use a tiling extension and a real tiling window manager together?
Not practically. A GNOME tiling extension and a separate window manager like i3 or Sway both try to control window placement, so running both at once causes conflicts rather than extra features.
Why did my windows stop tiling after installing a new GNOME extension?
Extensions that touch desktop icons, window shape or docks commonly conflict with tiling extensions. Disable recently added extensions one at a time to find which one is interfering with tiling.
Does Tiling Shell work on Wayland?
Yes, Tiling Shell works on both Wayland and X11 sessions, since it’s built as a standard GNOME Shell extension rather than a separate compositor or window manager.
Do I need GNOME Tweaks to use a tiling extension?
No, tiling extensions work without it. GNOME Tweaks just adds complementary settings like Focus on Hover that make the whole desktop feel closer to a dedicated tiling window manager.
Does Ubuntu already have window tiling without extensions?
Yes, Ubuntu has shipped Tiling Assistant by default since version 23.10, adding quarter tiling and a snap prompt on top of GNOME’s edge tiling.
Conclusion
Tiling Shell remains the easiest entry point into GNOME tiling, and swapping it for Pop Shell, Forge or PaperWM later costs nothing more than disabling one extension and enabling another.