
Installing CentOS with VirtualBox on Windows looks different than it did a few years back, since CentOS Linux itself is dead now. CentOS 7 reached end of life in June 2024, so this guide now installs CentOS Stream instead of the old release.
CentOS Linux vs CentOS Stream in 2026
CentOS Linux, the version most tutorials walk through installing, stopped getting updates a while back. CentOS Linux 8 stopped in December 2021 and CentOS Linux 7 followed on June 30, 2024. There’s no CentOS Linux 9 and there won’t be one.
Red Hat redirected the whole project toward CentOS Stream back in December 2020 and Stream is what centos.org actually hands you now. CentOS Stream isn’t a straight swap for old CentOS, since it sits upstream of Red Hat Enterprise Linux instead of downstream.
Packages land in Stream before they land in RHEL rather than after. For a home lab or a test VM, that difference barely matters. For a server you want to behave exactly like production RHEL for years without touching it, the difference matters a lot.
If you actually want the old CentOS experience, a free, stable, point-release RHEL rebuild, Rocky Linux and AlmaLinux are the two projects built to fill that gap. Either one installs in VirtualBox the same way this guide describes. This walkthrough uses CentOS Stream 9 since that’s the centos.org default.
System architecture check
First, let us check the system architecture we are on, to do that on your windows machine.:
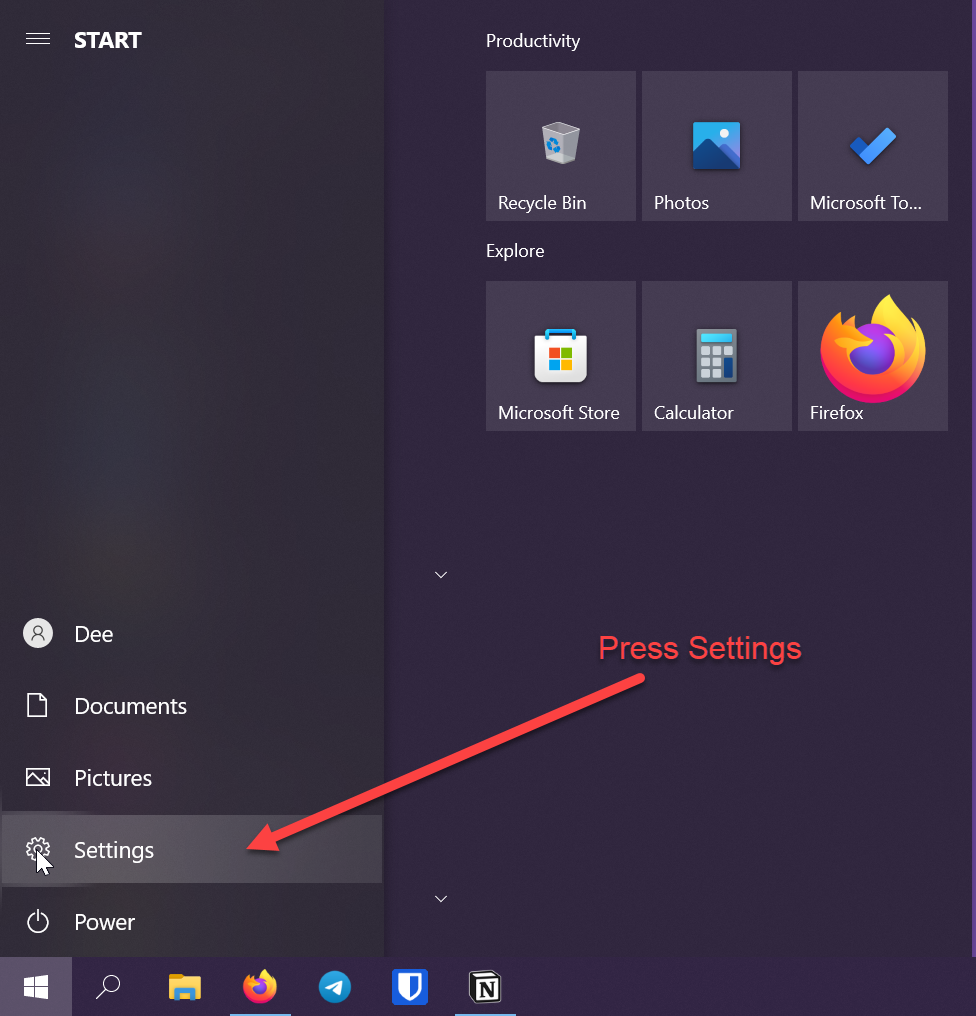
Step 1. Press the start button:

Step 2. Press the Setting button:
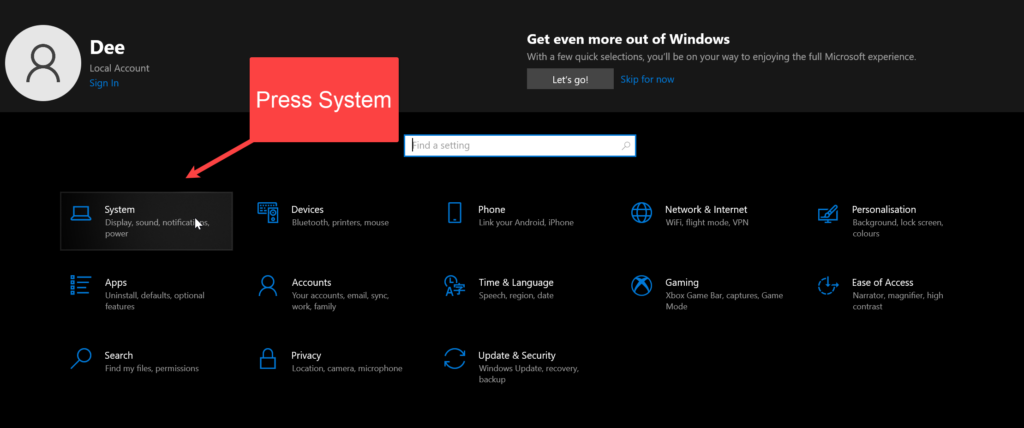
Step 3. In the setting page, press “System Options”:
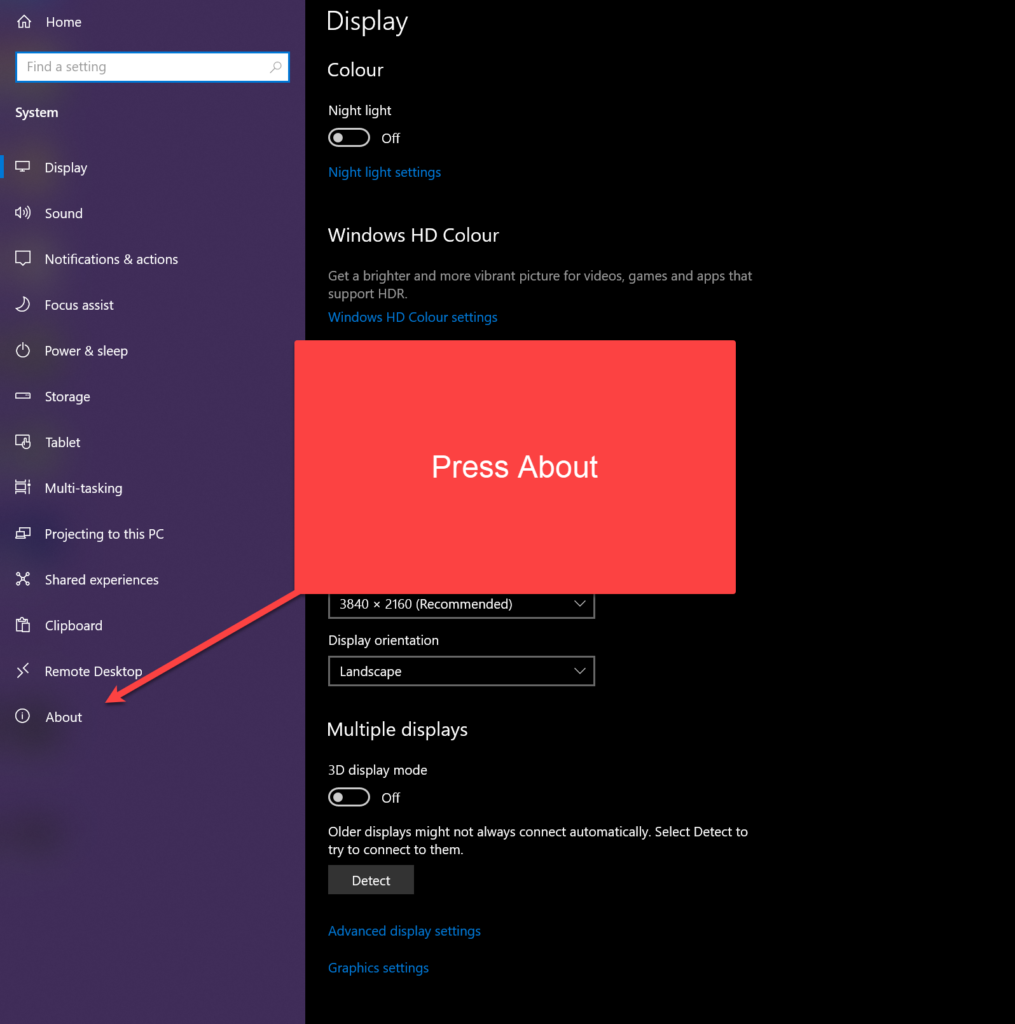
Step 4. In the systems option press the About button:
Step 5. Check the System Type in about panel:
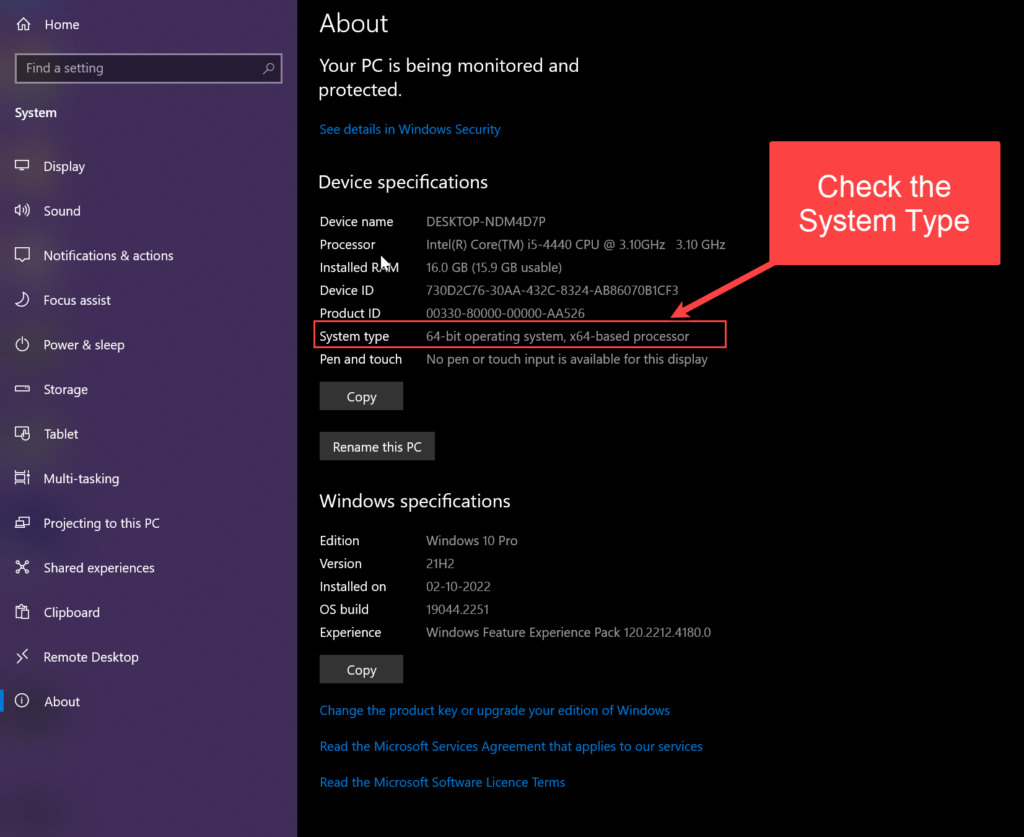
Note on System Type: Majority of the modern computing has shifted to 64-bit however there are certain devices that only support 32-bit operations. Be aware of this as it would be necessary while selecting the kind of Centos iso we would need to download.
Similarly, there are 3 different types of processors:
- x86
- x64
- arm
Most of our devices have now shifted over to x64 processors. However, older systems could have x86 processors. Newer arm processors such as apple silicon and Microsoft’s SQ series are included in some of the devices. In fact, Centos now supports arm processors and has a native arm build to run on arm processors.
Installing Virtualbox
Since we know the type of system we are running, let us now go ahead and download the VirtualBox application.
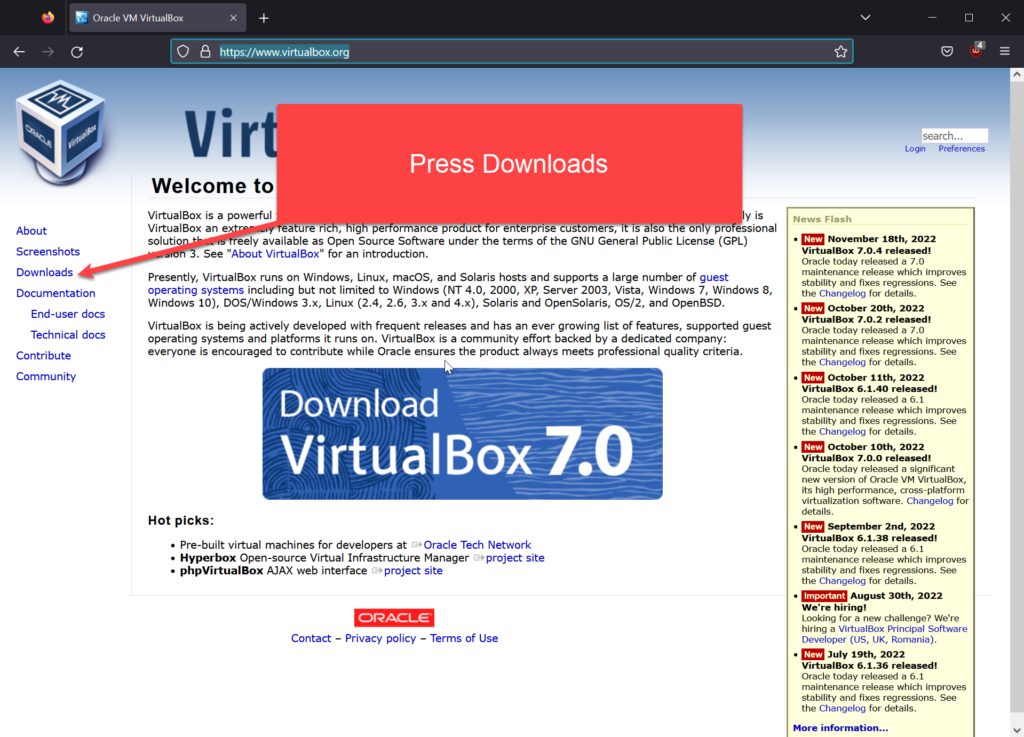
Step 1. Go to the Virtualbox Website and press the Download option.
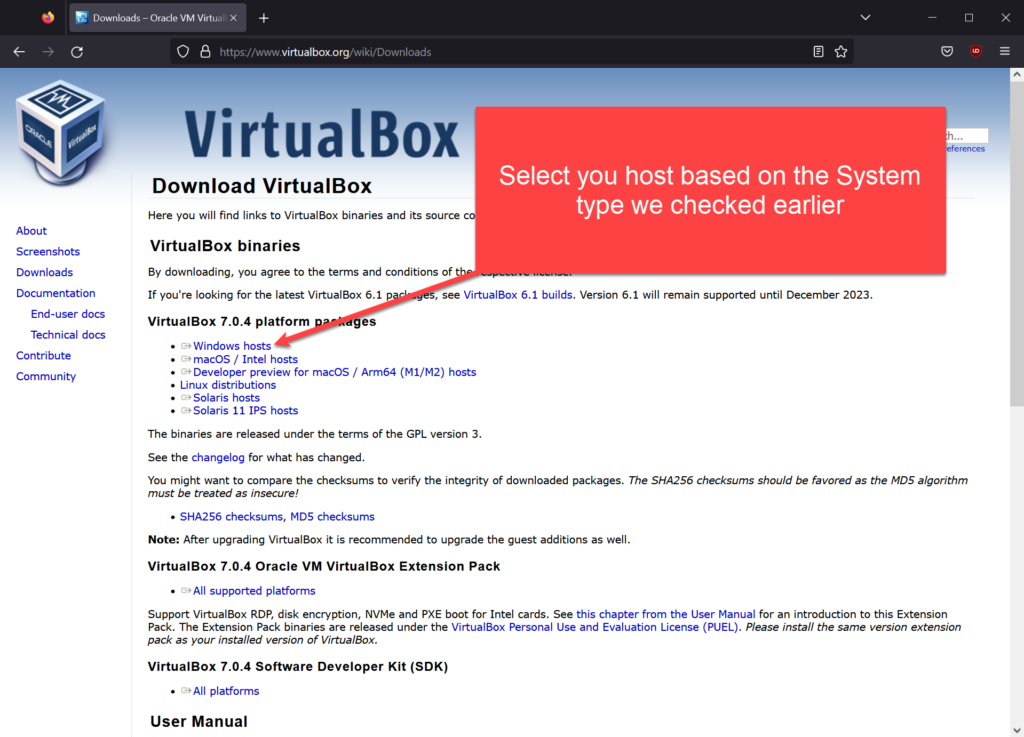
Step 2. Based on the System Type we checked earlier, let us select the appropriate host platform, in our case it’s Windows.
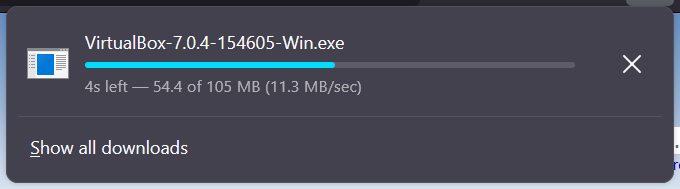
Step 3. Download the Application Executable
Step 4. To install Virtualbox, double-click on the downloaded executable
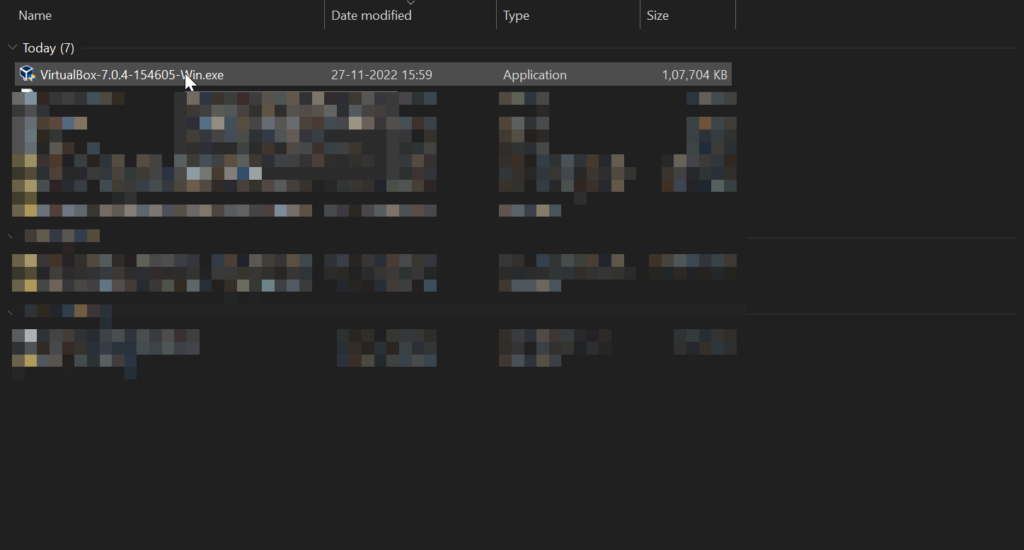
Step 5. Press next on the first Screen
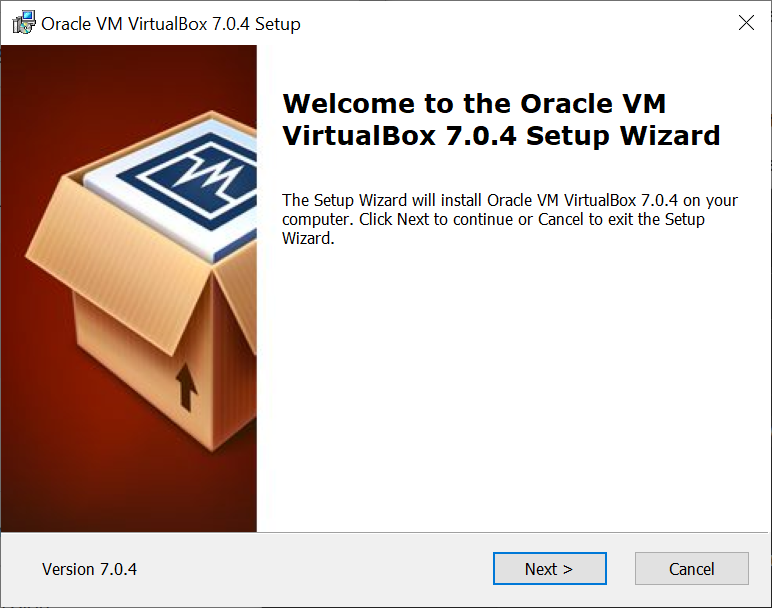
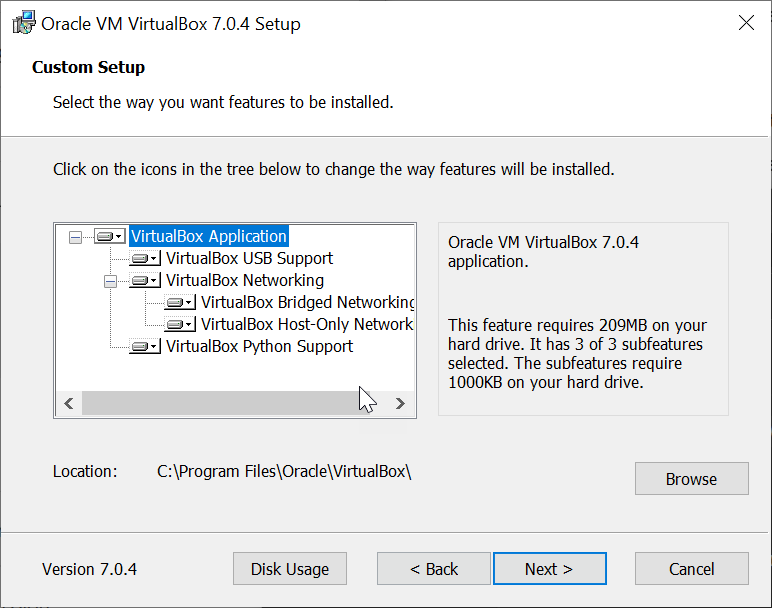
Step 6. Go through the Virtualbox components and press Next on the second screen
Step 7. Proceed with the installation
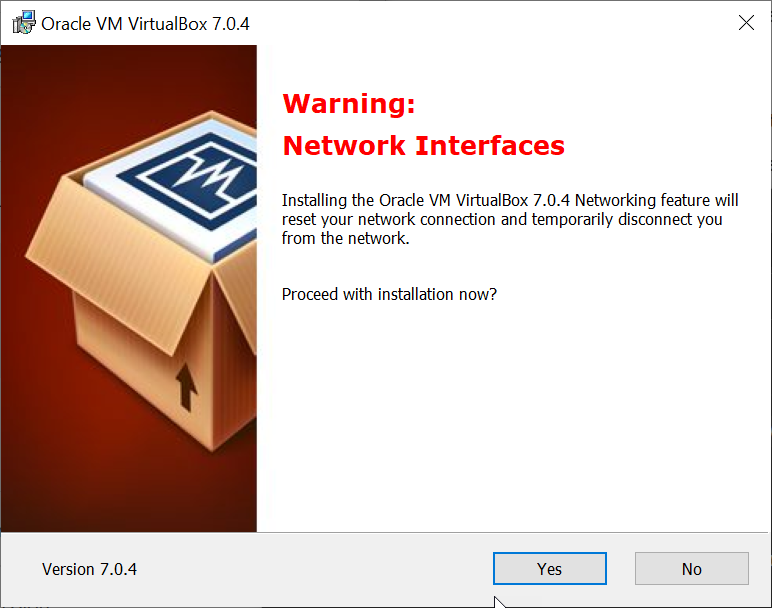
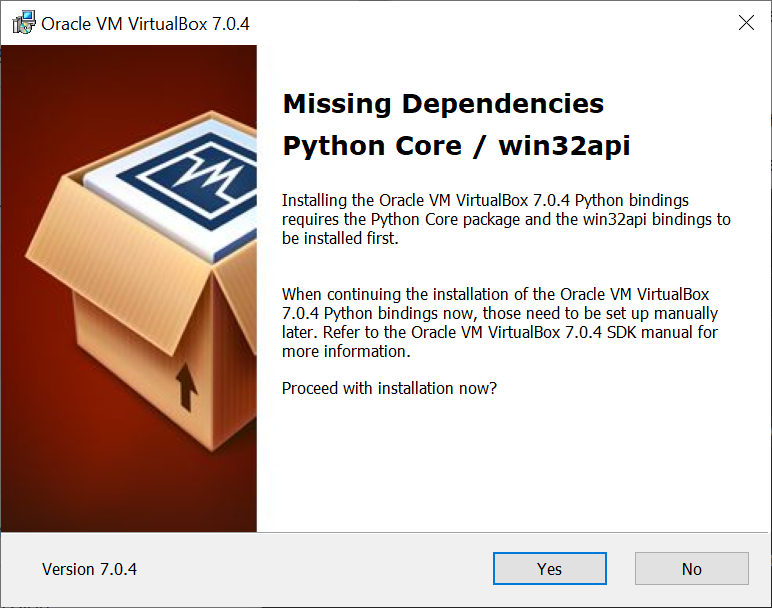
Step 8. Proceed to install the missing dependencies, Press yes
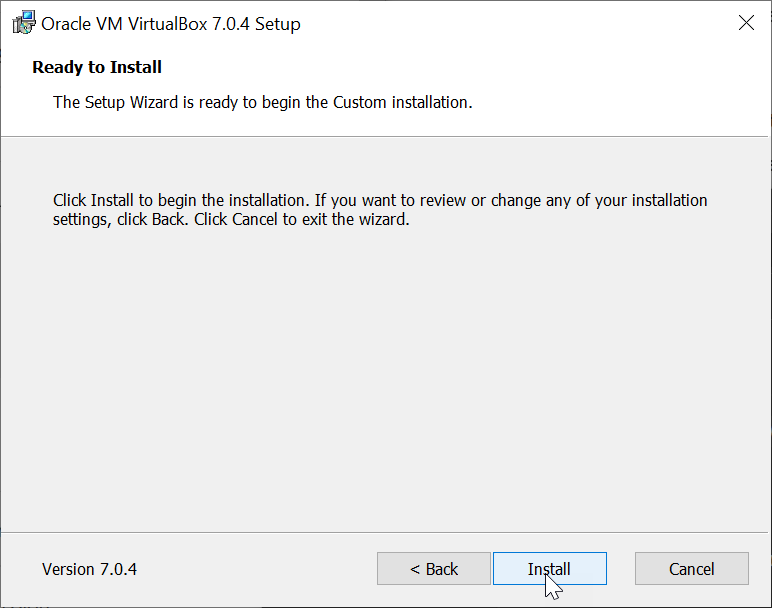
Step 9. Press Install to continue with the installation
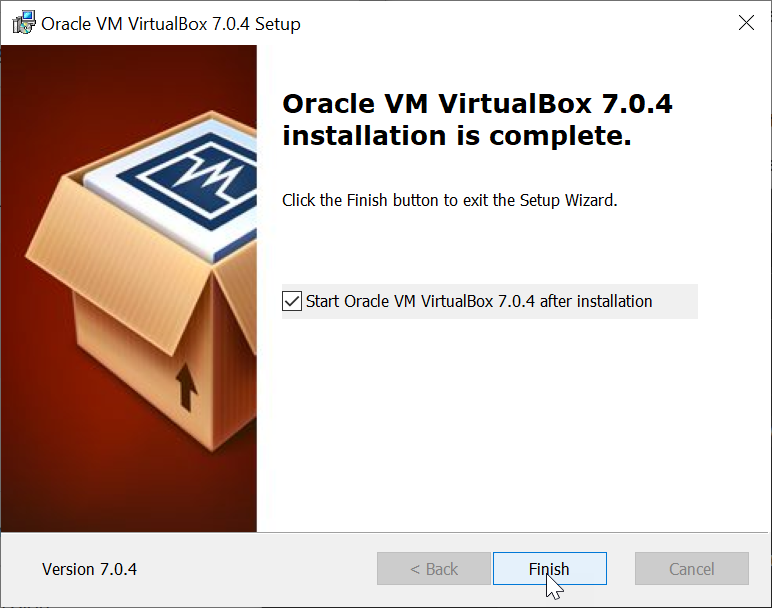
Step 10. Finishing the installation, should automatically launch the Virtualbox Application
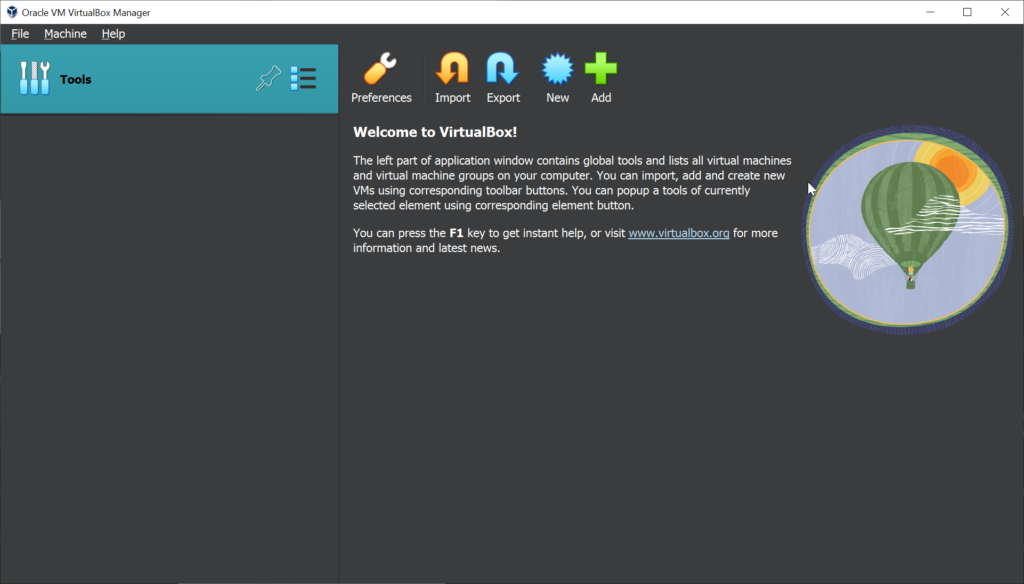
Step 11. We are greeted by the Virtualbox Home Screen
Downloading Centos
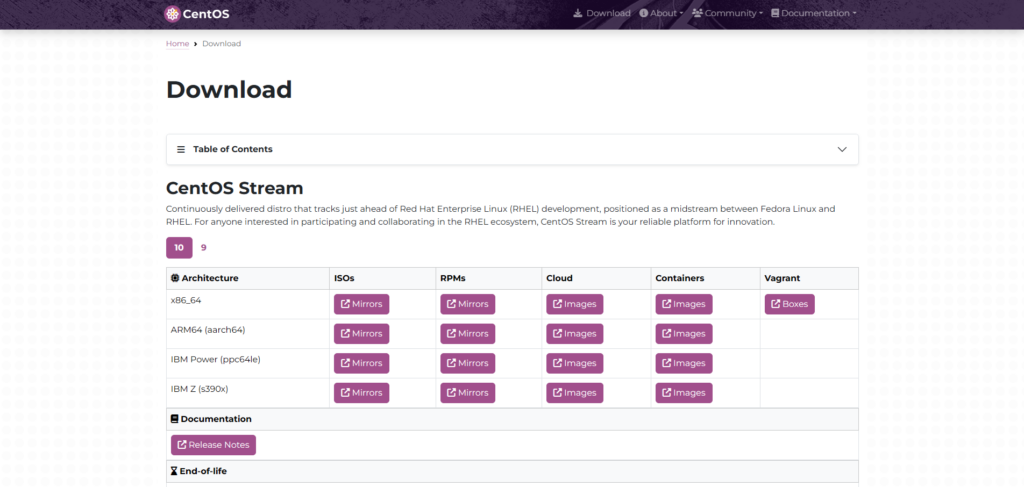
Now that we have installed Virtualbox, it’s time to get an operating system image to run inside it. Head to centos.org/download, where you won’t find a CentOS 7 or CentOS 8 Minimal ISO anymore, since CentOS Linux is gone.
What you’ll find instead is CentOS Stream, currently at major version 9 and 10. This guide uses Stream 9. Scroll to the CentOS Stream 9 section and pick your architecture: x86_64 for almost everyone here, aarch64 if you’re on an Arm host. You have two practical choices for VirtualBox:
- The DVD ISO is the full installer with everything included, several gigabytes and the closest match to the original steps below.
- The boot ISO is a small (roughly 750 MB) network installer that pulls packages during setup. It’s faster to download and works fine as long as your host has a stable connection.
Grab whichever one fits your connection and note the checksum listed next to it if you want to verify the download later.
If you’d rather install the old-style, free, point-release RHEL rebuild instead of Stream, Rocky Linux and AlmaLinux both publish ISOs on their own sites and the rest of this guide applies to either one without changes.
Setting up Virtualbox for running Centos
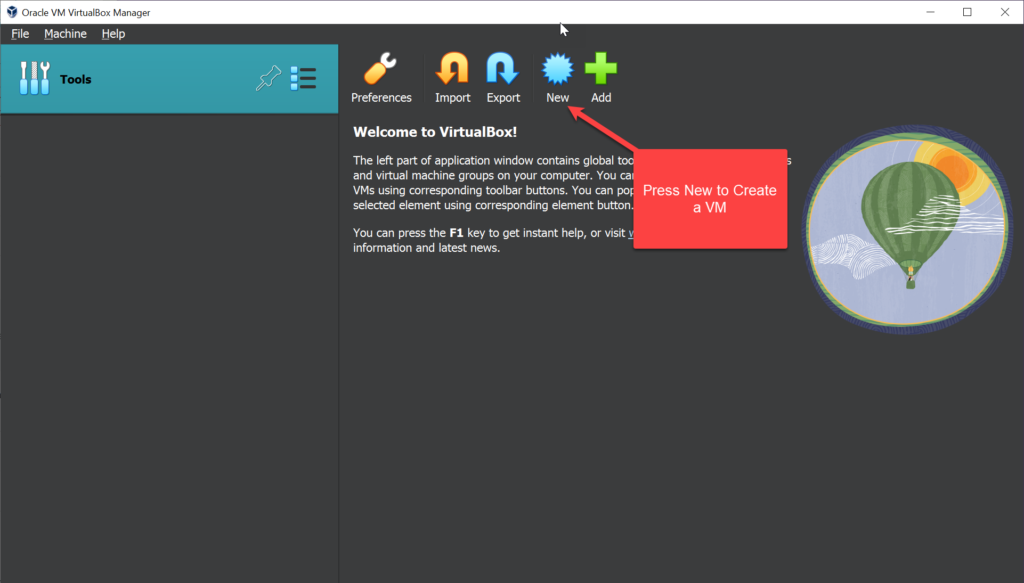
Step 1. Now, let us get started with the setup of Centos on Virtualbox. We need to press the New button to create a new Virtual Machine (VM)
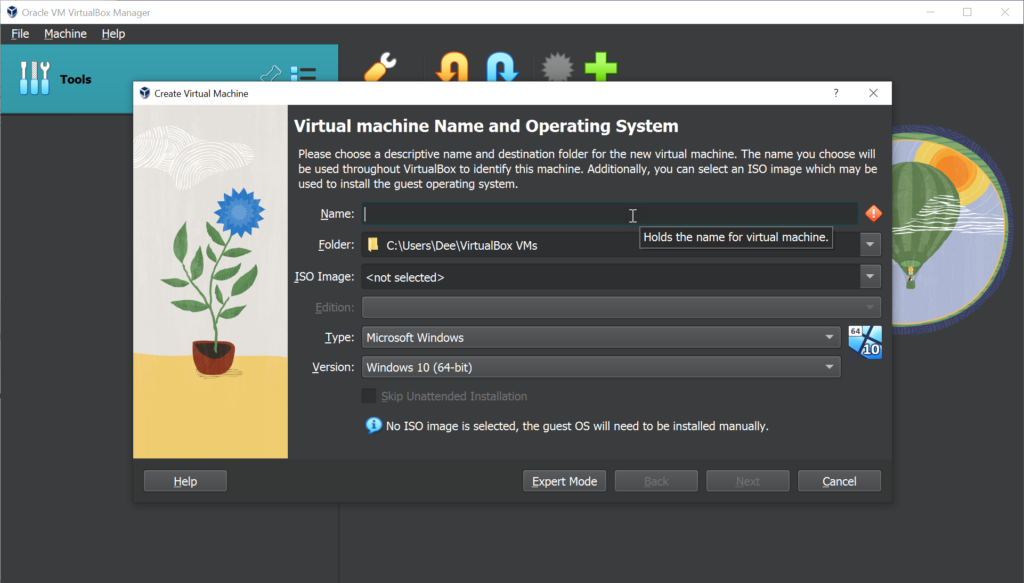
Step 2. This will give us a prompt to enter the name of the VM we are about to create. and the location of the iso file we downloaded. It will auto detect the Type and Version of the OS from the ISO once the iso has been detected successfully.
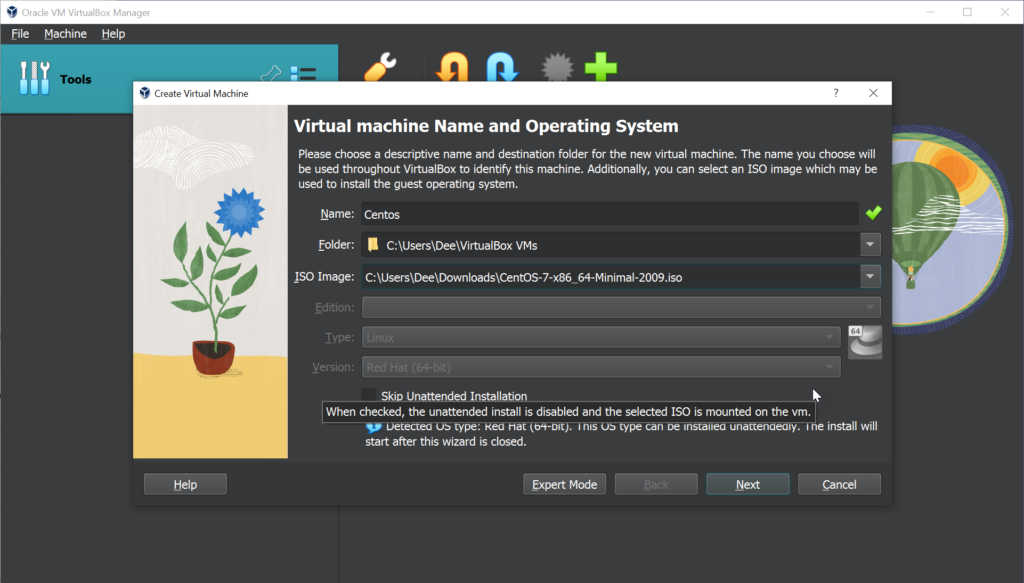
Step 3. Here I’m going to use the default name of the os I’m installing so that would be Centos, If you notice Virtualbox already auto-populated the OS Type and Version below.
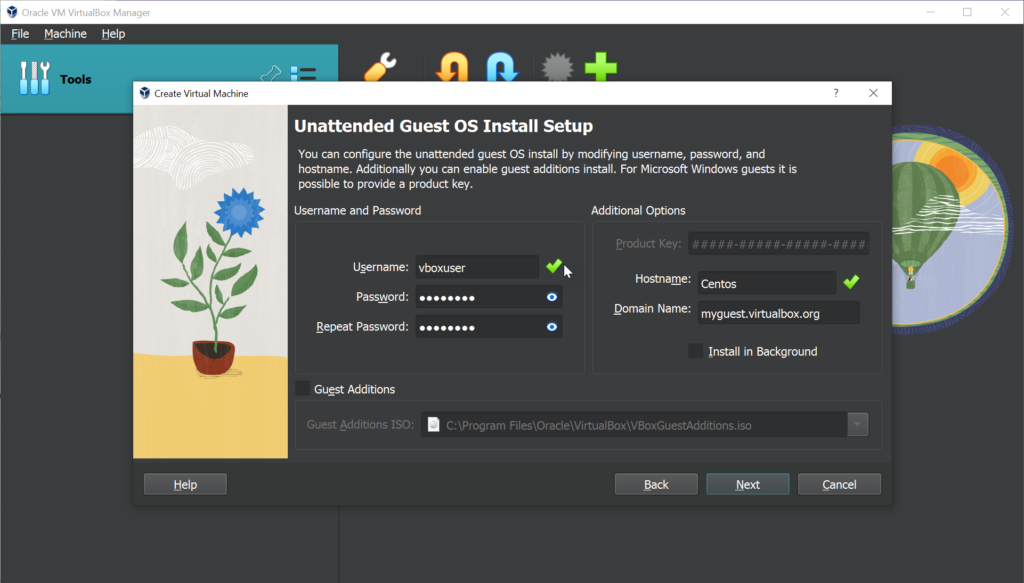
Step 4. Configuring the unattended guest OS install setup, by entering the username and password. That’s pretty much it unless you want to change the hostname and Domain Name. You can do this over here.
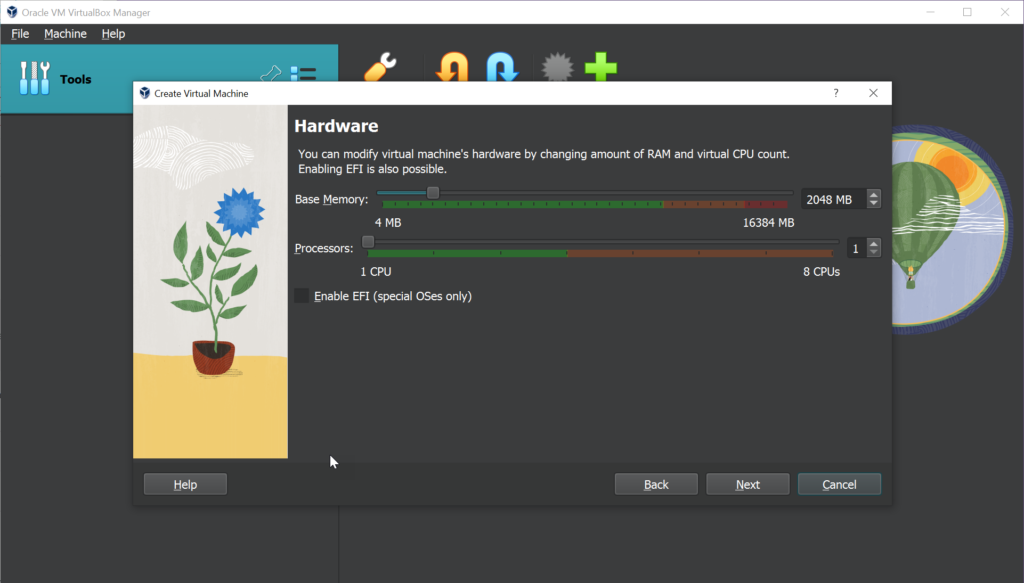
Step 5. This is one of the most important steps to be careful about. Make sure you save a good amount of resources for your host OS as well. If you are to dedicate more than the suggested green part of the resource. Your entire host OS could crash so make sure only a fraction of the entire available resource is given to the VM.
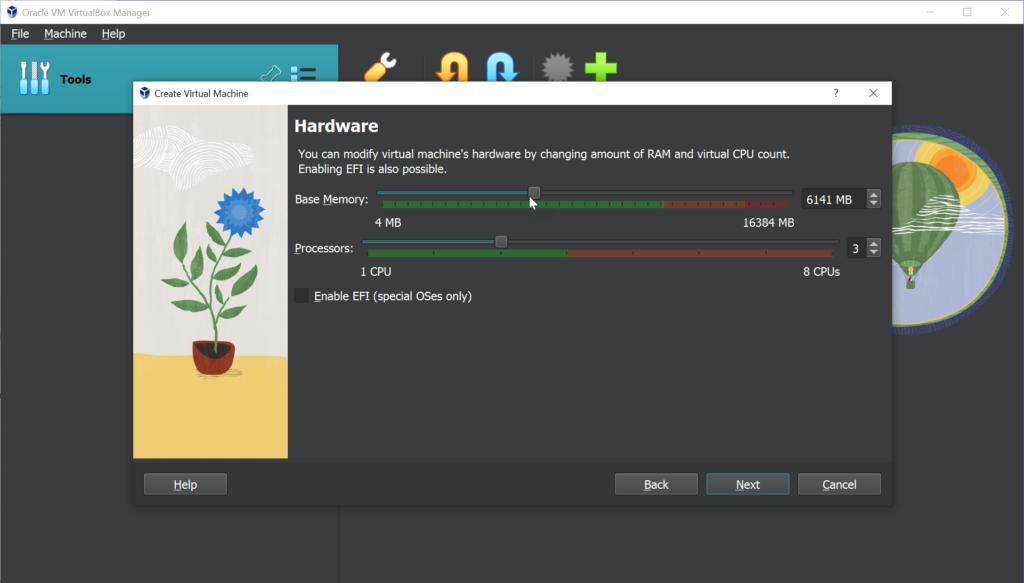
Step 6. Here I’m letting the Guest VM use 6 gigs of ram and 3 cores max.
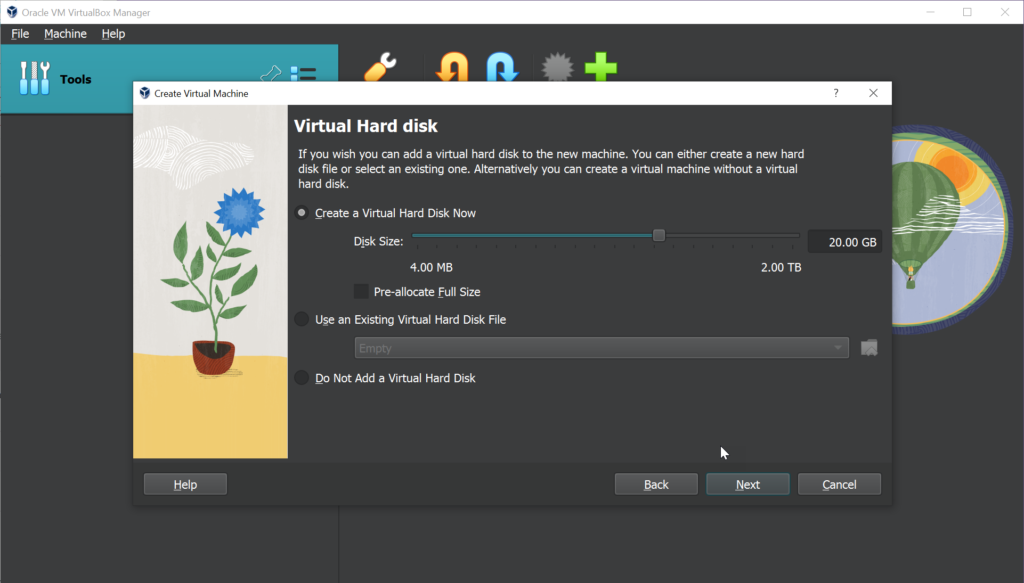
Step 7. Similarly, don’t go overboard with the storage allocation
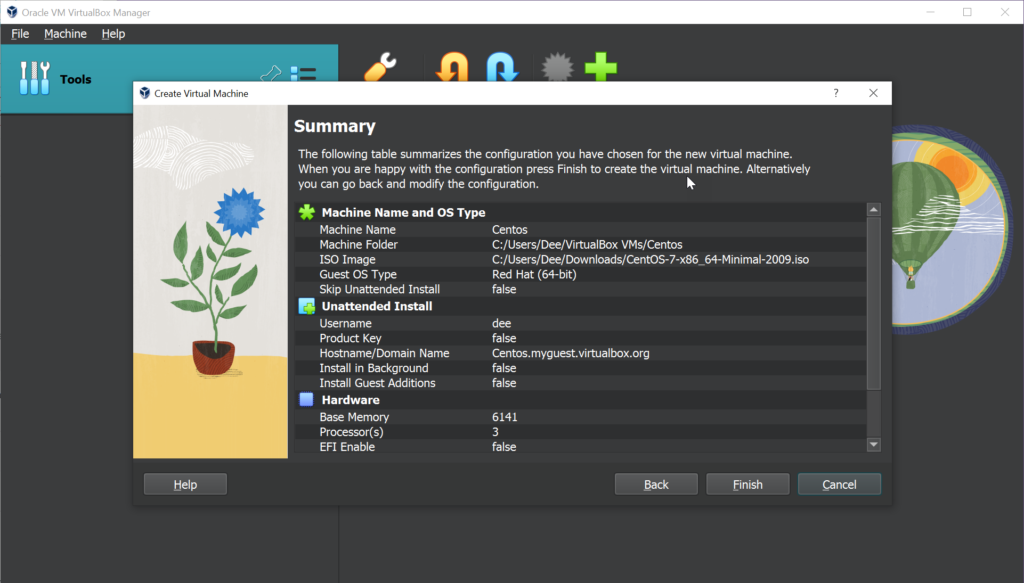
Step 8. Once done with the above steps Virtual box will provide us with the overall summary of the selections we made for this particular VM. Click on the Finish button to get done with the VM creation process.
Step 9. Now we have the Centos VM ready to go on the home page of Virtualbox
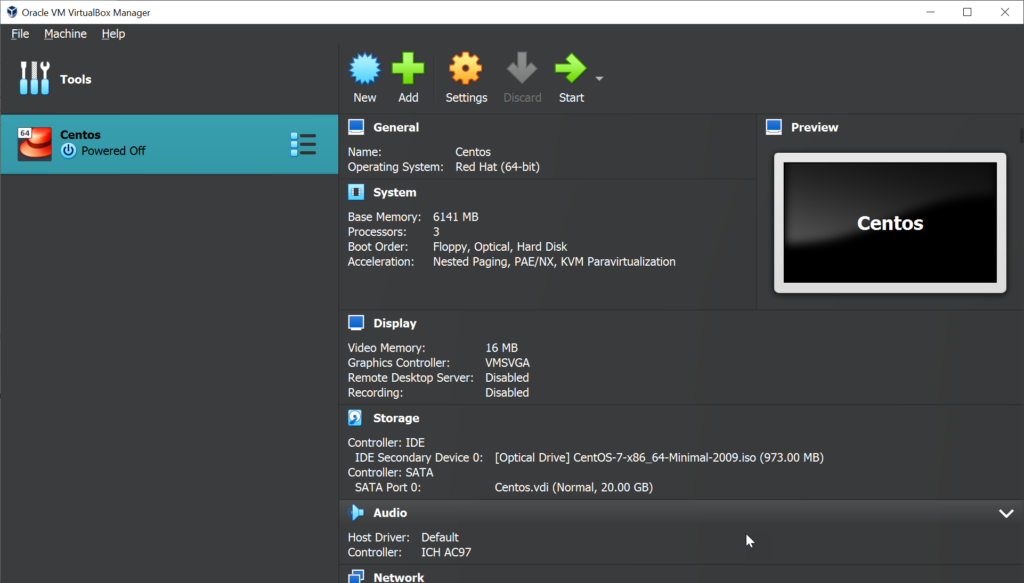
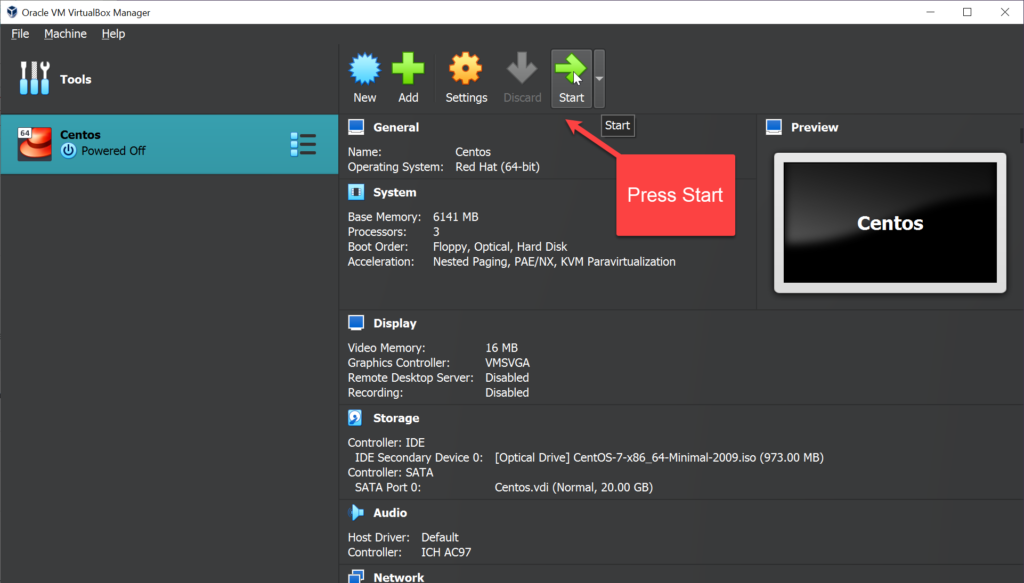
Step 10. Press the start icon to launch the Centos VM we created
Step 11. Centos running successfully after pressing the start button
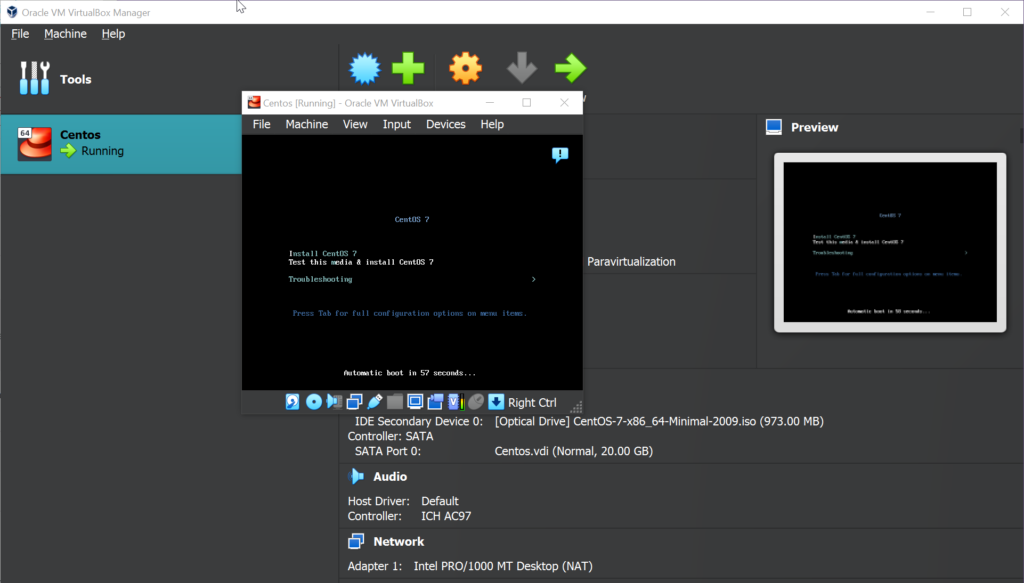
The exact login screen looks different on CentOS Stream, but a successful first boot looks like this.
Installing VirtualBox Guest Additions on CentOS
The other guide stopped at first boot, which leaves a small fixed-resolution window, no shared clipboard and no drag-and-drop between host and guest. Guest Additions fix all of that and CentOS doesn’t install them for you.
Install the build tools first
Guest Additions compiles a kernel module on first install, so CentOS needs the tools to build one. Open a terminal in your CentOS Stream VM and run:
sudo dnf install -y gcc make perl elfutils-libelf-devel kernel-devel-$(uname -r) kernel-headers-$(uname -r)
kernel-devel and kernel-headers have to match your exact running kernel, which is what the $(uname -r) part guarantees. Reboot after this step if dnf pulled in a kernel update, since Guest Additions needs to build against the kernel you’re actually booted into.
Mount and run the installer
From the VM window menu, go to Devices then Insert Guest Additions CD Image. CentOS will usually prompt to open the disc, or you can mount and run it by hand:
sudo mkdir -p /mnt/cdrom
sudo mount /dev/cdrom /mnt/cdrom
cd /mnt/cdrom
sudo ./VBoxLinuxAdditions.run
Let the script finish and reboot the VM. Each VirtualBox release ships its own matching Guest Additions build, so if you ever upgrade VirtualBox on the Windows host, plan to reinstall Guest Additions inside the guest to match.
Skip the install: use a prebuilt CentOS VM image
If you don’t need to walk through the installer yourself, a prebuilt virtual machine gets you to a working desktop in minutes instead of the better part of an hour.
LinuxVMImages.com keeps ready-to-import VirtualBox images for CentOS Stream alongside Rocky Linux, AlmaLinux, Ubuntu and Debian. It’s worth checking their site directly rather than an old CentOS 8 page, since CentOS 8 itself now carries an EOL tag in their own navigation. CentOS Stream 9 is what they list as most downloaded these days.
Once you’ve downloaded an image, importing it works the same way regardless of where it came from:
- In VirtualBox, open File then Import Appliance.
- Point it at the downloaded
.ovaor.ovffile. - Review the suggested name, RAM and disk settings on the next screen and adjust anything that looks off for your host before clicking Import.
- Start the VM once import finishes. Login details are usually listed on the download page, commonly a non-root user with sudo access rather than a root password.
This is also the same mechanism VirtualBox uses for exporting and restoring your own VMs, covered in our guide to backing up VirtualBox virtual machines. If you’d rather see the OVA import flow walked through step by step with screenshots, our Kali Linux VirtualBox guide covers the same process.
Key takeaways
- CentOS Linux is fully end of life. CentOS Stream is the active successor.
- centos.org now serves CentOS Stream 9 and 10, not CentOS 7 or 8 ISOs.
- Rocky Linux and AlmaLinux are free point-release alternatives if you want the old CentOS behavior.
- VirtualBox’s unattended-install wizard handles the username, password and hostname fields for you.
- Guest Additions need matching kernel-devel and kernel-headers before they’ll build.
- Reinstall Guest Additions in the guest after upgrading VirtualBox on the host.
- Prebuilt OVA images skip the installer entirely and import through File then Import Appliance.
- This same install process works for Rocky Linux and AlmaLinux ISOs too.
Frequently asked questions
Can I still download CentOS 7 or CentOS 8 to install in VirtualBox?
No. Both are past end of life and centos.org no longer hosts their installer ISOs. Use CentOS Stream, Rocky Linux or AlmaLinux instead.
What’s the difference between CentOS Stream and Rocky Linux or AlmaLinux?
Stream sits upstream of Red Hat Enterprise Linux and changes continuously. Rocky Linux and AlmaLinux are downstream, point-release rebuilds that behave like the old CentOS Linux did.
Do I need Guest Additions to use CentOS in VirtualBox?
Not strictly, but without them you’re stuck with a fixed small window, no shared clipboard and no drag-and-drop. Installing them takes about five minutes and is worth doing.
How much RAM and disk space does a CentOS Stream VM need in VirtualBox?
Give it at least 2 GB of RAM and 20 GB of disk for a minimal install, more if you’re adding a desktop environment. Leave enough resources for Windows too.
Can I run this same VirtualBox setup on an Apple Silicon Mac?
Only partly. VirtualBox added Apple Silicon host support in version 7.1, but it runs ARM64 guests, not the x86_64 CentOS ISO this guide uses. Use VMware Fusion or UTM instead.
What’s the difference between yum and dnf on CentOS Stream?
CentOS Stream uses dnf, the newer, faster package manager. yum still works as an alias to dnf on RHEL-family systems, so commands from older guides mostly still run.
Conclusion
Between the installer walkthrough, Guest Additions and the prebuilt-image shortcut, you’ve now got three ways to get CentOS Stream running in VirtualBox on Windows, plus a path to Rocky Linux or AlmaLinux if that’s what you actually needed. Pick whichever one matches how much time you want to spend and go build something.