

In this article, we’ll set up HAProxy as a load balancer for Nginx on CentOS. We assume you already have NGINX service set up and running.
What is load balancing?
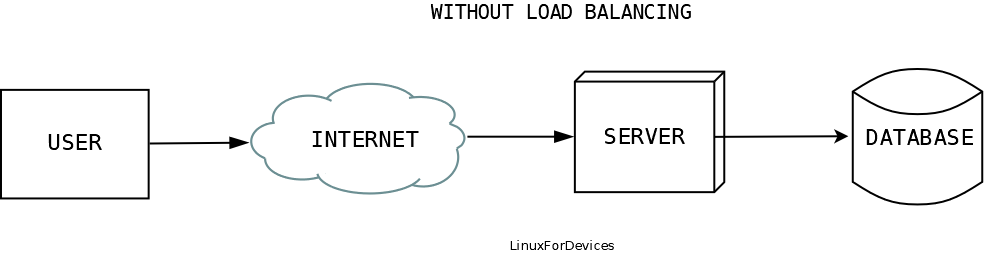
A load balancer sits in between the client and the server and distributes the network traffic across multiple servers. Its sole purpose is to distribute the incoming requests to the server capable of fulfilling the request. Here is a flowchart without load balancing.
A load balancer sits in between the client and the servers, as shown in the diagram below.

What is HAProxy?
HAProxy is a free, fast, popular, and open-source high availability server load-balancer and proxy solution for TCP and HTTP-based applications. It is written in C language and is the most widely used load balancer. It is used by top websites like Github, Stackoverflow, Imgur, and many others.
How to install HAProxy on CentOS?
To install HAProxy on CentOS, you can make use of the yum package manager as mentioned below.
Before we proceed, make sure your yum index is up-to-date by executing:
sudo yum update
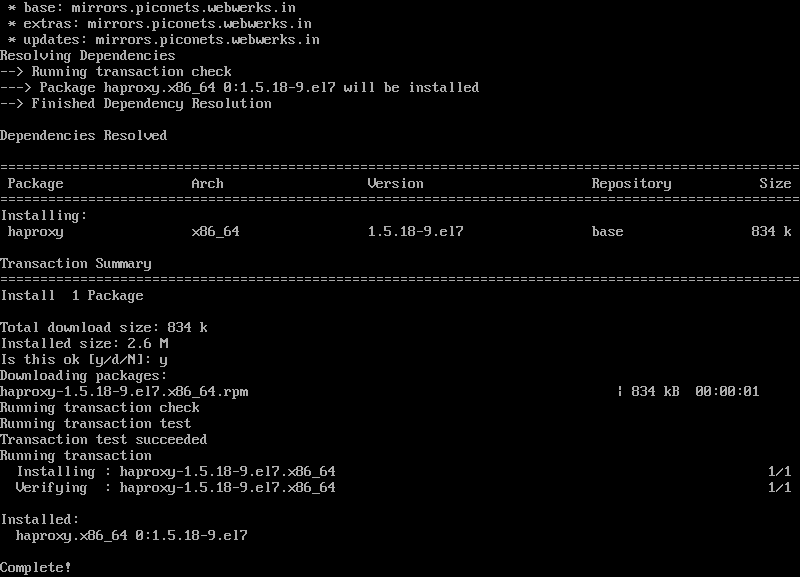
After, which we can now install HAProxy by using yum package manager, execute:
sudo yum install haproxy
Once we have it installed, we can proceed to configure HAProxy.
Essentials to know before configuring HAProxy
In, this section we’ll learn about some basics of HAProxy.
What are modes supported by HAProxy?
HAProxy supports two modes, namely: TCP and HTTP. The TCP model is called the Layer-4 proxy, and the HTTP mode is called the Layer-7 proxy. Both the modes have their pros and cons. The TCP model is the default mode.
TCP mode is lighter and faster as its sole purpose is to transmit the data and as it does not have to read the data. It is a better option for non-HTTP services.
HTTP mode can alter HTTP messages as it reads the data in between, better health checking, and rate-limit requests. It is a better option for applications that make use of HTTP protocol.
What are the load balancing mechanisms supported by HAProxy?
HAProxy has a lot of load-balancing algorithms. According to the official documentation, there are about ten such algorithms. But in this tutorial, we’ll demonstrate HAProxy using the round-robin algorithm. The top three algorithms are listed below:
- Round-robin – In this algorithm, HAProxy starts with one of the servers and picks each server in turn.
- leastconn – In this, it simply chooses a server with the least number of connections.
- source – In this, it chooses a server depending on where the connection is coming from (the client).
Others are URI, hdr, first…
What are ACLs in HAProxy?
ACLs or Access Control Lists are the conditionals on which the operations can be made using logical operators (AND, OR, NOT). For example, if you want to deny anyone navigating to /wp-admin/ on a WordPress website other than you accessing it from your static IP address, you can use access control lists.
How to configure HAProxy?
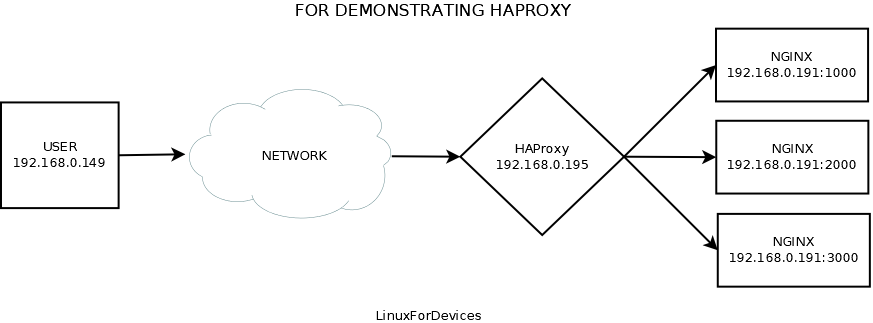
To demonstrate how to configure HAProxy, we have set up a test environment comprising three NGINX instances hosted on the same server but at different ports with different web pages. We have installed HAProxy on a CentOS server and configured it as a load-balancer for these NGINX instances using a round-robin mechanism. We will also set up an ACL to deny any request on /admin/ from the user.
HAProxy’s example configuration file can be found at /etc/haproxy named as haproxy.cfg. Go to directory by executing:
cd /etc/haproxy

But in this tutorial, we’ll be using a simple HAProxy configuration below:
frontend httpd
        bind *:80
        timeout client 30s
        mode http
        http-request deny if { path -i -m beg /admin/ } !{ src 192.168.0.149 }
	    default_backend httpd-servers

backend httpd-servers
        timeout connect 5s
        timeout server 20s
        balance roundrobin
        mode http
        server httpd1000 192.168.0.191:1000
        server httpd2000 192.168.0.191:2000
        server httpd3000 192.168.0.191:3000
Explanation for the frontend part of the configuration:
The frontend http in the 1st line tells about the application part which, we have named it as httpd here but you can name it anything you want.
The bind in the 2nd line tells about which IP and port to bind.
The timeout client 30s in the 3rd line tells about after, how many seconds the connection with the client should get terminated, in here it is 30 seconds.
The mode http in 4th line determines it to use the http mode, which you can change to TCP by replacing http with tcp.
The http-request deny if { path -i -m beg /admin/ } !{ src 192.168.0.149 } in the 5th line is an ACL which denies any request made on /admin/ path other than the user coming from 192.168.0.149.
The default_backend httpd-servers in the 6th line tells which backend to use by default for this frontend.
Now we move to the server’s part of the configuration:
The backend httpd-servers in the 8th line defines the server part of the configuration that sits behind the HAProxy.
The timeout connect 5s in the 9th line determines how many seconds the HAProxy should try connecting to the server before jumping to another server.
The timeout server 20s in the 10th line determines the time interval the HAProxy should wait for the response to the input from the server before jumping to another server.
The balance roundrobin in line 11th defines which load balancing mechanism to be used. We are using a round-robin in here.
The mode http in line 12th determines it to use the http mode should match with the frontend mode.
Then the servers are listed in the format server serverName ip:port each server per line.
How to launch HAProxy on CentOS?
Once you are done with the configuration, we can now proceed to launch it. Before it, allow port 80 in firewall by executing:
sudo firewall-cmd --zone=public --permanent --add-service=http
You can test HAProxy configuration by executing:
sudo haproxy -f /path/to/configuration
This should launch HAProxy on your system. To launch HAProxy every time the system reboots, use systemctl to launch it. The configuration at /etc/haproxy/haproxy.cfg will be used.
To launch HAProxy with SELinux enabled execute:
sudo setsebool -P haproxy_connect_any 1
or, you can temporarily disable SELinux by executing:
sudo setenforce 0
Then use the following systemctl commands to enable and start the service:
sudo systemctl enable haproxy
sudo systemctl start haproxy
Now every time you reboot, the HAProxy will start on its own.
If we open 192.168.0.195 in our browser, and every time we reload we can see round-robin in action.


Now let’s test the ACL we had set in the configuration for /admin/.
I’m the user (i.e. 192.168.0.149) and when I navigate to 192.168.0.195/admin/, I can easily access it

and, when trying to access the same destination with any other user.

So that was how ACLs work in HAProxy!
Conclusion
Installing HAProxy on CentOS is very easy but the configuration part can be little tricky, we have tried to cover all the basics in the article to help you setup a simple HAProxy load balancer on your system.
Thank you for reading! 😀