
Apache Ant turns the repeatable parts of a Java build into named XML targets, from installation through compilation, packaging, and execution.
Install Apache Ant on Debian and Ubuntu
For Debian and Ubuntu systems, install Ant from the configured APT repositories, which puts the ant launcher on your PATH without an ANT_HOME setting.
sudo apt update
sudo apt install -y ant
Ant 1.10 requires a JDK 8 or newer because tasks such as javac need the compiler that a Java Runtime Environment does not provide.
java --version
ant -version
If either command is missing, install a JDK from your distribution before creating a build file. Use the repository package when its version meets the project requirement, because the package manager can track upgrades and removal.
Install the Apache binary distribution on another Linux distribution
Use your distribution’s package manager first. If its package is unavailable or your project requires the upstream binary distribution, download the current archive from the Apache Ant binary download page and verify its published signature or checksum before extracting it.
After extracting the archive, set ANT_HOME to that directory and add its bin directory to PATH in the shell where you run Ant. Set JAVA_HOME to the JDK directory when your launcher cannot locate the JDK automatically.
export ANT_HOME=/opt/apache-ant
export JAVA_HOME=/path/to/jdk
export PATH="$PATH:$ANT_HOME/bin"
ant -version
Keep Ant JAR files out of the global CLASSPATH, because the installation manual recommends task-scoped or project-scoped dependencies.
Create a minimal Apache Ant project
Ant reads build.xml by default and runs a target’s prerequisites before the requested action.
Create the source directory and save this class as src/HelloAnt.java for a visible build result without an added library or test framework.
public class HelloAnt {
    public static void main(String[] args) {
        System.out.println("Ant built and ran this Java program.");
    }
}
Save the following file as build.xml in the project root, where its dependencies make ant clean run remove generated output, compile the source, create a runnable JAR, and start it.
<project name="ant-hello" default="run" basedir=".">
    <property name="src.dir" value="src"/>
    <property name="build.dir" value="build"/>
    <property name="classes.dir" value="${build.dir}/classes"/>
    <property name="dist.dir" value="dist"/>
    <property name="main.class" value="HelloAnt"/>

    <target name="clean">
        <delete dir="${build.dir}"/>
        <delete dir="${dist.dir}"/>
    </target>

    <target name="compile">
        <mkdir dir="${classes.dir}"/>
        <javac srcdir="${src.dir}" destdir="${classes.dir}" includeantruntime="false"/>
    </target>

    <target name="jar" depends="compile">
        <mkdir dir="${dist.dir}"/>
        <jar destfile="${dist.dir}/${ant.project.name}.jar" basedir="${classes.dir}">
            <manifest>
                <attribute name="Main-Class" value="${main.class}"/>
            </manifest>
        </jar>
    </target>

    <target name="run" depends="jar">
        <java jar="${dist.dir}/${ant.project.name}.jar" fork="true"/>
    </target>
</project>
Run the build and inspect the output
I ran ant clean run with Apache Ant 1.10.15 and OpenJDK 21.0.11, which compiled the class, created ant-hello.jar, printed the application message, and ended with BUILD SUCCESSFUL.
ant clean run
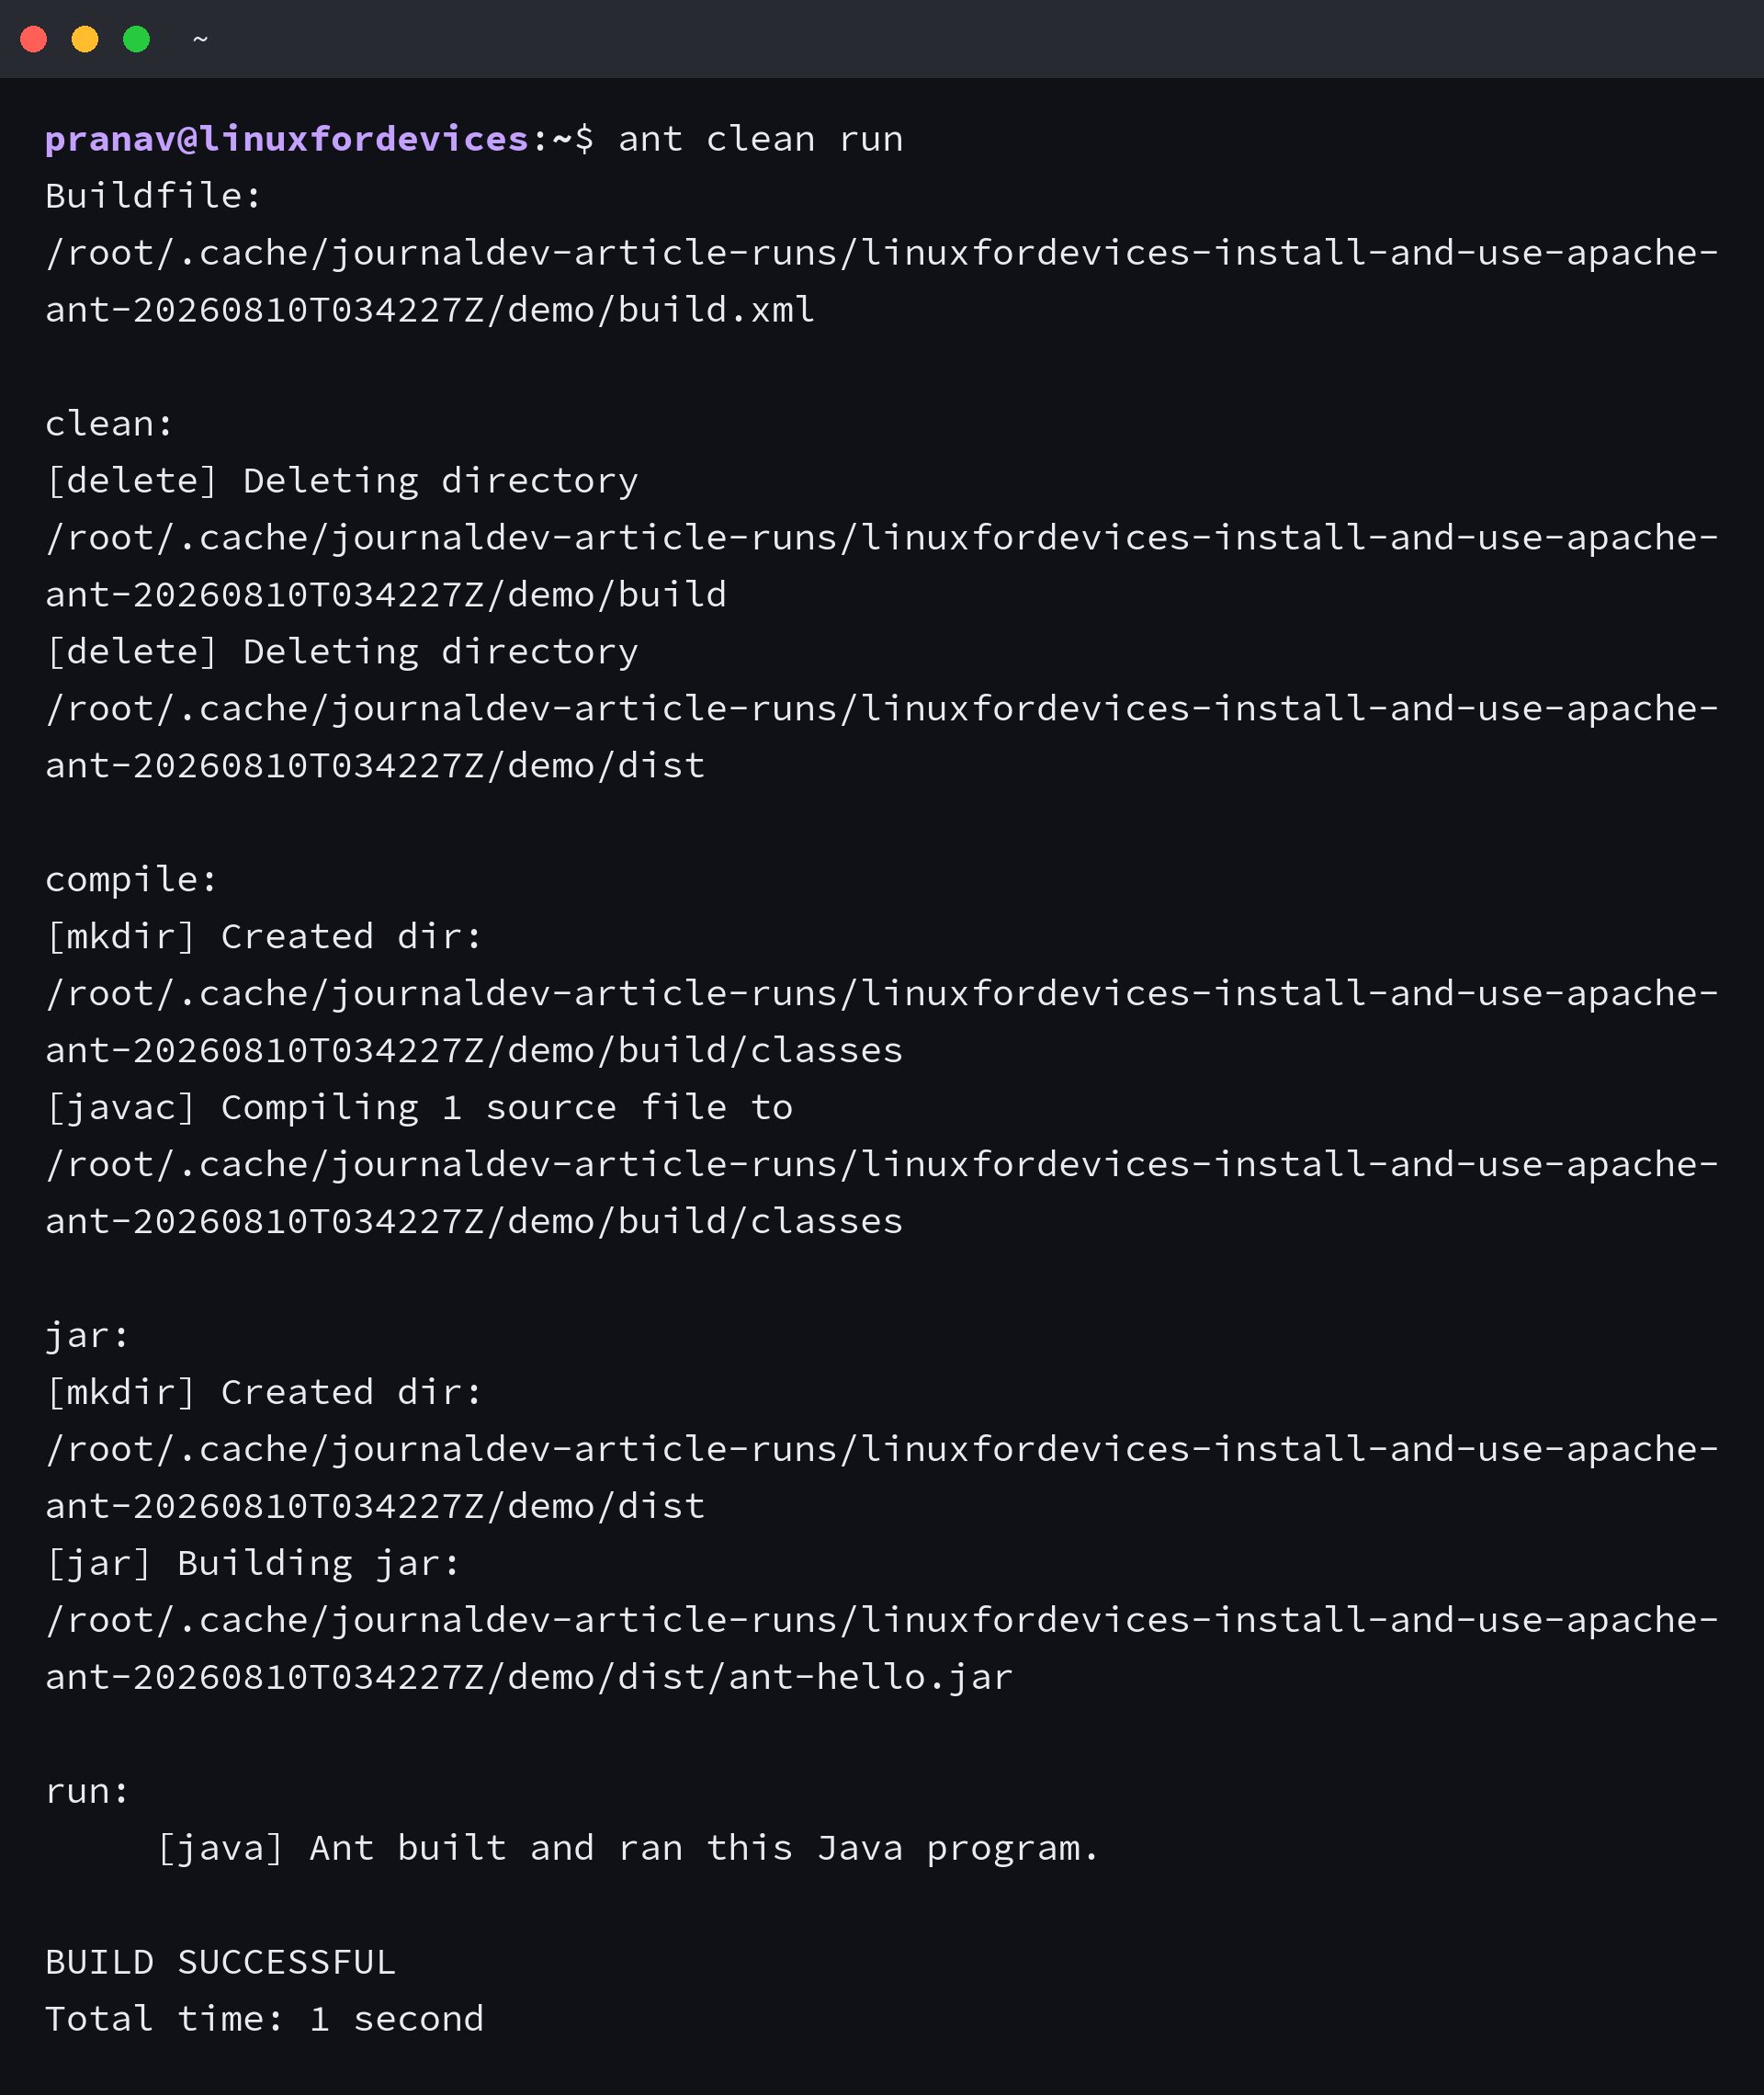
The compile target writes class files under build/classes, while jar packages them with a Main-Class manifest entry and java starts that JAR in a separate process.
Use Ant where explicit build steps help
Ant is a strong fit when you maintain an existing Ant project or need a build with explicit file operations and target dependencies. It does not provide dependency resolution as a default workflow, so a new Java project that needs repository-managed dependencies may fit Maven or Gradle better.
Keep paths and build output under project properties, as the example does, instead of embedding machine-specific paths in every target. When you add a third-party library, define its classpath inside the build file or pass it to the specific task rather than changing the global CLASSPATH.
Troubleshoot an Ant installation
If ant is not found, open a new shell after changing PATH and run ant -version again. For an archive installation, check that ANT_HOME points to the extracted directory and that ANT_HOME/bin exists.
If a compile target fails because javac is unavailable, install a JDK rather than only a JRE and verify java –version. For classpath errors or missing optional tasks, run ant -diagnostics and inspect the reported Ant location, JARs, optional tasks, and JVM settings.
Next step
Run ant -p in your project to list its targets before changing the build. The Apache Ant manual documents each task and its required attributes when you are ready to add tests, resources, or packaging rules.