
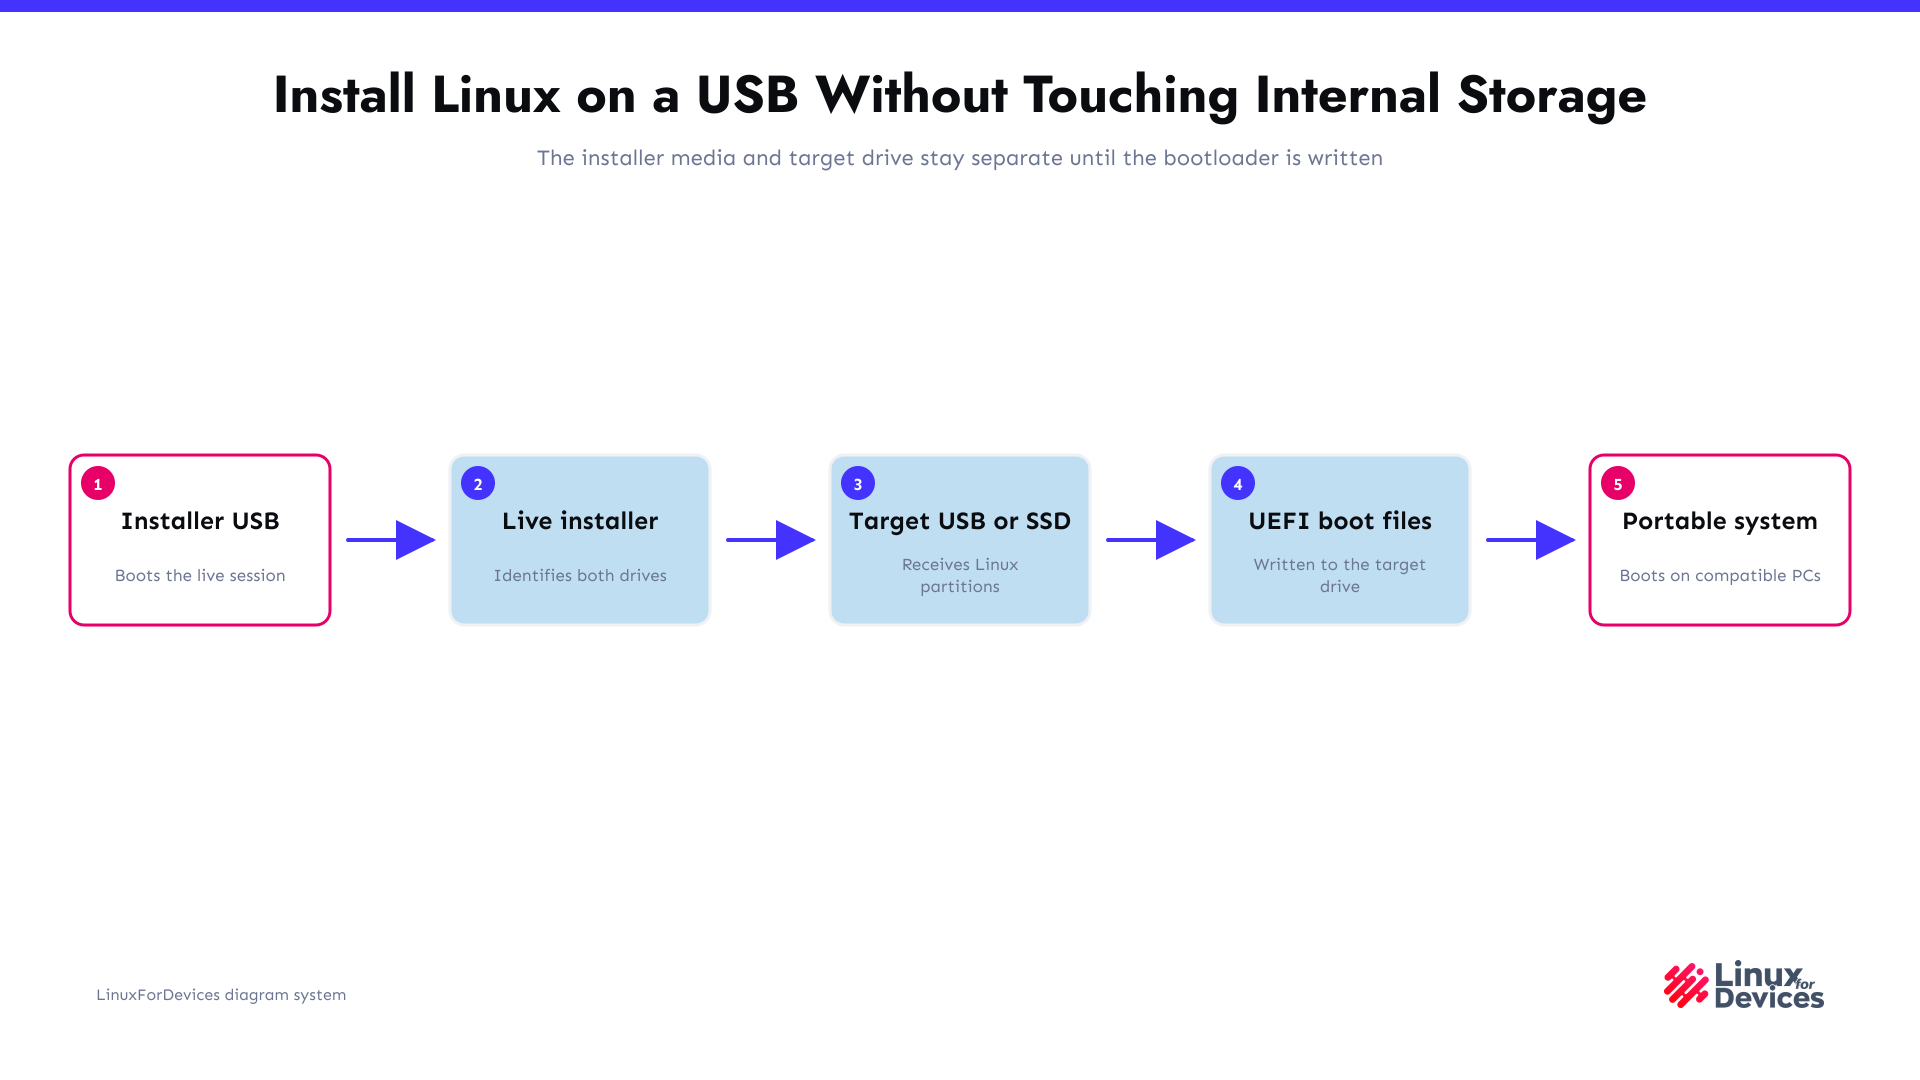
You can install a full Linux system on a USB drive or external SSD and boot it on compatible PCs when you identify the target drive before partitioning and keep both Linux partitions and UEFI boot files on that drive.
Choose a full installation, not a persistent live USB
A persistent live USB keeps changes beside a live image and suits short-lived troubleshooting. A full installation uses the distribution installer to create a normal Linux system with its own packages, user account, updates, and bootloader.
Use an external SSD for smoother updates and regular desktop use. A USB flash drive can work, but it has less endurance and usually lower write performance.
What you need
- One USB drive for the installer media.
- A separate USB drive or external SSD for the full Linux installation.
- A Linux ISO from your chosen distribution and a way to write it to the installer USB.
- A computer that can boot from USB in UEFI mode.
Back up both removable drives before writing installer media or repartitioning the target drive.
Create the installer USB
Download the ISO from the distribution’s official download page and verify its checksum when the project publishes one. Fedora recommends Fedora Media Writer for its images, while Ubuntu’s desktop installation flow begins by writing the ISO to a USB stick.
Use one drive only as the installer media, never the drive that will hold your finished Linux system.
Identify every storage device before the installer changes anything
Boot the installer USB, connect the target drive, and open a terminal in the live session. This command shows device names, size, transport, removable status, device type, and mount points.
lsblk -o NAME,SIZE,MODEL,TRAN,RM,TYPE,MOUNTPOINTS
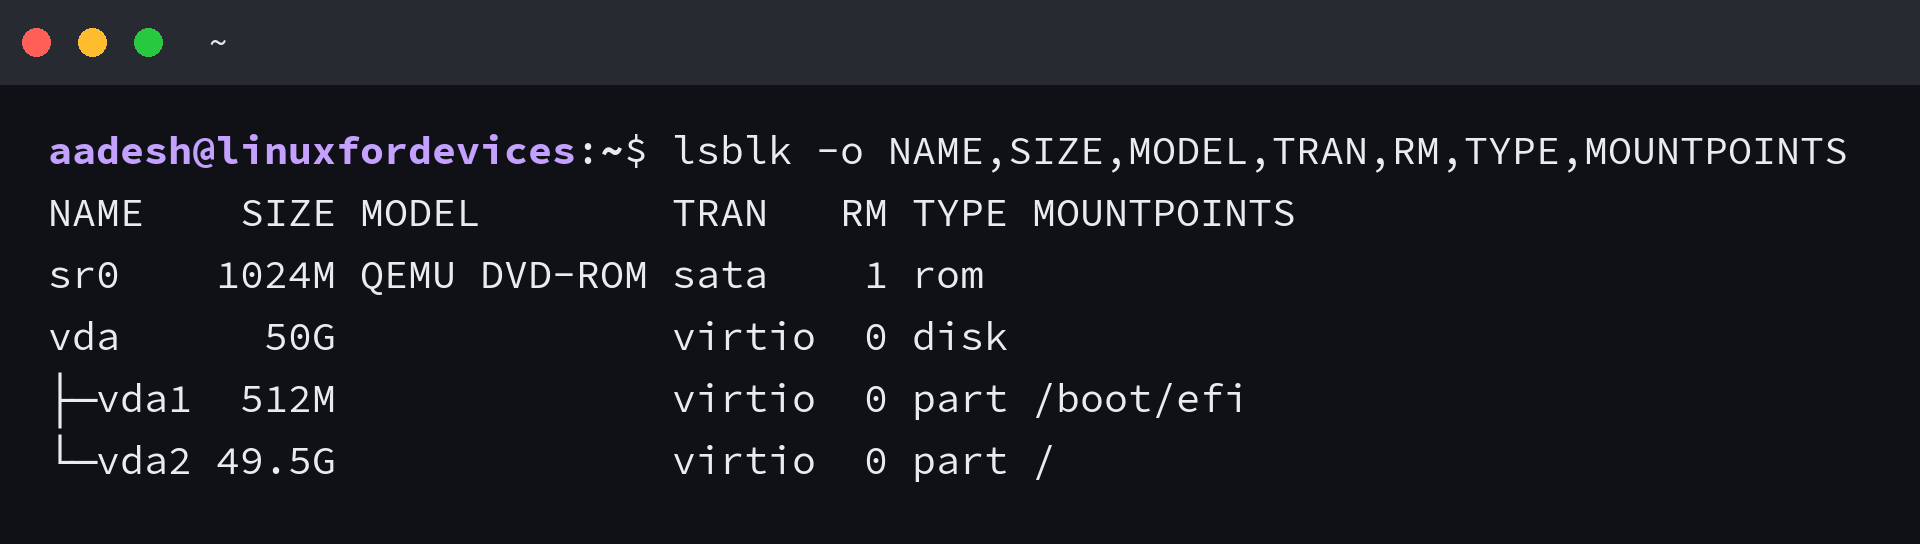
Do not trust a device name from an earlier boot. Compare capacity, model, and transport with the drive in front of you, then unplug and reconnect the target drive if you need to confirm which row disappears and returns.
Install Linux on the target USB drive
Start the distribution installer and select the manual partitioning option when it is available. The installer labels differ, but the requirement stays the same: every selected partition must belong to the target USB or external SSD.
Create the target layout
For a UEFI installation, create an EFI System Partition on the target drive, format it as FAT32, and mount it at /boot/efi. Create a Linux root partition on that same drive, normally formatted as ext4 and mounted at /.
You can add a separate home partition when you want to keep personal files apart from the system, while current desktop installers commonly use a swap file rather than a dedicated swap partition.
Set the bootloader destination
Select the target USB drive as the bootloader device. Its EFI System Partition must also be on that drive, otherwise the installer can place boot files on the computer’s internal disk and leave the portable drive unable to boot on its own.
Review the installer summary before confirming. It should list only the target drive for partition formatting and bootloader installation.
Boot the finished drive and verify it
When installation finishes, shut down, remove the installer USB, and choose the target drive from the computer’s UEFI boot menu. The finished system should reach its own boot menu or desktop without the installer media attached.
After the first boot, install updates and confirm that the root filesystem belongs to the external drive. Test it on another compatible PC only after a successful boot on the installation machine.
Portability limits you should expect
A full USB installation is portable, not hardware-neutral. Wi-Fi adapters, graphics hardware, Secure Boot policy, and firmware settings can differ between computers.
Keep the system updated, avoid proprietary drivers unless you need them, and use an external SSD when you expect frequent writes. If a PC refuses to boot the drive, check its UEFI boot menu and Secure Boot setting before changing the installation.
Next step
Boot the installer USB, run lsblk, and write down the target drive’s size and model before opening the partitioning screen. That one check is the best defense against selecting internal storage by mistake.